Remote Authentication and Login Guidance Using Active Directory and RV34x Routers
Available Languages
Objective
This article explains how to configure remote authentication using Windows Active Directory (AD) on Cisco RV34x series routers. In addition, information will be provided to avoid a potential login error.
Introduction
When you configure the service authentication settings on the RV34x router, you need to select an external authentication method.
By default, the external database priority on the RV34x series router is RADIUS/LDAP/AD/Local. If you add the RADIUS server on the router, the Web Login Service and other services will use the RADIUS external database to authenticate the user. There is no option to enable an external database for Web Login Service alone and configure another database for another service. Once RADIUS is created and enabled on the router, the router will use the RADIUS service as an external database for Web Login, Site-to-Site VPN, EzVPN/3rd Party VPN, SSL VPN, PPTP/L2TP VPN, and 802.1x.
If you use Windows, Microsoft provides an internal AD Service. AD stores all of the essential information for the network including users, devices, and policies. Administrators use AD as a single place to create and manage the network. It facilitates working with interconnected, complex, and different network resources in a unified manner.
Once configured, anyone authorized can authenticate using the external AD option (present in Windows server OS) to use any specific service on the RV34x router. Authorized users can use the features provided, as long as they have the required hardware and software to use that type of authentication.
Applicable Devices | Software Version
- RV340 | 1.0.03.16
- RV340W | 1.0.03.16
- RV345 | 1.0.03.16
- RV345P | 1.0.03.16
Table of Contents
- Identify the Distinguished Name Value
- Create a User Group for Active Directory
- Add Active Directory Details on the RV34x Router
- What happens if you don’t take the space out of the full name field?
Identify the Distinguished Name Value
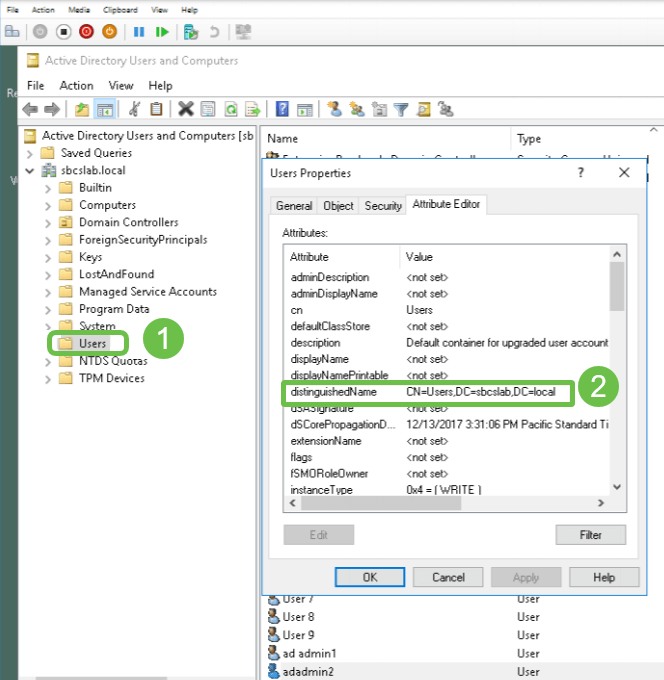
Access the Active Directory Users and Computers management interface on the Windows 2016 server. Select the Users container folder, right-click the mouse, and open Properties. Take note of the DistinguishedName value that will be used later in the RV34x router User Container Path field.
Create a User Group for Active Directory
Step 1
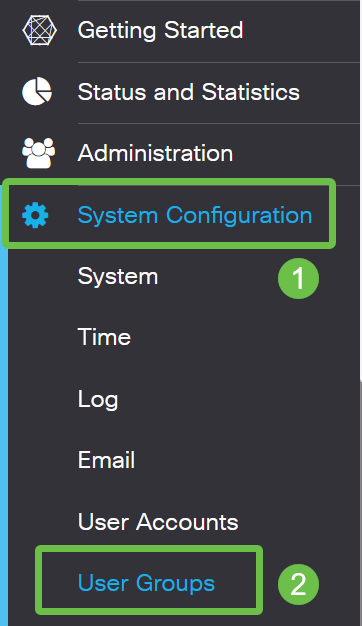
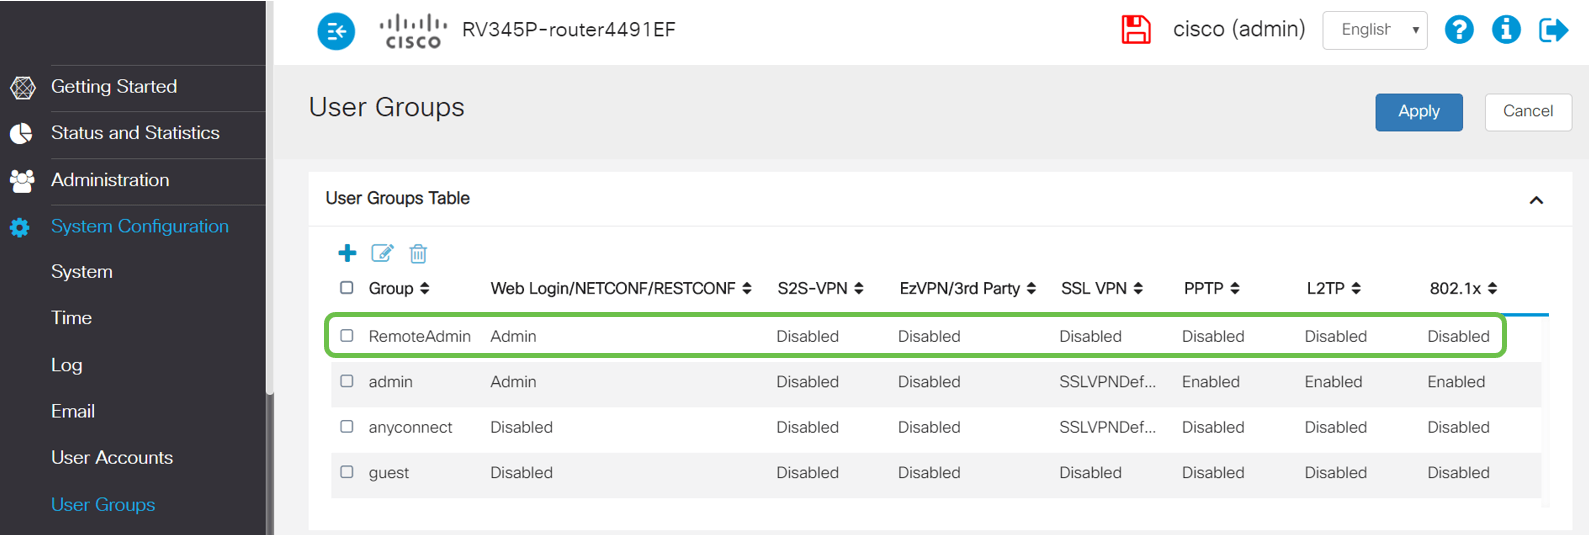
Log into the RV34x series router. Navigate to System Configuration > User Groups.
Step 2
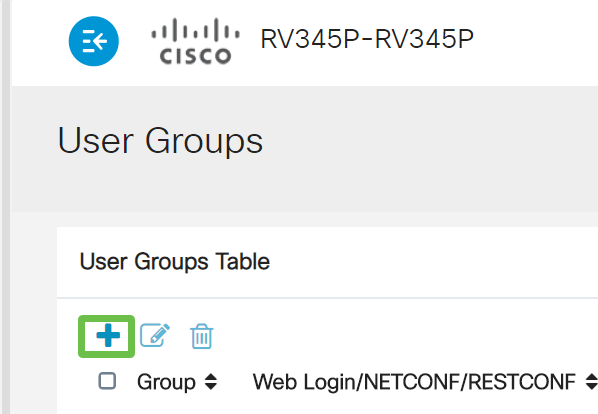
Click on the plus icon.
Step 3
Enter a Group Name. Click Apply.

In this example, a RemoteAdmin User Group has been created.
Step 4
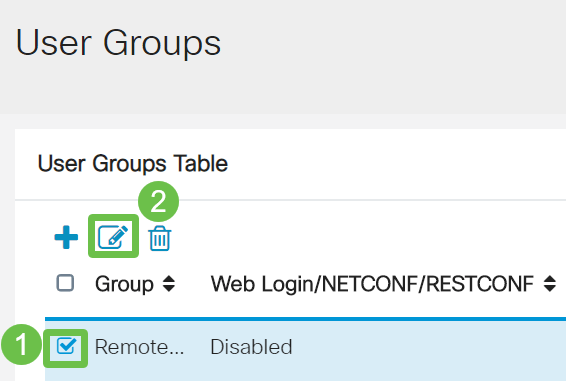
Click the checkbox next to the new User Group. Click the edit icon.
Step 5
Scroll down the page to Services. Click the Administrator radio button.

Step 6
Click Apply.

Step 7
You will now see the new User Group showing with Admin privileges.
Add Active Directory Details on the RV34x Router
Step 1
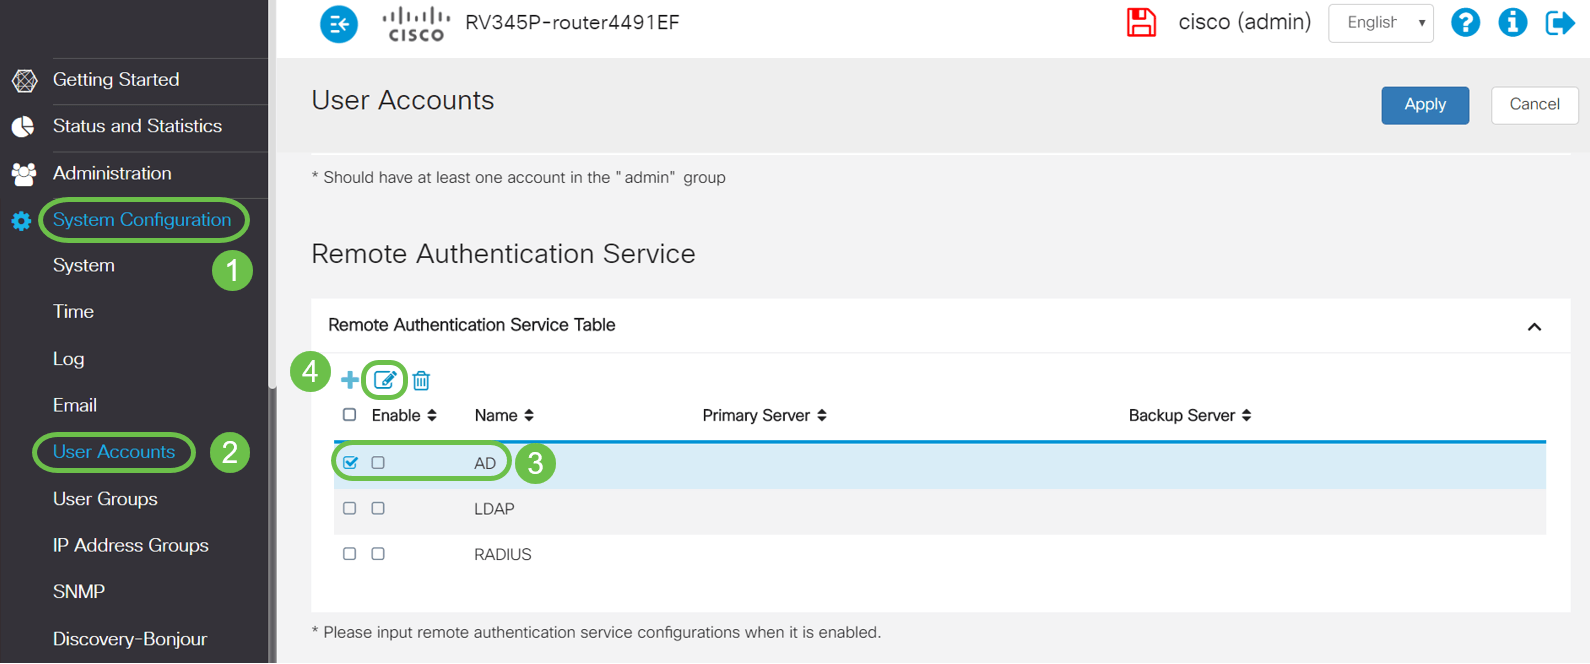
Navigate to System Configuration > User Accounts. Select the AD option and click the edit icon to add the details for the AD server.
Step 2
Enter the AD Domain Name, Primary Server, Port, and User Container Path details. Click Apply.
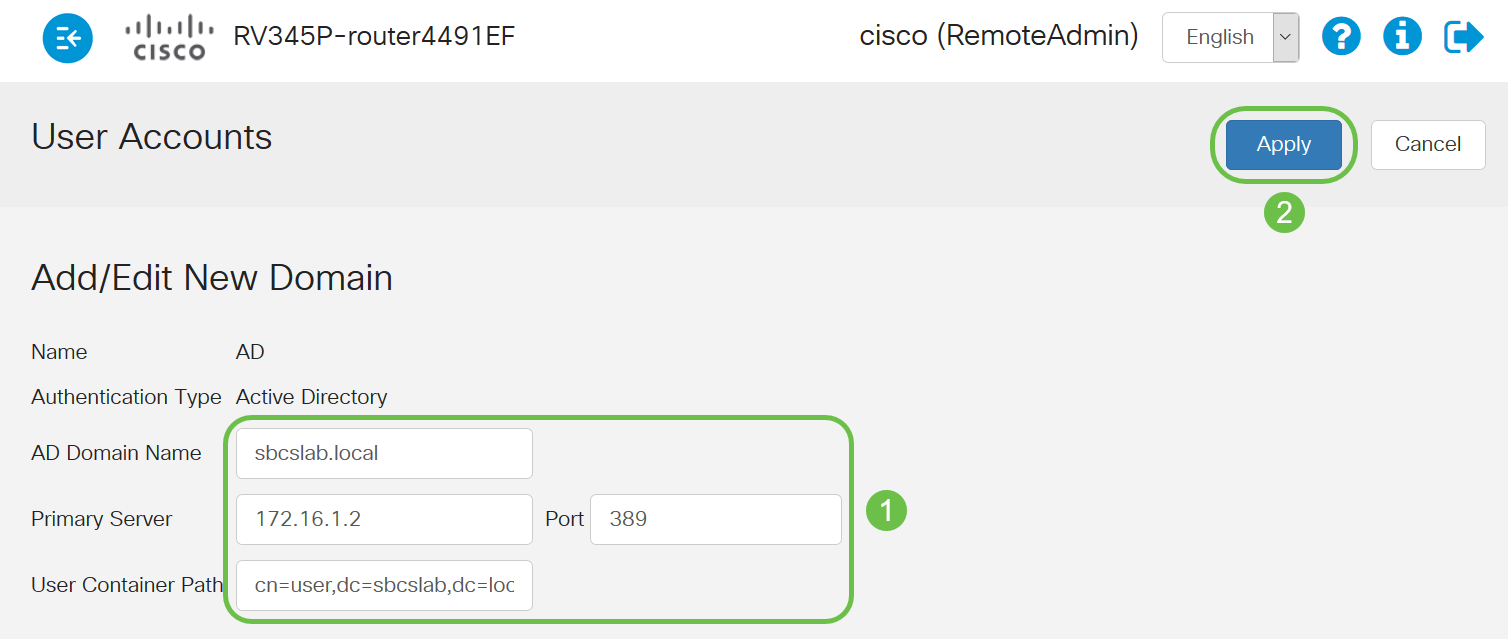
Note: You need to enter the User Container Path details captured from the Windows server in the Identify the Distinguished Name Value section of this article.
In this example, the details are Cn=user,dc=sbcslab,dc=local. The Lightweight Directory Access Protocol (LDAP) server default listening port is 389.
Step 3
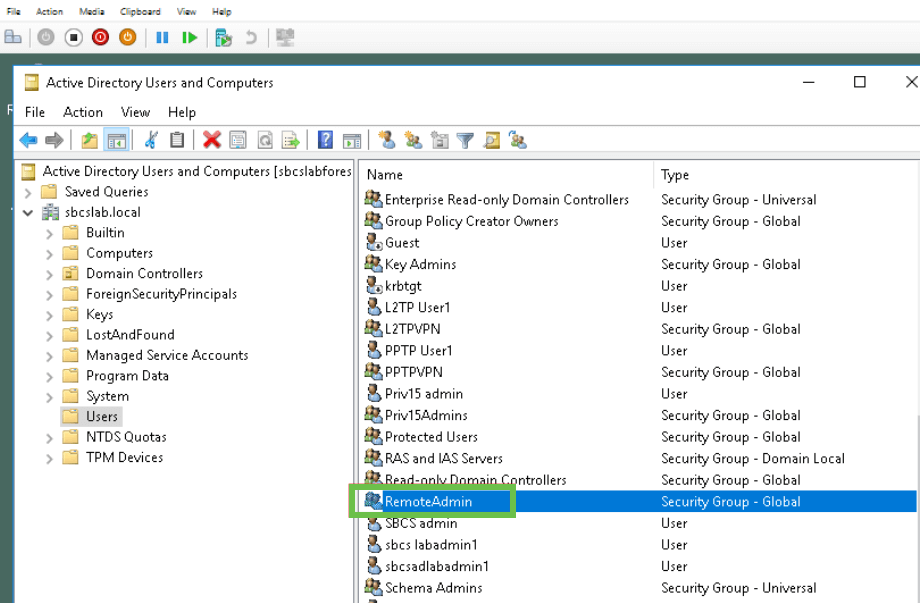
In the AD, verify that the User Group is configured, and it matches router’s User Group name.
Step 4
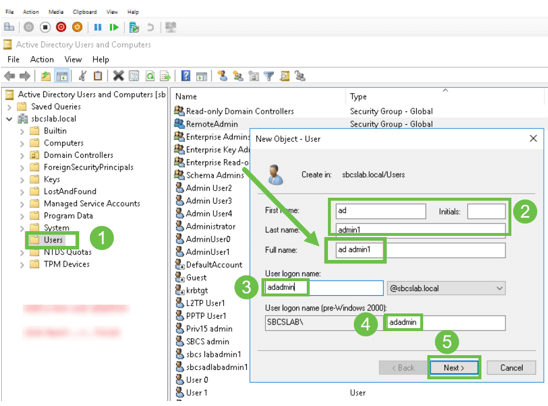
Under New Object – User, fill in First name, Initials and Last name, The Full name field will be populated automatically, showing a space between the first and last name.
The space between the first and last name in the Full name box must be deleted or it will not login properly.
This image shows the space in the Full name that must be deleted:
Step 5
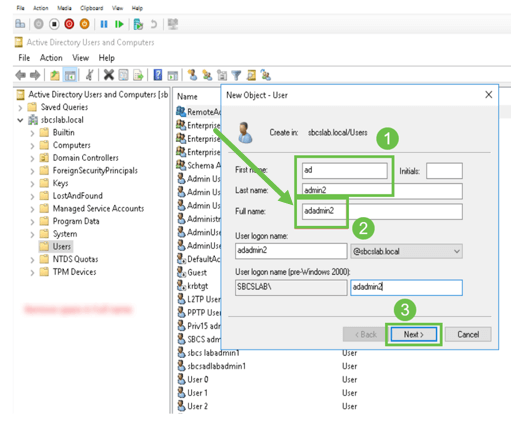
Repeat the steps to create another user. Once again, you need to modify the Full Name field by removing any spaces automatically created. Click Next to set up the password and finish creating the user.
This image shows that the space in the Full name was deleted. This is the correct way to add the user:
Step 6
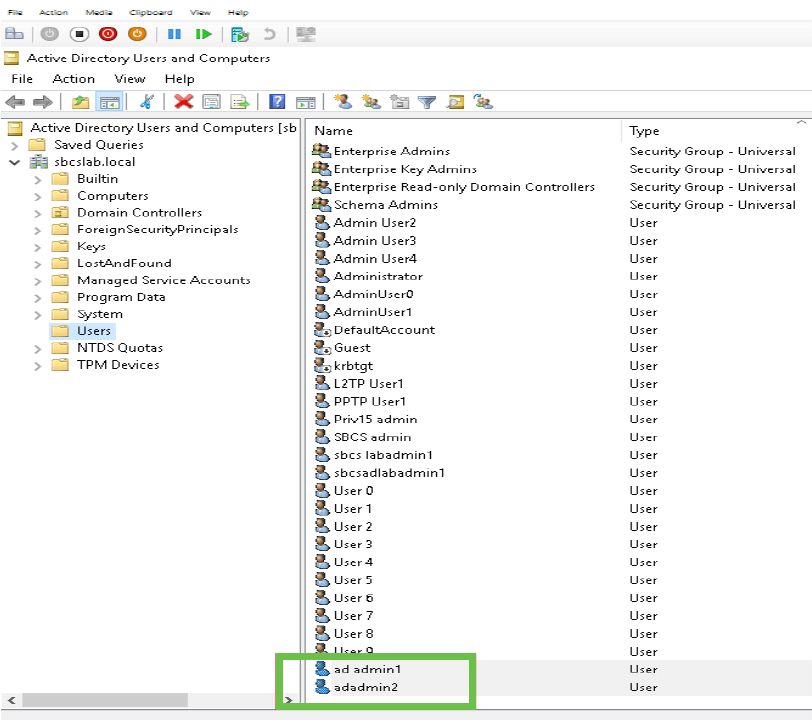
The Users list will show both of the newly added user details.
Step 7
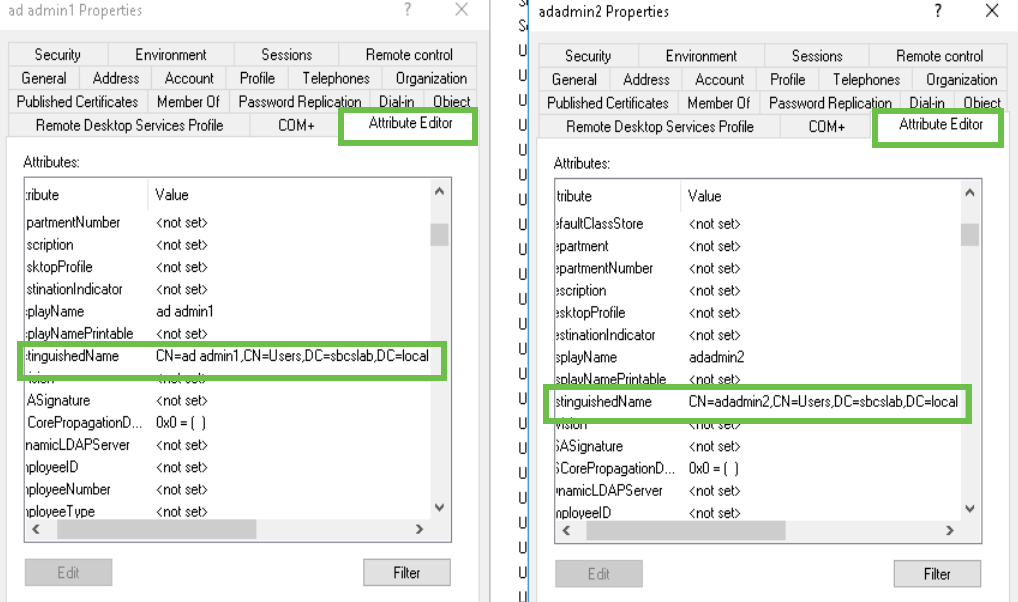
You will notice that the ad admin1 shows a space between the first and last name, if this is not fixed, login will fail. This error is being left in for demonstration purposes, do not leave the space there! The adadmin2 example is correct.
To view, right-click on the ad admin 1 username and select the Properties option. Then navigate to the Object tab to see the Canonical name of Object details.

Also, you can verify the Domain Users and RemoteAdmin details for those usernames by navigating to the Member Of tab under the Properties option.

Navigate to theAttribute Editor tab to verify the DistinguishedName values for those usernames.
Step 8
Log in with the User logon name, in this case, adadmin2, you will see that the login is successful.
Step 9
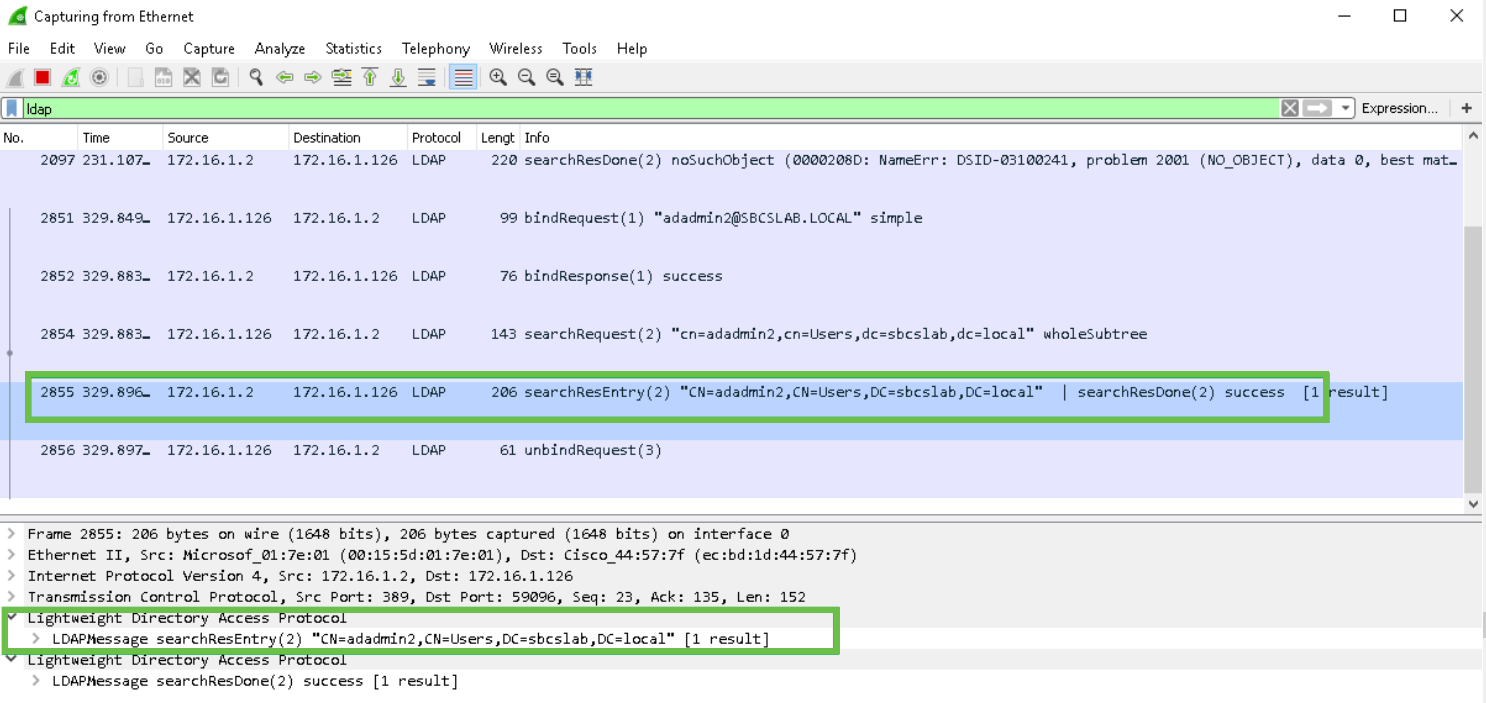
You can see the details on the packet capture as shown in the following screenshot.
What happens if you don’t take the space out of the full name field?
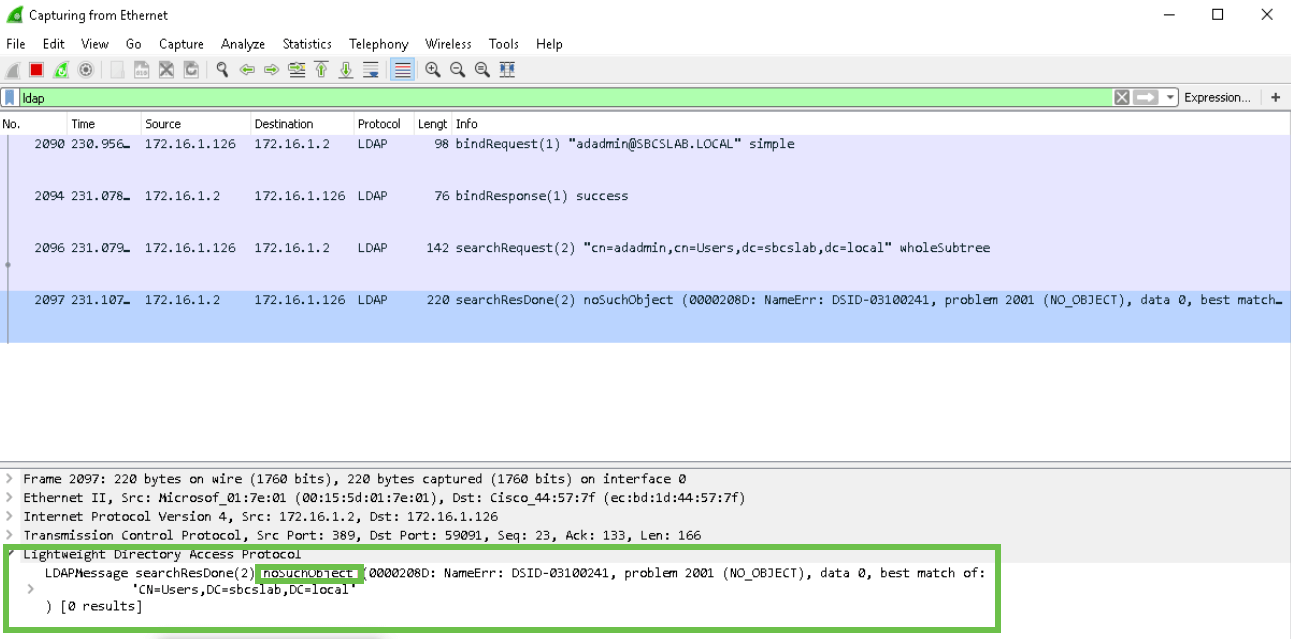
If you try using the User logon name, in this case adadmin, you will see that login fails as Lightweight Directory Access Protocol (LDAP) server cannot return object because Full name, in this case, ad admin1, has a space. You will be able to see that details upon capturing the packets as shown on the following screenshot.
Conclusion
You have now successfully completed and avoided a failed login for remote authentication via Active Directory on RV34x Router.