Configuring Site-to-Site VPN Advanced Settings and Failover on the RV160 and RV260
Available Languages
Objective
The objective of this document is to show you how to configure site-to-site VPN advanced settings and failover on the RV160 and RV260.
Introduction
A virtual private network (VPN) is a great way to connect remote workers to a secured network. A VPN allows a remote host to act as if they were connected to the onsite secured network. In a site-to-site VPN, the local router at one location connects to a remote router through a VPN tunnel. This tunnel encapsulates data securely by using industry-standard encryption and authentication techniques to secure sent data. An identical configuration must be done on both sides of the connection for a successful site-to-site VPN connection to be established. Advanced site-to-site VPN configuration provides the flexibility to configure optional configurations for the VPN tunnel.
Failover is a powerful feature that ensures a constant connection between these two sites. This is useful when fault-tolerance is important. A failover occurs when the primary router is down. At this point, a secondary or backup router will take over and provide a connection. This will help prevent a single point of failure.
Applicable Devices
· RV160
· RV260
Software Version
· 1.0.00.13
Prerequisites
Before configuring advanced settings and failover for site-to-site VPN on the RV160 and RV260, you will need to configure IPsec profile and site-to-site VPN on your local and remote router. Below is a list of articles that can help you configure them. You have the option to use the VPN Setup Wizard which will help you configure both IPsec profile as well as site-to-site VPN or you can configure them separately and follow along the two documents that are provided below.
1. Configuring VPN Setup Wizard on the RV160 and RV260
Or
1. Configuring IPSec Profiles (Auto Keying Mode) on the RV160 and RV260 (Optional)
2. Configuring Site-to-Site VPN on the RV160 and RV260
Configuring Site-to-Site VPN Advanced Settings
The advanced settings should be configured the same on both sides of the VPN connection.
Step 1. Log in to the web configuration utility.
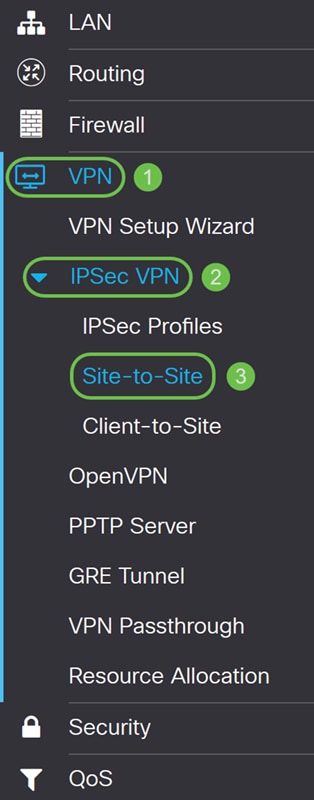
Step 2. Navigate to VPN > IPSec VPN > Site-to-Site.
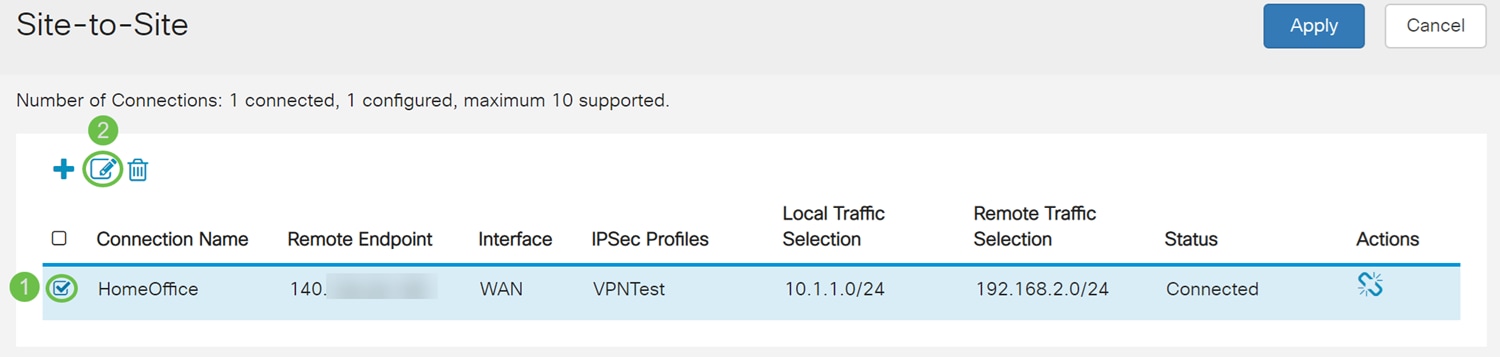
Step 3. Check the checkbox of the connection that you want to edit. Then press the pen and paper icon to edit the connection. In this example, the connection named HomeOffice is selected.
Step 4. Click the Advanced Settings tab.
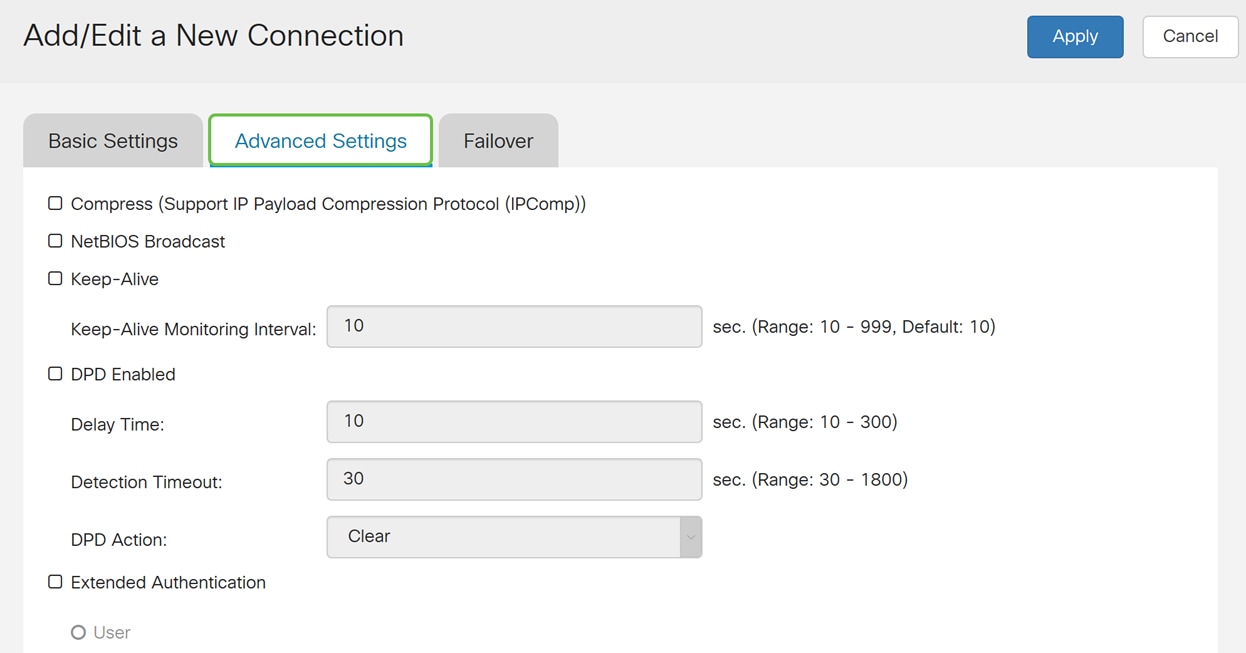
Step 5. Check the Compress (Support IP Payload Compression Protocol (IPComp)) check box to enable the router to propose compression when it starts a connection. This protocol reduces the size of IP datagrams. If the responder rejects this proposal, then the router does not implement compression. When the router is the responder, it accepts compression, even if compression is not enabled. If you enable this feature for this router, you would need to enable it on the remote router (the other end of the tunnel).
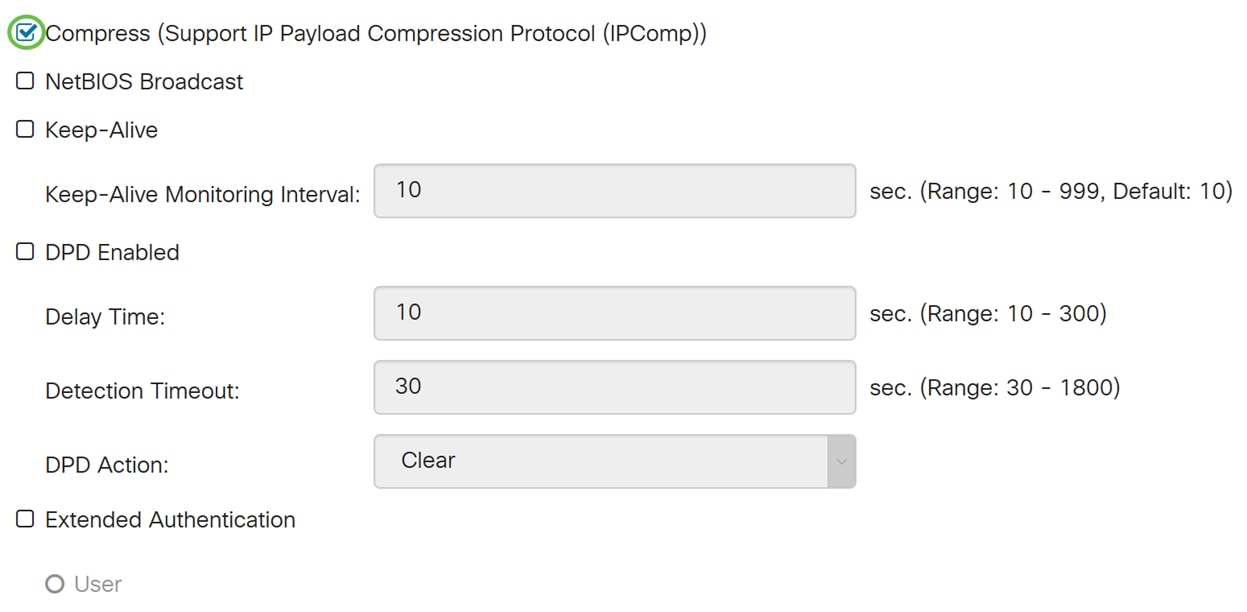
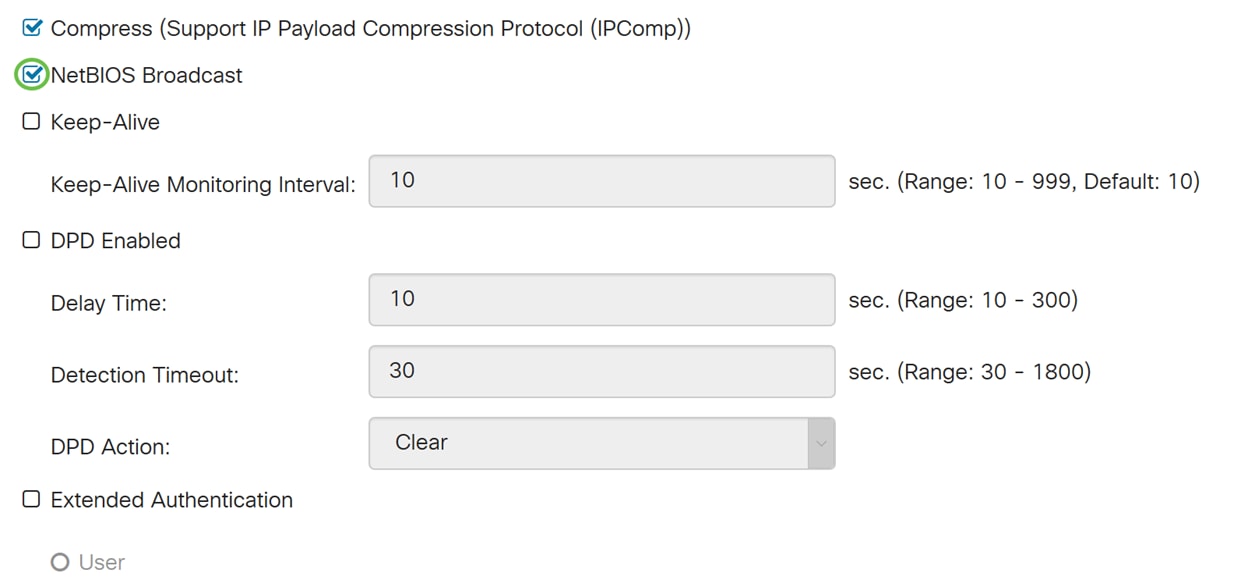
Step 6. Broadcast messages are used for name resolution in Windows networking to identify resources such as computers, printers, and file servers. These messages are utilized by some software applications and Windows features such as Network Neighborhood. LAN broadcast traffic is typically not forwarded over a VPN tunnel. However, you can check this box to allow NetBIOS broadcasts from one end of the tunnel to be rebroadcast to the other end. Check the NetBIOS Broadcast checkbox to enable.
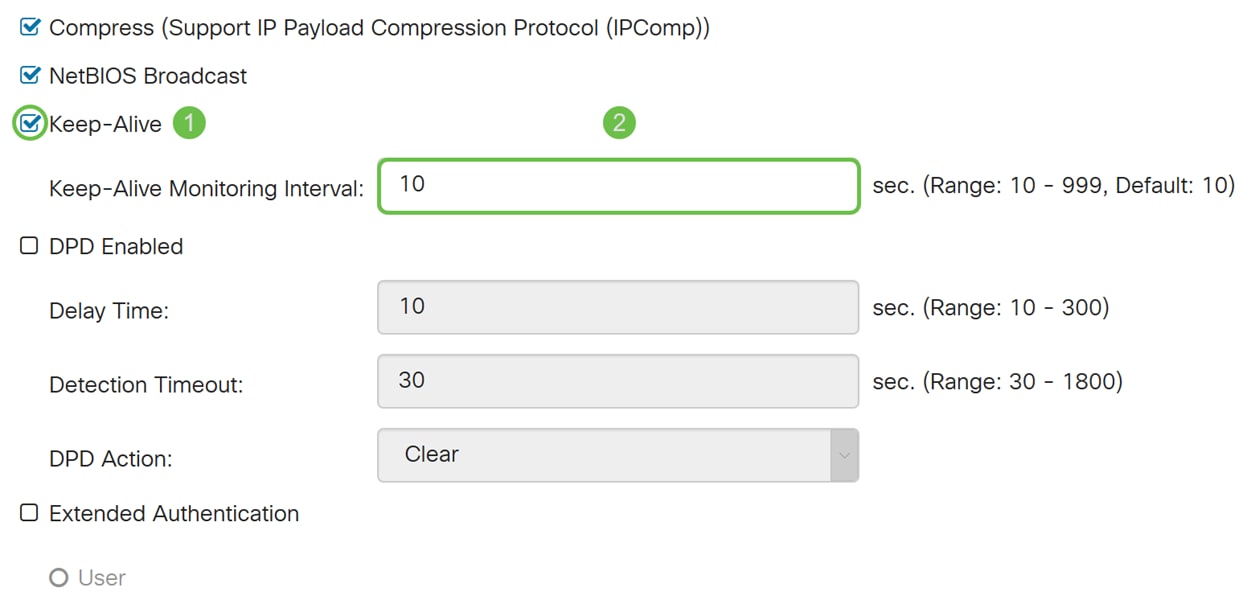
Step 7. Check the Keep-Alive checkbox to enable the router to attempt to re-establish the VPN connection in regular intervals of time. Enter the number of seconds to set the keep-alive monitoring interval in the Keep-Alive Monitoring Interval field. The range is from 10-999 seconds.
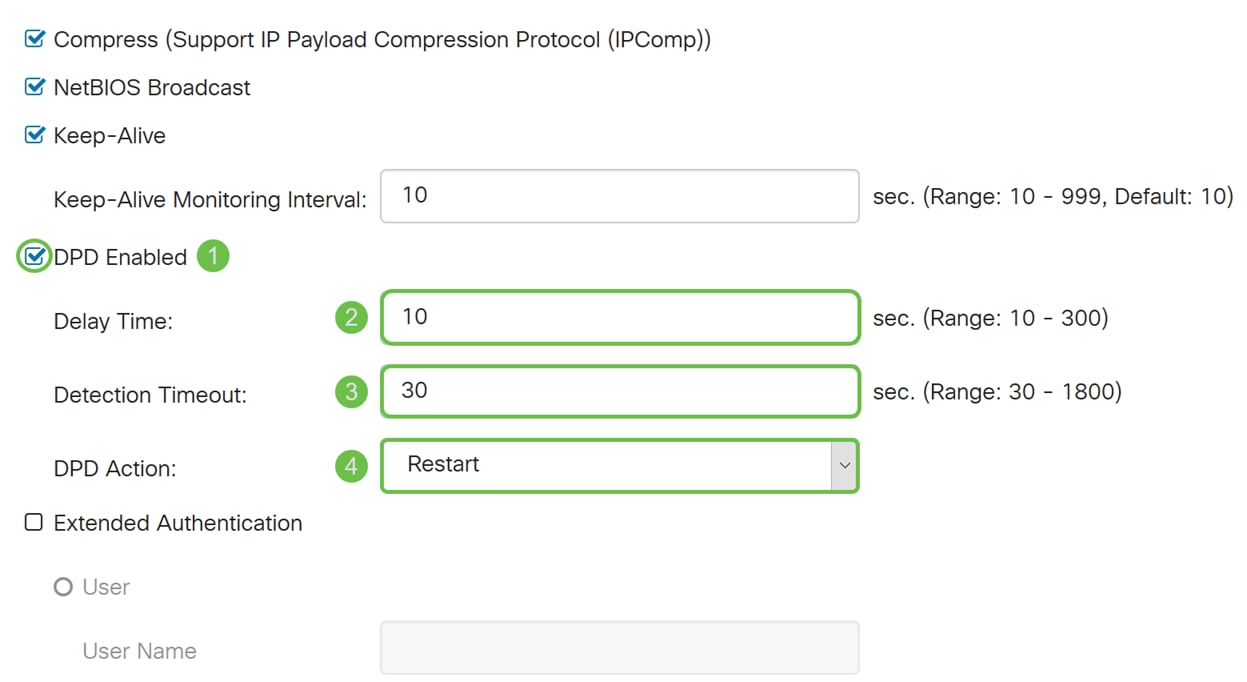
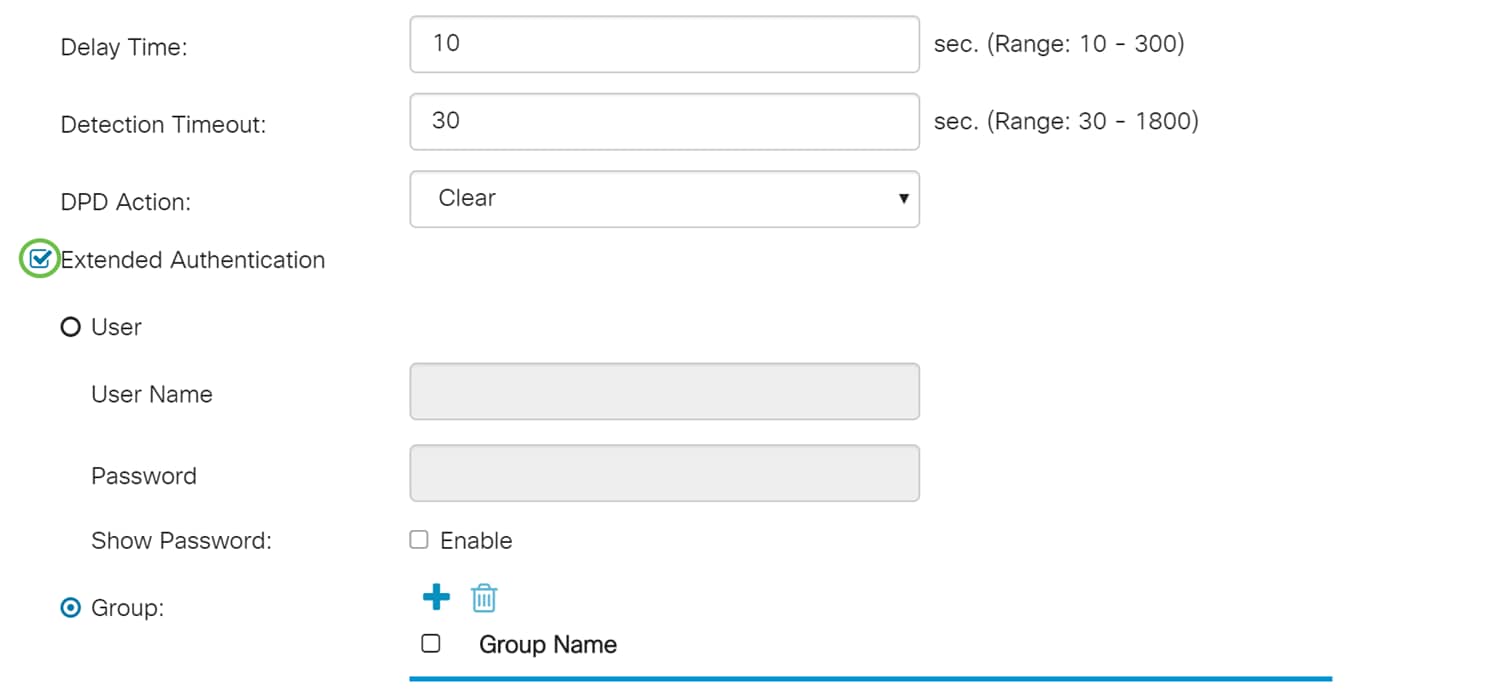
Step 8. Check Dead Peer Detection (DPD) Enabled to enable DPD. It sends periodic HELLO/ACK messages to check the status of the VPN tunnel. DPD option must be enabled on both ends of the VPN tunnel. Specify the interval between HELLO/ACK messages in the Interval field by entering the following:
· Delay Time – Enter the time delay in seconds between each Hello message. The range is from 10 – 300 seconds and the default value is 10.
· Detection Timeout – Enter the timeout in seconds to declare that the peer is dead. The range is from 30 – 1800 seconds.
· DPD Action – Action to be taken after DPD timeout. Select Clear or Restart from the drop-down list.
Step 9. Check Extended Authentication if you want to enable extended authentication. This will provide an additional level of authentication that will require remote users to key in their credentials before being granted access to the VPN. To get extended authentication to work, the main site must use group authentication and the remote site must use user authentication. In the next few steps, we will be configuring the main site to use group authentication.
Note: It is recommended to configure Client-to-Site for user authentication instead of extended authentication.
If you haven’t already created a User Group for your main site, click the link to learn how to create a User Group located in this article: Creating User Group for Extended Authentication.
If you want to learn how to create User Accounts, click the link to be redirected to the section: Creating User Account for Extended Authentication.
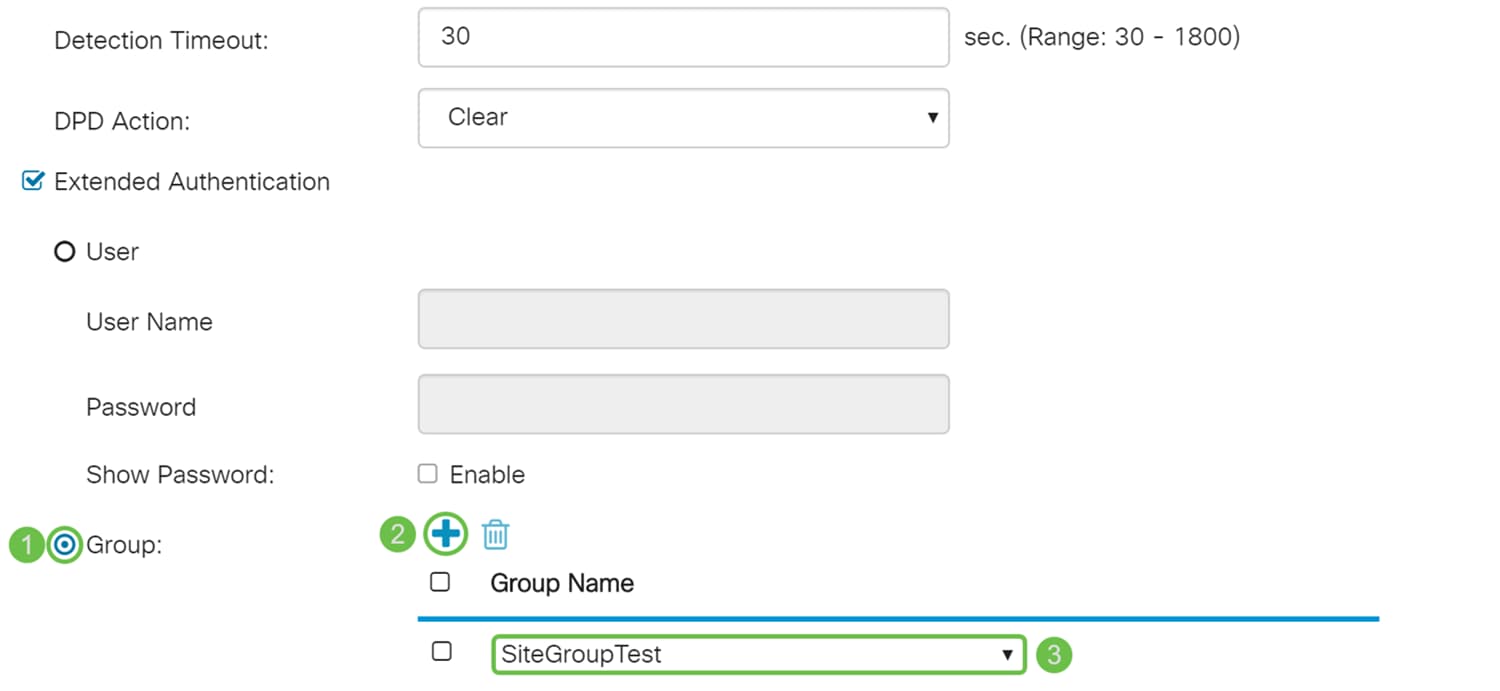
Step 10. Select Group as the extended authentication and press the plus icon to add a new group. From the drop-down list, choose the group that you want to use for authentication. Make sure the users that you want are in that group.
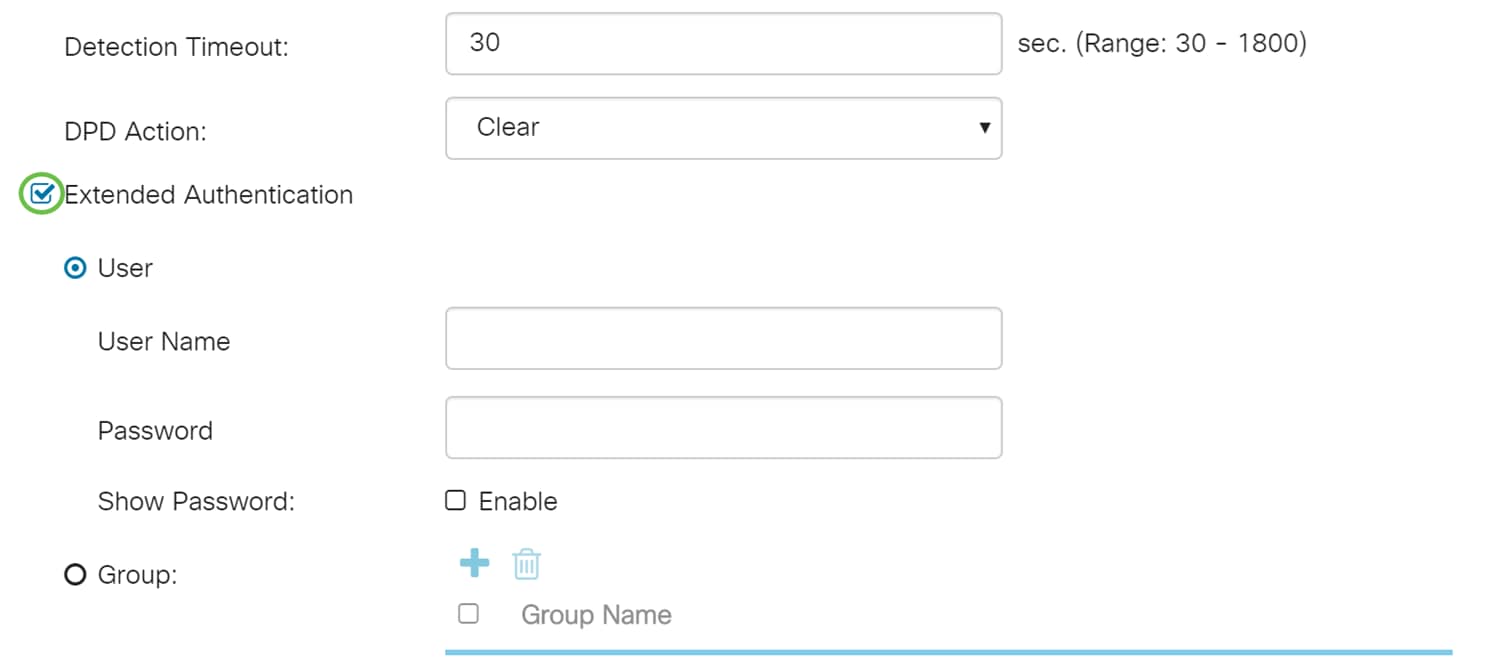
Step 11. In the next few steps, we will be configuring the remote router to use user authentication. In the remote router, check Extended Authentication check box to enable extended authentication.
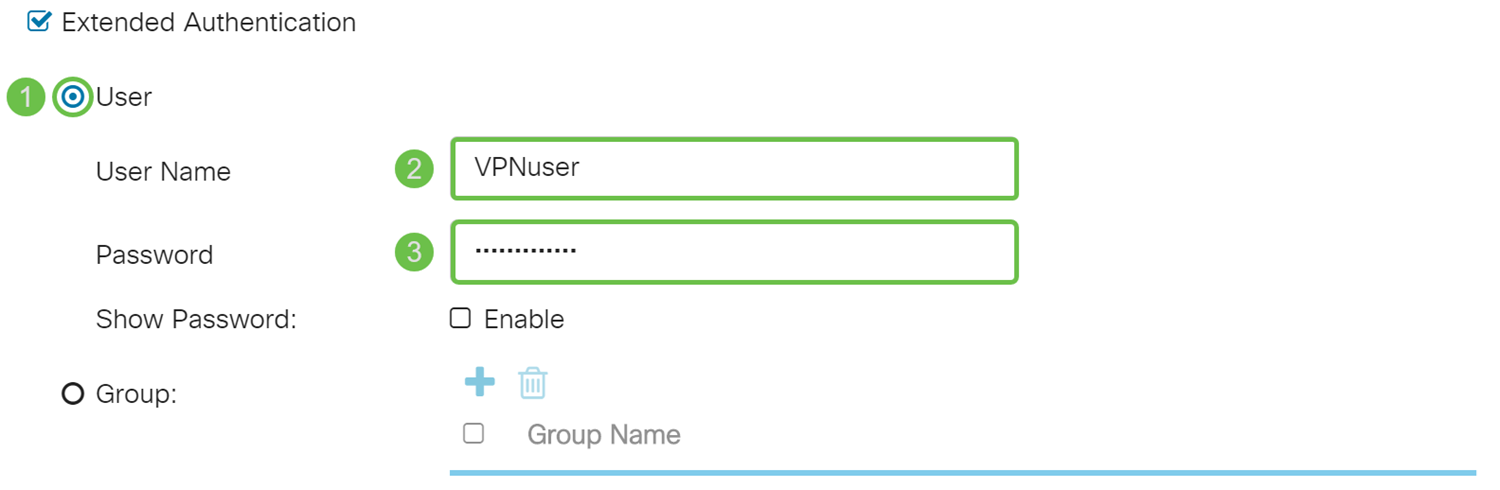
Step 12. Select User as the extended authentication. Enter the User Name and Password of the user in the group that was selected in the main router. In this example, VPNuser and CiscoTest123! was entered.
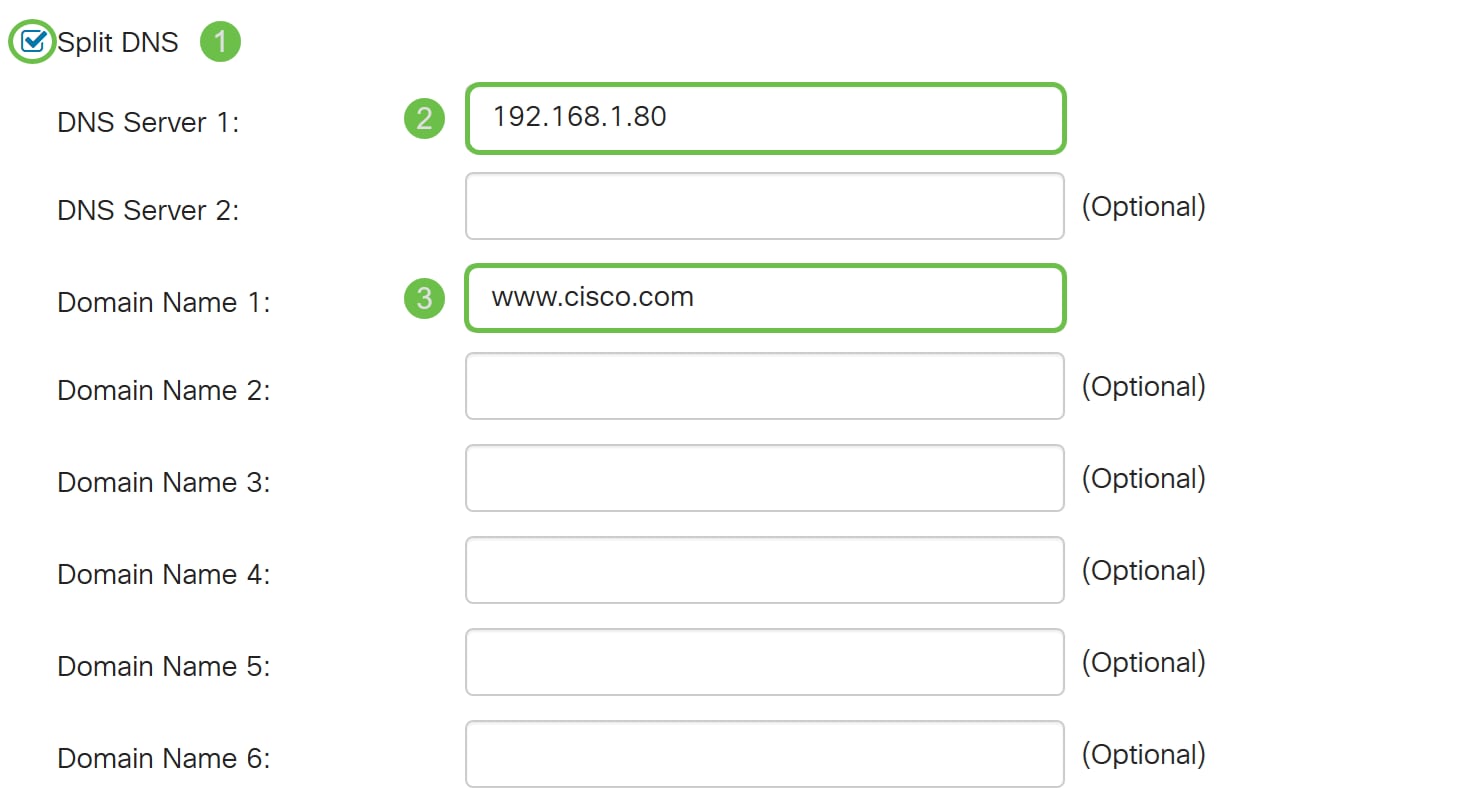
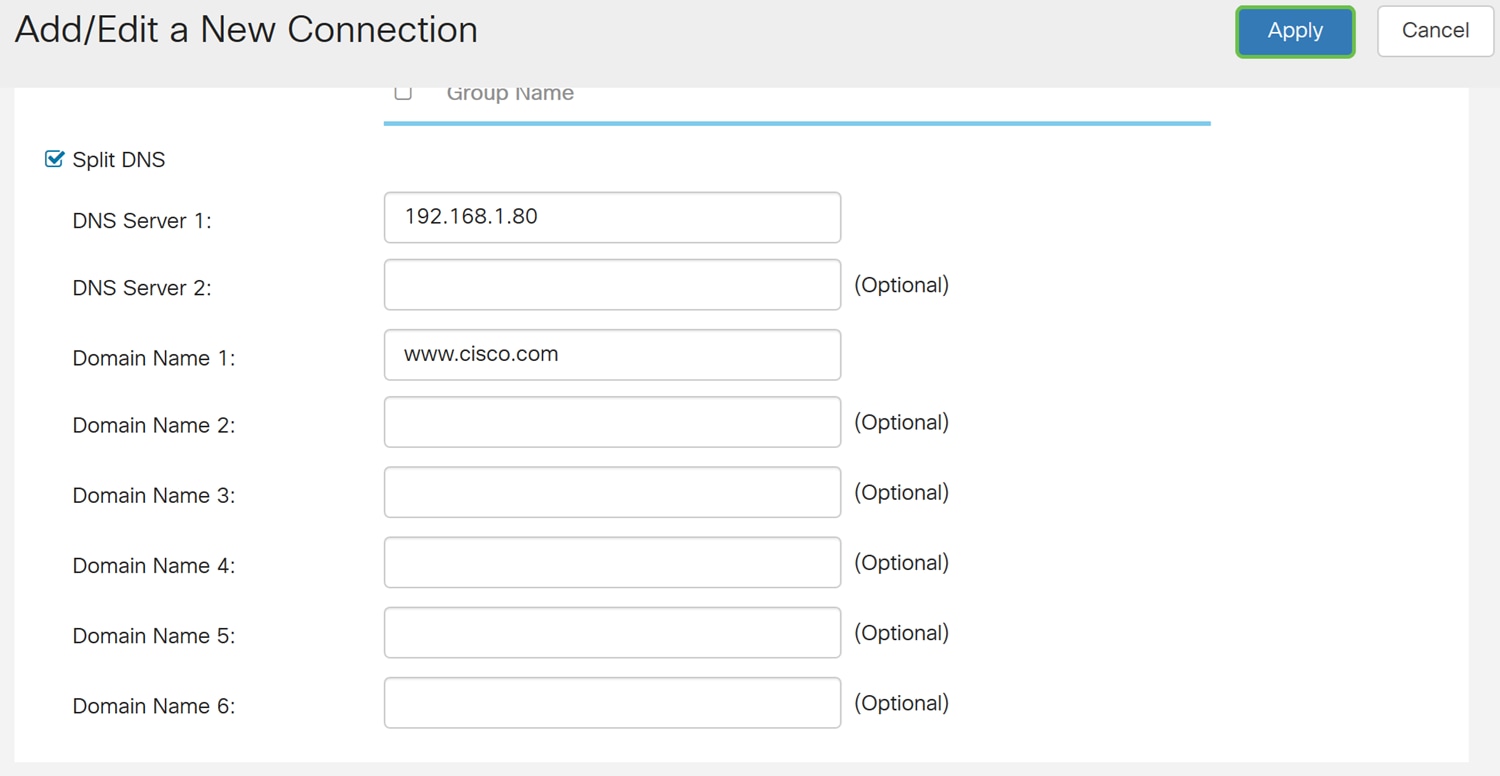
Step 13. Check Split DNS to enable. This splits the Domain Name System (DNS) server and other DNS requests to another DNS server, based on specified domain names. When the router receives an address resolution request, it inspects the domain name. If the domain name matches a domain name in the Split DNS settings, it passes the request to the specified DNS server within the VPN server network. Otherwise, the request is passed to the DNS server that is specified in the WAN interface settings (i.e. the ISP DNS server).
Split DNS is separated into two zones for the same domain. One to be used by the internal network and the other used by the external network. Split DNS directs internal hosts to an internal DNS for name resolution and external hosts are directed to an external DNS for name resolution.
If you have enabled Split DNS, enter the IP address of the DNS server to use for the specified domains. Optionally, specify a secondary DNS server in the DNS Server 2 field. In the Domain Name 1-6, enter the domain names for the DNS servers. Requests for the domains are passed to the specified DNS server.
Step 14. Click Apply.
Creating User Group for Extended Authentication
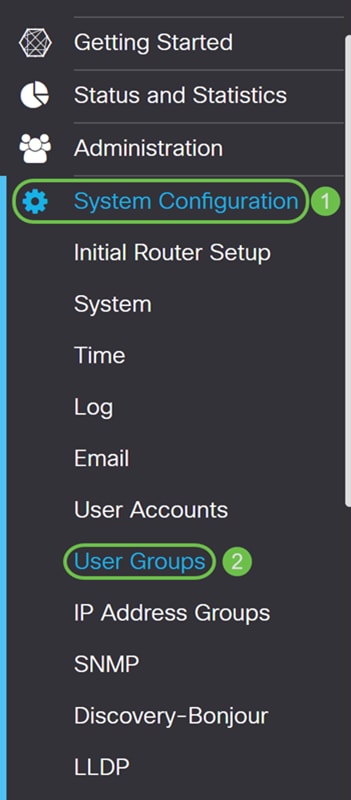
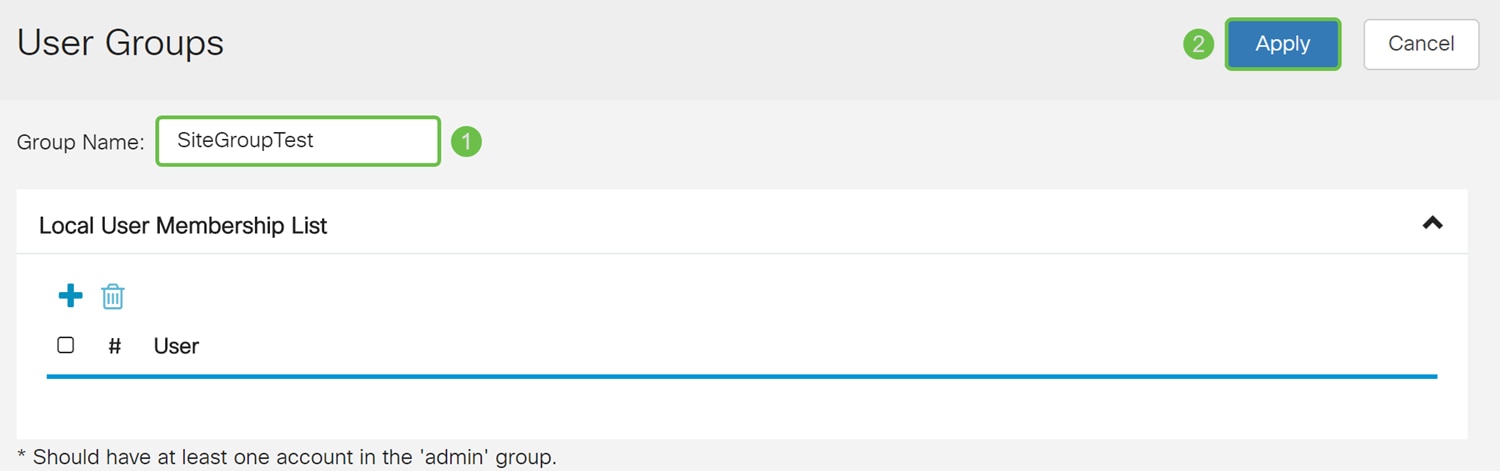
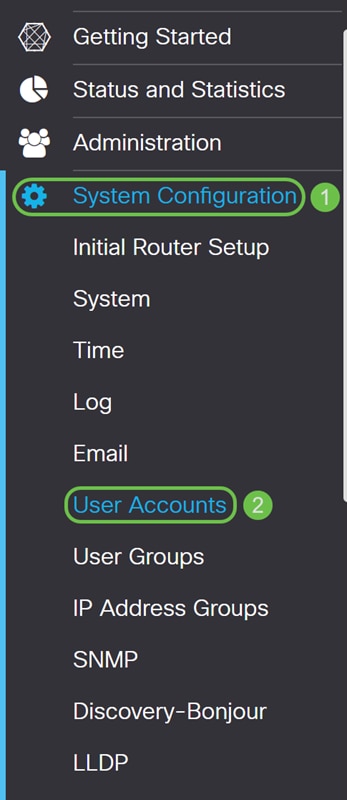
Step 1. Navigate to System Configuration > User Groups.
Step 2. Click the plus icon to add a new user group.
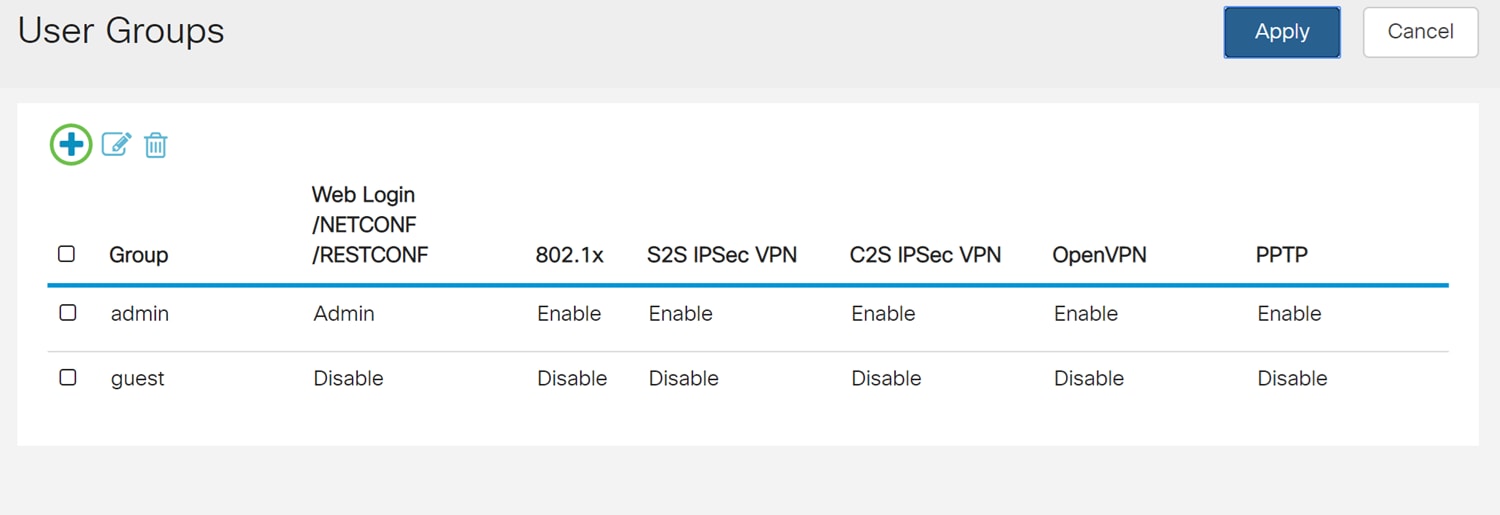
Step 3. Enter a name in the Group Name field and then press Apply. In this example, SiteGroupTest was entered as the group name.
Configuring User Accounts for Extended Authentication
Important Note: Please leave the default admin account in the admin group and create a new user account and user group for Shrew Soft. If you move your admin account to a different group, you will prevent yourself from logging into the router.
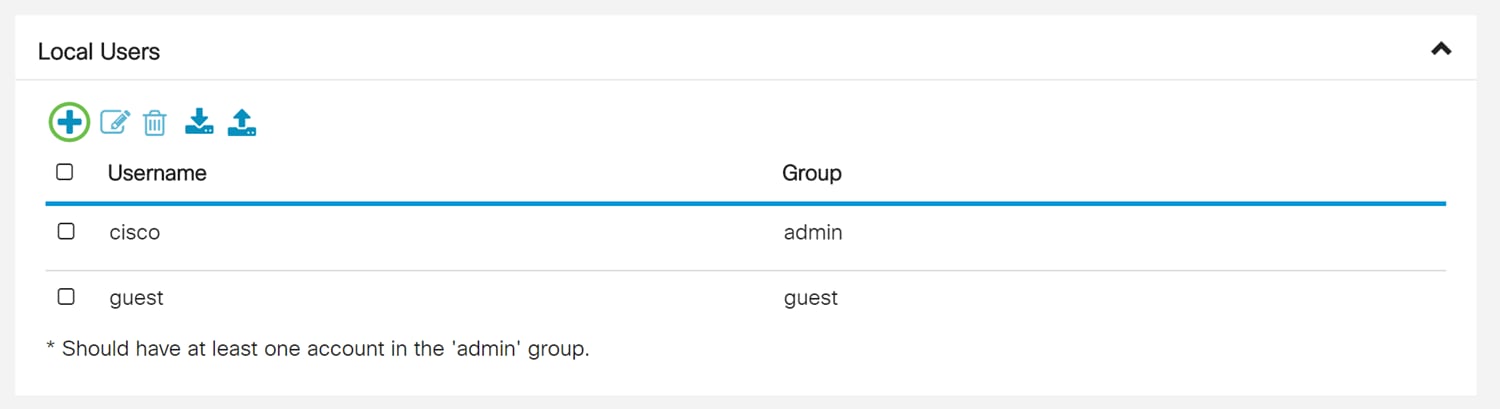
Step 1. Navigate to System Configuration > User Accounts.
Step 2. Scroll down the page to Local Users. Click the plus icon to add a new local user.
Step 3. The Add user account page opens. Enter a username in the Username field. In this example, VPNuser was entered as the username.
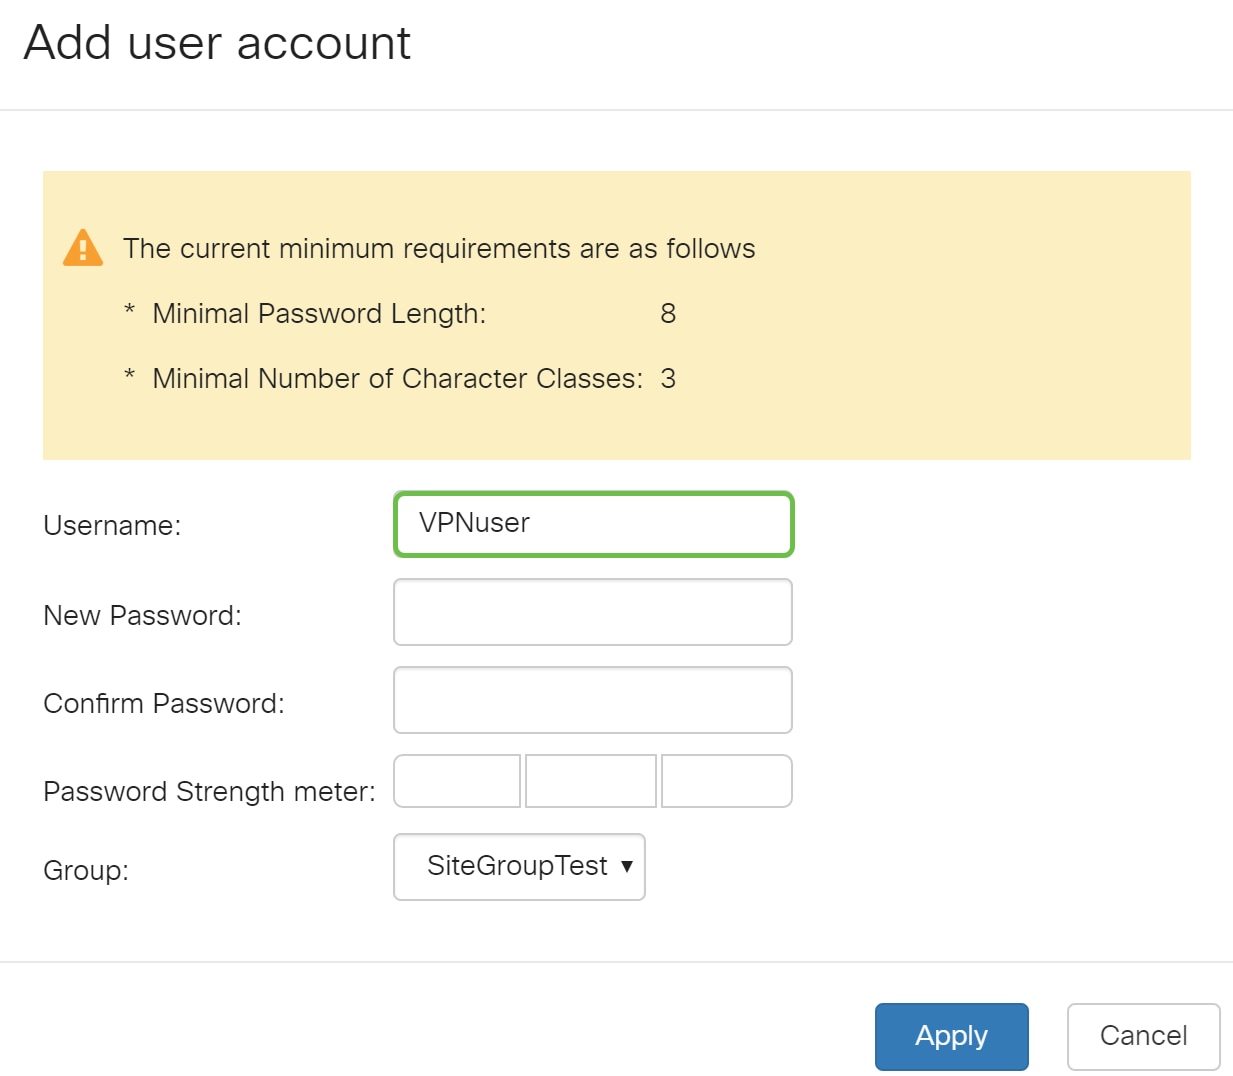
Step 4. Enter a password in the New Password and Confirm Password field. In this example, CiscoTest123! was entered.
Note: This password was used as an example, however a more complex password is recommended.
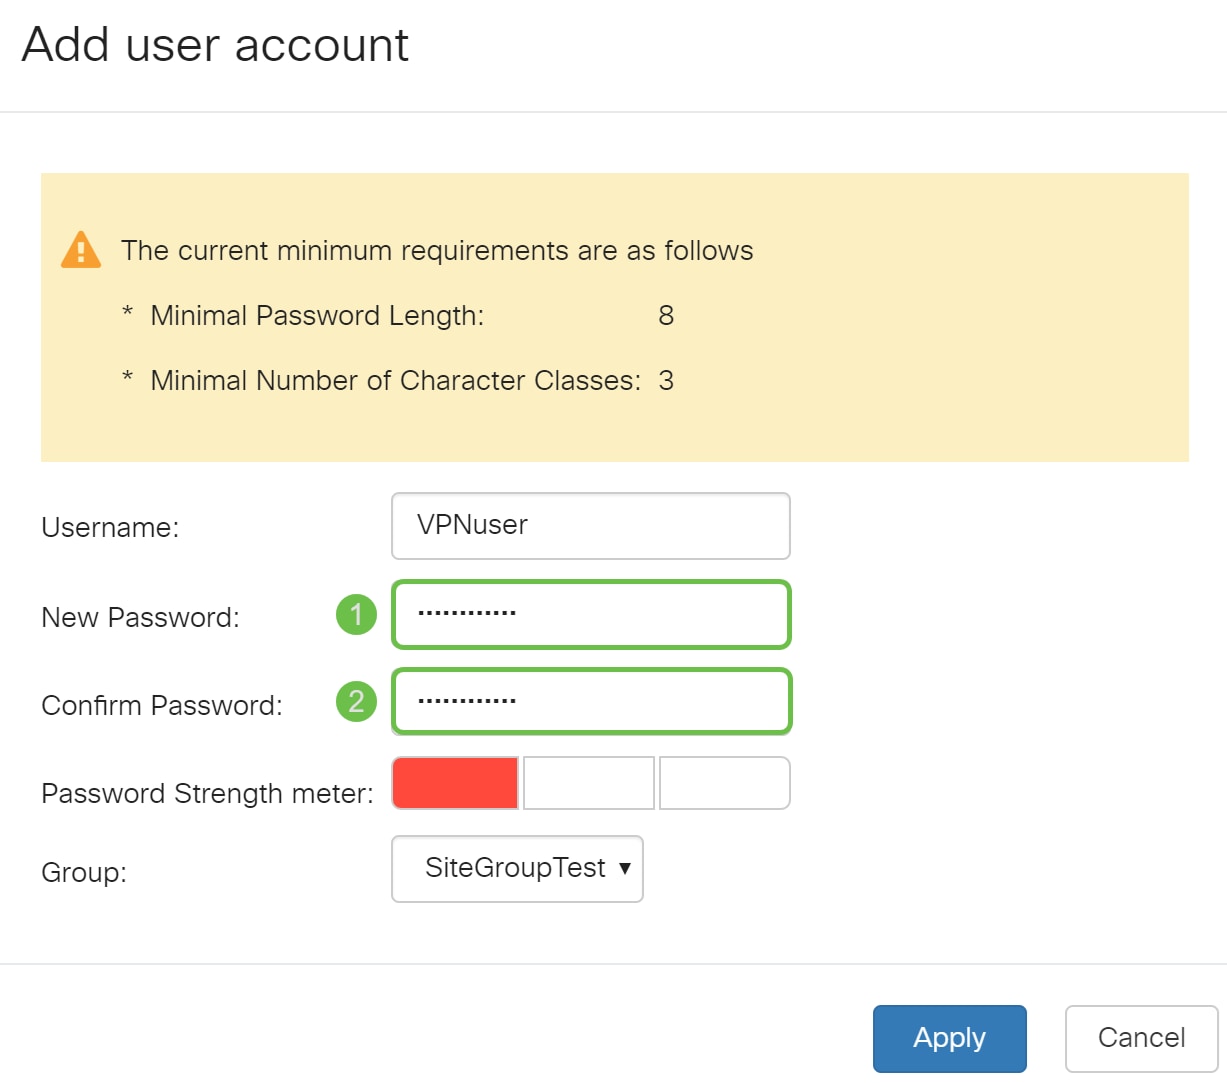
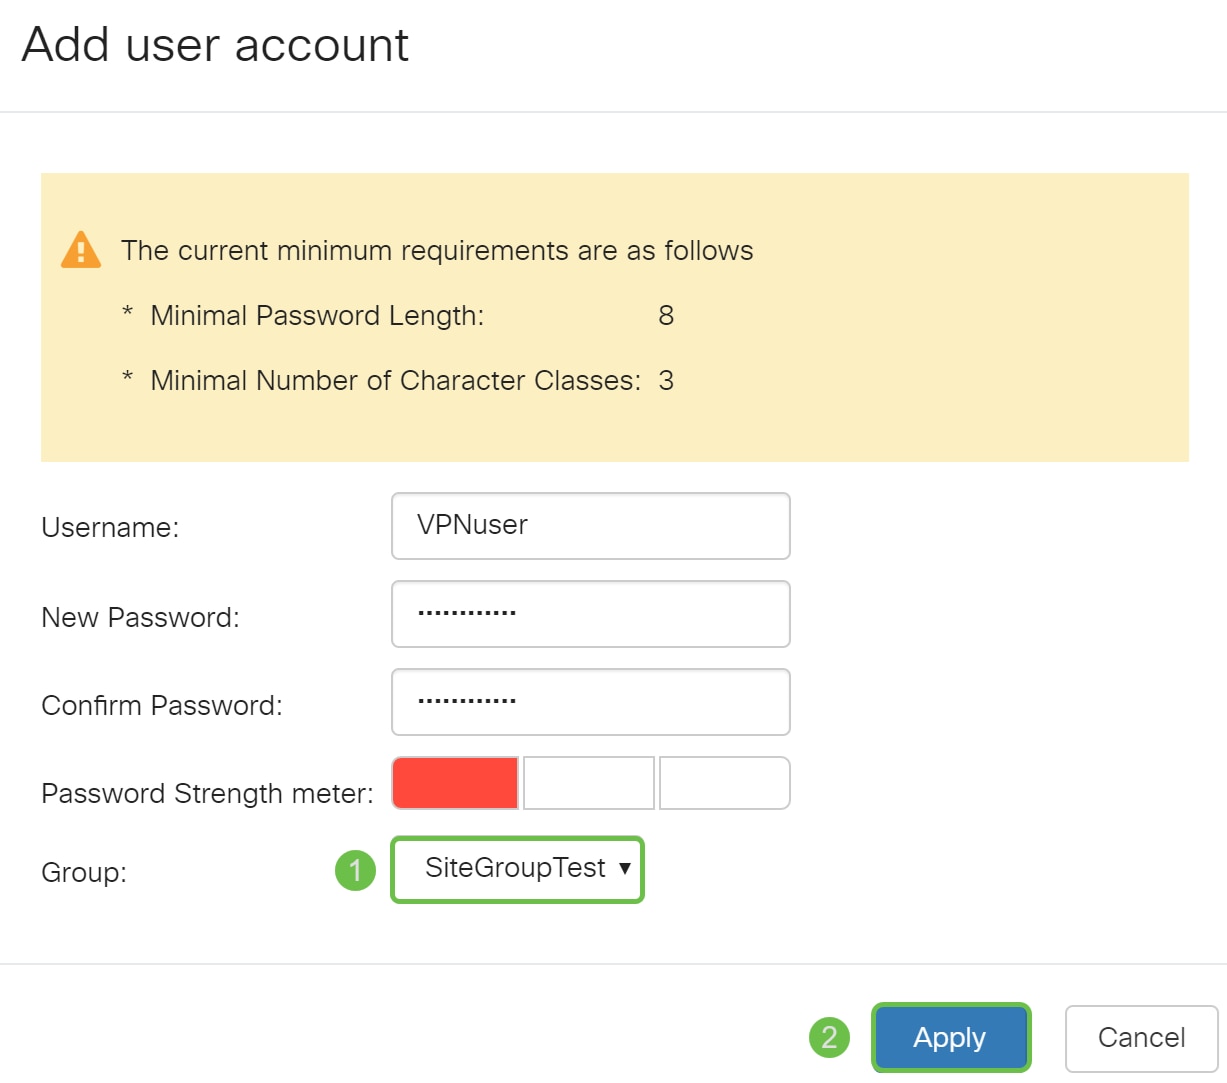
Step 5. Select a group and then press Apply to create your new user account. In this example, SiteGroupTest was selected as the group.
Configuring Failover
To enable the Site-to-Site Failover, the keep-alive must be enabled on the Advanced Settings tab.
Step 1. Click the Failover tab to configure failover.
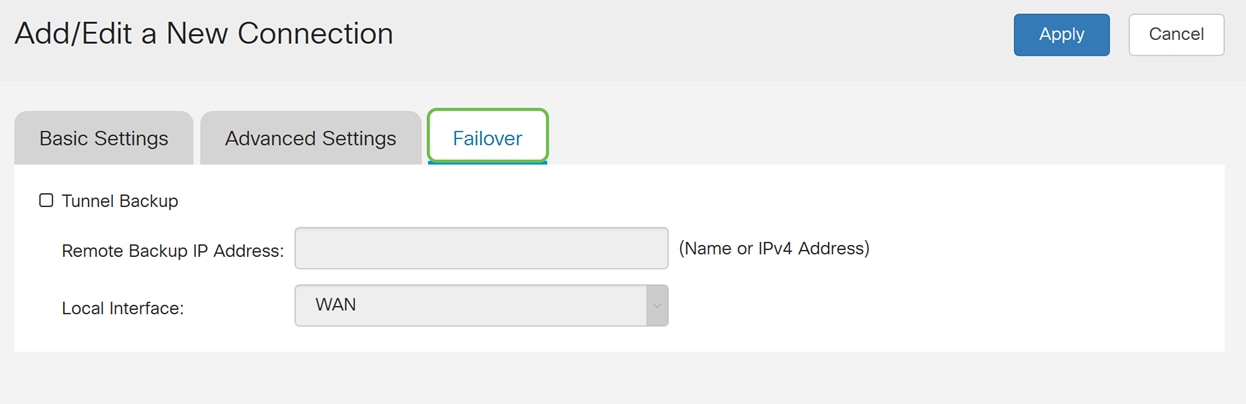
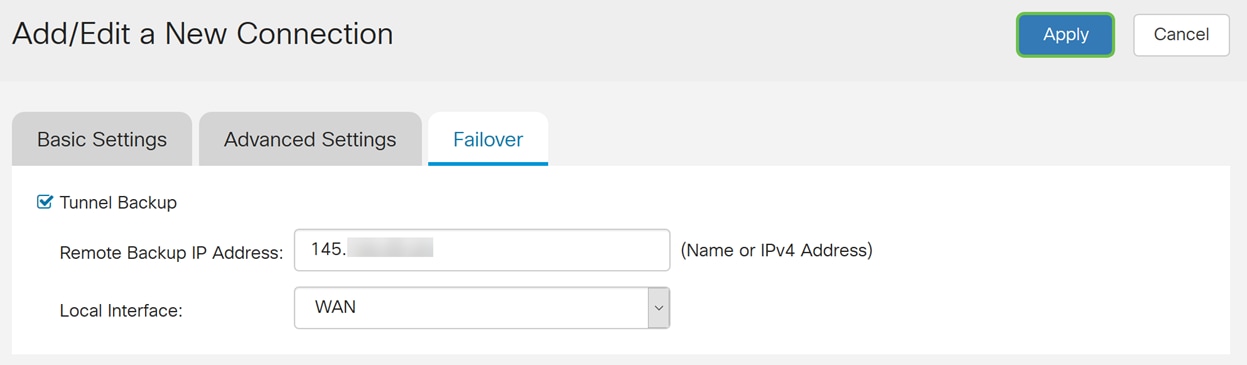
Step 2. Check Tunnel Backup to enable. When the primary tunnel is down, this feature enables the router to re-establish the VPN tunnel by using either an alternate IP address for the remote peer or an alternate local WAN. This feature is available only if DPD is enabled.

Step 3. In the Remote Backup IP Address field, enter the IP address for the remote peer, or re-enter the WAN IP address that was already set for the remote gateway. Then select the local interface (WAN1, WAN2, USB1, or USB2) from the drop-down list.

Step 4. Click Apply.
Conclusion
You should now have successfully configured advanced settings and failover for your site-to-site VPN on the RV160 and RV260. Your site-to-site VPN should still be connected.
 Feedback