Configuring Dynamic DNS on the RV160 and RV260 Routers
Available Languages
Objective
This article explains how to configure Dynamic DNS on the RV160 and RV260 routers.
Introduction
Most small business owners do not want to pay the high fee for a permanent (static) public IP address but still want to have a consistent way for users to access their site. For example, if your business' domain name was www.example.com, that is what a user would enter in the web browser to access your site.
A Domain Name System (DNS) server stores information on domain names and the IP address (or addresses) that correspond to it. This saves the users the time and effort of having to memorize actual IP addresses for every site they want to visit. It is so much easier to remember www.google.com versus having to remember 216.58.216.164. Large businesses, like Google, maintain permanent IP addresses.
Without paying for a permanent (static) IP address, the IP address of a business will change and no longer be linked to the domain name. This is done by your Internet Service Provider (ISP) as they are in charge of (public) Wide Area Network (WAN) IP addresses. A solution to this problem can be found in Dynamic DNS.
Dynamic DNS, also referred to as DDNS, automatically updates a server in the DNS with the active configuration of its hostnames, addresses, or other information. In other words, DDNS assigns a fixed domain name to a dynamic WAN IP address. Customers can continue to search by domain name to access the site without interruption.
Applicable Devices
- RV160
- RV260
Software Version
- 1.0.0.13
Configure Dynamic DNS
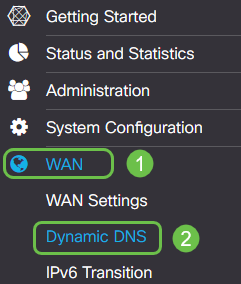
Step 1. Select WAN > Dynamic DNS.
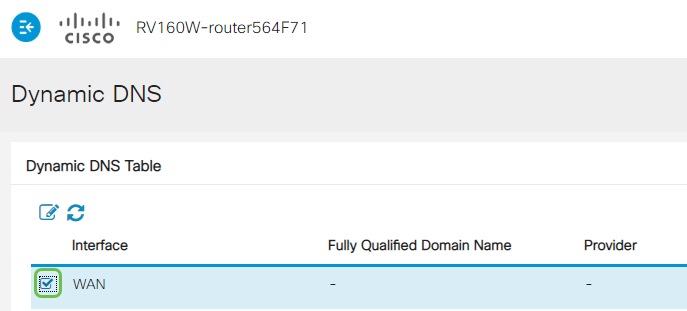
Step 2. In the Dynamic DNS Table, select the interface to add to the Dynamic DNS policy.
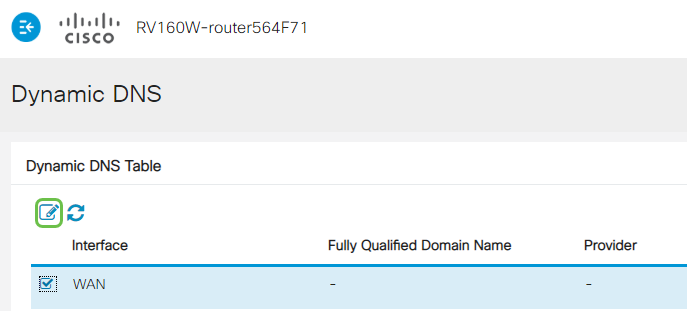
Step 3. Click the pencil icon to edit.
Step 4. Check Enable to enable the policy configuration.
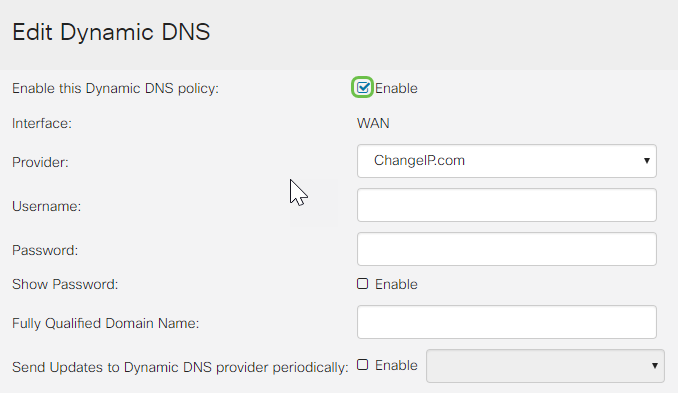
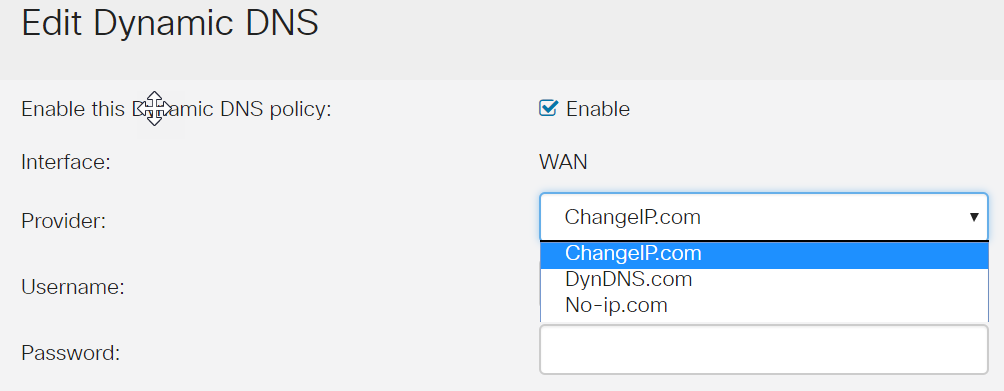
Step 5. To utilize this service, you need to create an account and install an application from one of the sites listed below onto one of the computers on your network. This application should be on almost all of the time so it can effectively search out the current IP address assigned and send any updates to the site that holds the information for your network. This is also a place you can purchase a domain name, so if you do not have a domain name, it would be easy to get them both from one site. Select the name of service provider from the Provider drop-down list.
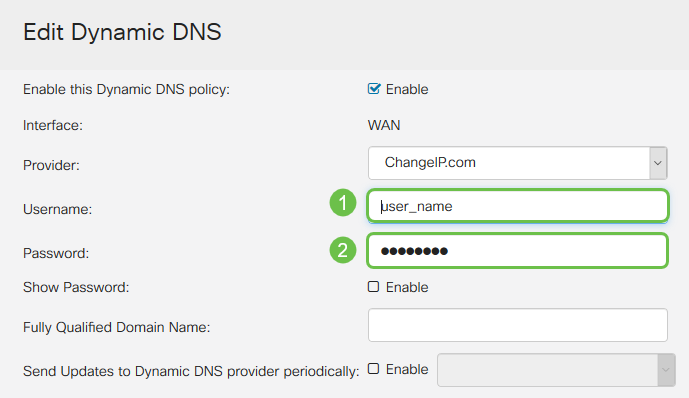
Step 6. Enter a Username and Password for the DDNS account. To display the password, check Enable in the Show Password field.
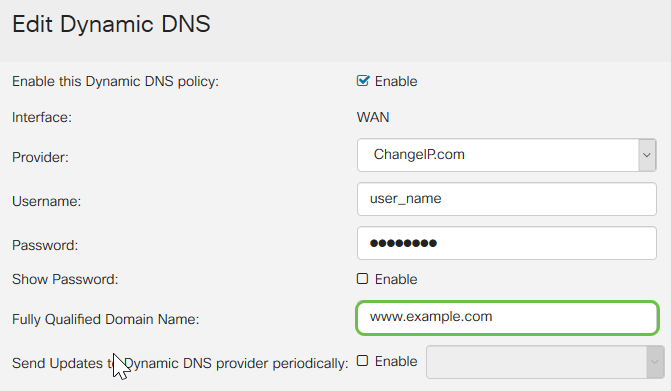
Step 7. Enter the Fully Qualified Domain Name.
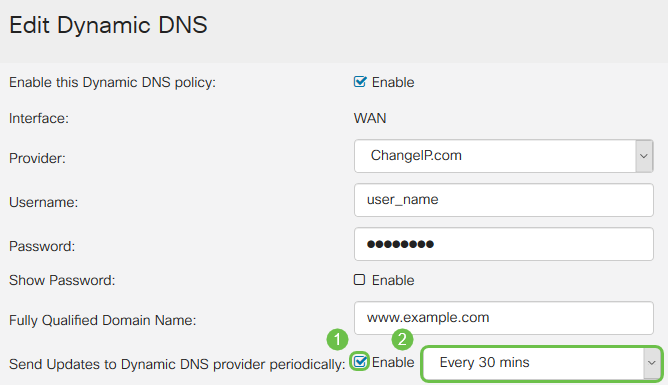
Step 8. Check Enable to receive updates to Dynamic DNS provider and select how often updates should be sent.
Step 9. Click Apply.

You have now configured Dynamic DNS on your RV160 and RV260 router.
For more articles and discussion topics on Cisco Small Business products, visit the Cisco Small Business Support Community.
 Feedback