Configuring Port Settings on the RV160 and RV260 Routers
Available Languages
Objective
This document shows you how to configure port settings on the RV160 and RV260.
Introduction
A Local Area Network (LAN) is a type of network that is limited to an area and commonly found in an office building, school, or a home. A LAN can vary in size. For example, a LAN can exist in a home with two computers, as well as an office with hundreds. The most common type of LAN is Ethernet, but it can also be connected via Wi-Fi. A port is an Ethernet jack or socket on your network device that an Ethernet cable can plug into. This will allow you to connect to the LAN where you can obtain an IPv4 and/or IPv6 address from your router. Port settings are used to configure the connection settings for each local port. These settings include Port Label, Energy-Efficient on Ethernet (EEE), Flow Control, Mode (Speed and Duplex), Port Mirror, and Jumbo Frames. Some examples of why you may want to alter port settings could be because you can manually configure the speed and duplex for older hardware that doesn’t support auto-negotiation, better organization by using port labels, or because you want to disable unused ports for security reasons.
Applicable Devices
- RV160
- RV260
Software Version
- 1.0.00.13
Configuring Port Settings
Step 1
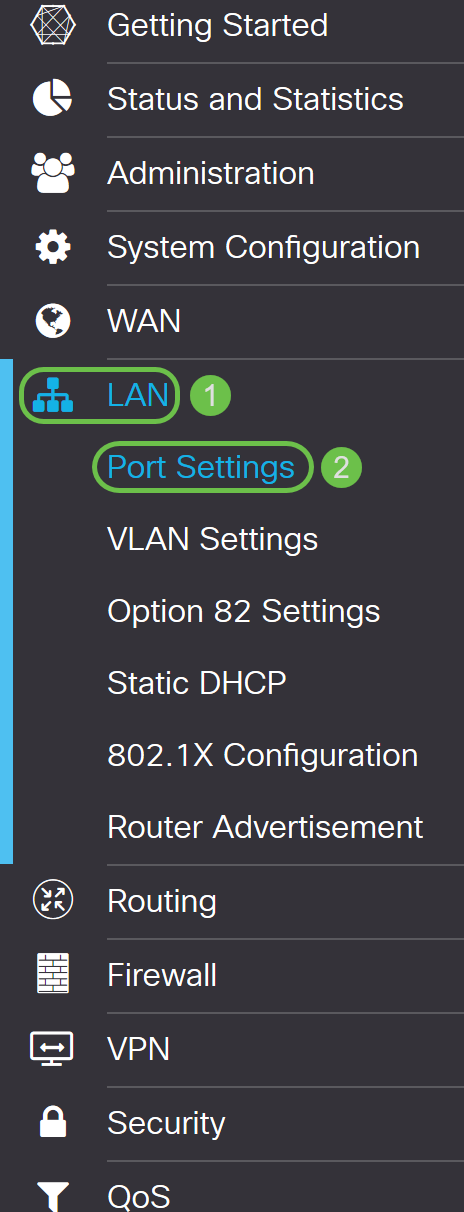
Log into the web configuration utility and navigate to LAN > Port Settings.
In this article, we will be using the RV160 to configure port settings. The configuration may vary depending on the model you are using. For more information about accessing the web configuration utility page, click here.
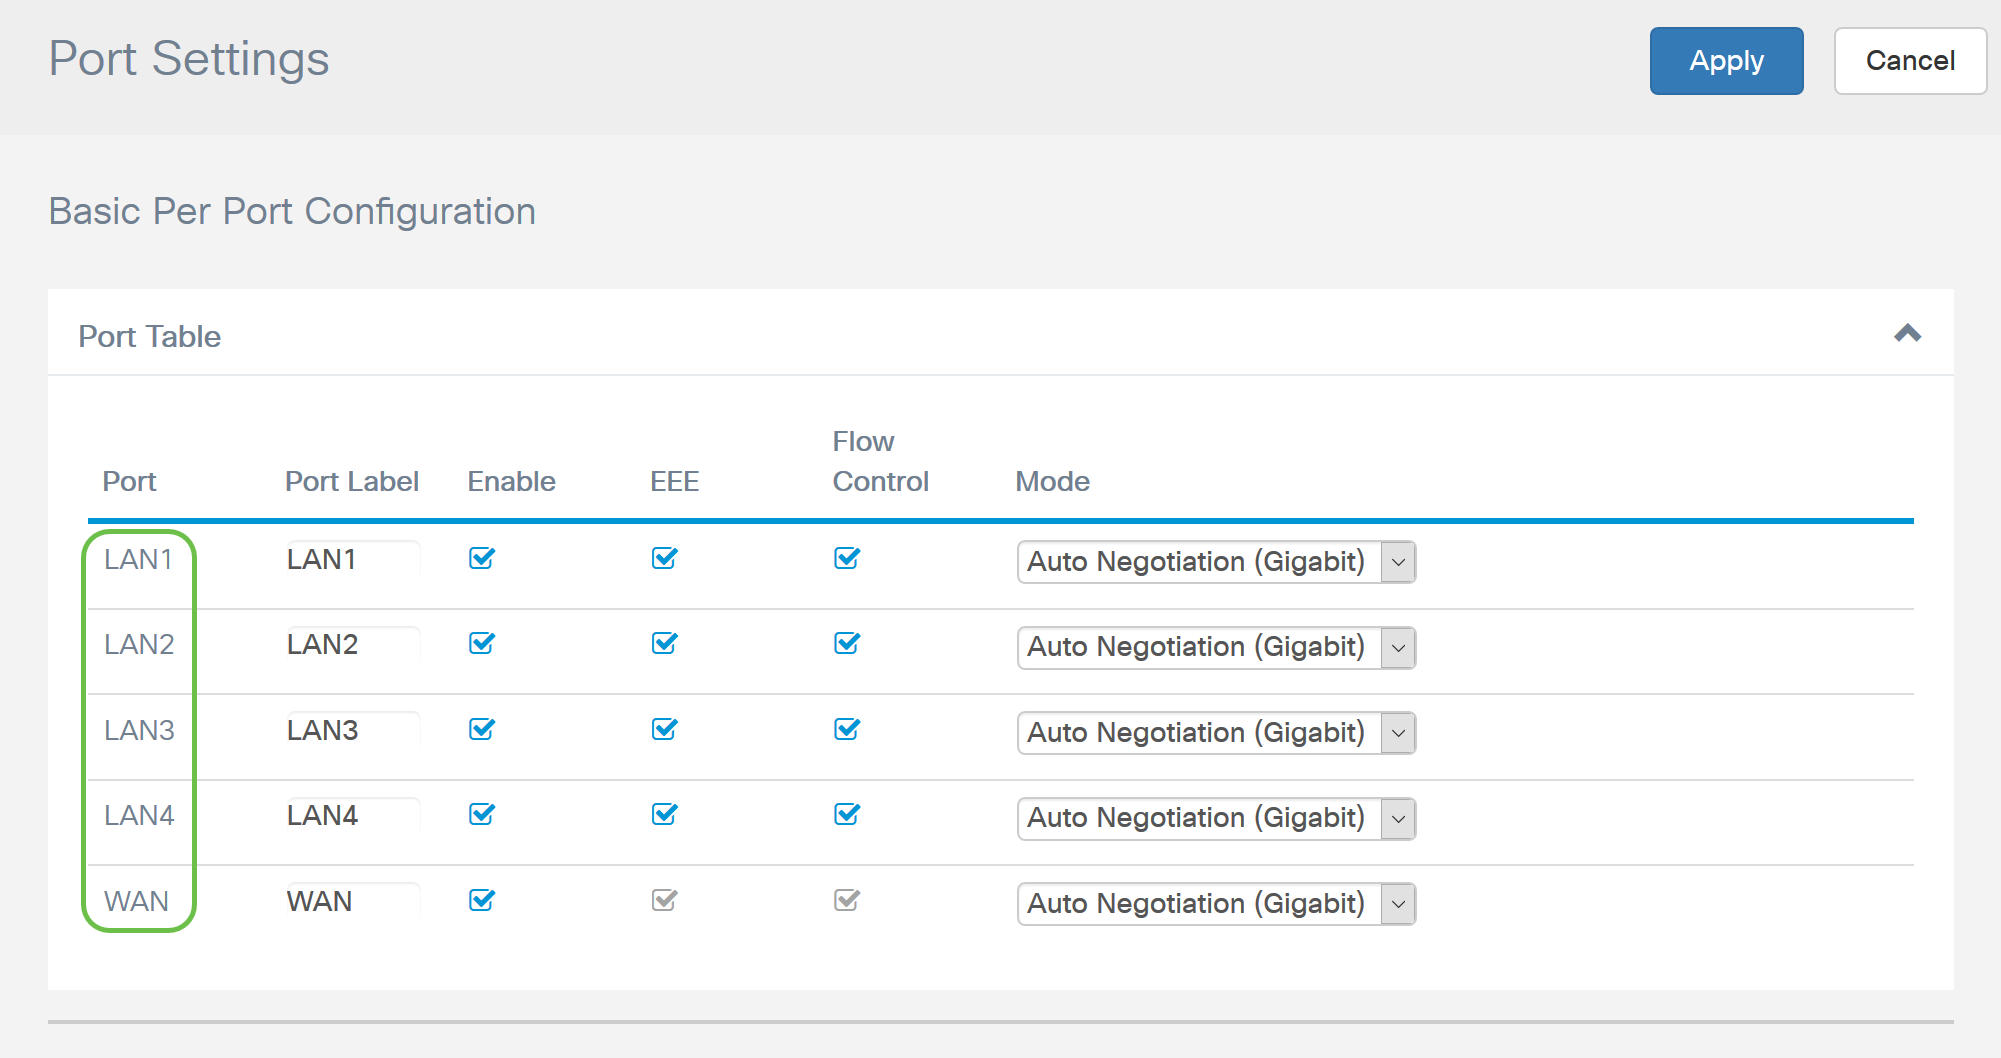
In the Port Table area, the Port field lists the ports currently available on the router.
Step 2
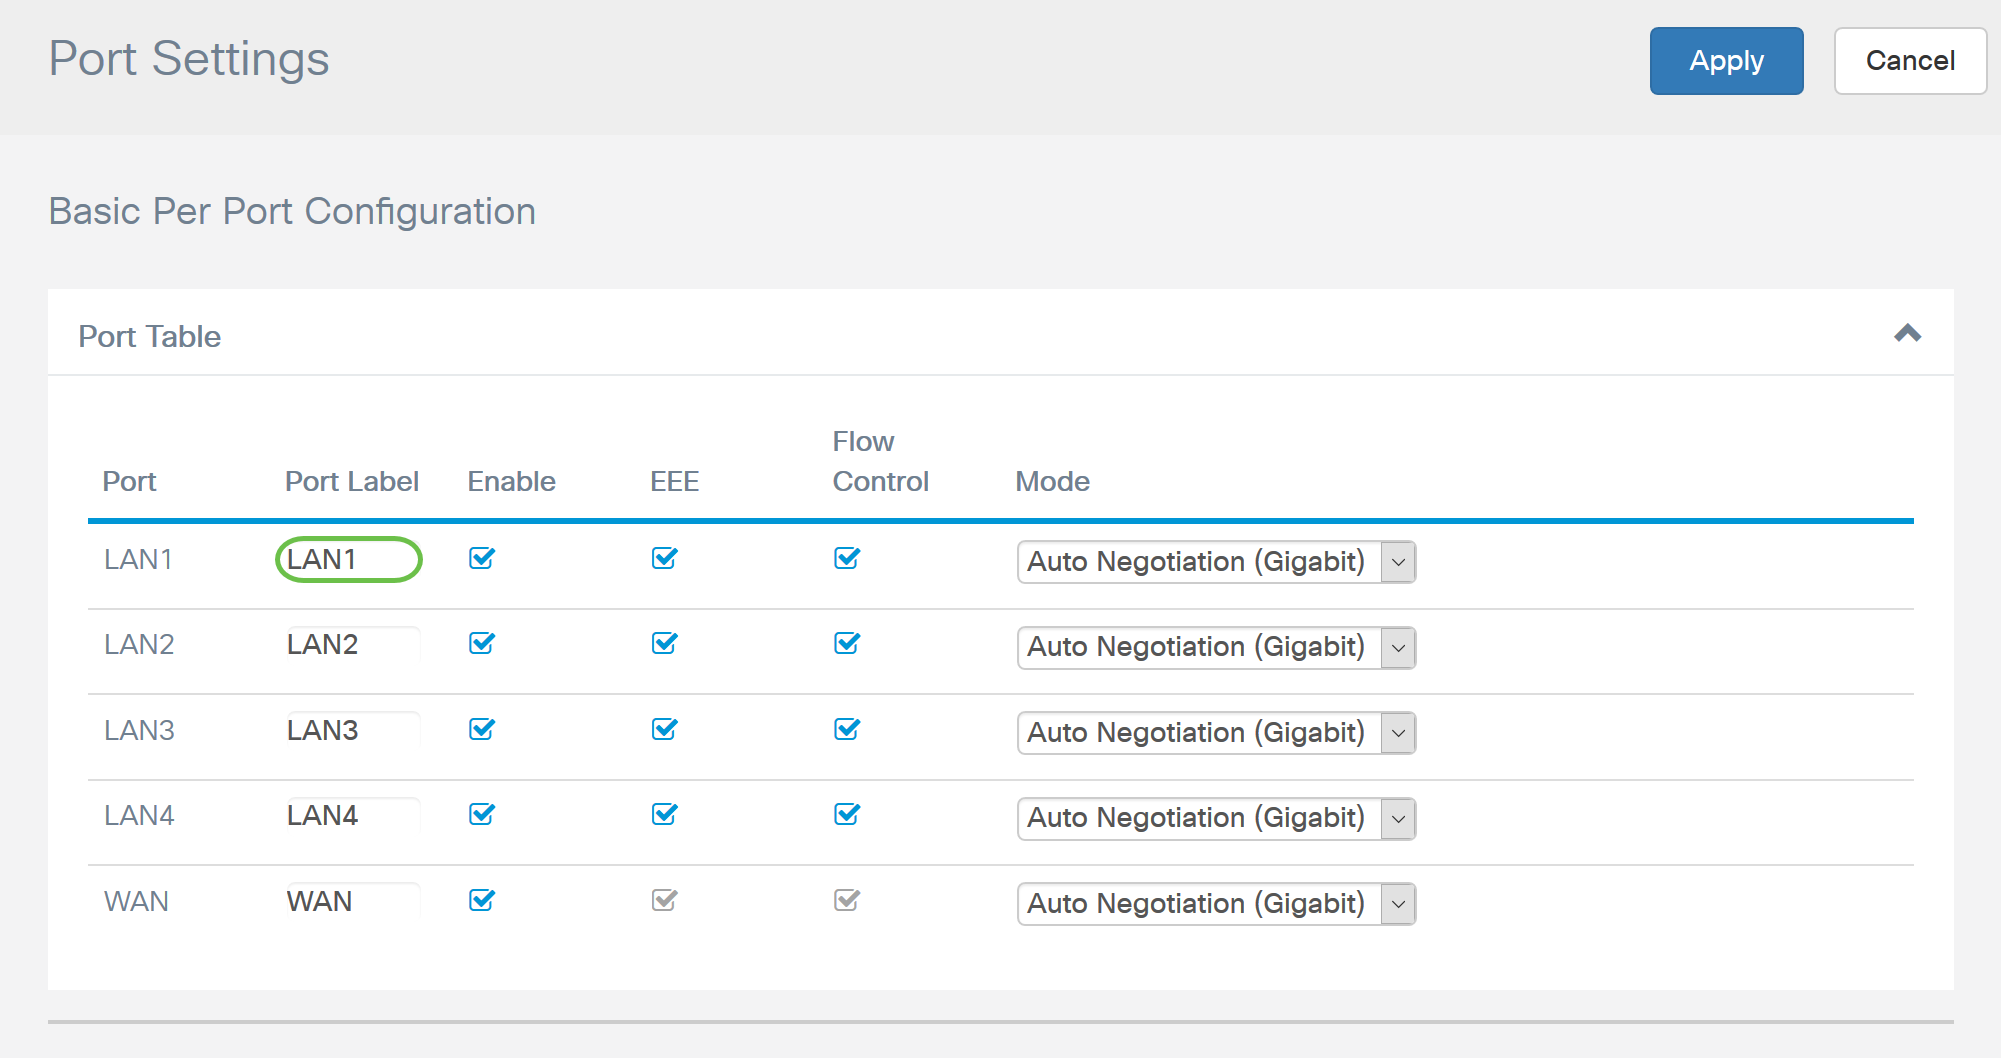
To modify the port label, enter a new label in the Port Label field. In this example, the default port label of LAN1 is retained.
Step 3
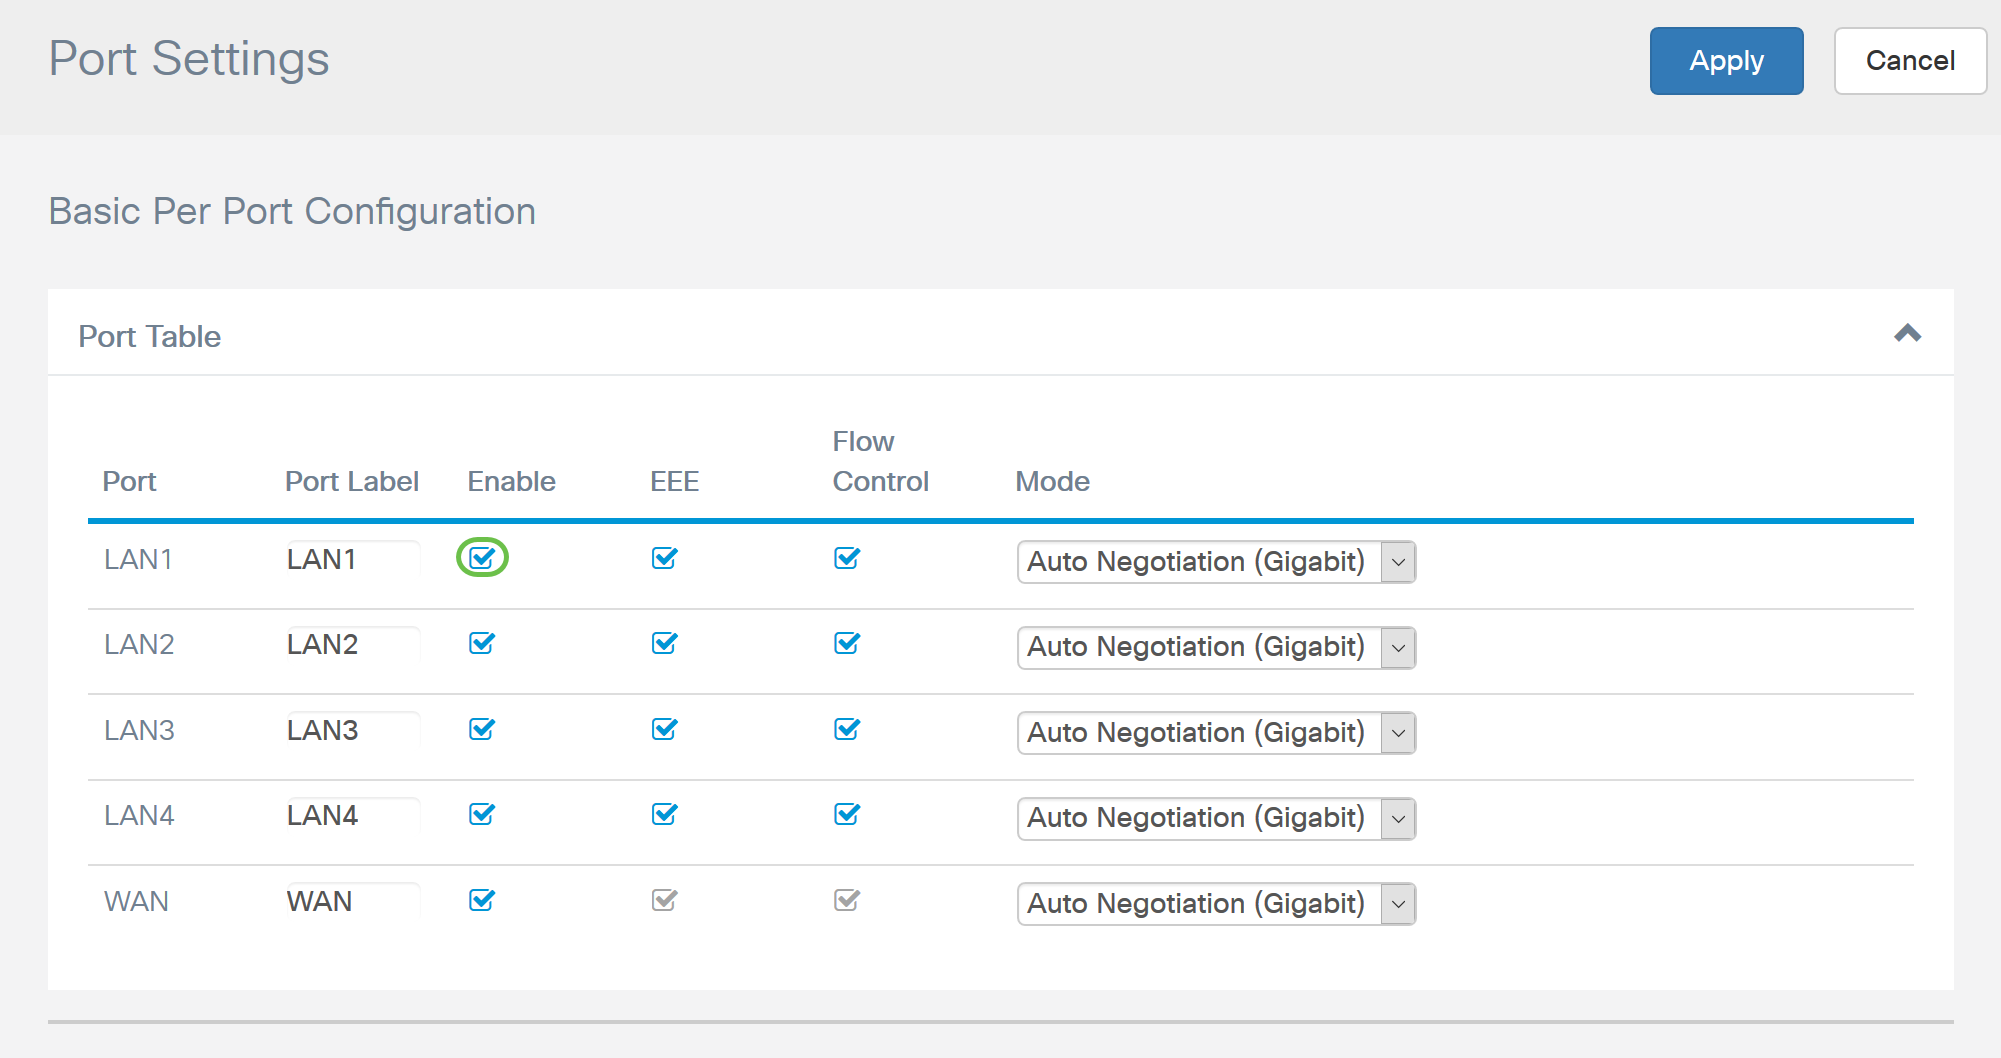
Check the Enable checkbox to enable the port settings. If the enable box is unchecked, the settings for the port will not be applied.
Step 4
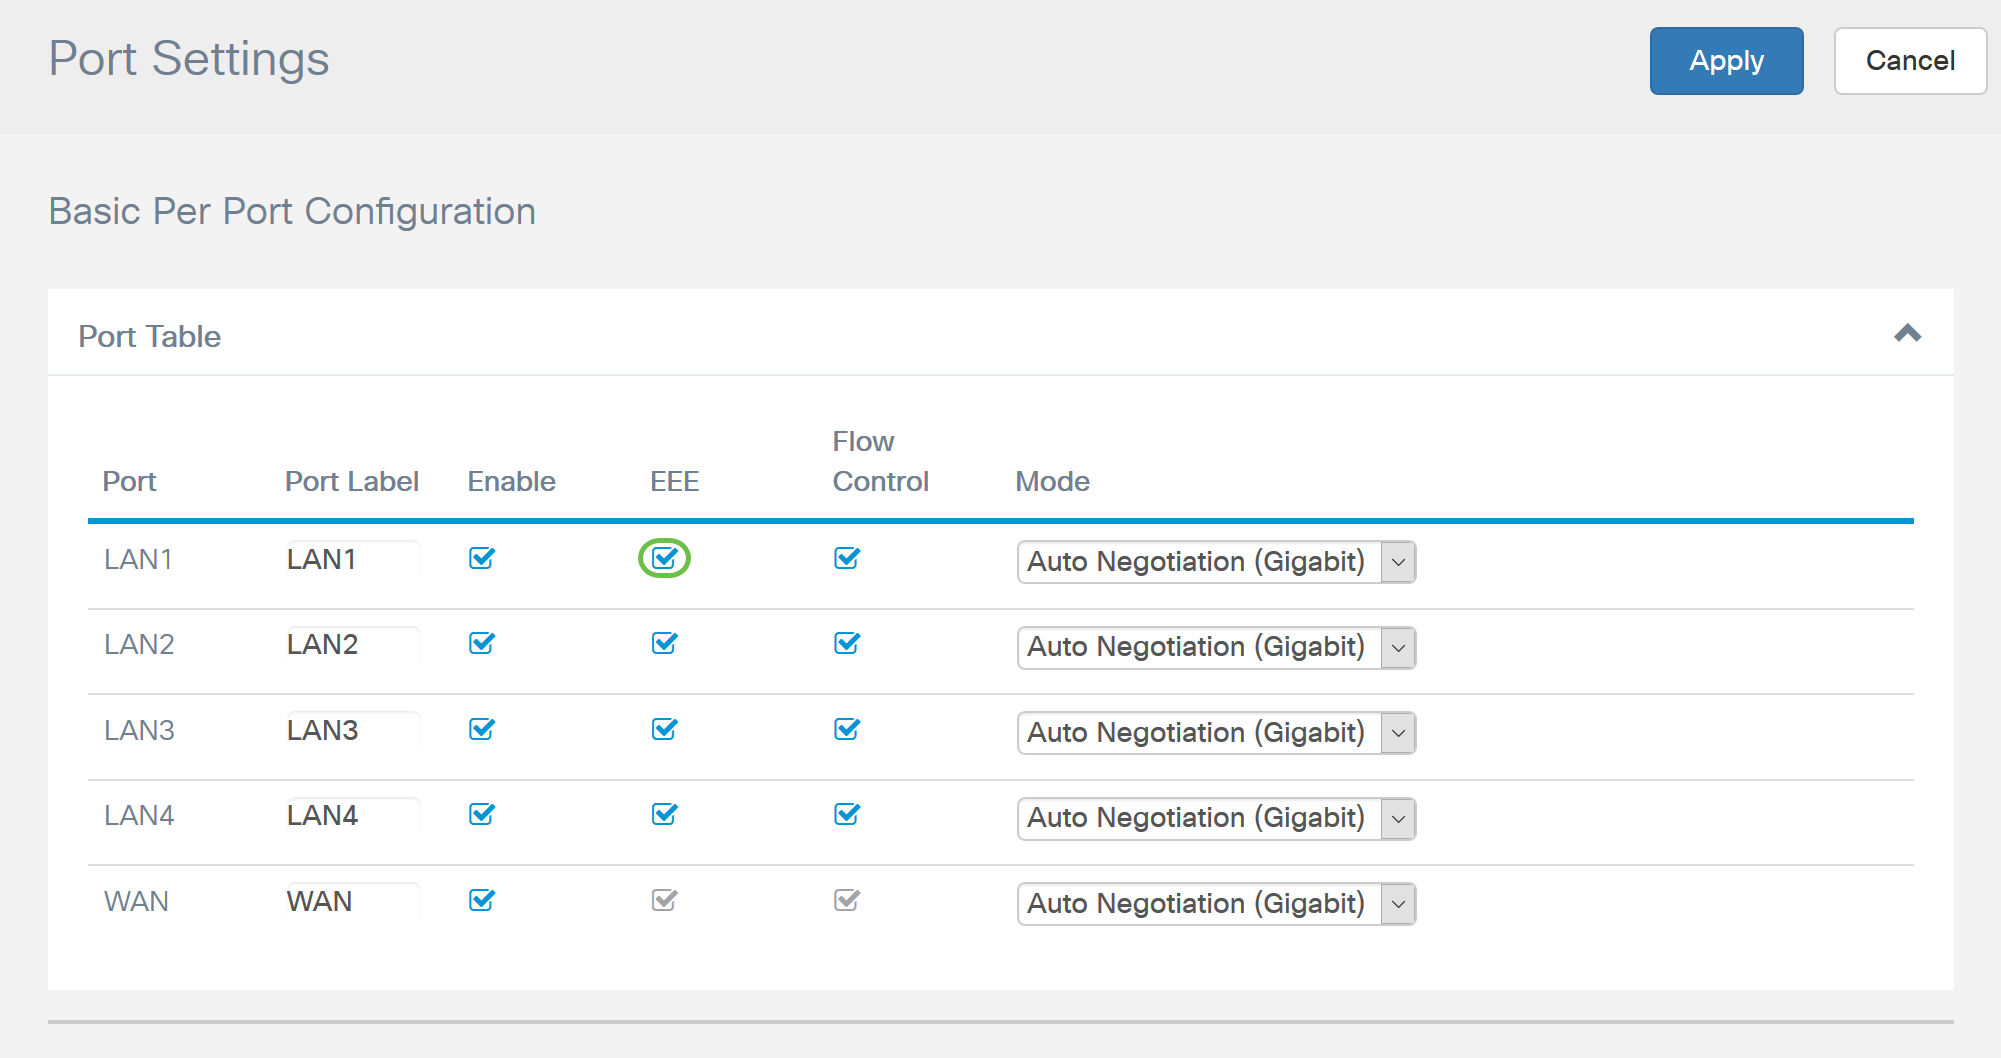
Check the Energy-Efficient on Ethernet (EEE) checkbox to allow the port to consume less power during periods of low data activity.
Step 5
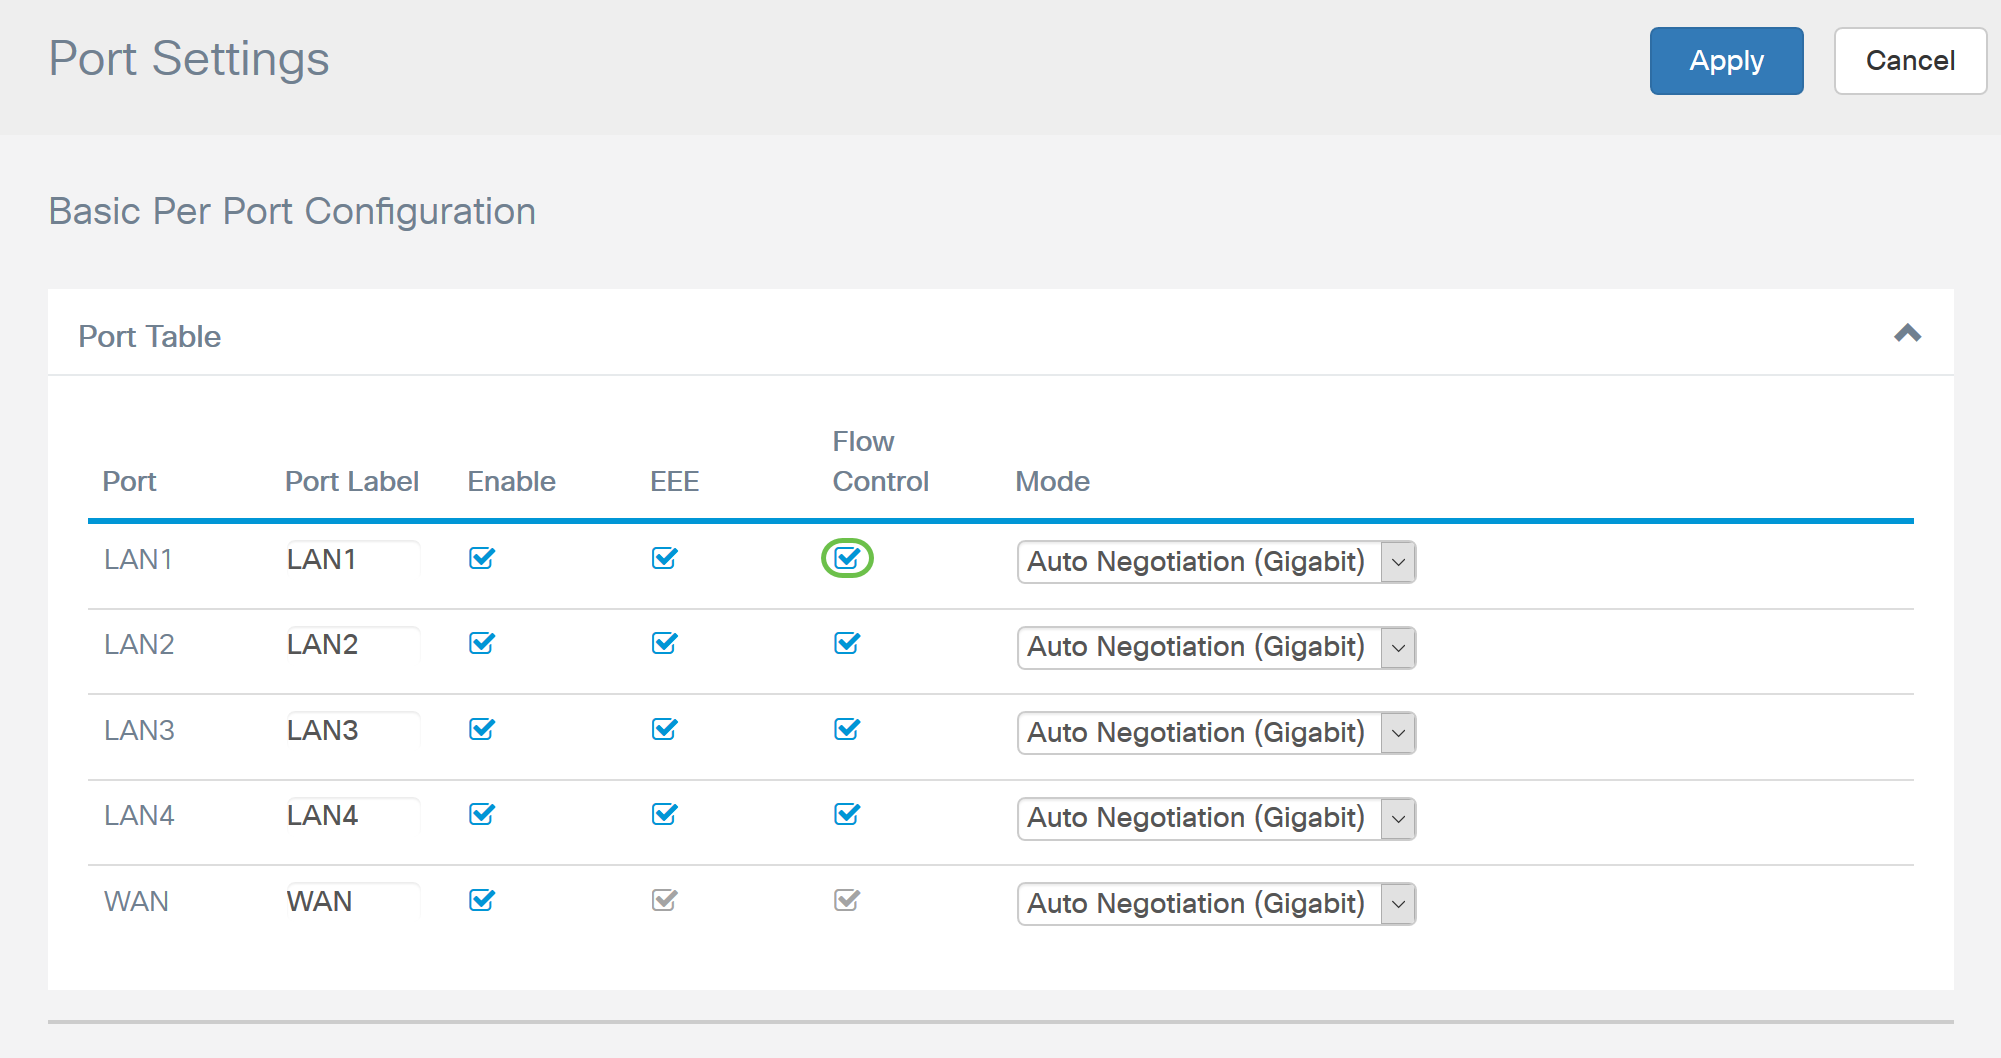
Flow control is a feature that allows the receiving device to send a signal to the sending device that it’s congested. This tells the sending device to temporarily stop transmitting to help ease the congestion. Check the checkbox if you would like to enable flow control.
Step 6
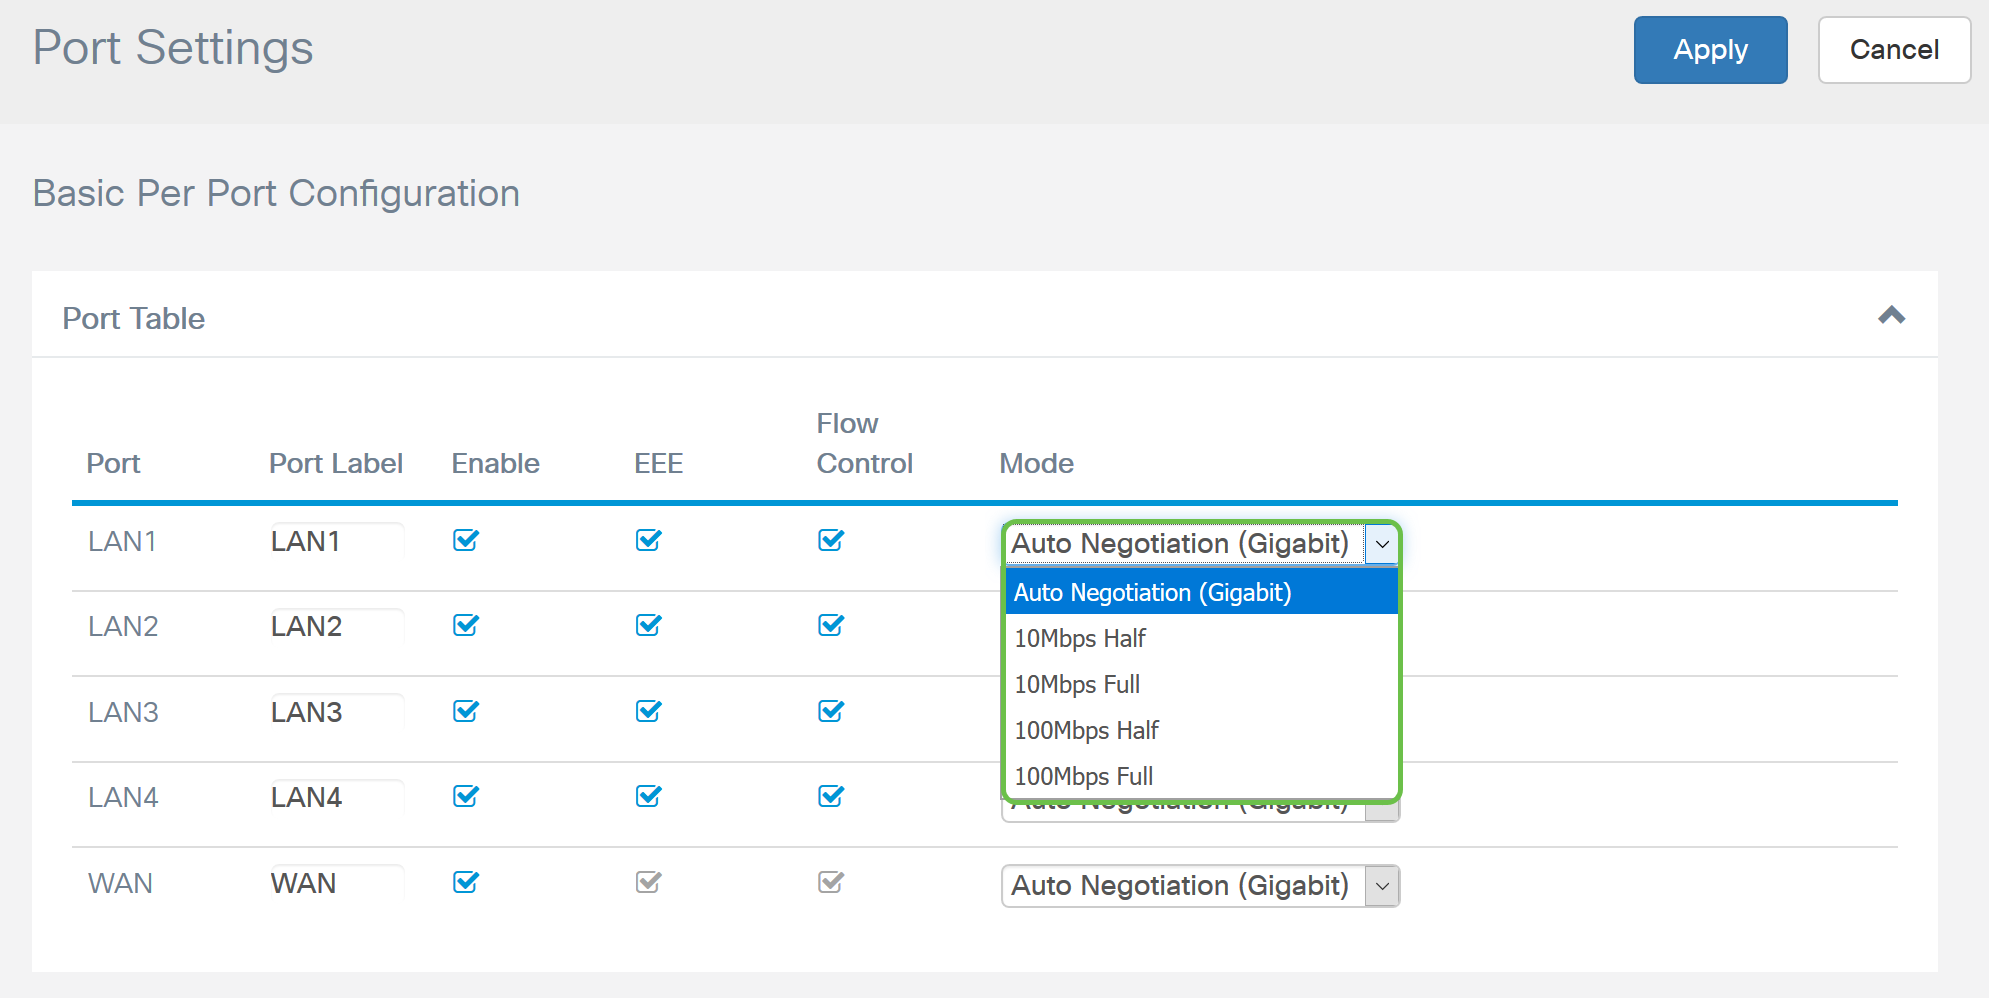
In the Mode field, select the port setting mode from the drop-down list. This is where you can configure the speed and the duplex, the way the data is transmitted. Full duplex mode indicates that the data transmission between devices can go both directions simultaneously. Half-duplex allows the communication to go both directions, but only one direction at a time. Auto Negotiation is recommended unless your other equipment does not have auto-negotiation capabilities. If that is the case, you can manually select the speed and duplex that it supports. The options are:
- Auto Negotiation (Gigabit) – The device auto-negotiates connection speeds and duplex mode with the connected device.
- 10Mbps Half – 10 Mbps in both directions, but only one direction at a time.
- 10Mbps Full – 10 Mbps in both directions simultaneously.
- 100Mbps Half – 100 Mbps in both directions, but only one direction at a time.
- 100Mbps Full – 100 Mbps in both directions simultaneously.
In this example, Auto Negotiation (Gigabit) is selected.
Step 7 (Optional)
Jumbo frames are Ethernet frames with more than 1500 bytes of payload, which is the limit set by the IEEE 802.3 standard. Jumbo frames can carry up to 9000 bytes of payload. Some software would use it to move large blocks of data (big file copies) because it’s more efficient. Check the Enable checkbox if you would like to enable jumbo frames.
Generally, it is preferred for the jumbo frame traffic to have its own VLAN so it can be isolated from other traffic. Click the hyperlink to learn about the Prevention of ICMP Jumbo Frames on the SG200/300 Series Managed Switches.

Step 8 (Optional)
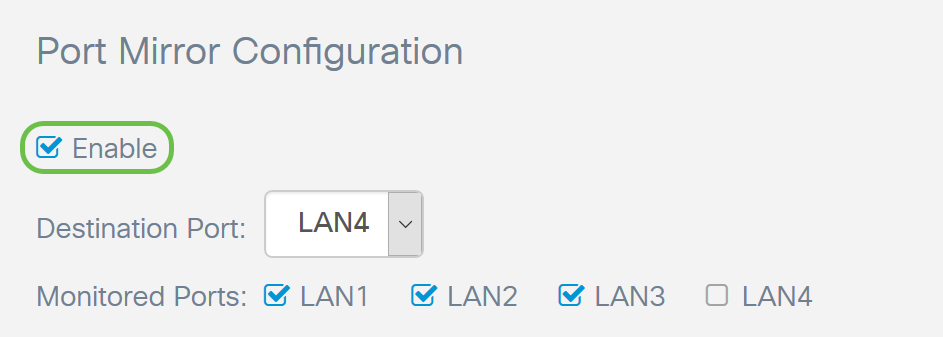
Port mirroring is commonly used for network appliances that require monitoring of network traffic. It would send a copy of network packets seen on one port to a network monitoring connection on another port. If you would like to enable port mirror configuration, check the Enable checkbox.
Step 9 (Optional)
Select the Destination Port that will be monitoring the traffic of the source port. Select one of the LAN ports (LAN1 to LAN4) from the drop-down list. In this example, we will be selecting LAN3.
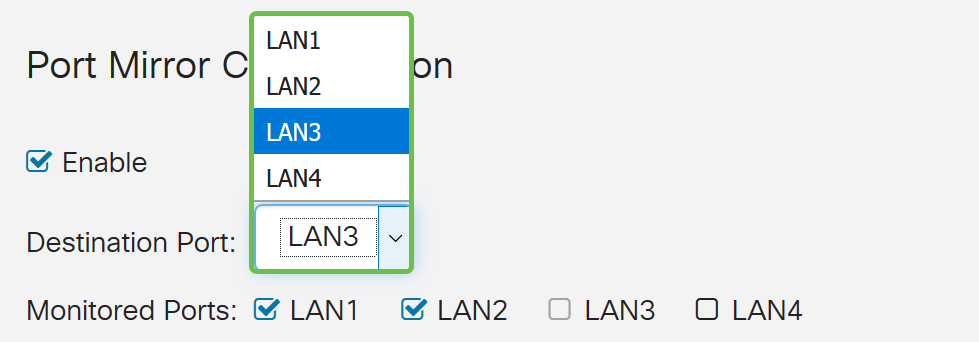
Step 10 (Optional)
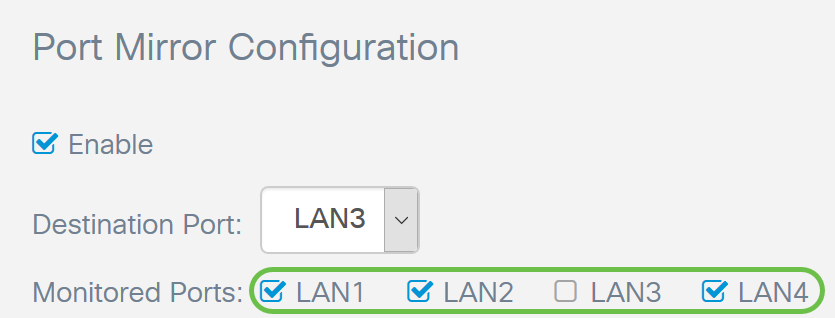
Select the ports that the traffic will be monitored on the destination port.
The destination port cannot be selected to be monitored.
Step 11 (Optional)
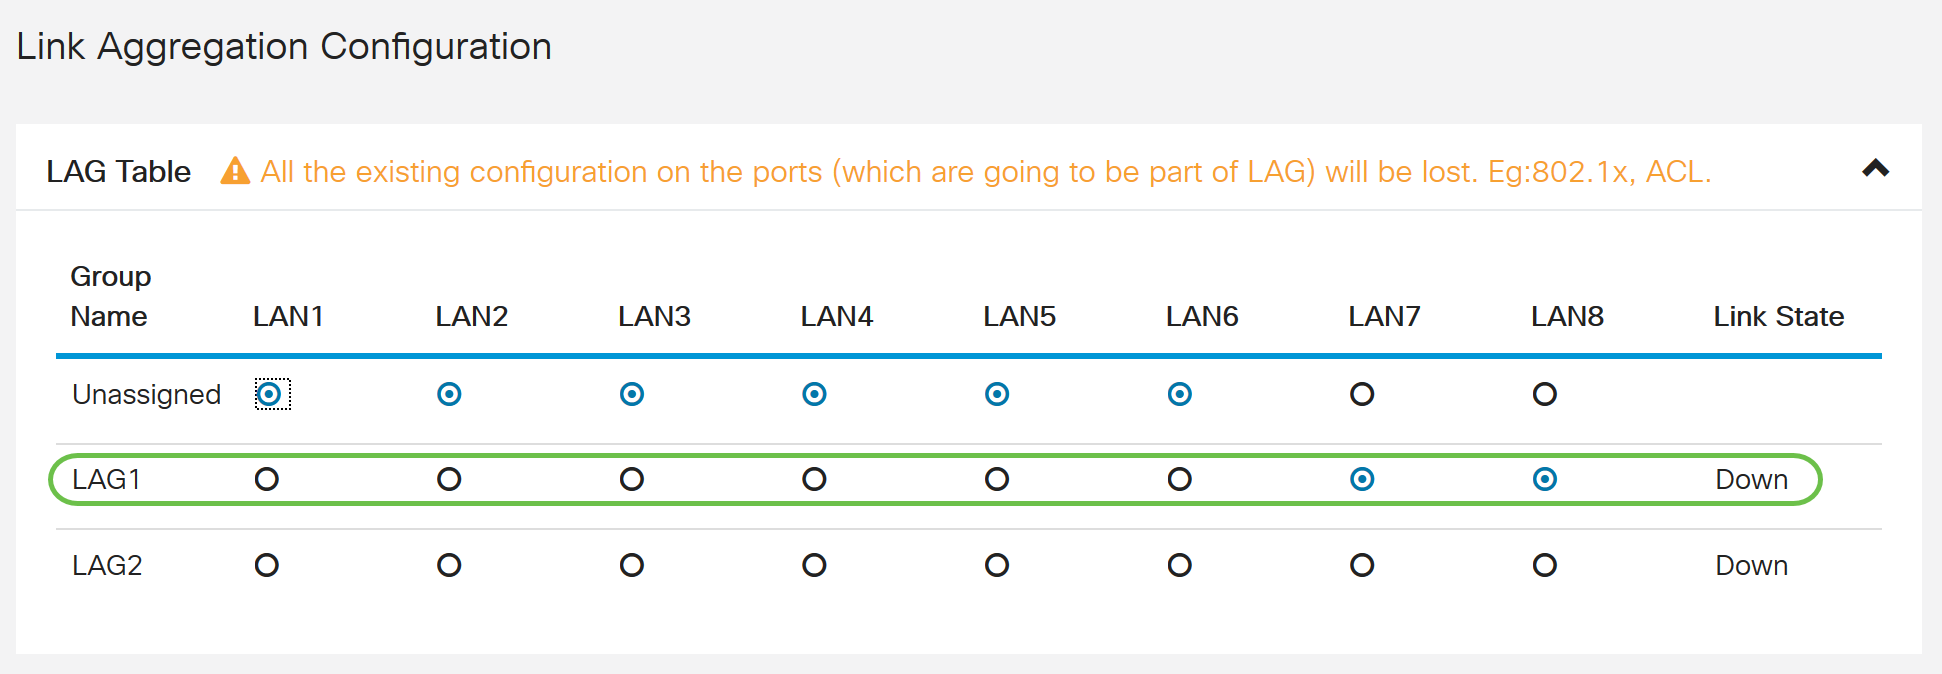
This step is only for the RV260. If you want to configure Link Aggregation Group (LAG), select 2-4 LAN ports to be aggregated into one LAG. A LAG multiplies the bandwidth, increases port flexibility, and provides link redundancy between two devices. In this example, we have selected LAN7 and LAN8 to be part of LAG1. Make sure that the other device that is connected to both LAN7 and LAN8 has LAG configured as well.
An RV260W was used in this example. All the existing configuration on the ports that are going to be part of the LAG will be lost. The LAG will overwrite the port configuration.
The Link State field will show whether the link of the LAG is active or down.
Step 12
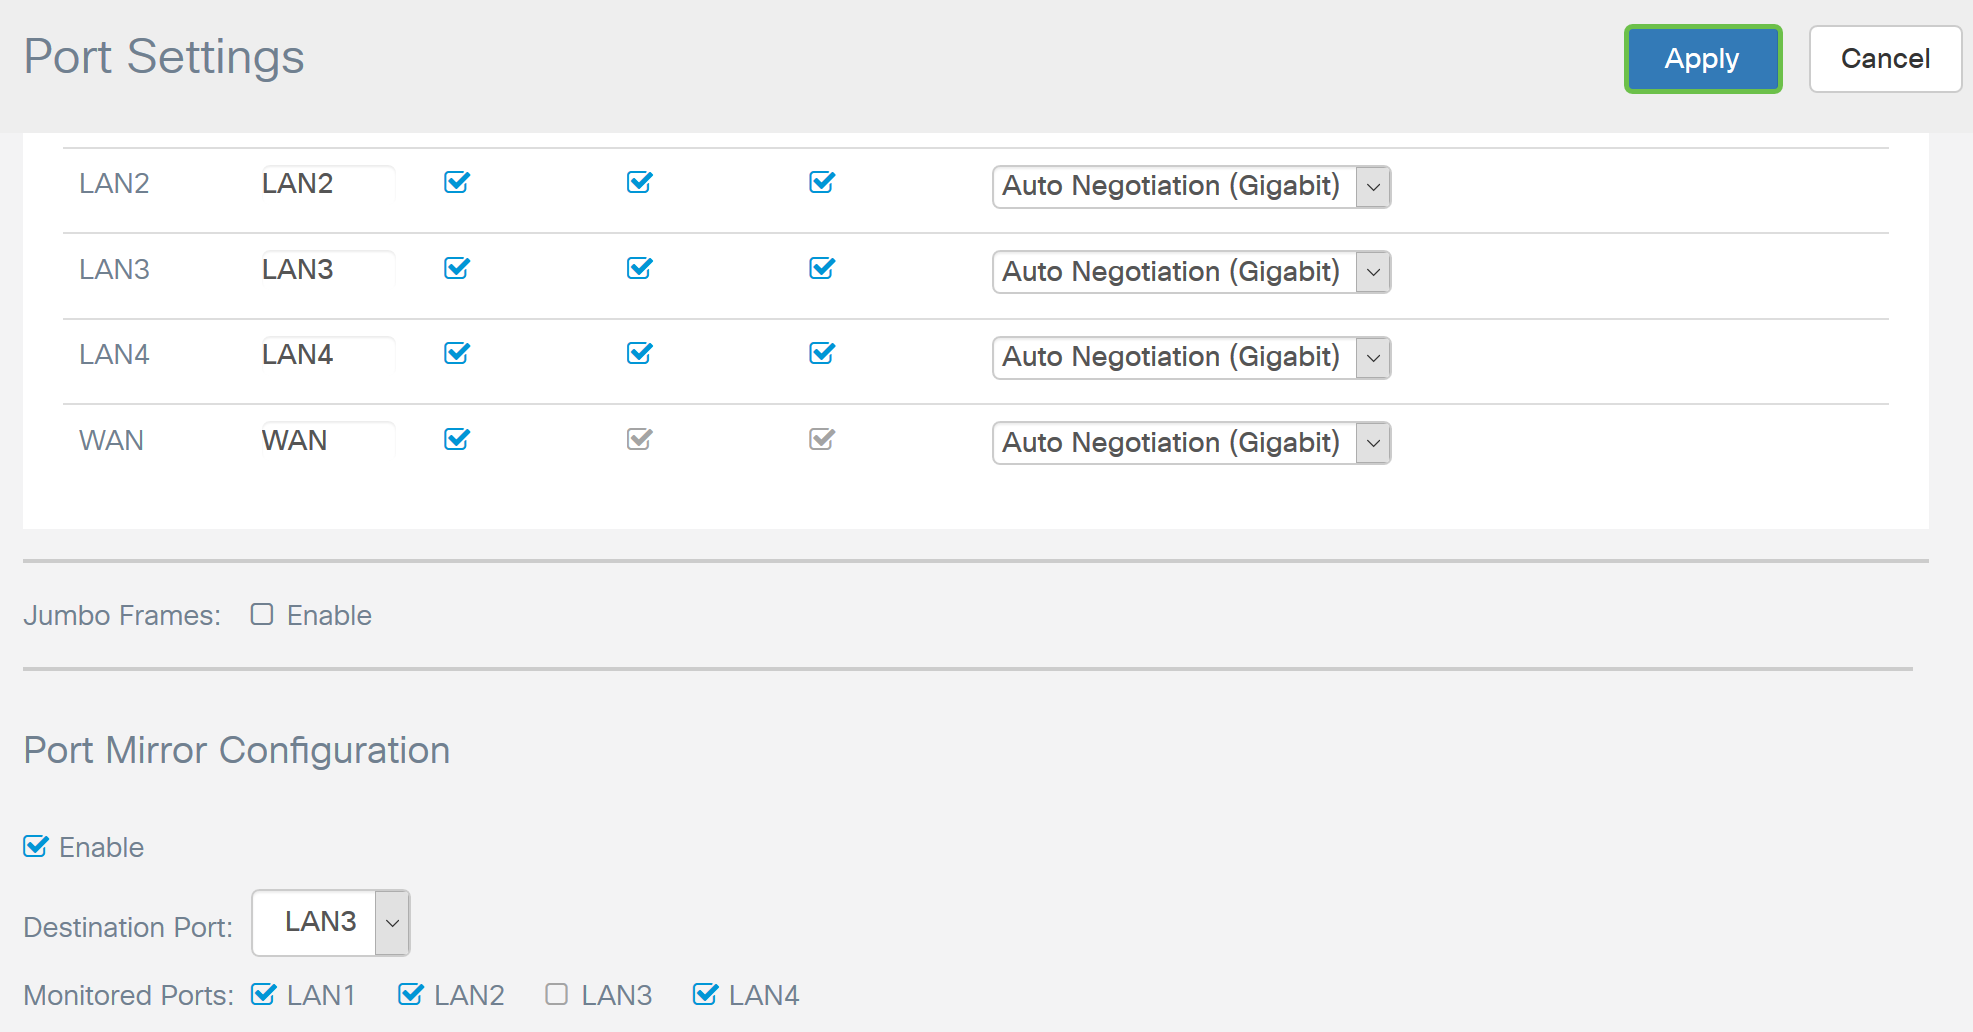
Click Apply to save your changes.
Conclusion
You should now have successfully configured port settings on your RV160 or RV260 router.