View the Routing Table on the RV Series Router
Available Languages
Objective
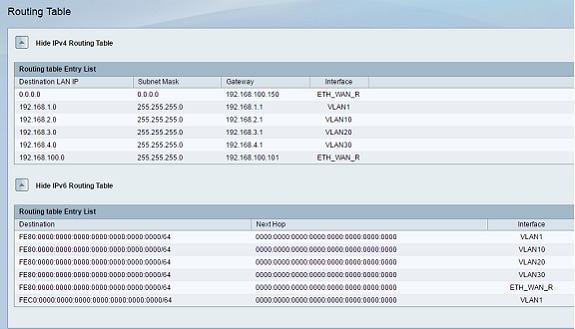
The routing table contains information about the topology of the network immediately around it. Viewing the routing table displays the destination Local Area Network (LAN) Internet Protocol (IP) address, Subnet Mask, Gateway, and Interface of devices using IPv4, and the Destination, Next Hop. If your router supports IPv6, it will display the Interface of devices connected via IPv6. This allows the administrator to verify the validy of the routers when he is setting up a static route.
This article aims to show you how to view the routing table on the RV Series Router.
Applicable Devices
- RV Series
Software Version
- 1.0.1.3 — RV130, RV130W
- 1.0.0.17 — RV132W
- 1.0.0.21 — RV134W
- 1.0.5.4 — RV180, RV180W
View the Routing Table
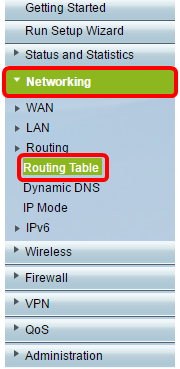
Step 1. Log in to the web-based utility and choose Networking > Routing Table.
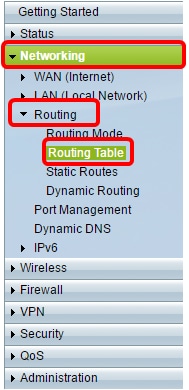
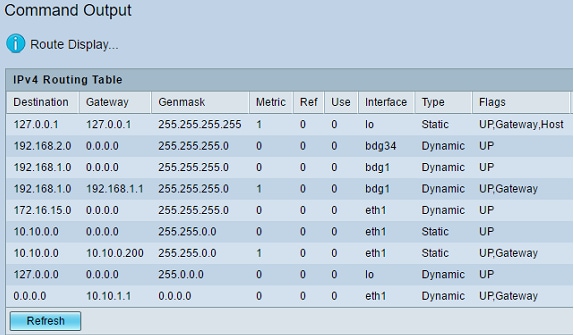
If you are using the RV180 or RV180W, choose Networking > Routing > RoutingTable.
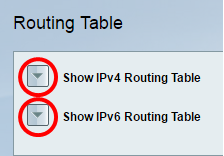
Step 2. Choose the IP routing table you want to view and click the appropriate button to show the routing table.
Note: In this example, both the IPv4 and IPv6 routing tables are used.
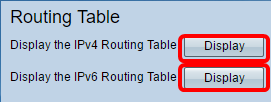
If you are using the RV180 or RV180W, click Display.
Step 3. It will display the Routing table of the chosen IP version. Check the route that you want.
If you are using the RV180 or RV180W, this is how it will appear.
You should now have successfully viewed the routing table of your RV Series Router.
Revision History
| Revision | Publish Date | Comments |
|---|---|---|
1.0 |
11-Dec-2018 |
Initial Release |
 Feedback