VPN Clients Settings on RV110W
Available Languages
Objective
A Virtual Private Network (VPN) is a network established between various remote locations such as when small offices communicate with a head office. A VPN Client is a means of connection with the VPN. This article explains how to configure VPN Clients settings on the RV110W.
Applicable Devices
- RV110W
Steps of Procedure
PPTP Configuration
Point to Point Tunneling Protocol (PPTP) is a network procedure that secures connections between remote locations over a VPN. This procedure explains how to configure PPTP settings.
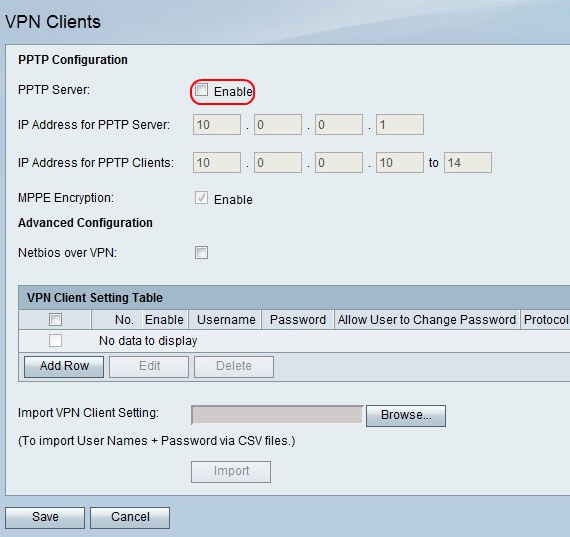
Step 1. Use the web-based configuration utility to choose VPN > VPN Clients. The VPN Clients page opens.
To right of PPTP Server, check the Enable checkbox to allow changes to the PPTP server.
In the IP Address for PPTP Server fields, enter the IP address for the PPTP server.
In the IP Address for PPTP Clients fields, enter the IP address range to which the PPTP server will connect.

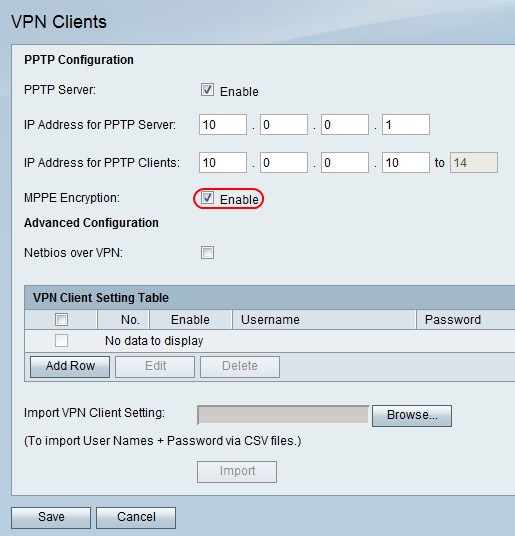
Step 2.To the right of MPPE Encryption, check the Enable checkbox to Microsoft Point-to-Point Encryption (MPPE) encryption which is used to when a PPTP VPN client connects to the RV110W.

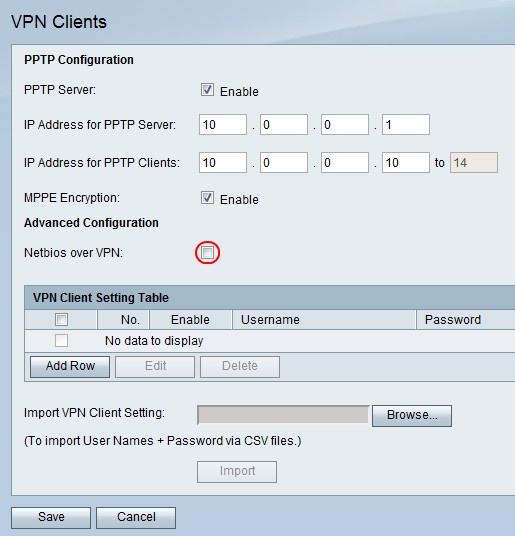
Step 3. To the right of Netbios over VPN, check the checkbox to allow NetBIOS communications over the VPN tunnel.
Click Save to save changes or Cancel to discard them.

Add or Edit a VPN Client
This feature setups an user for a VPN Client and makes changes to settings.
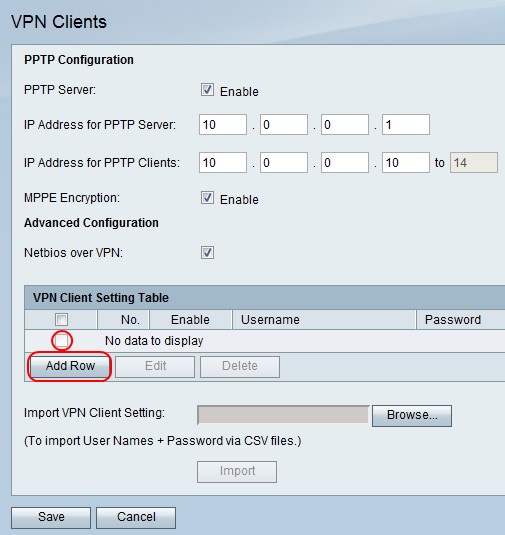
Step 1. Click Add Row to add a new VPN client, or to edit an existing VPN client, check a VPN Client checkbox and click Edit.
Step 2. Check the Enable checkbox to enable the VPN client.
Step 3. In the Username field, enter the username for a user who uses the VPN client.
Step 4. In the Password field, enter the password for the user.
Step 5. Check the Allow User to Change Password checkbox to allow the user to change the password.
Step 6. From the Protocol drop-down menu, choose a protocol.
- PPTP — This option uses Transmission Control Protocol (TCP) and Generic Routing Encapsulation (GRE).
- QuickVPN — This option uses Hypertext Transfer Protocol(HTTP) and Internet Protocol Security(IPsec).
Step 7. Click Save to save changes or Cancel to discard them.

Delete a VPN Client
This feature allows an user to delete a VPN client that already exists.
Step 1. Check a VPN Client checkbox.
Step 2. Click Delete.
Step 3. Click Save to save changes or Cancel to discard them.
Import VPN Client Settings
An user can import VPN clients settings with a CSV file. This feature saves time because a user doesn not have to enter the settings manually.
Step 1. To the right of Import VPN Client Settings, click Browse.
Step 2. Locate the file.
Step 3. Click Import to load the file.
Step 4. Click Save to save changes or Cancel to discard them.
Note: The device supports a maximum of 5 VPN Clients.
For more information, click on the following links:
- Basic Virtual Private Network (VPN) Configuration on the RV110W VPN Firewall
- Configure WPS Settings on the RV110W
- Cisco RV110W Wireless-N VPN Firewall Product Page
- IPsec VPN Client Setup (Video)
- SSL VPN Client Configuration (Video)
- Router Site to Site IPsec VPN Configuration
 Feedback