Configure Virtual Local Area Network (VLAN) Membership on an RV Series Router
Available Languages
Objective
A Virtual Local Area Network (VLAN) is a logically separate Internet Protocol (IP) subnetwork whose endpoints are associated by function or other shared characteristics. This makes it possible for different departments to have separate networks so that its members have exclusive access to resources.
A VLAN also allows sharing of resources between VLANs by enabling inter-VLAN routing. This equates to security as only members of a VLAN have access to the resources passing through that VLAN. It also means savings because deploying a VLAN means having separate networks but buying only one device. By default, the RV Series routers have a default VLAN, VLAN1, which cannot be deleted, edited, or changed. You can create up to 6 VLANs, depending on the model of your device. The VLANs can be tagged, untagged, or excluded to specific ports.
This article aims to show you how to configure VLAN membership on your RV Series Router.
Applicable Devices
- RV Series — RV110W, RV130, RV130W, RV132W, RV134W
Software Version
- 1.2.0.10 — RV110W
- 1.0.3.16 — RV130, RV130W
- 1.0.0.17 — RV132W
- 1.0.0.21 — RV134W
Configure VLAN Membership
Add a VLAN
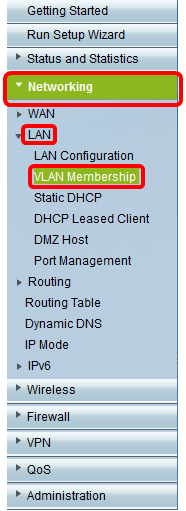
Step 1. Log in to the web-based utility of the router and choose Networking > LAN >VLAN Membership.
Note: The images on this article are taken from the RV132W router. Options and terminologies may vary depending on the model of your device.
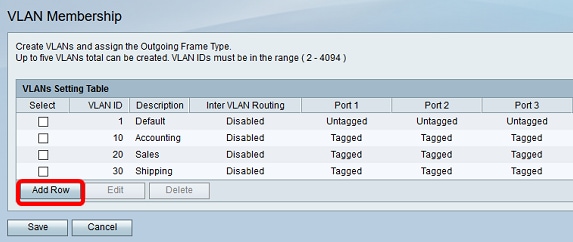
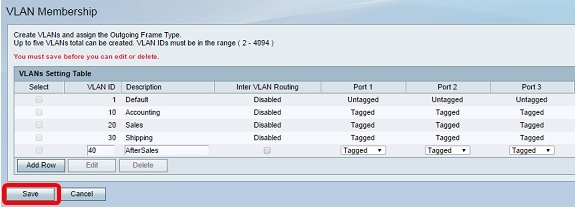
Step 2. Click Add Row.
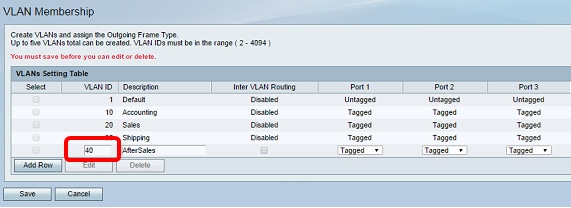
Step 3. Enter a VLAN number on the VLAN ID field. VLAN IDs must be in the range 2 to 4094. In this example, 40 is used as VLAN ID.
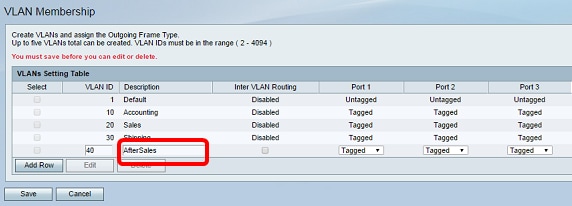
Step 4. Enter a description for the VLAN in the Description field. In this example, AfterSales is entered.
Step 5. Click Save.
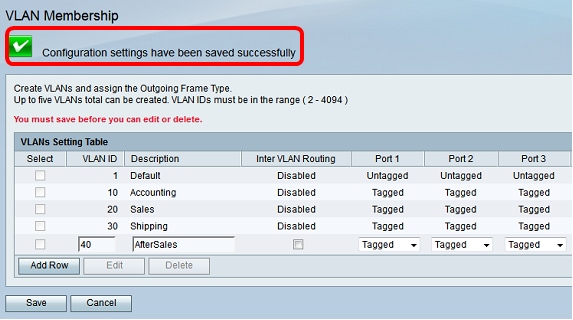
You should now have successfully added a VLAN to your RV Series Router. A confiirmation massage that configuration settings have been saved successfully will appear at the top portion of the VLAN Membership page.
Add a Member
Step 1. To add members to a VLAN, check the check box of the appropriate VLAN. In this example, a member will be added to VLAN 40, AfterSales.
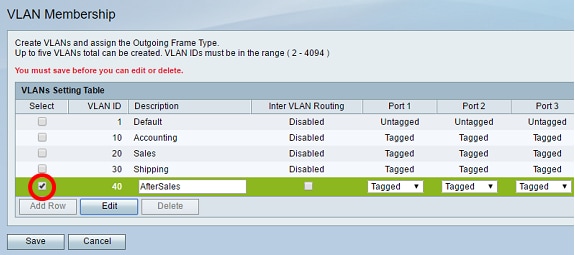
Step 2. Click Edit.
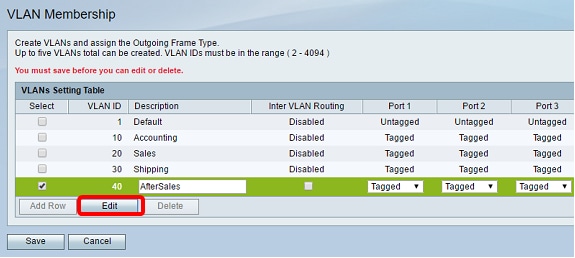
Step 3. (Optional) Check the check box to disable inter-VLAN routing. If inter-VLAN is enabled, you will need to assign an IP address to the VLANs that will be included in the routing capability.
Note: In this example, Inter VLAN Routing is left unchecked or disabled.
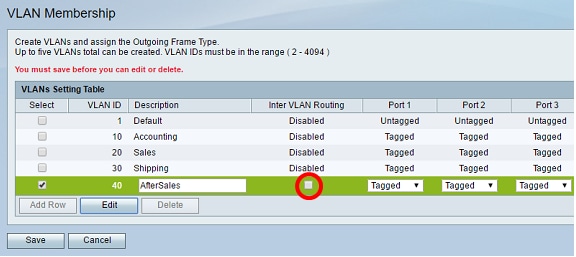
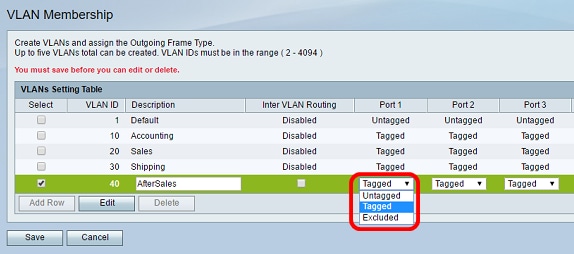
Step 4. Choose a VLAN tag in your preferred port. Click the drop-down arrow and then choose Untagged, Tagged, or Excluded.
- Untagged — The interface is an untagged member of the VLAN. Frames of the VLAN are sent untagged to the port VLAN.
- Tagged — The interface is a tagged member of the VLAN. Frames of the VLAN are sent tagged to the port VLAN.
- Excluded — The port is currently not a member of the VLAN. This is the default setting for all ports when the VLAN is created.
Note: In this example, the AfterSales VLAN is tagged as a member of Port 1, Port 2, and Port 3.
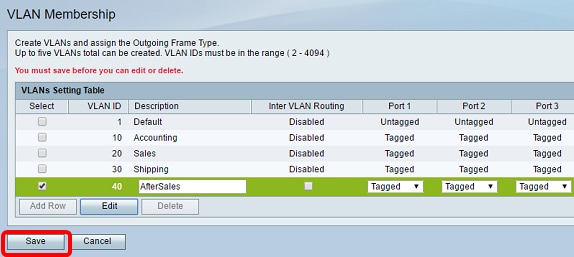
Step 5. Click Save.
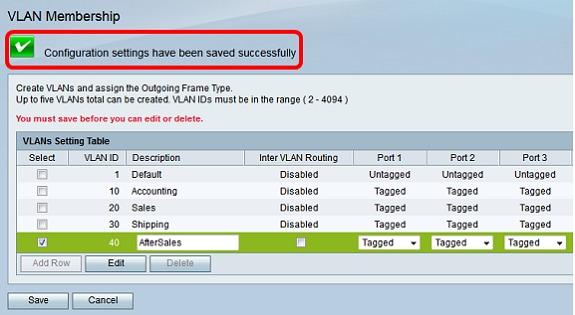
You should now have successfully added a member to your VLAN. A confirmation message that configuration settings have been saved successfully will appear at the top portion of the VLAN Membership page.
Assign an IP address to the VLAN
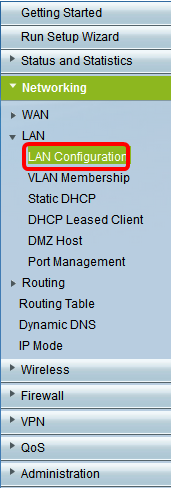
Step 1. Click LAN > LAN Configuration.
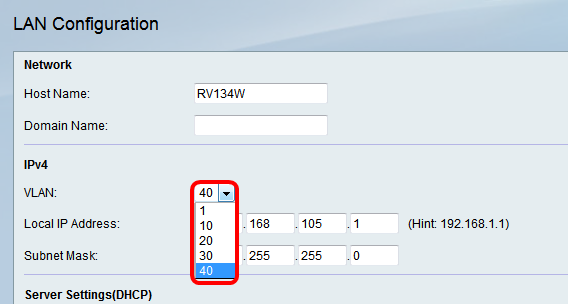
Step 2. Click the VLAN drop-down arrow and choose the VLAN that needs to be assigned with an IP address.
Note: In this example, we will be adding an IP address to VLAN 40.
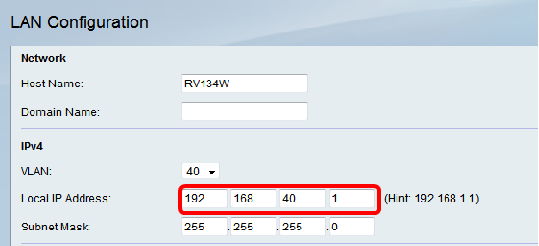
Step 3. Under theLocal IP Address field, enter the IP address you need to assign for that VLAN.
Note: In this example, we are assigning the IP address 192.168.40.1 to VLAN 40.
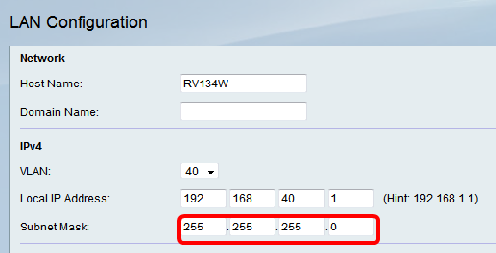
Step 4. Enter the subnet mask for the VLAN in the Subnet Mask field.
Step 5. Click Save.
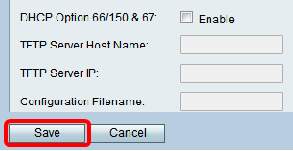
You should now have successfully assigned an IP address to the VLAN.
Revision History
| Revision | Publish Date | Comments |
|---|---|---|
1.0 |
12-Dec-2018 |
Initial Release |
 Feedback