VPN Clients and Certificate Management Setup on RV016, RV042, RV042G and RV082 VPN Routers
Available Languages
Objective
A Virtual Private Network (VPN) is a secure connection established within a network or between networks. The VPN creates a secure tunnel between these two end points and provides security to the data traffic along the tunnel. VPN clients are users that have been granted access to a VPN connection. The VPN client makes remote resources of another network available in a secure way. The RV0xx Series Routers allow VPN clients.
This article explains how to allow VPN clients and how to manage certificates for clients, which add more security to the clients on RV016, RV042, RV042G and RV082 VPN Routers.
Applicable Devices
• RV016
• RV042
• RV042G
• RV082
Software Version
• v4.2.1.02
Create VPN Clients
Note: The Router supports up to 50 Cisco QuickVPN Clients.
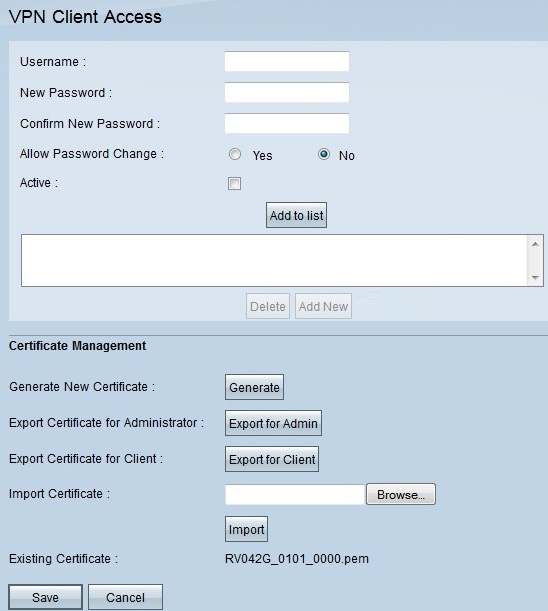
Step 1. Log in to the web based configuration utility and choose VPN > VPN Client Access. The VPN Client Access page opens:


Step 2. In the Username field, enter the desired username of the VPN client.
Step 3. In the New Password field, enter the desired password the VPN client uses to log in.
Step 4. In the Confirm New Password field, enter the same password for password verification purposes.
Step 5. In the Allow Password Change field, click Yes radio button to allow password changes in the future. Otherwise, click No.
Step 6. Check the Active check box to make the user active and ready to use the VPN connection.

Step 7. Click Add to List to add the new client to the list.
Step 8. Click Save to finish the configuration.
Certificate Management
Certificates allows the VPN to have more security by using a valid personal certificate to authenticate the connection. Under Certificate Management, you can create a certificate for each client. The client will install this certificate on a PC that runs Quick VPN, a software created for end users to connect remotely to the VPN. This section explains how to manage certificates for VPN clients on RV042, RV042G and RV082 VPN Routers.
Note: Cisco QuickVPN is available free of charge from Cisco.com.
Step 1. Log in to the web based configuration utility and choose VPN > VPN Client Access. The VPN Client Access page opens:


Step 2. To generate a new certificate, click Generate.

Step 3. In the new window, click OK replace the new certificate with the old certificate.

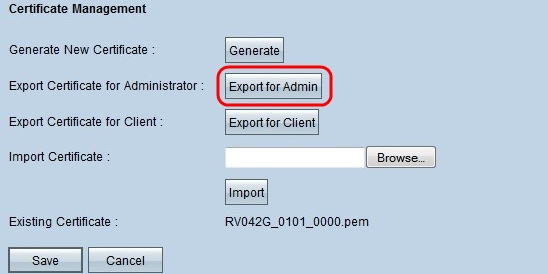
Step 4. To export a certificate for an administrator, click Export for Admin. This saves a copy of the certificate for backup purposes.

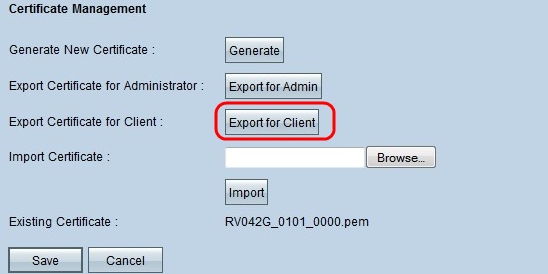
Step 5. To export a certificate for a client, click Export for Client. This exports a certificate for a VPN client. This certificate is then installed on the Cisco QuickVPN software on the client PC and it provides authentication for the client.

Step 6. To import a certificate, click Browse and locate the certificate file.
Step 7. After you locate the certificate file, click Import to import the certificate.
Note: The Existing Certificate shows what certificate is currently in existence.
Step 8. Click Save to finish the configuration.
Revision History
| Revision | Publish Date | Comments |
|---|---|---|
1.0 |
10-Dec-2018 |
Initial Release |
 Feedback