Proper Connection of QuickVPN with WRV210 on Windows 7
Available Languages
Objective
QuickVPN is an easy way to set up VPN software on a remote computer or laptop with a simple user name and password. This will help to securely access networks based on the device used. This article explains how to properly connect the QuickVPN on Windows 7 with a WRV210 Wireless-G VPN Router.
Note: Make sure the QuickVPN software is installed in Windows.
Applicable Devices
• WRV210
QuickVPN Setup
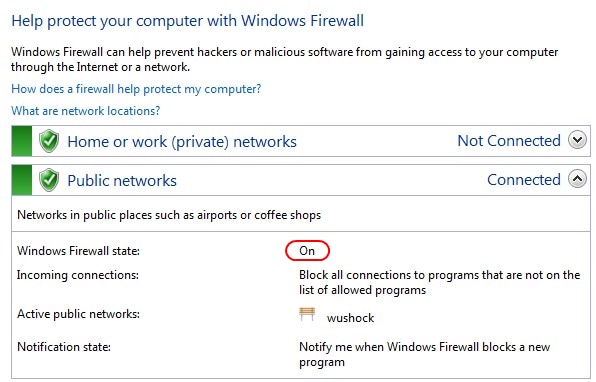
Step 1. In Windows 7 choose Start > Control Panel > System and Security > Firewall. The Firewall page opens:


Step 2. If the Windows Firewall is turned off click Turn Windows Firewall on or off and the Firewall Customization page opens:

Step 3. Click Turn on Windows Firewall in the network settings area and click OK.

Note: The Windows Firewall state field in the Firewall page will now display On.
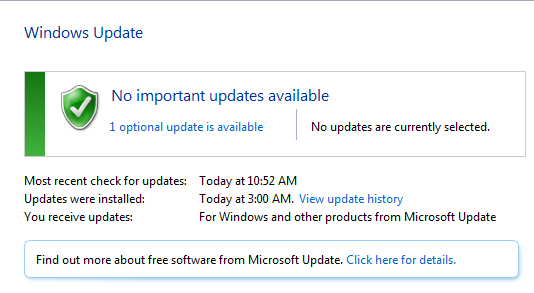
Step 4. In Windows 7 choose Start > Control Panel > System and Security > Windows Update. The Windows Update page opens:

Step 5. Verify that Windows is up to date. If not update Windows.

Step 6. Enter Services in the search box available in the Start menu.
Step 7. Click Services and the Services window opens:


Step 8. Right-Click on the appropriate services and choose Start or Stop to begin or end the service from the Services window.
Step 9. Connect with the QuickVPN Client.

Step 10. The QuickVPN Client pop-up window appears with the following information:
• Connected to — Specify the Destination IP to which the QuickVPN is connected.
• Connected at — Specify the Time and Date when the QuickVPN is connected to the Router.
• Total Time Connected — Specify the total time spent connected to the QuickVPN.
Note: The destination IP in the current example of the WRV210 Router is 83.12.42.50. The destination IP can be different for different users.
Contact Cisco
- Open a Support Case

- (Requires a Cisco Service Contract)
 Feedback