Configure VLAN Membership on RV320 and RV325 VPN Routers
Available Languages
Objective
A Virtual Local Area Network (VLAN) is a logically separate Internet Protocol (IP) subnetwork whose endpoints are associated by function or other shared characteristics. This makes it possible for different departments to have separate networks so that its members have exclusive access to resources.
A VLAN also allows sharing of resources between VLANs by enabling inter-VLAN routing. This equates to security as only members of a VLAN have access to the resources passing through that VLAN. It also means savings because deploying a VLAN means having separate networks but buying only one device. By default, the RV Series routers have a default VLAN, VLAN1, which cannot be deleted, edited, or changed. You can configure up to four VLANs on the RV320 and up to fourteen VLANs on the RV325 to forward packets in inter-VLAN.
This article explains how to configure VLAN membership on the RV32x VPN Router Series.
Applicable Device
• RV320 Dual WAN VPN Router
• RV325 Gigabit Dual WAN VPN Router
Software Version
• 1.1.0.09
Manage VLAN Membership
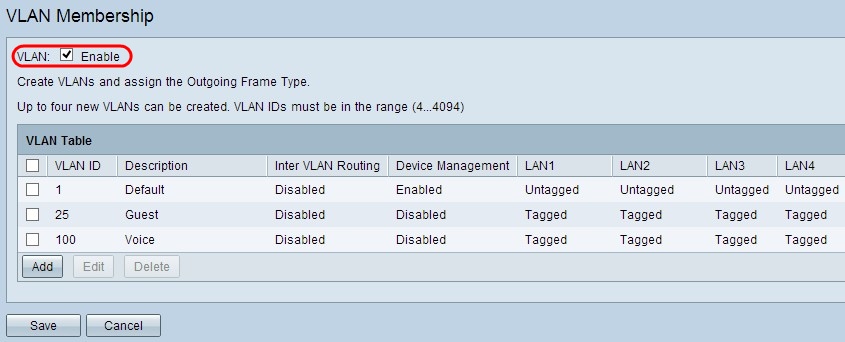
Step 1. Log in to the the web configuration utility and choose Port Management > VLAN Membership. The VLAN Membership page opens:

Step 2. Check the VLAN Enable check box to enable VLANs on the device.

Note: You can see three default VLANs already configured on the router used for this example.
Add VLAN
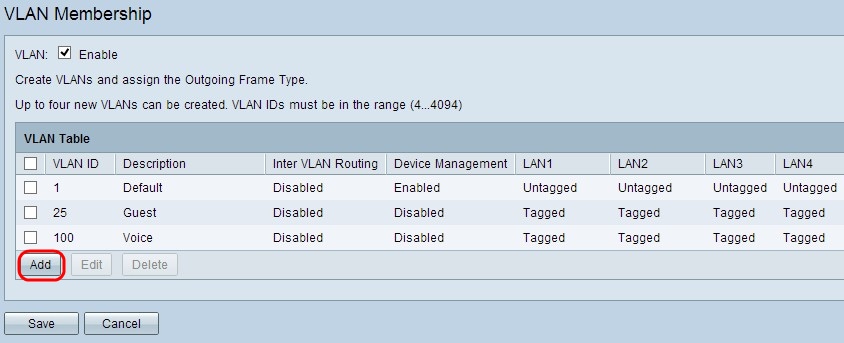
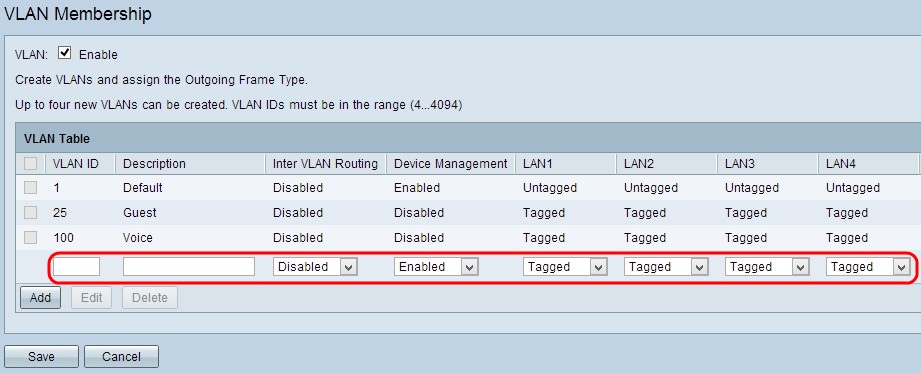
Step 1. Click Add to create a new VLAN. A new row is added in the VLAN Table:

Step 2. Enter a VLAN ID in the VLAN ID field. The VLAN ID is the unique identifier of the VLAN. The range is from 4 to 4094. VLAN 1 is reserved for the default VLAN.

Step 3. Enter a brief description about the newly created VLAN in the Description field. This helps you to quickly understand the purpose of the new VLAN.
Step 4. Choose the appropriate inter VLAN routing option from the Inter VLAN Routing drop-down list to route packets from one VLAN to another VLAN.
• Disabled — It represents that Inter VLAN Routing is inactive.
• Enabled — It represents that Inter VLAN Routing is active on this VLAN. Inter VLAN routing routes the packets only among those VLANs that have it enabled.

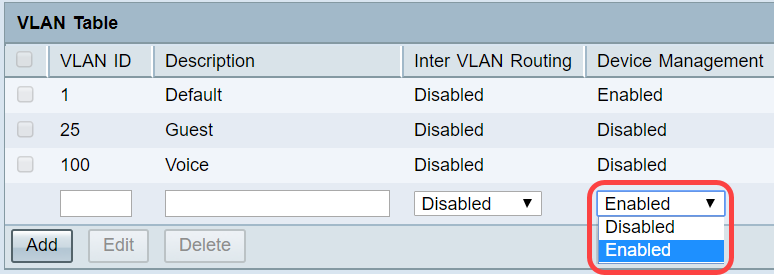
Step 5. Choose the appropriate option from Device Management drop-down list to manage device management. Device Management is a software application which gives you the opportunity to log into the web configuration utility of the device from the VLAN to manage your device.
• Disabled — It represents that device manager is inactive, and you cannot access the device manager from the VLAN.
• Enabled — It represents that device manager is active, and you can access the device manager from the VLAN.

Step 6. Choose the desired option from the drop-down list for the LAN port with which you are connected and the setting should be matched with the connected port. If you are connected with more than one port, for each port you are connected, you need to choose the same settings. The default is Tagged.
• Tagged — Represents that the association between the port and the VLAN is tagged. Tagged is used to determine to which VLAN the traffic belongs through the unique VLAN ID when multiple VLANs are created for same port.
• Untagged — Represents that the association between the port and the VLAN is untagged. It is used when only one VLAN is created and the traffic is aware of the VLAN. Only one VLAN can be marked as untagged for each port. If the default VLAN is on the port, it should always be untagged even if the port has multiple VLANs.
• Excluded — Represents that the interface is not a member of the VLAN. If you choose this option, traffic is disabled between the VLAN and the port.
Note: If you enable inter VLAN routing in Step 4, you have to tag the VLAN to distinguish the traffic.

Step 7. Click Save to save the settings.

Edit VLAN
Step 1. If you want to change any setting of a VLAN, check the check box beside the specific VLAN.

Step 2. Click Edit and change the necessary information for the VLAN. To know more on how to change the necessary information refer to the Add VLAN section.

Step 3. Click Save to save the settings.

Delete VLAN
Step 1. If you want to delete any of the VLANs, check the check box beside the specific VLAN and select Delete.

Step 2. Click Delete to remove the VLAN.

Step 3. Click Save to save the settings.

Conclusion
You now know how to set up a VLAN. If you would like to read a related article on the same topic, click here.