Access Rule Setup Wizard on RV32x VPN Router Series
Available Languages
Objective
The Access Rule Setup Wizard is a convenient and simple guided method to set up initial configurations on the RV32x router. It guides the user through a step-by-step process to configure the device. An access rule is configured based on various criteria in order to allow or deny access to the network. The access rule is scheduled based on the time when the access rules need to be applied to the router. This article outlines and describes the Access Rule Setup Wizard, which is used to determine what traffic is allowed to enter the network through the firewall, helping to secure the network.
Applicable Device
• RV320 Dual WAN VPN Router
• RV325 Gigabit Dual WAN VPN Router
Software Version
• v1.1.0.09
Access Rule Setup Wizard
Step 1. Log in to the Router Configuration Utility and choose Wizard. The Wizard page opens:

Step 2. Click the Launch Now button underneath the Access Rule Setup area to begin the Access Rule Setup Wizard. The Access Rule Setup Installation Wizard dialog box appears.

Step 3. Click Next to continue to the wizard.
Action
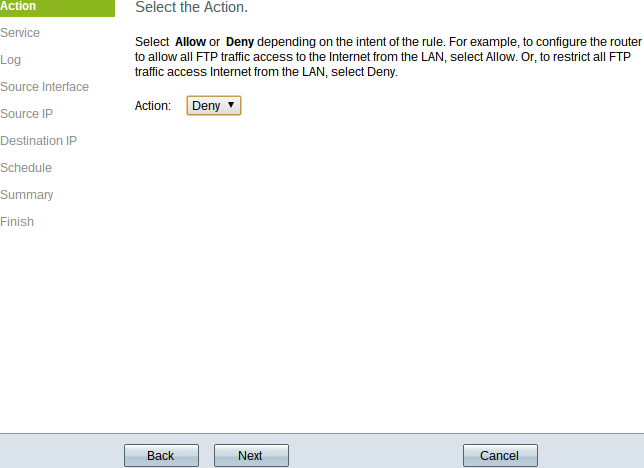
Step 1. Choose the appropriate radio button from the Action drop-down list to allow or restrict the rule you are about to setup. Access rules limit access to the subnetwork by allowing or denying traffic access from specific services or devices.
• Allow — Allows all traffic.
• Deny — Restricts all the traffic.
Step 2. Click Next to continue the wizard.
Service
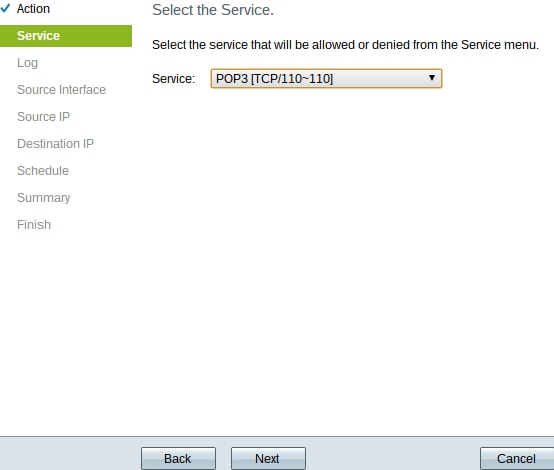
Step 1. Choose the appropriate service that you need to filter to be allowed or restricted from the Service drop-down list.
Note: To allow all traffic choose All Traffic [TCP&UDP/1~65535] from the service drop-down list if action has been set to allow. The list contains all types of services you might want to filter.
Step 2. Click Next to continue with the setup.
Log
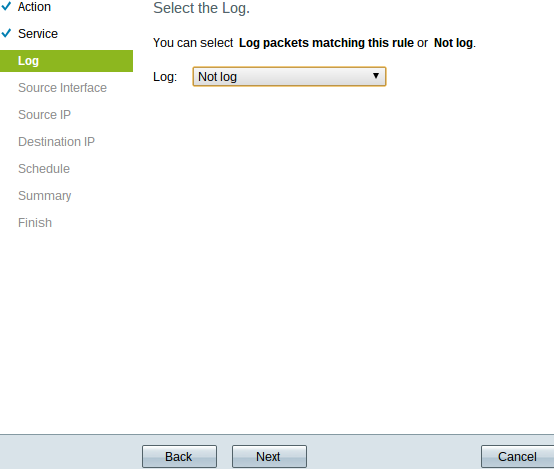
Step 1. Choose the appropriate Log option from the Log drop-down list. The log option determines if the device will keep a log of the traffic that corresponds to the access rules set.
• Log packets match this access rule — Enables the router to keep log tracking for the service which has been selected.
• Not Log — Disables the router to keep log tracking.
Step 2. Click Next to continue with the setup.
Source Interface

Step 1. Click the Interface drop-down list and choose the appropriate source interface. This interface is where the access rule is enforced.
• LAN — The access rule affects only the LAN traffic.
• WAN 1 — The access rule affects only the WAN 1 traffic.
• WAN 2 — The access rule affects only the WAN 2 traffic.
• Any — The access rule affects all traffic in any of the interfaces of the device.
Step 2. Click Next to continue with the setup.
Source IP
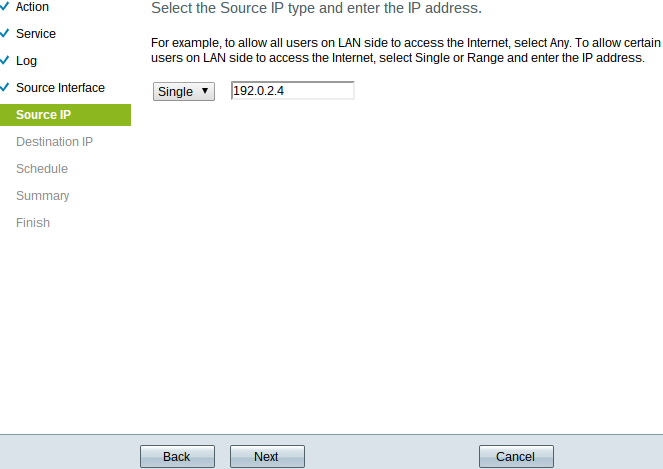
Step 1. Choose the appropriate source IP type to which the access rule is applied from the available drop-down list.
• Any — Any IP address of the network of the device has the rule applied to them.

• Single — Only a single specified IP address of the network of the device has the rule applied to it. Enter the desired IP address.

• Range — Only a specified range of IP addresses on the network have the rule applied to them. If you choose Range, you need to enter the starting and ending IP addresses for the range.
Step 2. Click Next to continue with the setup.
Destination IP

Step 1. Choose the appropriate destination IP type to which the access rule is applied from the available drop-down list.
• Any — Any destination IP address has the rule applied to them.

• Single — Only a single specified IP address the rule applied to it. Enter the desired IP address.

• Range — Only a specified range of IP address going out of the of the network of the device have the rule applied to them. If you choose Range, you need to enter the starting and ending IP addresses for the range.
Step 2. Click Next to continue with the setup.
Schedule

Step 1. Click the appropriate radio button to choose the time when you want to apply the access rule on the router.
• Always — Access rules are always active on the router. If you choose this option, skip to Step 5. This is the default.
• Interval — Access rules are active for some specific times. If you choose this option you need to enter the time interval for the access rule to be enforced.
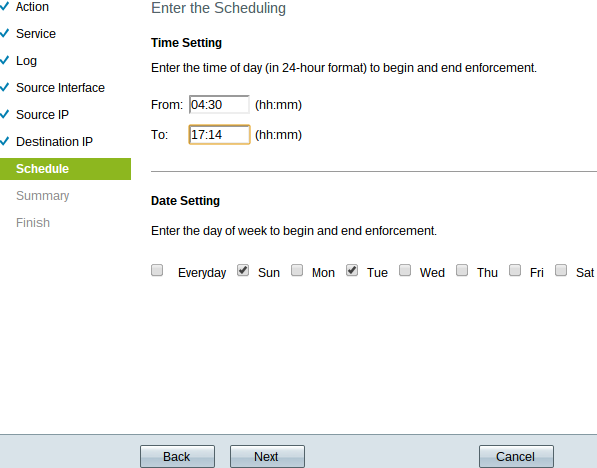
Step 2. Enter the time from when you want to apply the access list in the From field. The format for the time is hh:mm.
Step 3. Enter the time until when you want to apply the access list in the To field. The format for the time is hh:mm.
Step 4. Check the check box of the specific days when you want to apply the access list.
Step 5. Click Next to continue with the setup.
Summary

Note: The Summary page displays an overall view of all the settings that have just been configured on the RV320 by the Access Setup Wizard.
Step 1. Click Submit to submit your changes to the wizard configuration.
Finish
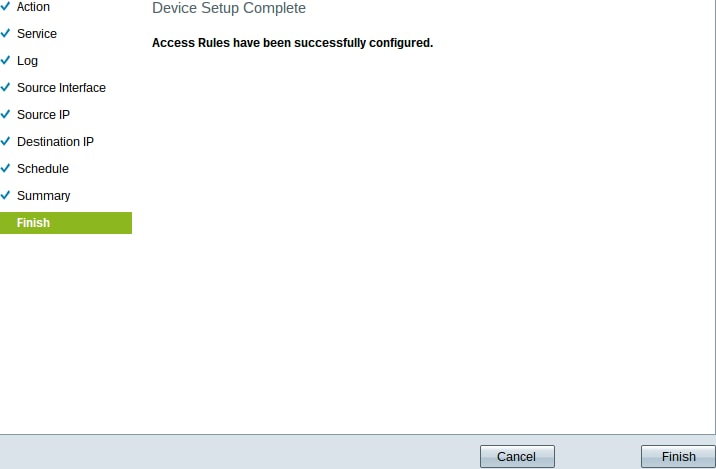
Step 1. Click Finish to finalize the Access Rule Setup Wizard.
 Feedback