View/Add Trusted IPSec Certificate on RV320 and RV325 VPN Routers
Available Languages
Objective
Certificates are used to verify the user identity on a computer or Internet and to enhance a private or secured conversation. In RV320, you can add a maximum of 50 certificates through self-signing or third-party authorization. You can export a certificate for a client or for an administrator, save that in a PC or USB and then import that. IPsec is used in the exchange of key generation and authentication data, key establishment protocol, encryption algorithm, or authentication mechanism of secure authentication and validation of online transactions with SSL Certificates.
This article explains how to View and Add Trusted IPSec Certificate on the RV32x VPN Router Series.
Applicable Devices
• RV320 Dual WAN VPN Router
• RV325 Gigabit Dual WAN VPN Router
Software Version
• v1.1.0.09
Trusted IPSec Certificate
Step 1. Log in to the web configuration utility and choose Certificate Management > Trusted IPSec Certificate. The Trusted IPSec Certificate page opens:

The Trusted IPSec Certificate Page Contains the following fields:
• Type — Two types of certificates are available
– Self-Signed — It is an Secure Socket Layer (SSL) certificate which is signed by its own creator. It is less trustworthy as it can not be cancelled if the private key is compromised somehow by the attacker.
– Certified Signing Request — It is a public key infrastructure (PKI) which is sent to the certificate authority to apply for a digital identity certificate. It is more secure than self-signed as the private key is kept secret.
• Subject — It shows to whom the certificate is issued.
• Duration — It shows the date the certificate expires. The security of the Web site cannot be guaranteed if this date has been exceeded.
• Details — It shows all the details about the Certificate Issuer, Certificate Serial Number, and the Expiration Date are generated by the CA service. The information is used when a Generate Certificate Signing Request is created and sent to your CA service for validation.
• Export — To export or display a certificate, click the Export Certificate icon. A pop-up window displays where you can Open the certificate for inspection or Save the certificate to a PC.
Step 2. Click the Enable check-box to enable a particular IPSec certificate.
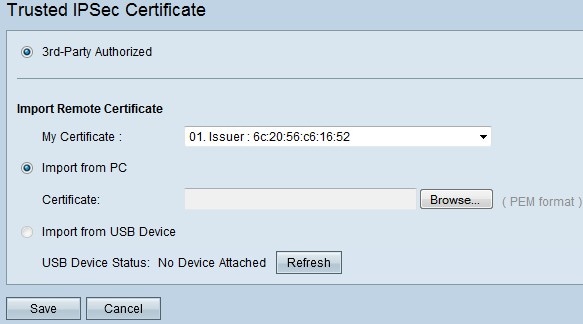
Step 3. Click Add to get a new certificate from the PC or from USB.
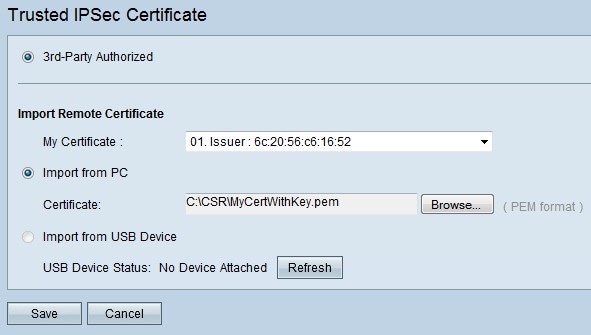
• Import From PC — From the PC you can locate the Certificate and import to the device
• Import From USB — From the USB which is attached to the device you can also import the certificate.

Step 3. Click on Browse to locate the CA Certificate from the PC.

Step 4. Click Save to add the certificate to the trusted IPSec Certificate Table.
 Feedback