Workaround for Inaccessibility of GUI after Firmware Version 1.0.1.17 Upgrade on RV320 VPN Routers
Available Languages
Objective
The RV320 Router is inaccessible after the firmware upgrade version 1.1.0.09. This article shows the recovery process that needs to be followed in order for the router to be upgraded to the latest firmware and work normally.
Applicable Devices
- RV320 Dual WAN VPN Router
Software Version
Firmware Upgrade
Step 1. Download the latest firmware version to your PC.
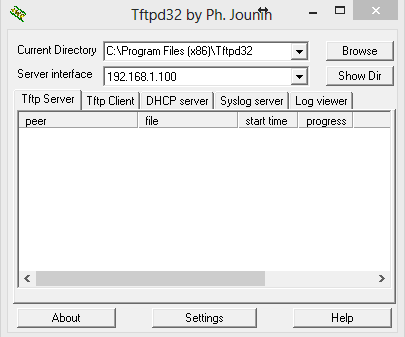
Step 2. Download and install the Tftpd32 or any other TFTP client that supports files bigger than 32MB. To download click here.
RV320 Device
Step 3. Power off the RV320.
Step 4. Hold in the "RESET" button and then turn on the RV320.
Step 5. Wait for 10 seconds until the POWER LED flashes and the DIAG LED is solid RED.
Step 6. Release the reset button.
Network Settings on PC
Step 7. Click Control Panel > Network and Internet > Network and Sharing Center. The Network and Sharing page opens:
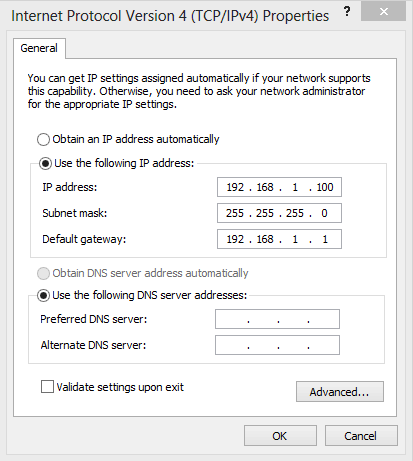
Step 8. Click Local Area Connection > Properties > Internet Protocol Version 4 (TCP/IPv4) > Properties. The Internet Protocol Version 4 (TCP/IPv4) Properties window appears:

Step 9. Assign a static IP address for the PC within a range of 192.168.1.2 to 192.168.1.254 in the IP Address field.
Step 10. Enter the subnet mask in the Subnet Mask field.
Step 11. Enter the default gateway in the Default Gateway field. The default gateway is the IP address of the RV320 router.
TFTP Application
Step 12. Launch the TFTP application.

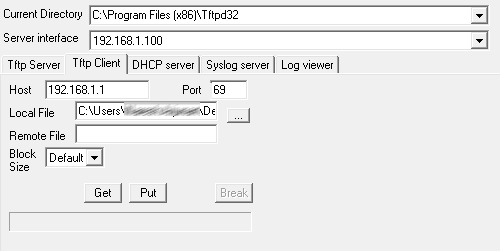
Step 13. Choose the TFTP Client tab.

Step 14. Enter the IP address 192.168.1.1 in the Host field and value 69 in the Port field.
Step 15. In the Local File field, choose the downloaded firmware from the PC to be loaded in to the router.
Step 16. Verify all the values and then press PUT on the TFTP Client.
Step 17. Wait for 5 minutes and then try to access the router GUI. The RV320 should work normally.

Note: The Upgraded firmware is shown in the Firmware Version field.
 Feedback