How to Configure Basic Firewall Settings on the RV130 and RV130W
Available Languages
Objective
Basic Firewall Settings can secure your network by creating and applying rules that the device uses to selectively block and allow inbound and outbound Internet traffic.
Features like Universal Plug and Play make it easy to connect devices to each other on your network without added configurations.
Universal Plug and Play (UPnP) allows automatic discovery of devices that can communicate with the device. Blocking Contents can help secure your computer because certain content can be sent to your device which may compromise security or infect your computer with malicious software. The ability to block specific content on the ports of your choosing is useful for greater firewall security.
The objective of this document is to show you how to configure Basic Firewall Settings on the RV130 and RV130W.
Applicable Devices
• RV130
• RV130W
Software Version
• v1.0.1.3
Configuring Basic Firewall Settings
Step 1. Log in to the web configuration utility and choose Firewall > Basic Settings. The Basic Settings page opens:

Step 2. In the IP Address Spoofing Protection field, check the Enable check box to protect your network against IP address spoofing. IP Address Spoofing is when an unauthorized user tries to gain access to a network by impersonating another trusted device using its ip address as its own. It is recommended to enable IP Address Spoofing Protection.

Step 3. In the DoS Protection field, check the Enable check box to protect your network from Denial of Service attacks. Denial of Service Protection is used to protect a network from a Distributed Denial of Service (DDoS) attack. DDoS attacks are meant to flood a network to the point where the resources of the network become unavailable.

Step 4. In the Block WAN Ping Request field, check the Enable check box to stop ping requests to your device from the external WAN network.

Step 5. The listed fields from LAN/VPN Web Access to Remote Management Port are used to configure LAN and Remote Management Web Access. To learn more about these configurations, refer to Configuration of LAN and Remote Management Web Access on the RV130 and RV130W.

Step 6. In the IPv4 Multicast Passthrough:(IGMP Proxy) field, check the Enable check box to enable the multicast passthrough for IPv4. This will forward group IGMP packets from the external WAN network to your internal LAN.

Step 7. In the IPv4 Multicast Immediate Leave:(IGMP Proxy Immediate Leave) field, check the Enable check box to enable the Multicast Immediate Leave. Enabling immediate leave ensures that optimal bandwidth management is provided to hosts on your network, even during times of simultaneous multicast group usage.

Step 8. In the Session Initiation Protocol (SIP) Application Layer Gateway (ALG) field, check the Enable check box to allow the Session Initiation Protocol (SIP) traffic to traverse the Firewall. Session Initiation Protocol (SIP) equips platforms to signal the setup of voice and multimedia calls over IP networks. Application Layer Gateway (ALG) or also known as Application Level Gateway is an application that translates IP address information inside the payload of an applications packet.

Note: The device supports a maximum of 256 SIP ALG sessions.
Configuring Universal Plug and Play
Step 1. In the UPnP field, check the Enable to enable the Universal Plug and Play (UPnP).

Step 2. In the Allow Users to Configure field, check the Enable check box to allow the UPnP port-mapping rules to be set by users who have UPnP support enabled on their computers or other UPnP-enabled devices. If disabled, the device does not allow the application to add the forwarding rule.

Step 3. In the Allow Users to Disable Internet Access field, check the Enable check box to allow users to disable Internet access.

Blocking Content
Step 1. Check the check box in the field that corresponds to the content you wish to block from the device.

The available options are defined as follows:
• Block Java — Blocks the downloading of Java applets.
• Block Cookies — Blocks the device from receiving cookie information from web pages.
• Block ActiveX — Blocks ActiveX applets which can be present when using Internet Explorer on the Windows operating system.
• Block Proxy — Blocks the device from communicating through a proxy server to external devices. This keeps the device from circumventing any firewall rules.
Step 2. Select either the Auto radio button to automatically block all instances of that particular content, or click the Manual radio button and enter a specific port in the corresponding field on which the content will be blocked.

Note: You may enter any desired number in the range (1-65535) for your port value.
Step 3. Click Save to save your settings.
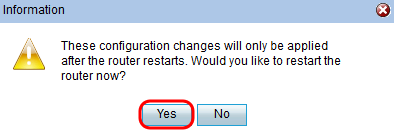
Step 4. A window appears prompting you to restart your router. Click Yes to restart your router to apply the changes.

Revision History
| Revision | Publish Date | Comments |
|---|---|---|
1.0 |
12-Dec-2018 |
Initial Release |
 Feedback