Configure Application Control on the RV34x Series Router
Available Languages
Objective
Application Control is an additional security feature on the router that can enhance an already secured network, promote productivity in the workplace, and maximize bandwidth. Application control can be useful for smartphones and other browser-based applications. If you connect a Wireless Access Point (WAP) to a router, the router will be able to allow or deny traffic to any host connected to the WAP. In turn, this discourages users from accessing some applications.
This article aims to show you how to configure Application Control on the RV34x Series Routers using the Application Control Wizard and through the manual configuration.
Applicable Devices
- RV34x Series
Software Version
- 1.0.02.16
Configure Application Control
Via the Application Control Wizard
Step 1. Log in to the web-based utility and choose Configuration Wizards > Launch Wizard....
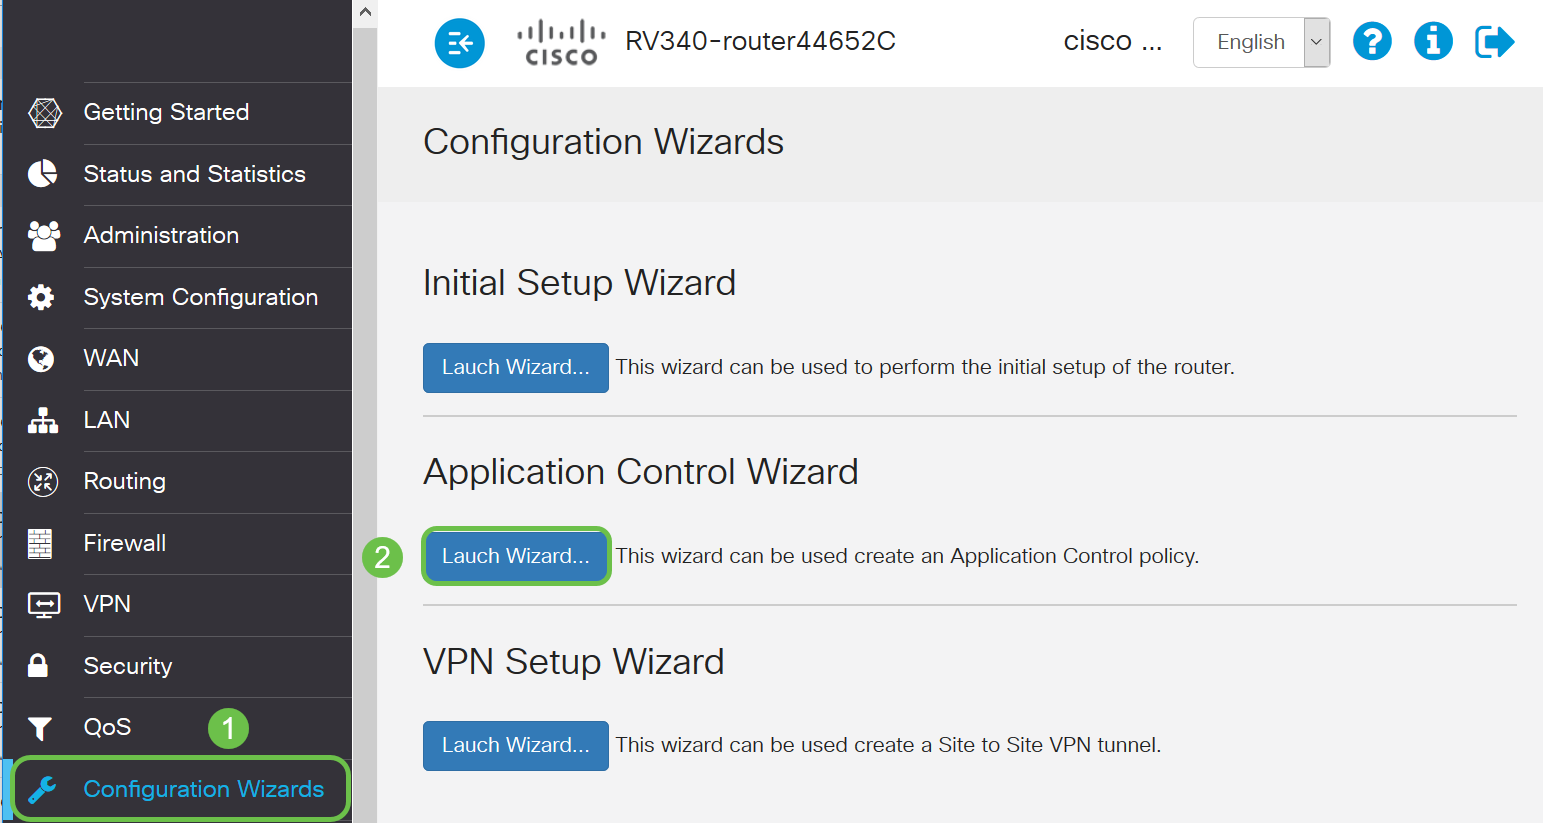
Step 2. Click the On radio button to enable Application Controller. This feature is disabled by default.

Step 3. Create a unique name for the policy in the Policy Name field. This name must not contain spaces or special characters.
Note: For this example, MobileControl is used.

Step 4. Click Next.

Step 5. Click the Edit button to define the parameters and categories which application control will use to filter data.

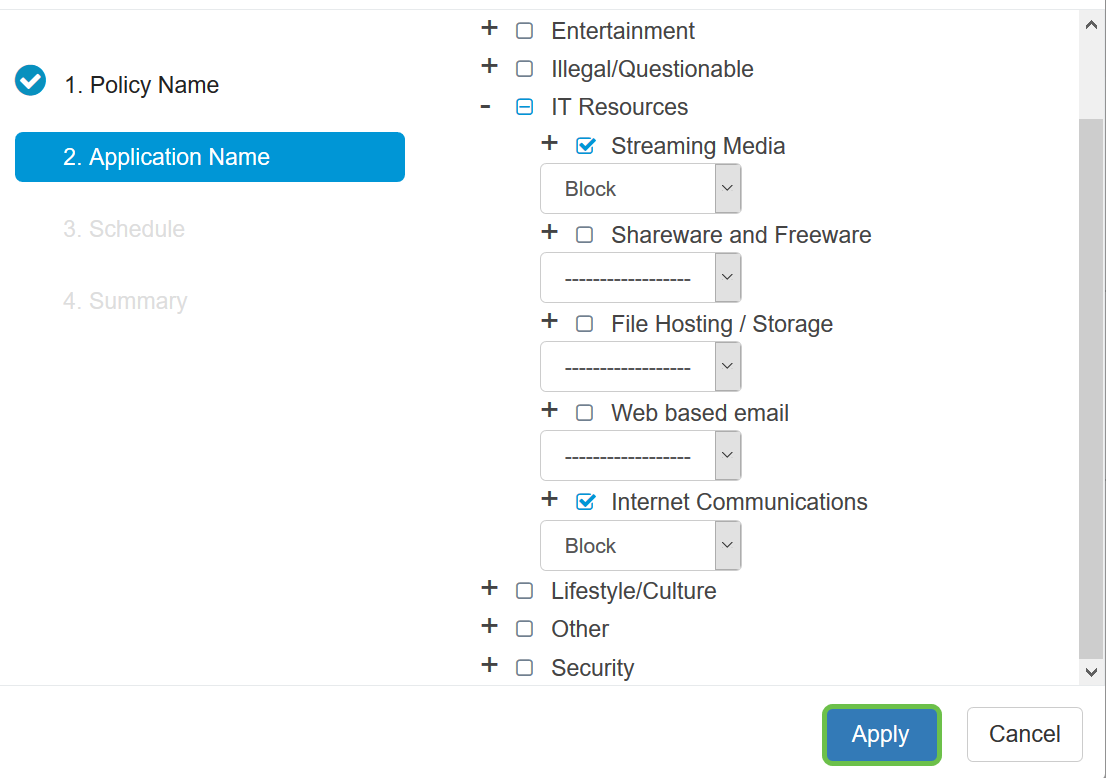
Step 6. Click on the + beside any category to expand and view the subcategories and specific applications. Alternatively, to view all categories and their subcategories, click Expand at the bottom portion of the page.
Note: In this example, IT Resources is the category expanded.
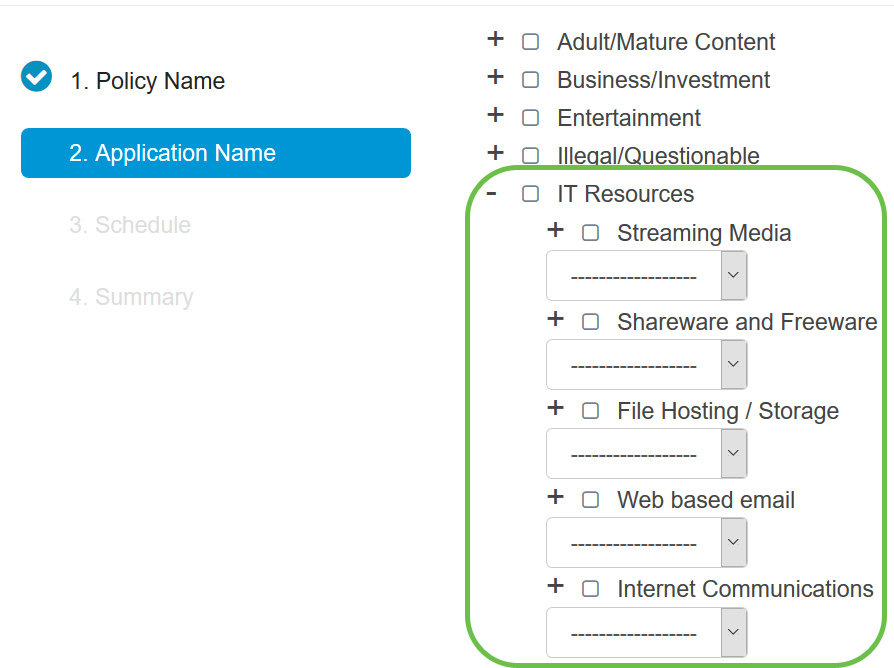
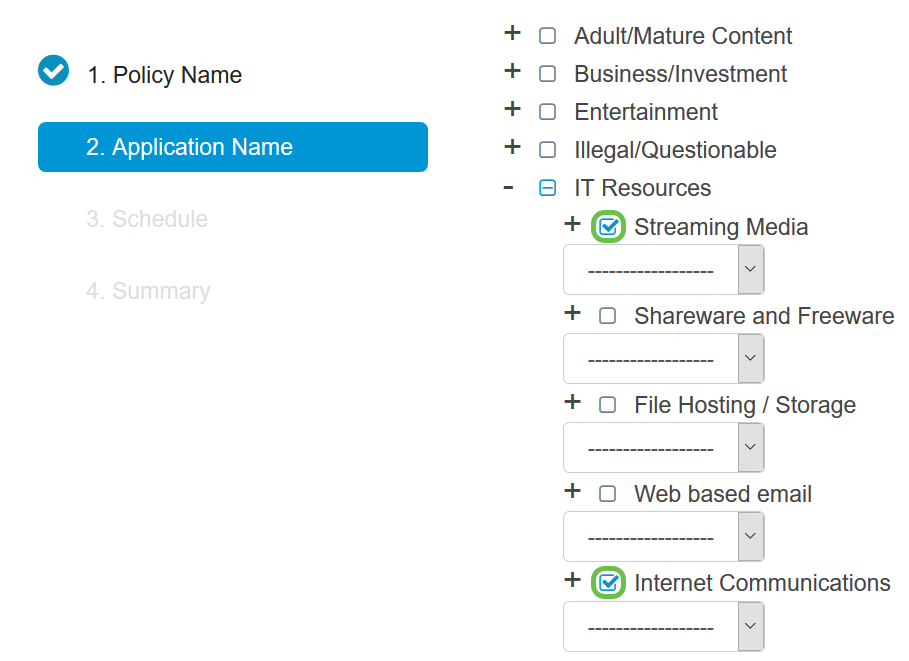
Step 7. Check the check box of the categories and subcategories you want to apply to the policy.
Note: For this example, Streaming Media and Internet Communications are the subcategories under IT Resources that are used as the examples.
Step 8. (Optional) Click the drop-down list beside the application you want to apply to the policy. Repeat this step as necessary. The options are:
- Permit & Log — Data is permitted to flow and is logged.
- Permit — Data is permitted.
- Block — Data is blocked.
- Block & Log — Data is blocked and is logged.
Note: Ensure that Logging is enabled on the router by choosing System Configuration > Log. Check the Enable check box, and then click Apply.
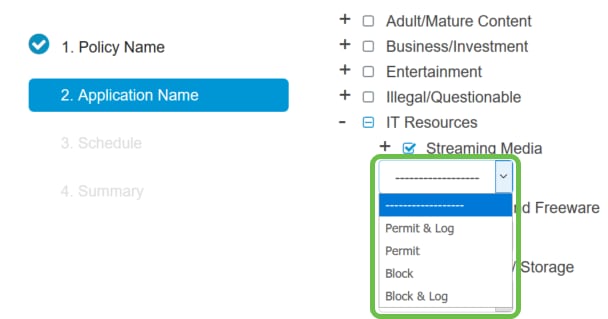
Note: For this example, Block is used for Streaming Media.
Step 9. Click Apply. You will be redirected back to the second page of the configuration wizard.
Note: The Application List Table populates with the chosen categories and applications.
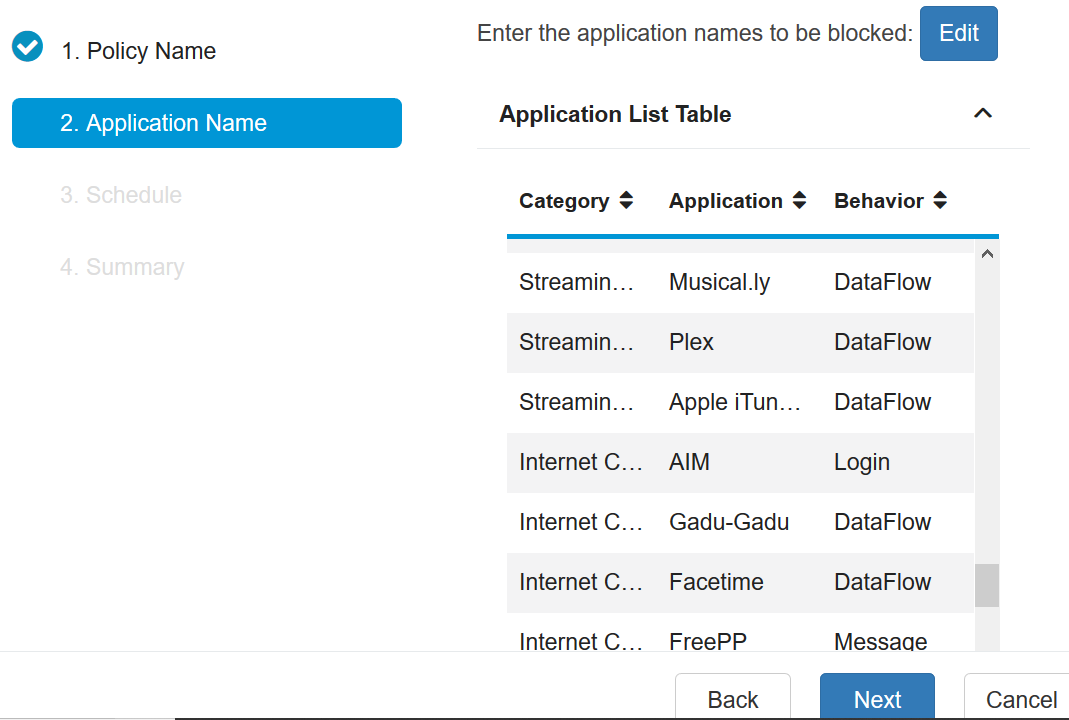
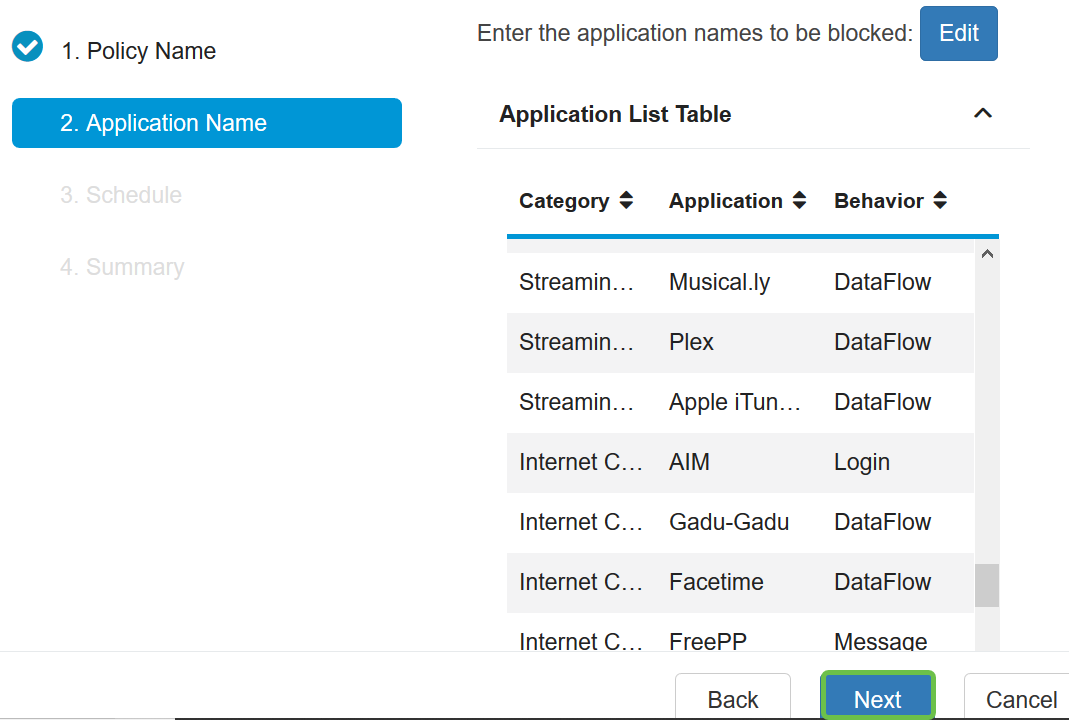
Step 10. Click Next to be brought to the Schedule page.
Step 11. From the Schedule drop-down list, choose a schedule which the policy should be set. The options may vary according to previously defined schedules. To configure a schedule, go to System Configuration > Schedules. Click Next.
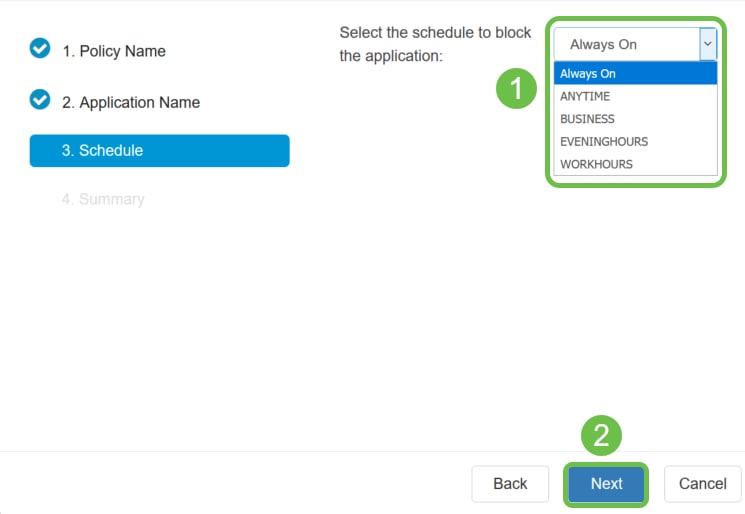
Note: For this example, Always On is used.
Step 12. You will be taken to the Summary page. The Application Control Policies table is now populated with the policy you have configured. In the summary page, review your settings and click Submit. You can click back to modify your settings.
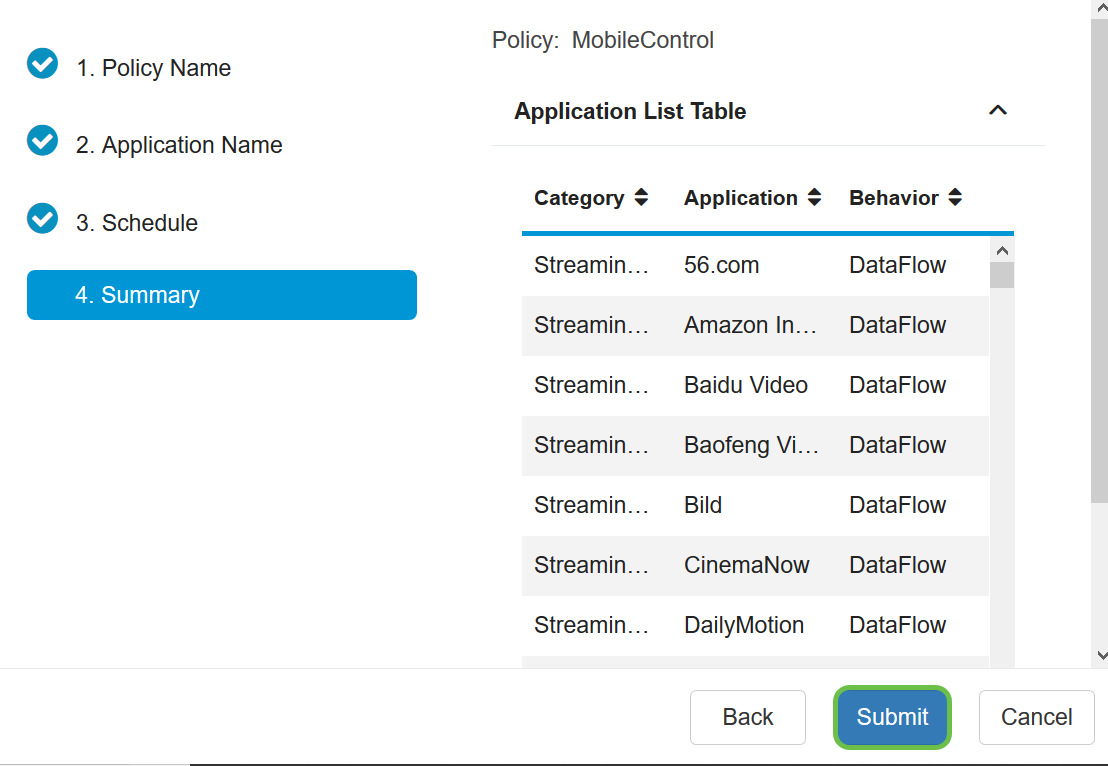
Step 13. A pop-up window will open that shows your Application Control Policy was set up successfully. Click OK.
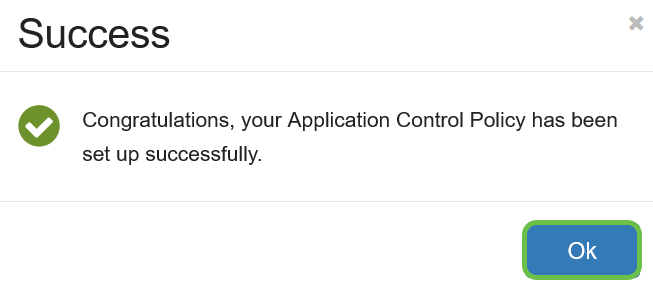
Step 14. To view the new policy, navigate to Security > Application Control > Settings.

You should now have successfully configured an application control policy through the Application Control Wizard.
Via the Manual Configuration
Note: For policies configured through the wizard, this is the area where you can further define and tune your policies.
Step 1. Log in to the web-based utility and choose Security > Application Control.
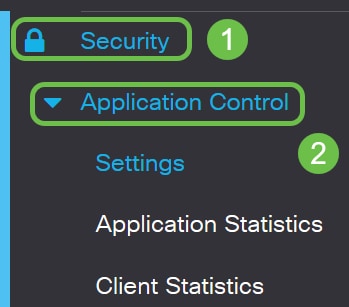
Step 2. Click the On Application Control radio button to enable the Application Control feature. The feature is disabled by default.
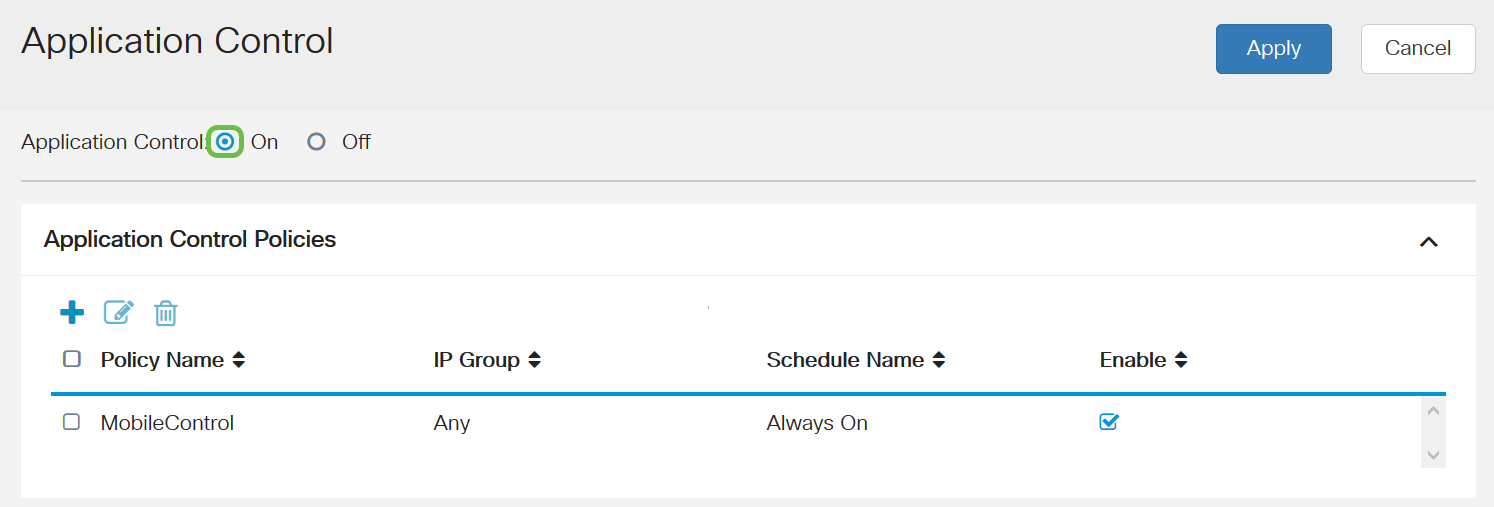
Step. 3 Click Apply.
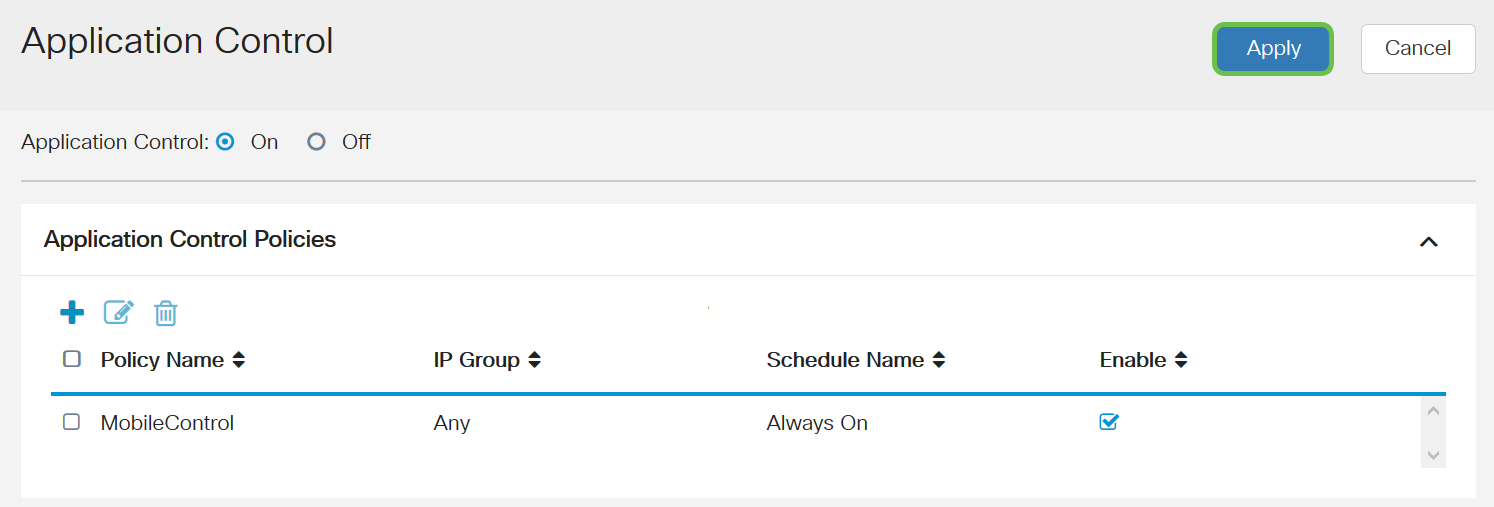
Step 4. Click plus icon in the Application Control Policies table to create an application control policy.

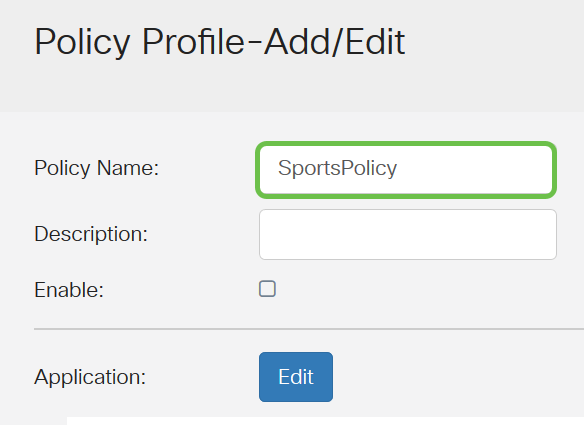
Step 5. Create a name for the policy. This name must not contain spaces or special characters.
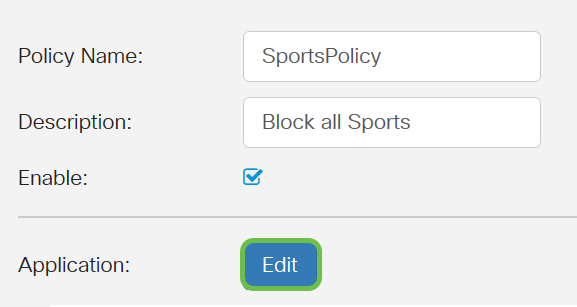
Note: For this example, SportsPolicy is used.
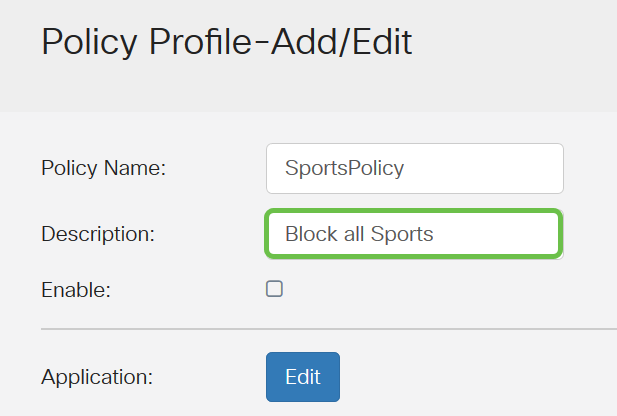
Step 6. In the Description field, create a description for the policy.
Note: For this example, Block all Sports is used.
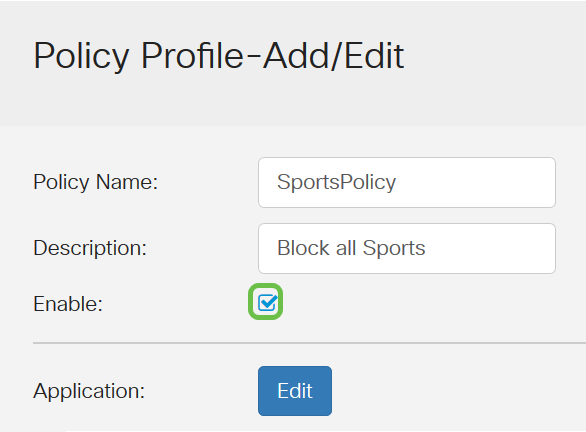
Step 7. Check the Enable check box to activate this specific policy.
Step 8. Click the Edit Application button to define and tune the parameters to be applied to the policy.
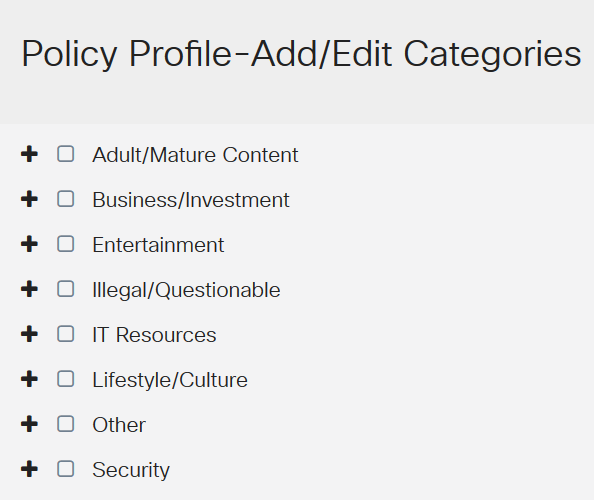
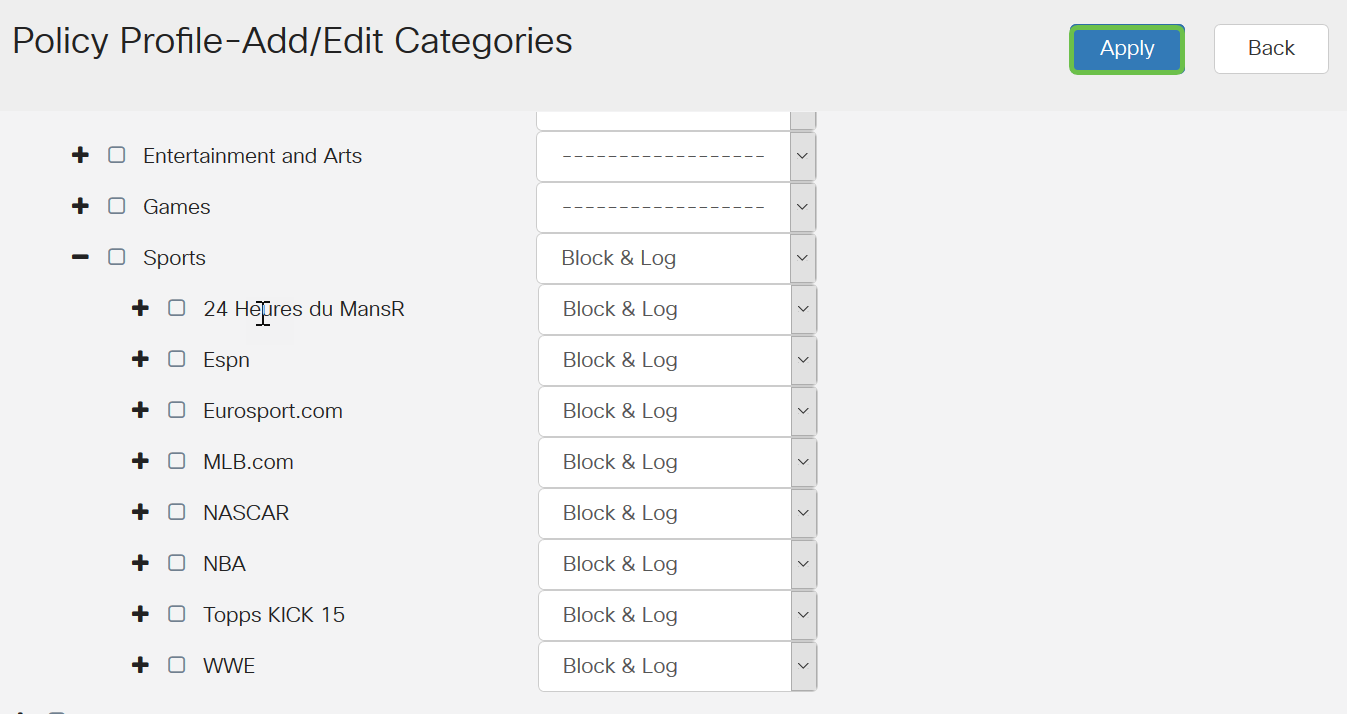
Step 9. Check the check box of the categories and subcategories you want to apply to the policy.
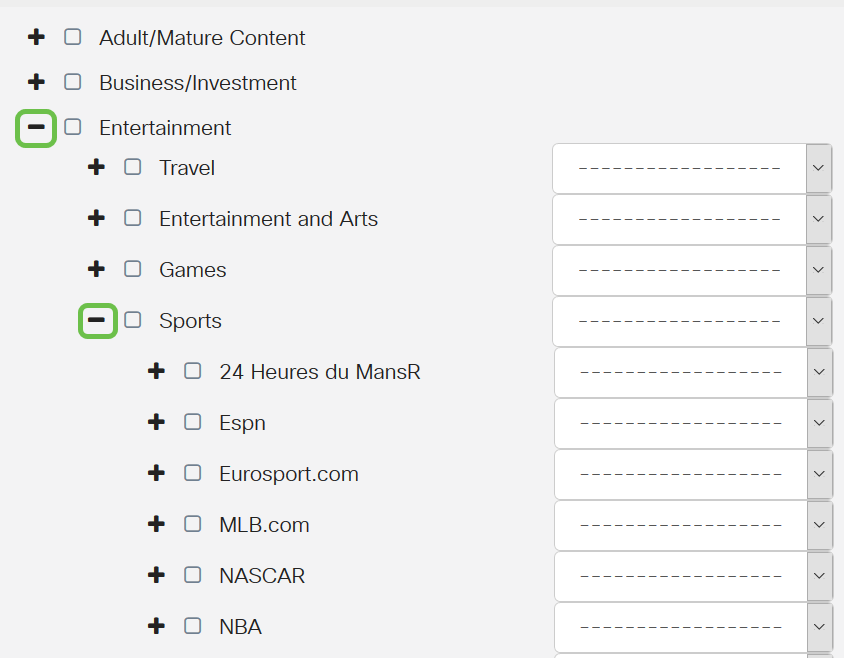
Step 10. Click on the + beside any category to expand and view the subcategories and specific applications. Alternatively, to view all categories and their subcategories, click Expand at the bottom portion of the page.
Note: For this example, Entertainment and /sports are chosen.
Step 11. (Optional) Click the drop-down list beside the application you want to apply to the policy. Repeat this step as necessary. The options are:
- Permit & Log — Data is permitted to flow and is logged.
- Permit — Data is permitted.
- Block — Data is blocked.
- Block & Log — Data is blocked and is logged.
Note: For this example, Block & Log is chosen for Sports.
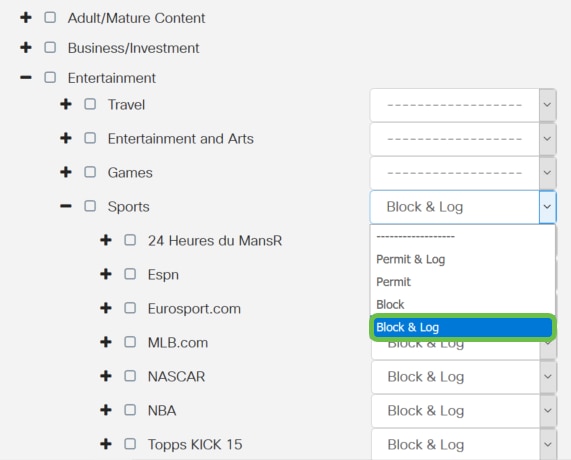
Step 12. The Application List Table populates with the chosen categories and applications. Click Apply.
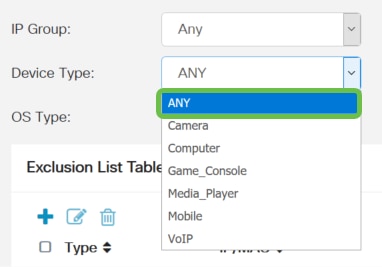
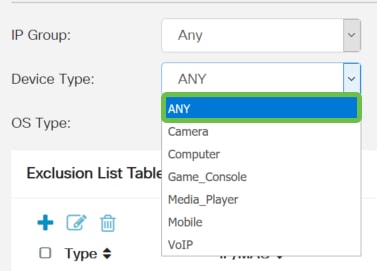
Step 13. From the Device Type drop-down list, select the source or destination of the packets to be filtered. Only one option may be chosen at a time. The options are:
- ANY — Choose this to apply the policy to any device.
- Camera — Choose this to apply the policy to cameras (such as IP security cameras).
- Computer — Choose this to apply the policy to computers.
- Game_Console — Choose this to apply the policy to Gaming Consoles.
- Media_Player — Choose this to apply the policy to Media Players.
- Mobile — Choose this to apply the policy to mobile devices.
- VoIP — Choose this to apply the policy to Voice over Internet Protocol devices.
Note: For this example, ANY is chosen.
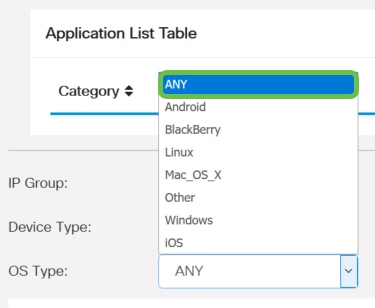
Step 14. From the OS Type drop-down list, choose an Operating System (OS) to which the policy should be applicable. Only one may be chosen at a time. The options are:
- ANY — Applies the policy to any type of OS. This is the default.
- Android — Applies the policy to Android OS only.
- BlackBerry — Applies the policy to Blackberry OS only.
- Linux — Applies the policy to Linux OS only.
- Mac_OS_X — Applies the policy to Mac OS only.
- Other — Applies the policy to an OS that is not listed.
- Windows — Applies the policy to the Windows OS.
- iOS — Applies the policy to iOS OS only.
Note: For this example, ANY is chosen.
Step 15. Choose an IP group from the IP Groups drop-down list. The options may vary depending if any IP groups have been previously configured. The default is Any.
Step 16. (Optional) Click the plus icon under the Exclusion List Table to exclude specific users from the policy.
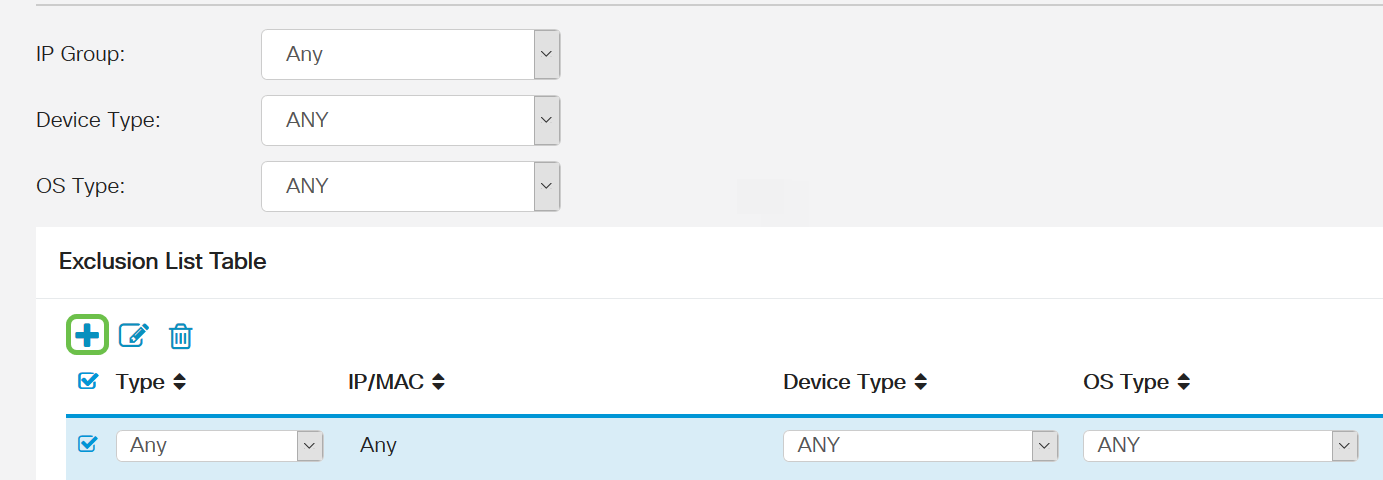
Step 17. From the Type drop-down list, choose the type of address to be excluded from the policy. The options are:
- MAC — Specify a MAC address to exclude from the policy.
- IPv4 IP Address — Specify a single IPv4 address to exclude from the policy.
- IPv4 IP Range — Specify a range of hosts of IPv4 addresses to be excluded from the policy. Enter a Start IP address and an End IP address in the respective fields.
- IPv6 IP Address — Specify a single IPv6 address to exclude from the policy.
- IPv6 IP Range — Specify a range of hosts of IPv6 addresses to be excluded from the policy. Enter a Start IP address and an End IP address in the respective fields.
Note: For this example, IPv4 IP Address is used.

Step 18. Enter an IPv4 address in the IP field.
Note: In this example, 192.168.1.114 is used.

Step 19. Choose a device type to be excluded from the policy.
Note: For this example, ANY is chosen.

Step 20. Choose an OS type to be excluded from the policy.
Note: For this example, ANY is chosen.

Step 21. From the Schedule drop-down list, choose a schedule which the policy should be set. The options may vary according to previously defined schedules. To configure a schedule, go to System Configuration > Schedules.
Note: For this example, Always On is Chosen.

Step 22. Click Apply.

Step 23. (Optional) To save the configuration permanently, click the Save icon.

Note: If you would like to permanently save this configuration, be sure to save the Running Configuration to the Startup Configuration.
You should now have successfully configured the Application Control feature on your RV34x Series Router.
You might find also this article informative: RV34x Series Router Frequently Asked Questions (FAQs)
This site offers several links to other articles you might find interesting: RV34x Series Router Product Page
 Feedback