Configure Service Management on the RV34x Series Router
Available Languages
Objective
The router keeps a list of services and its respective ports in the Service Management table. With Service Management, this allows an administrator to create, edit, and delete services. Services are used in firewall rules, bandwidth management, port forwarding, and other functions.
This document aims to show you how to manage the Service Management settings on the RV34x Series Router.
Applicable Devices
- RV34x Series
Software Version
- 1.0.01.16
Configure Service Management
Add a Service
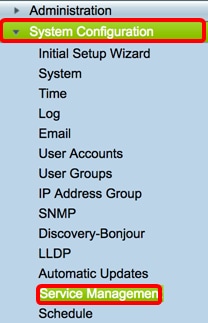
Step 1. Log in to the web-based utility of the router and choose System Configuration > Service Management.
Step 2. In the Service Table, click Add to add a service.
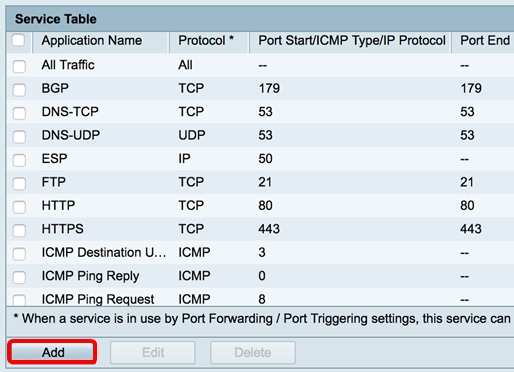
Step 3. In the Application Name field, enter a name for the application.
Note: In this example, the application name is set to VOIP.

Step 4. From the protocol drop-down list, choose a protocol that will be used by the application. The options are:
- All — All protocols are used.
- TCP — Transport Control Protocol (TCP) is used to transmit data from an application to the network. TCP is typically used for applications where information transfer must be complete and packets are not dropped. TCP determines when Internet packets require being re-sent and stop the flow of data until all packets are successfully transferred.
- UDP — Protocol used for client/server network applications based on the Internet Protocol (IP). The main purpose of this protocol is for live applications such as VOIP, games, and so on. UDP is faster than TCP because there is no form of data flow control and any collisions and errors will not be corrected. UDP prioritizes speed.
- TCP&UDP — This protocol utilizes both TCP and UDP.
- IP — Internet Protocol (IP) is a packet-based protocol used to exchange data over computer networks. IP handles addressing, fragmentation, reassembly, and protocol demultiplexing.
- ICMP — Internet Control Message Protocol (ICMP) is a protocol that sends errors messages and is responsible for error-handling in the network. Use this protocol to get a notification when the network has issues with the delivery of packets.
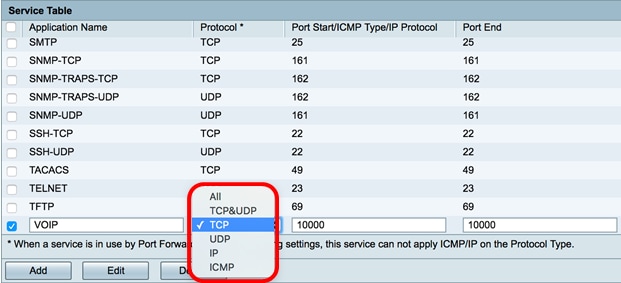
Note: In this example, TCP is chosen.
Step 5. In the Port Start/ICMP Type/IP Protocolfield, enter a port number used by the service and the protocol.
Note: The port numbers are divided into three ranges. The Well Known Ports range from 0 to 1023, the Registered Ports range from 1024 through 29151, and the Dynamic and/or Private Ports range from 49152 to 65535. If your service requires custom or temporary permissions for automatic allocation of ephemeral ports, choose a port number from the Dynamic and/or Private Ports range. If your service requires specific permissions and requests Registered Port access assigned by the Internet Assigned Numbers Authority (IANA), choose a port number from the Registered Port range. In a few cases, if your service has super-user privileges and requests network sockets to bind to an IP address, choose a port from the Well Known Ports range.
Note: In this example, 5060 is used.

Step 6. In the Port Endfield, enter the ending range of the port associated with the protocol.
Note: In this example, 5061 is used.
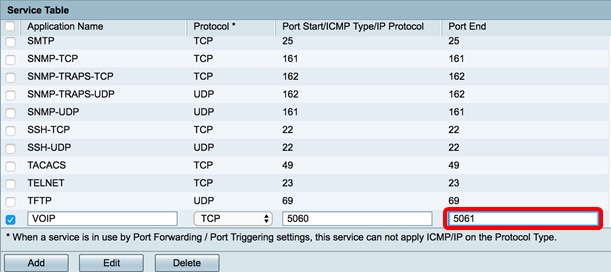
Step 7. Click Apply.

You should now have successfully added a service on an RV34x Series Router.

Edit a Service
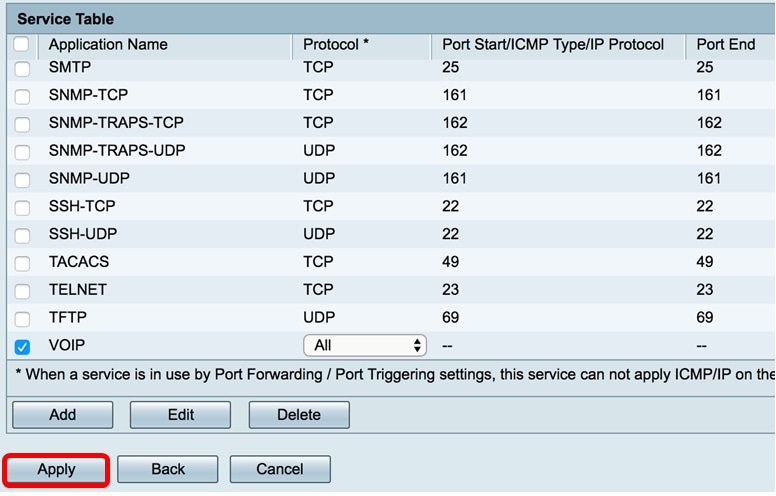
Step 1. In the Service Table, check the check box of the service to be modified.
Note: In this example, VOIP is checked.
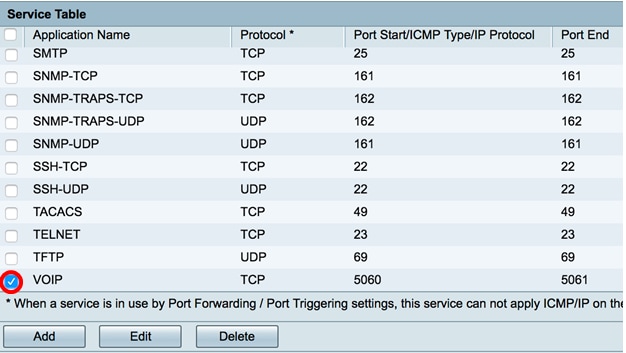
Step 2. Click Edit.
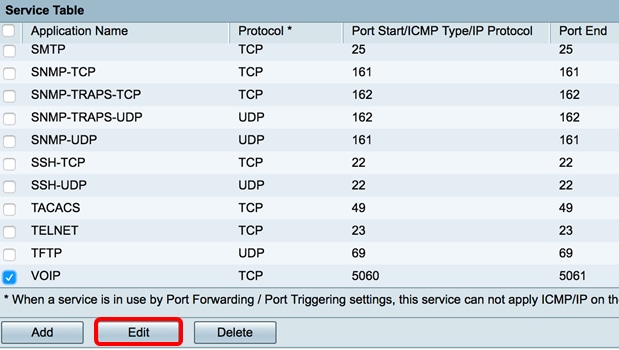
Step 3. Update the necessary fields accordingly.
Note: In this example, the protocol is changed to All.

Step 4. Click Apply.
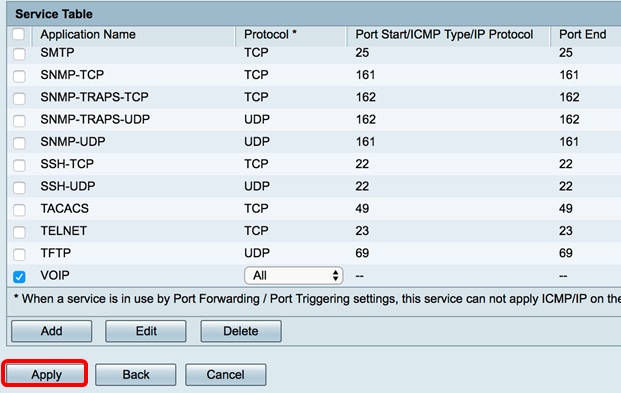
You should now have successfully edited a service on an RV34x Series Router.
Delete a Service
Step 1. In the Service Table, check the check box of a service to be deleted.
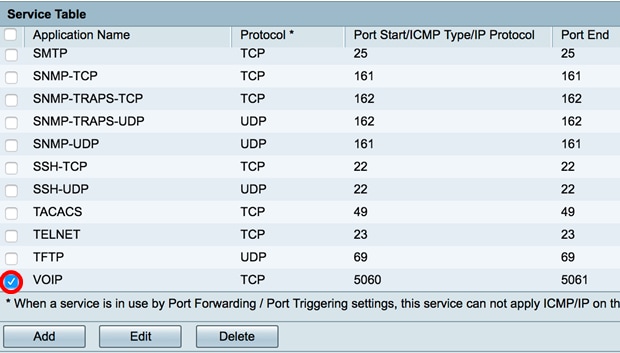
Step 2. Click Delete to delete the service.

Step 3. Click Apply.
You should now have successfully deleted a service on an RV34x Series Router.
 Feedback