Configuration of Universal Plug and Play (UPnP) on RV016, RV042, RV042G and RV082 VPN Routers
Available Languages
Objective
Universal Plug and Play (UPnP) is a set of networking protocols that allow devices to discover each other on the network. The discovered devices can then establish network services for data sharing, communications, and entertainment.
The objective of this document is to show you how to configure UPnP on RV016, RV042, RV042G, and RV082 VPN Routers.
Applicable Devices
• RV016
• RV042
• RV042G
• RV082
Software Version
• v4.2.2.08
UPnP Configuration
Step 1. Log in to the web configuration utility and choose Setup > UPnP. The UPnP page opens:

Step 2. Click the Yes radio button to enable the UPnP feature.

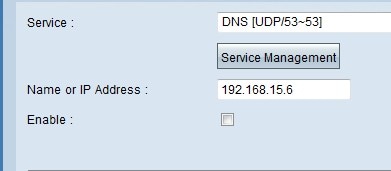
Step 3. From the Service drop-down list, choose the appropriate service and the predefined port of the service that you would like to apply for the UPnP device.

Note: If the desired service is unavailable, refer to the Service Management section.
Step 4. In the Name or IP Address field, enter the IP address or the name of the UPnP device.

Step 5. To enable this feature for the respective IP address, check the Enable check box.
Step 6. Click Add to List. The new entry will be displayed in the list.

Step 7. (Optional) To edit an entry from the UPnP list, choose the entry from the list that you want to edit, edit the necessary information, and click Update.
Step 8. (Optional) To delete an entry from the UPnP list, choose the entry from the list that you want to delete and click Delete.
Step 9. Click Save to save the settings.
Step 10. Click View to see the UPnP forwarding table. The UPnP Forwarding Table List window opens:

The available options are defined as follows:
• Service Name — Represents the service name.
• Protocol — Represents the protocol used for the service.
• Ext. Port — Represents the external port for the service.
• Internal Port — Represents the internal port for the service.
• IP Address — Represents the IP address of the UPnP device.
• Enable — Represents whether the UPnP is enabled or disabled.
Service Management
The Service Management section is used to create a new service for the UPnP configuration.
Step 1. Click Service Management.

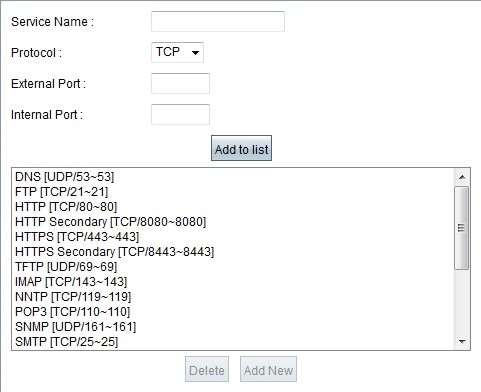
The Service Management window appears:

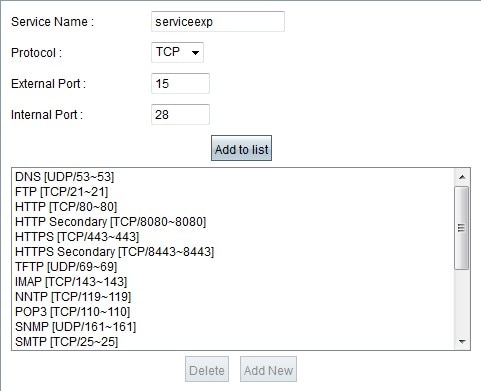
Step 2. Enter a service name in the Service Name field.
Step 3. Choose the appropriate protocol type from the Protocol drop-down list.

The available options are defined as follows:
• TCP (Transmission Control Protocol) — Transport layer protocol used by applications that require guaranteed delivery.
• UDP (User Datagram Protocol) — Uses datagram sockets to establish host to host communications.
Step 4. Enter the external port in the External Port field.
Note: If the service that has been created has a standard port number, that number must be used as the external port number.

Step 5. Enter the internal port in the Internal Port field.
Note: The external port number can be used. However, for higher security, any other port number can be used as well.

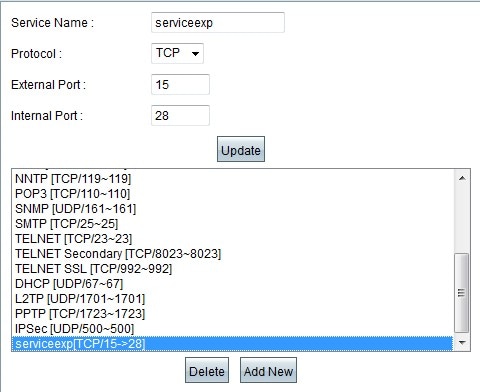
Step 6. Click Add to list. The service is displayed in the service field.
Step 7. (Optional) To delete a service, choose the service that you would like to delete from the list and click Delete.
Step 8. (Optional) To edit a service, choose the service that you would like to update from the list, edit the necessary information, and click Update.
Step 9. Click OK. This closes the window and takes you back to the UPnP page.
Revision History
| Revision | Publish Date | Comments |
|---|---|---|
1.0 |
10-Dec-2018 |
Initial Release |
 Feedback