Bandwidth Management on RV016, RV042, RV042G, and RV082 VPN Routers
Available Languages
Objective
Bandwidth Management is used to measure and control the communication on a network link which can be used to avoid network congestion.
This article explains how to configure rate control and priority bandwidth management settings on RV016, RV042, RV042G and RV082 VPN Routers.
Applicable Devices
• RV016
• RV042
• RV042G
• RV082
Software Version
• v4.2.1.02
Bandwidth Management
Maximum Bandwidth Provided by ISP
Step 1. Log in to the Router configuration utility and choose System Management > Bandwidth Management. The Bandwidth Management page opens:
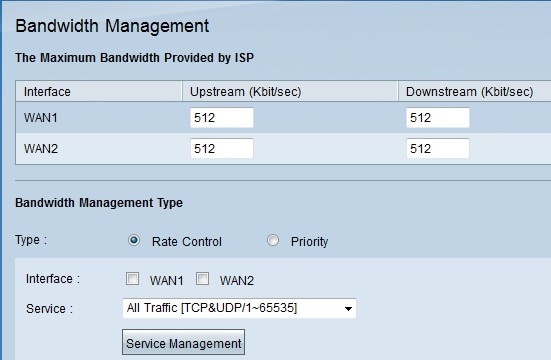

Step 2. Enter the upstream bandwidth in the Upstream field for each one of the WANs. The upstream is the maximum quantity of data that the user can send to the Internet. This is specified by your ISP (Internet Service Provider). The default value is 512 Kbit/sec.
Step 3. Enter the downstream bandwidth in the Downstream field for each one of the WANs. The downstream is the maximum quantity of data that the user can receive from the internet; this is specified by your ISP (Internet Service Provider). The default value is 512 Kbit/sec.
Rate Control Bandwidth
Choose this option to distinctively control minimum and maximum bandwidth rate for each service and WAN interface.
Step 1. Click Rate Control radio button to manage application bandwidth within the network.
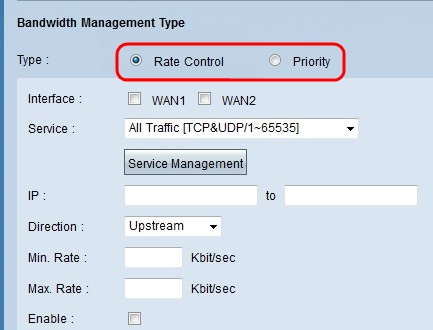
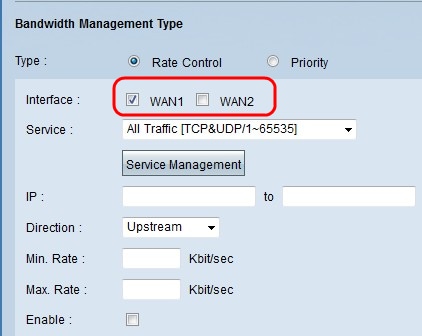
Step 2. Check the Interface check box of the WAN that you would like to apply rate control management.
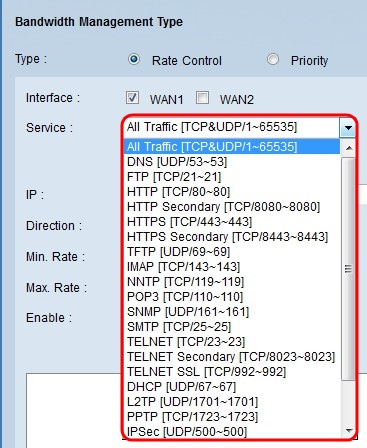
Step 3. Choose the service that you would like to apply to the interface from the service drop-down list. A service provides a protocol and ports for that data that it is going to be sent or received.
Note: If the desired service is unavailable, refer to the Add a New Service section.
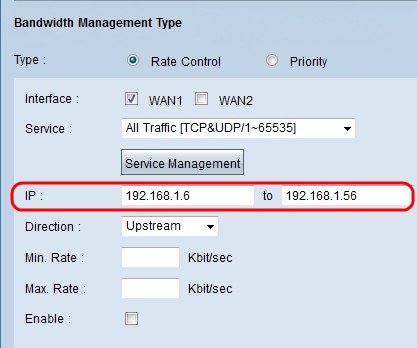
Step 5: Choose the direction that you would like to apply to the interface from the direction drop-down list. There are two possible values:
• Upstream — How fast (speed) the user can send information to the network.
• Downstream — How fast (speed) the user can received information from the network.
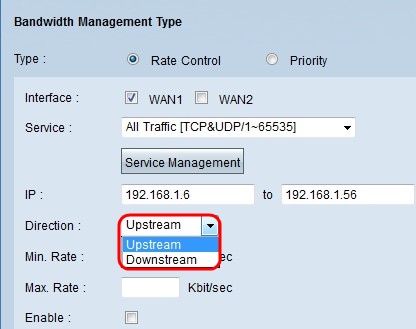
Step 7. Enter the maximum rate that you would like to assign to the interface in the Max. Rate field. The maximum rate is the maximum quantity of data transmitted per second (Kbit/sec)
Step 8. Check the Enable check box to enable the rate control.
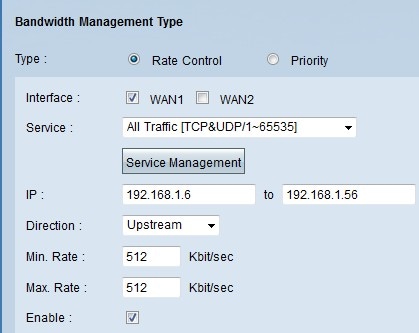
Step 9. Click Update, and the configuration will be displayed in the Bandwidth Management Table.
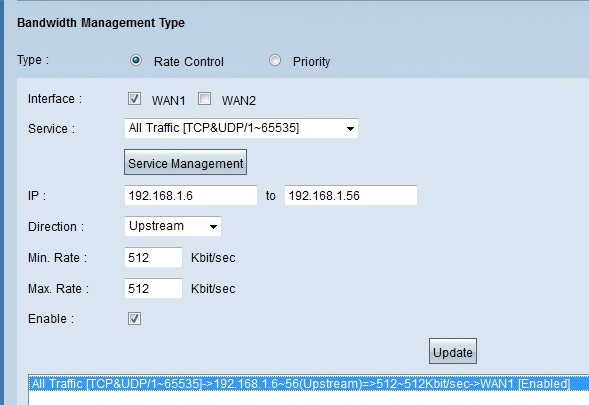
Step 10. Click Save to save the bandwidth settings.
Priority Bandwidth
Choose this option to control upstream and downstream bandwidth by identifying high-priority and low-priority services.
Step 1. Click Priority radio button to manage application bandwidth within the network.
Step 2. Check the WAN check box of the interface that you would like to apply priority management.
Step 3. Choose the service that you would like to apply to the rate control from the service drop-down list. A service provides a protocol and ports for the data that it is going to be send or received.
Note: If the desired service is unavailable, refer to the Adding a New Service section to add a new service.
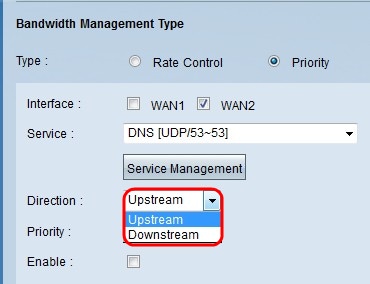
Step 4. Choose the direction that you would like to apply to the rate control from the direction drop-down list. There are two possible values:
• Upstream — How fast (speed) the user can send information to the network.
• Downstream — How fast (speed) the user can received information from the network.
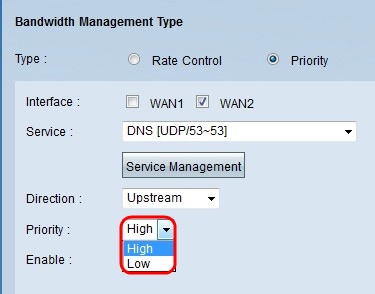
• High — A priority management is more likely to be serviced with a high priority.
• Low — A priority management is to be serviced with a low priority.
Step 6. Check the check box in the Enable field to enable the priority management.
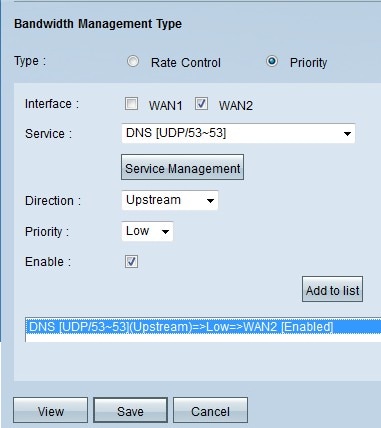
Step 7. Click Add to list button, and the configuration will be displayed in the Bandwidth Management Table.
Step 8. Click Save to save the bandwidth settings.
Adding a New Service
Services are used to control the data that it is sent or received. The service establishes a protocol and the ports that the data will use.
Step 1. Click the Service Management button. The Service Management window appears.
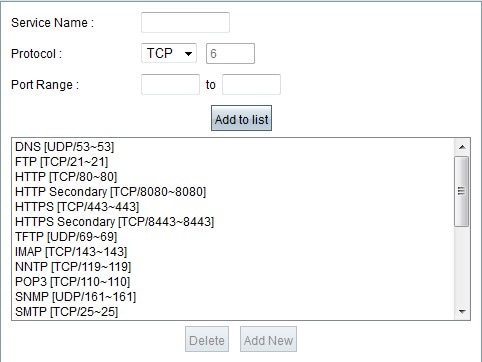
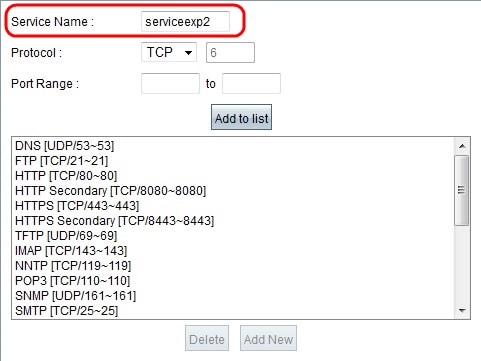
Step 2. Enter the name that you would like to assign to the service in the Service Name field.
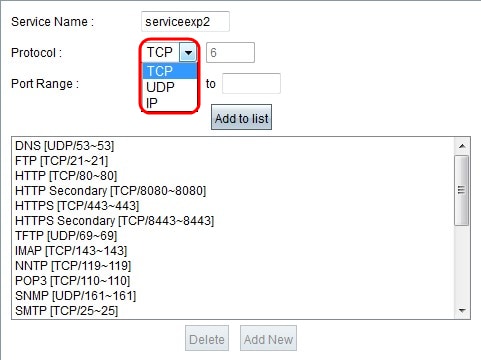
Step 3. Choose the protocol that you would like to assign to the new service from the Protocol drop-down list. There are three possible options.
• TCP — Transmission Control Protocol (TCP) sends traffic consistently and intact but is slower than UDP.
• UDP — User Datagram Protocol (UDP) sends traffic quickly but does not guarantee packet integrity
• IP — Internet protocol is used to manage the delivery or transmission of the data through the Internet.
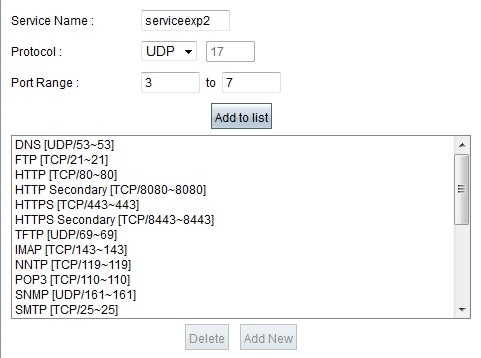
Step 5. Click Update. The new service will be displayed in the Service Management Table.
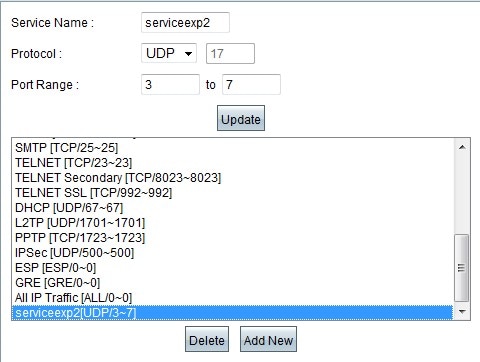
Step 6. Click OK to save your settings.
Step 7. (Optional) To update a service, choose the desired service click Update, update the fields, and click OK.
Step 8. (Optional) To delete the service a service, choose the desired service, click Delete, and click OK.
Note: The default services cannot be deleted or updated.
Revision History
| Revision | Publish Date | Comments |
|---|---|---|
1.0 |
10-Dec-2018 |
Initial Release |
 Feedback