Assign an Interface VLAN as an Access or Trunk Port on a Switch
Available Languages
Objectives
Virtual Local Area Network (VLAN) is a group of ports that enables devices to communicate with each other over the Ethernet MAC layer, regardless of the physical Local Area Network (LAN). A port is a member of a VLAN if it can send to and receive data from the VLAN. A port is an untagged member of a VLAN if all packets destined for that port into the VLAN have no VLAN tag. A port is a tagged member of a VLAN if all packets destined for that port into the VLAN have a VLAN tag. VLANs are typically used to isolate endpoints as a workgroup. A basic example is setting up a different VLAN for Voice and a separate VLAN for Data. This ensures that packets for both data types are isolated from each other, maximizing the utilization of the switch.
You can assign an interface VLAN into a specific mode such as an Access or Trunk port.
- Access port — A port that carries traffic only to and from the specific VLAN assigned to it.
- Trunk port — A port that is capable of carrying traffic for any or all the VLANs that are accessible by a specific switch.
This article aims to show you how to configure an interface VLAN on your switch to be an access, or trunk port.
Applicable Devices | Firmware Version
- Sx250 Series | 2.2.0.66 (Download latest)
- Sx350 Series | 2.2.0.66 (Download latest)
- SG350X Series | 2.2.0.66 (Download latest)
- Sx550X Series | 2.2.0.66 (Download latest)
Interface Settings
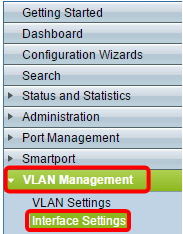
Step 1. Log in to the web-based utility and choose VLAN Management > Interface Settings.
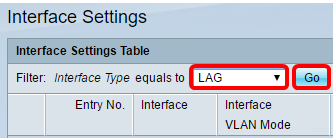
Step 2. In the Interface Settings Table, choose an interface from the Interface Type equals to drop-down list and then click Go. The options are:
- Port - Choose Port if only a single port needs to be configured.
- Link Aggregation (LAG) - Choose LAG if you intend to configure a group of ports defined in the LAG configuration.
Note: In the example below, LAG is chosen.
Step 3. Click the radio button for the port or LAG you want to modify and click Edit.
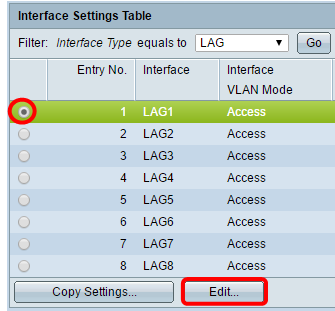
A pop-up window will then appear showing the chosen interface type in the previous page.

Step 4. Choose the radio button that corresponds to the desired VLAN mode for the interface.
- Access - The interface is an untagged member of a single VLAN.
- Trunk - The interface is an untagged member of at most one VLAN and is a tagged member of one or more VLANs.

Note: For this example, Trunk was chosen.
Step 5. Click Apply.

Step 6. The page will then show with a check mark that the settings have been successful. Click Close.
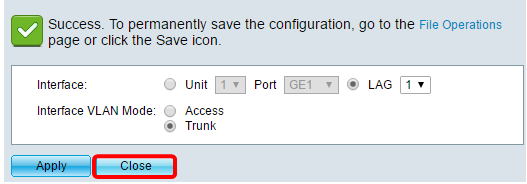
You will now be taken back to the Interface Settings Table.
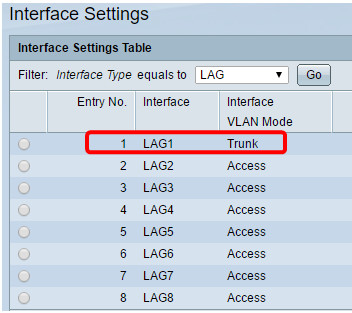
Step 7. Check the interface mode that you have configured to verify your recent setting.
Step 8. To permanently save the current configuration, click the  icon.
icon.
You have now successfully assigned the interface VLAN on your switch.