Enable Loopback Detection on a Switch
Available Languages
Objective
Loopback Detection (LBD) is a feature that protects against loops by sending out loop protocol packets when it has loop protection enabled. When the switch transmits a loop protocol packet and the port receives the same packet, it shuts down the port that received the packet. Although similar to the Spanning Tree Protocol (STP), LBD is not dependent on STP. The port that received the loop is put on Shut Down state. A trap is then sent, and then the event logged.
Applicable Devices
- Sx250 Series
- Sx350 Series
- SG350X Series
- Sx550X Series
Software Version
- 2.3.5.63
Enable Loopback Detection on the Switch
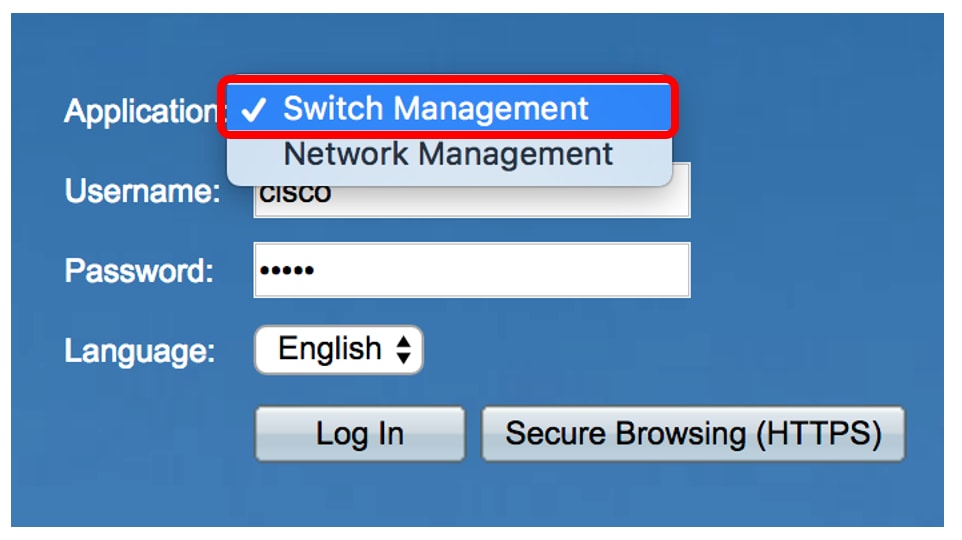
Step 1. Choose whether to manage the switch or manage the network.
Note: In this example, Switch Management is chosen.
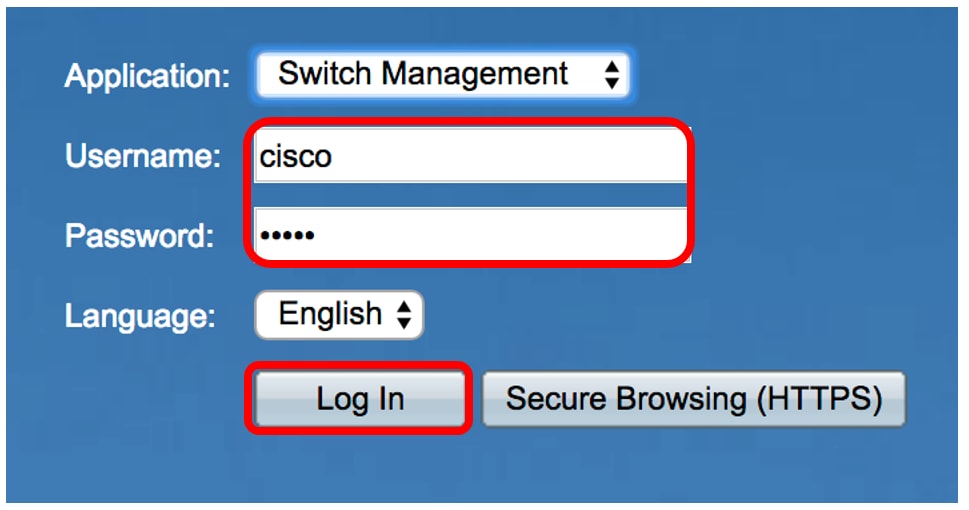
Step 2. Enter your credentials and then click Log In.
Step 3. Click the Display Mode drop-down list and then choose Advanced.

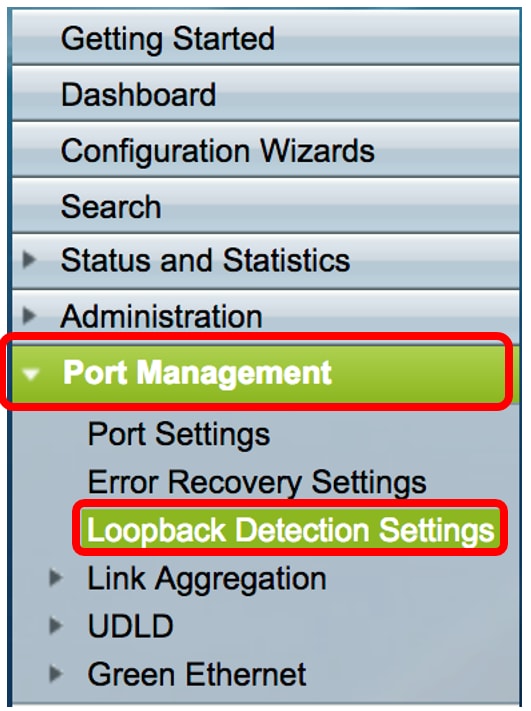
Step 4. Choose Port Management > Loopback Detection Settings.
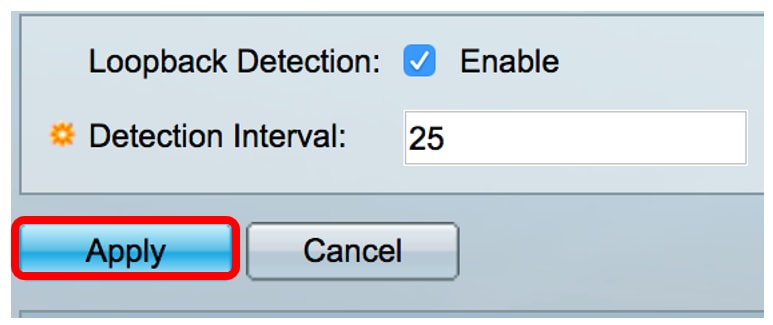
Step 5. Check the Loopback Detection Enable check box.

Step 6. Enter the Detection Interval value.
Note: The valid range is from 10 to 60. The default value is 30. In this example, 25 is entered.
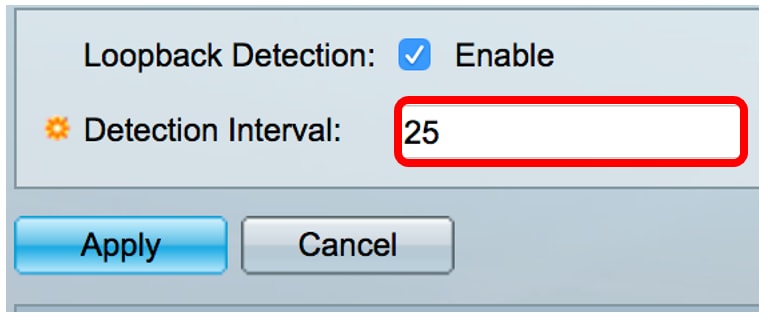
Step 7. Click Apply.
Step 8. (Optional) Click Save to save the configuration permanently.

Enable Loopback Detection on the Port
Step 1. On the Loopback Detection Port Setting Table, click the radio button that corresponds to the port that needs to be configured.
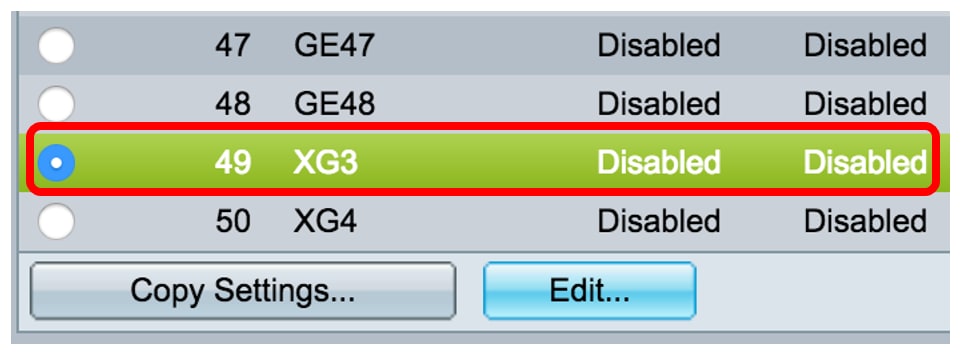
Note: In this example, XG3 is chosen.
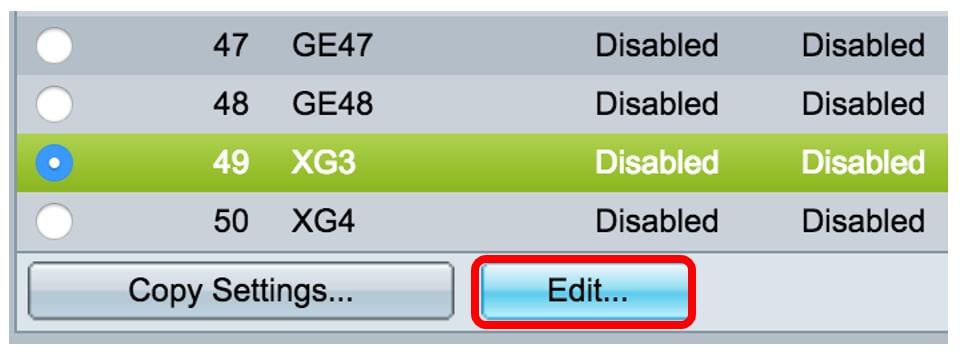
Step 2. Click Edit.
Step 3. Check the Loopback Detection State Enable check box.

Step 4. Click Apply.

Step 5. Click Save to save the configuration permanently.

Step 6. Verify that the Loopback Detection Administrative state is enabled.
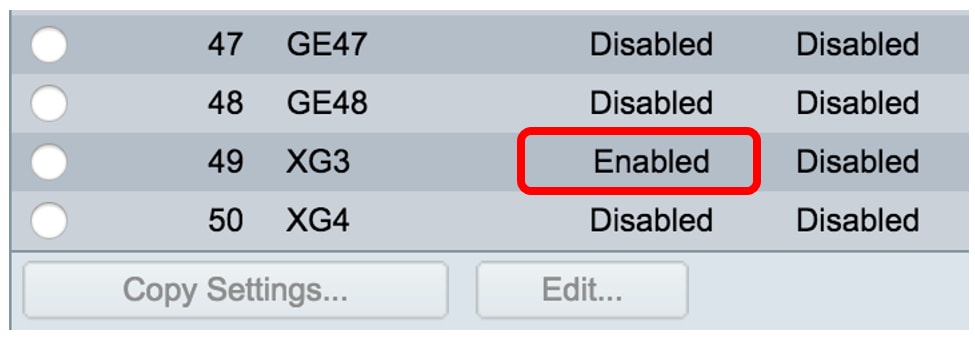
Step 7. (Optional) Repeat the steps for each port that needs to have LBD enabled.
You should now have successfully enabled loopback detection on your switch.
Contact Cisco
- Open a Support Case

- (Requires a Cisco Service Contract)
 Feedback