Link Flap Prevention on Sx250 and Sx350 Switches
Available Languages
Objective
Link flap is a situation in which a physical interface on the switch continually goes up and down, three or more times a second for duration of at least 10 seconds. The common cause is usually related to bad, unsupported, or non-standard cable or Small Form-Factor Pluggable (SFP), or related to other link synchronization issues. The cause for link flapping can be intermittent or permanent.
Link flap prevention mechanism minimizes the disruption to switch and network operation in a link flap situation. It stabilizes the network topology by automatically setting the ports that experience excessive link flap events to err-disable state ports. This mechanism also provides time to debug and locate root cause for flapping. A syslog message or Simple Network Management Protocol (SNMP) trap is sent to alert regarding link flap and port shutdown. The interface will become active again only if specifically enabled by the system administrator.
This article provides instructions on how to enable the Link Flap Prevention feature, configure Automatic ErrDisable Recovery Time, and reactivate a suspended interface on your Sx250 or Sx350 Series Switch.
Applicable Devices
-
SF350 Series
-
SG350 Series
-
SF250 Series
-
SG250 Series
Software Version
- 2.1.0.63
Configure Link Flap Prevention
Enable Link Flap Prevention
Step 1. Log in to the web-based utility of your switch.
Step 2. In the Display Mode drop-down menu, choose Advanced.

Step 3. Choose Port Management > Port Settings.
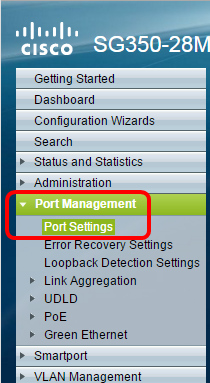
Step 4. Check the Enable Link Flap Prevention check box.
Note: By default, the Link Flap Prevention feature is enabled.
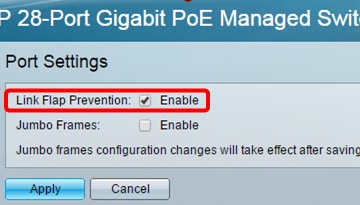
Step 5. Click Apply to save changes to the running configuration file.
Step 6. Click Save to update the startup configuration file.
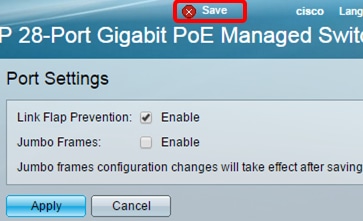
You should now have enabled Link Flap Prevention on your Sx350 Series Managed Switch.
Configure Automatic ErrDisable Recovery Time
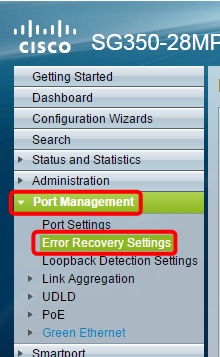
Step 1. To set a recovery time for suspended interface, go to Port Management > Error Recovery Settings.
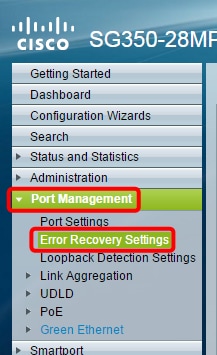
Step 2. (Optional) Enter a value in seconds in the Automatic Recovery Interval field.

Step 3. Under the Automatic ErrDisable Recovery area, check the Enable Link Flap Prevention check box.
Note: Link Flap Prevention is enabled by default for Automatic ErrDisable Recovery.
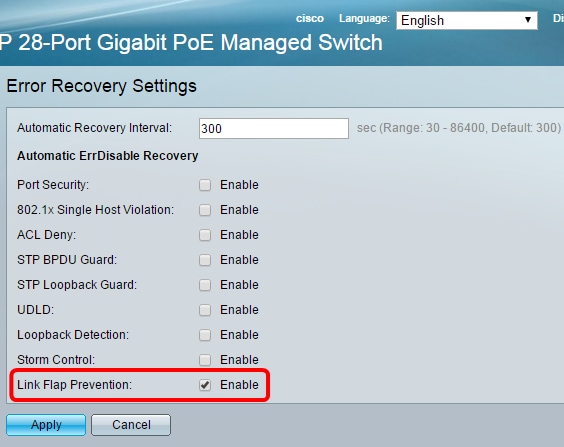
Step 4. Click Apply to save changes to the running configuration file.
Step 5. Click Save to update the startup configuration file.
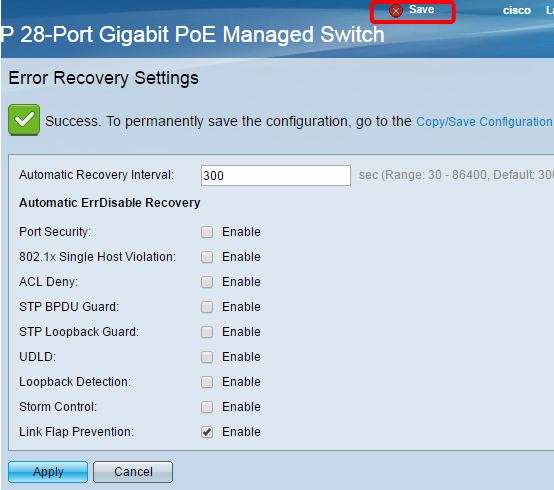
You should now have configured the Automatic ErrDisable Recovery Time settings on your Sx350 Series Managed Switch.
Reactivate a Suspended Interface
Step 1. To check the status of errDisabled or suspended interface, go to Port Management > Error Recovery Settings.
Note: If an interface is suspended due to Link Flap Prevention, the Suspended (errDisabled) Interface Table will show the suspended interfaces.
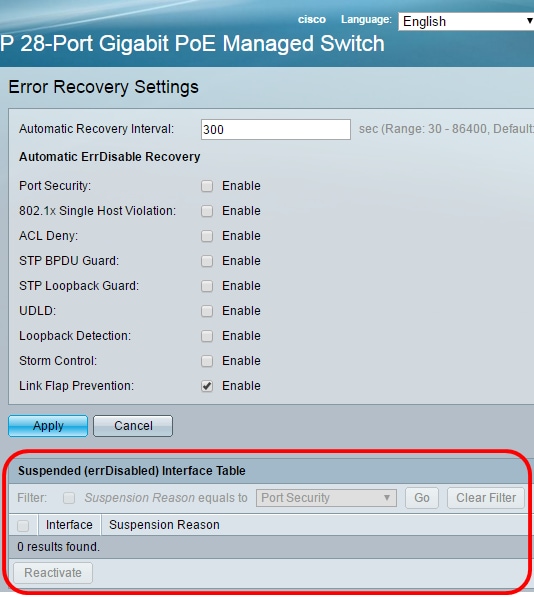
Step 2. Check the check box next to the interface that you want to reactivate.
Step 3. Click the Reactivate button to reactivate a suspended interface.
You should now have reactivated a suspended interface on your Sx250 or Sx350 Series Managed Switch.
Revision History
| Revision | Publish Date | Comments |
|---|---|---|
1.0 |
13-Dec-2018 |
Initial Release |
Contact Cisco
- Open a Support Case

- (Requires a Cisco Service Contract)
 Feedback