IGMP Snooping on the SG350 and SG550
Available Languages
Objective
When a switch receives multicast traffic, it will forward that traffic to all logically connect ports. By doing this, hosts could receive multicast traffic that they were not prepared to process, causing unnecessary delays. Enabling IGMP (Internet Group Management Protocol) snooping lets a switch listen to IGMP messages to determine which hosts are members of multicast groups, allowing that multicast traffic to only be forwarded to those hosts. This prevents hosts that are not members of a multicast group from receiving unwanted traffic.
Note: The steps in this document are performed under the Advanced Display Mode. To change the advance Display Mode, go to the top right corner and select Advanced in the Display Mode drop-down list.
The objective of this document is to show you how to enable IGMP snooping on the SG350 and SG550.
Applicable Devices
- SG350
- SG550
Software Version
- v2.0.0.73
Enabling IGMP Snooping
Step 1. Log in to the web configuration utility and choose Multicast > IPv4 Multicast Configuration > IGMP Snooping. The IGMP Snooping page opens.

Step 2. In the IGMP Snooping Status field, check the Enable checkbox to enable IGMP snooping.
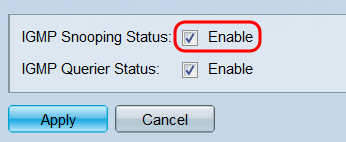
Note: IGMP snooping can only be operational when bridge multicast filtering is enabled. To enable it, click the Bridge Multicast Filtering link at the top of the page.
Step 3. In the IGMP Querier Status field, check the Enable checkbox to have the switch act as an IGMP querier. When enabled, the switch will periodically send out IGMP membership queries so it can update its membership tables.
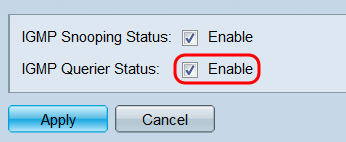
Step 4. Click Apply. The settings are saved.
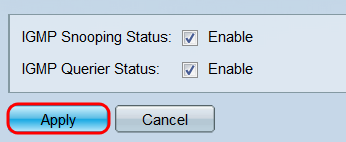
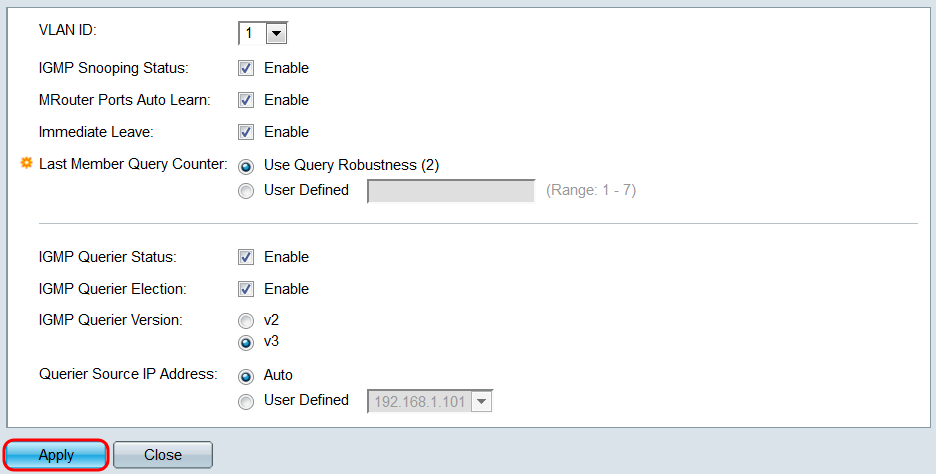
Step 5. The IGMP Snooping Table displays all of the VLANs currently configured on the switch, as well as their IGMP settings. To change the IGMP settings of a VLAN, select its radio button and click the Edit button. The Edit IGMP Snooping Settings window opens.

Step 6. In the VLAN ID field, use the drop-down list to select a VLAN to configure. This field should automatically show the VLAN you selected in the IGMP Snooping Table, and can be used to quickly switch between VLANs to configure without returning to the IGMP Snooping page.
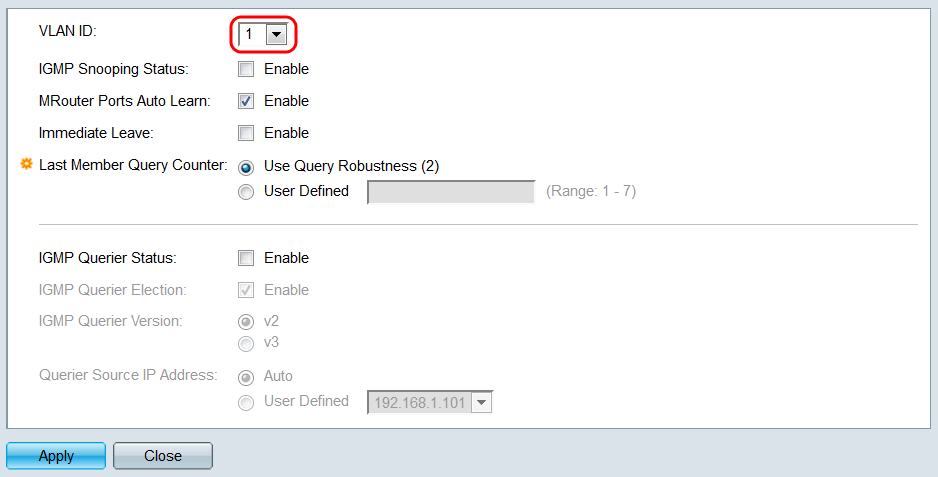
Note: You must have already added and configured VLANS under VLAN Management > VLAN settings to view additional VLANS in the drop down menu.
Step 7. In the IGMP Snooping Status field, check the Enable checkbox to enable IGMP snooping on the specified VLAN.

Step 8. In the MRouter Ports Auto Learn, check the Enable checkbox to have the VLAN detect which of its ports is connected to the multicast router.

Step 9. In the Immediate Leave field, check the Enable checkbox to have the switch remove interfaces from the forwarding table if they send a leave message. After relaying IGMP messages to the multicast router, the switch will periodically remove entries from the membership table if it does not receive reports from multicast clients. This options reduces the time it takes to block unnecessary IGMP traffic sent to hosts.

Step 10. In the Last Member Query Counter field, select a radio button to determine the number of IGMP group-specific queries sent before the switch assumes there are no more members for the group, if the switch is the elected querier.

The options are:
- Use Query Robustness (2) - Send two messages before assuming there are no more members for the group. This option is the default.
- User Defined - Enter the number of messages the switch should send in the text field. The range is 1 - 7.
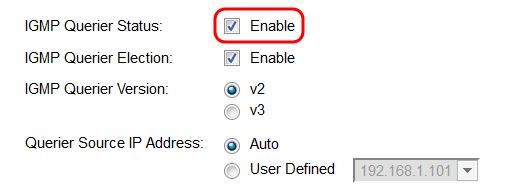
Step 11. In the IGMP Querier Status field, check the Enable checkbox to have the switch be the IGMP querier. Normally the multicast router will take over this function, but if there is no multicast router on the VLAN this feature is required. If you do not enable this feature, skip to Step 15.
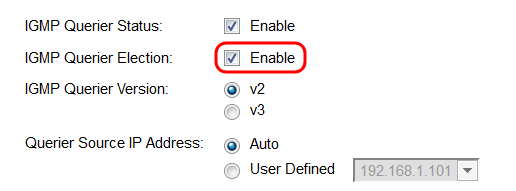
Step 12. In the IGMP Querier Election field, check the Enable checkbox to have the switch support the standard IGMP querier election process. If disabled, the switch will wait for 60 seconds before sending query messages, and will stop if it detects another querier.
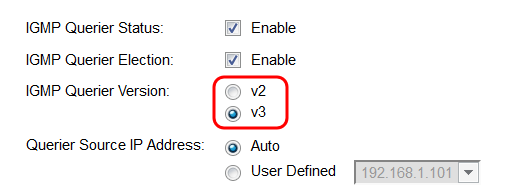
Step 13. In the IGMP Querier Version field, select a radio button to choose which version of IGMP the switch will use if it becomes the elected querier. Choose version 3 (v3) if there are switches and/or multicast routers in the VLAN that perform source-specific IP multicast forwarding. Otherwise, select version 2 (v2).
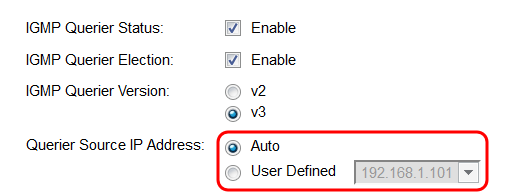
Step 14. In the Querier Source IP Address field, choose a radio button to determine what switch source address will be used in messages sent. Choose Auto to have the source address be determined automatically, or User Defined to choose and address from the drop-down list.
Step 15. Click Apply. The settings are applied to the VLAN specified. You can choose another VLAN to configure by selecting its ID in the VLAN ID field, or click Close to return to the IGMP Snooping page.
Step 16. To quickly copy a VLAN's settings, select the radio button of the VLAN you want to copy and click the Copy Settings button. The Copy Settings window opens.

Step 17. In the text field, enter the VLAN(s) or range of VLANs that you want to copy settings to. Click Apply to copy the settings.

 Feedback