Configure a VLAN on a Switch
Available Languages
Objective
Virtual Local Area Network (VLAN) creation allows you to make separate broadcast domains on a switch. The
broadcast domains can associate with one another with the help of a Layer 3 device such as a router. A VLAN
is
mainly used to form groups among the hosts regardless of where the hosts are physically located. Thus, a VLAN
improves security with the help of group formation among the hosts. When a VLAN is created, it has no effect
until that VLAN is attached to at least one port either manually or dynamically. One of the most common reasons to
set up a VLAN is to set up a separate VLAN for voice, and a separate VLAN for data. This directs the packets for
both types of data despite using the same network.
This article aims to show how to create, edit, or delete a VLAN.
Applicable Devices | Firmware Version
- Sx200 Series | V 1.4.5.02 (Download latest)
- Sx300 Series | V 1.4.5.02 (Download latest)
- Sx250 Series | V 2.2.0.66 (Download latest)
- Sx350 Series | V 2.2.0.66 (Download latest)
- SG350X Series | V 2.2.0.66 (Download latest)
- Sx500 Series | V 1.4.5.02 (Download latest)
- Sx550X Series | V 2.2.0.66 (Download latest)
VLAN Settings
Create a VLAN
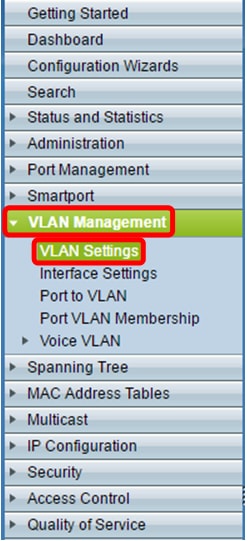
Step 1. Log in to the web-based utility and choose VLAN Management > VLAN Settings.
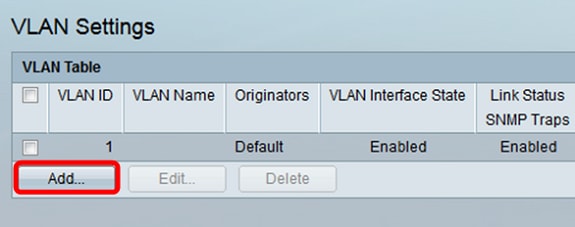
Step 2. Under the VLAN Table area, click Add to create a new VLAN. A window will pop-up.
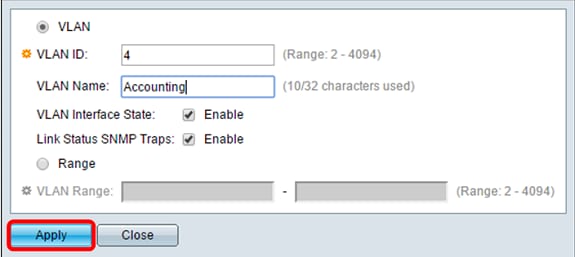
Step 3. VLAN can be added in two different methods as shown by the options below. Choose a radio button that corresponds to the desired method:
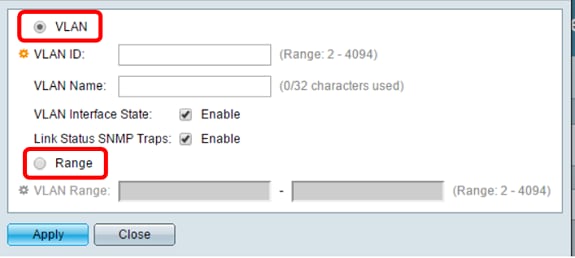
- VLAN — Use this method to create a specific VLAN.
- Range — Use this method to create a range VLANs.
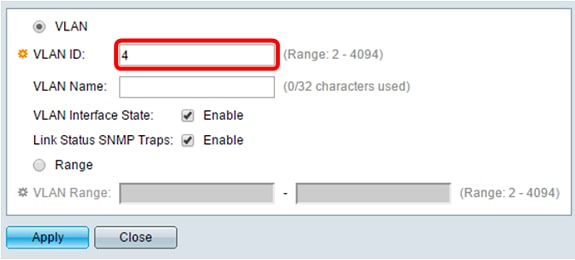
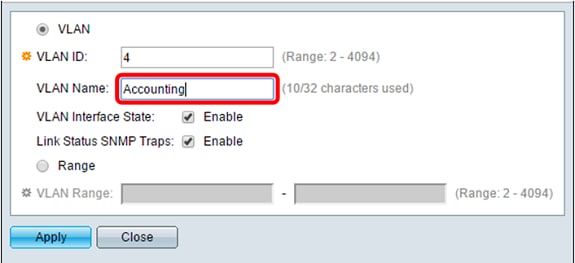
Step 4. If you chose VLAN in Step 3, enter the VLAN ID in the VLAN ID field. The range must be between 2 to 4094. For this example, the VLAN ID will be 4.
Step 5.In the VLAN Name field, enter a name for the VLAN. For this example, the VLAN Name will be Accounting. Up to 32 characters may be used.
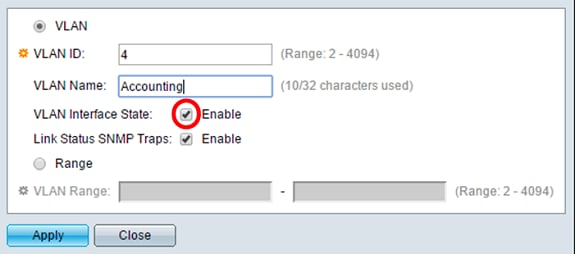
Step 6. Check the VLAN Interface State check box to enable the VLAN interface state; it is already checked by default. If not, the VLAN will be effectively shut down, and nothing will be able to be transmitted or received through the VLAN.
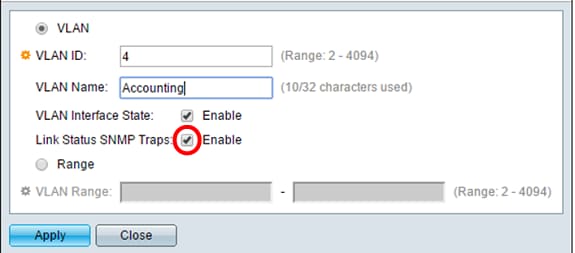
Step 7. Check the Link Status SNMP Traps check box if you want to enable the generation of SNMP traps. This is enabled by default.
Step 8. If you chose Range in Step 3, enter the range of the VLANs in the VLAN Range field. The available range is 2–4094. For this example, the VLAN Range is from 3 to 52.
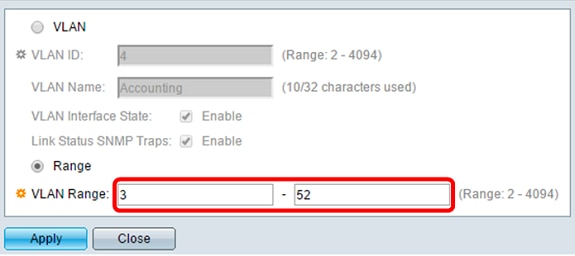
Note: Up to 100 VLANs can be created at a time.
Step 9. Click Apply.
Edit a VLAN
Step 1. Log in to the web-based utility and choose VLAN Management > VLAN Settings. The VLAN Settings page opens.

Step 2. Check the check box next to the VLAN you want to edit.

Step 3. Click Edit to edit the selected VLAN. The Edit VLAN window appears.

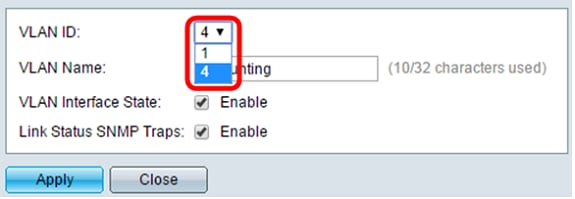
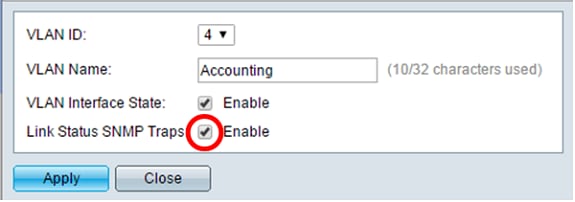
Step 4. The current VLAN can be changed using the VLAN ID drop-down list. This is used to quickly switch between the VLANs you want to configure without returning to the VLAN Settings page.
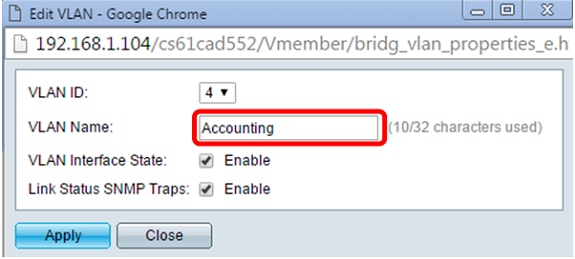
Step 5. Edit the name of the VLAN in the VLAN Name field. This name does not impact the performance of the VLAN, and is used for easy identification.
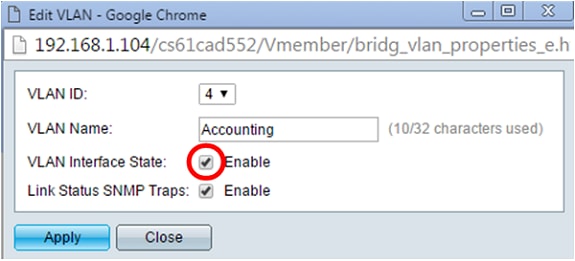
Step 6. Check the VLAN Interface State check box to enable the VLAN’s interface state; it is already checked by default. If not, the VLAN will be effectively shut down, and nothing will be able to be transmitted or received through the VLAN.
Step 7. Check the Enable Link Status SNMP Traps check box to enable the generation of SNMP traps with link status information. This box is checked by default.
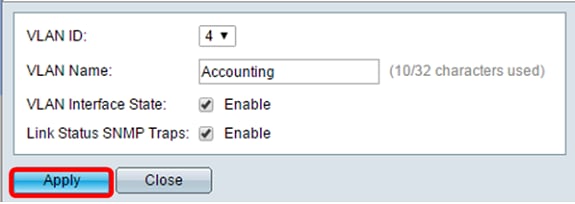
Step 8. Click Apply.
Delete a VLAN
Step 1.Log in to the web-based utility and choose VLAN Management > VLAN Settings.

Step 2. Check the check box next to the VLAN you want to delete.

Step 3. Click Delete to delete the selected VLAN.

You have now successfully deleted a VLAN.
Revision History
| Revision | Publish Date | Comments |
|---|---|---|
1.0 |
13-Dec-2018 |
Initial Release |
 Feedback