Web UI Setup Document
Available Languages
Objective
The objective of this document is to show you how to configure the day zero setup of a Cisco Business Wireless (CBW) Access Point (AP) using the Setup Wizard on your PC running Windows 10.
Applicable Devices | Firmware Version
- 140AC (Data Sheet) | 10.4.1.0 (Download latest)
- 141ACM (Data Sheet) | 10.4.1.0 (Download latest)
- 142ACM (Data Sheet) | 10.4.1.0 (Download latest)
- 143ACM (Data Sheet) | 10.4.1.0 (Download latest)
- 145AC (Data Sheet) | 10.4.1.0 (Download latest)
- 240AC (Data Sheet) | 10.4.1.0 (Download latest)
Supported Browsers
CBW APs are administered through a web user interface. To use this interface, your browser must be one of the following:
- Microsoft Internet Explorer 10 or above
- Apple Safari version 7 or above
- Mozilla Firefox version 33 or above
- Google Chrome version 38 or above
Requirements
- A DHCP Server is required for the day zero setup.
- Only ONE CBW deployment per LAN is feasible. If you need more than one deployment, it is required to isolate the networks.
- All primary-capable APs must be on the same VLAN.
Introduction
If you are looking to set up your Cisco Business wireless device, you have come to the right place! The day zero configuration will guide you through setting up your new, out of the box CBW AP. The CBW APs are 802.11 a/b/g/n/ac (Wave 2) based, with internal antennas. These access points support the latest 802.11ac Wave 2 standard for higher performance, greater access, and higher-density networks. They deliver industry-leading performance with highly secure and reliable wireless connections, for a robust, mobile end-user experience.
These APs can be used as traditional standalone devices or as part of a mesh network. Are you interested in learning more about mesh networking? Read the article on Wireless Mesh Networking to get more details.
If you are ready to configure your CBW AP, let’s get you setup!
Setup Wizard
Beginner Help
This toggled section highlights tips for beginners.
Logging In
Log into the Web User Interface (UI) of the Primary AP. To do this, open a web browser and enter
https://ciscobusiness.cisco. You may receive a warning before proceeding. Enter your
credentials.
You can also access the Primary AP by entering https://
Tool Tips
If you have questions about a field in the user interface, check for a tool tip that looks like the
following: ![]()
Trouble locating the Expand Main Menu icon?
Navigate to the menu on the left-hand side of the screen, if you don’t see the menu button, click
this icon to open the side-bar menu.
Frequently Asked Questions
If you still have unanswered questions, you can check our frequently asked questions document. FAQ
Step 1
To get started, power up the access point. Check the status of the indicator lights. The access point will take about 8 - 10 minutes to boot. The LED will blink green in multiple patterns, alternating rapidly through green, red, and amber before turning green again. There may be small variations in the LED color intensity and hue from unit to unit. When the LED light is blinking green, proceed to the next step.
The PoE Ethernet Uplink Port on the Primary AP can ONLY be used to provide uplink to the LAN, and NOT to connect to any other primary-capable or mesh extender devices.
If you are unfamiliar with the terms used, check out Cisco Business: Glossary of New Terms.
Step 2
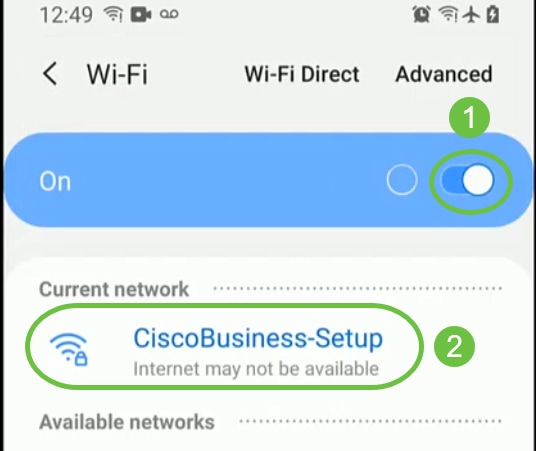
On your PC, click the Wi-Fi icon and choose CiscoBusiness-Setup wireless network. Click Connect.
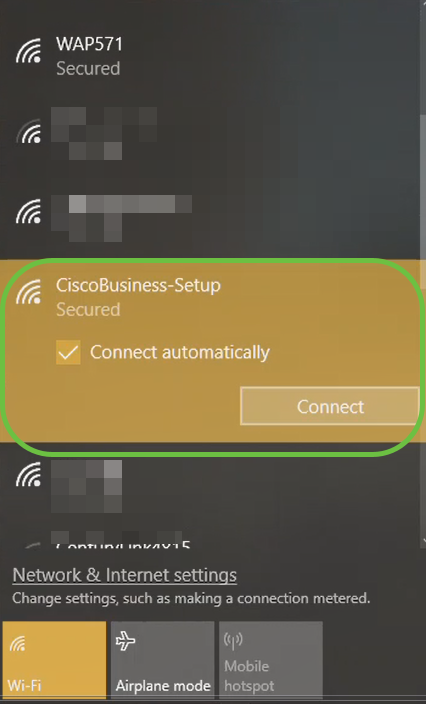
If your access point isn’t new, out of the box, make sure it is reset to factory default settings for the CiscoBusiness-Setup SSID to show up in your Wi-Fi options.
Step 3
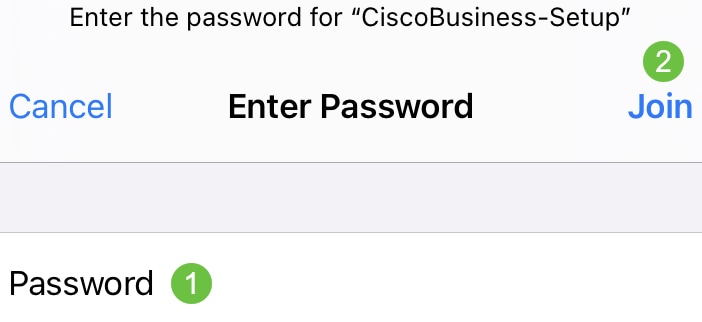
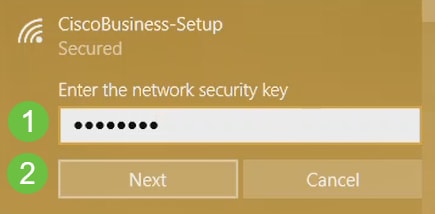
Enter the passphrase cisco123 and click Next.
Step 4
You will get the following screen. As you can configure only one device at a time, Click No.
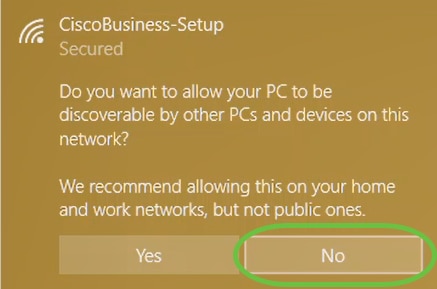
Only one device can be connected to the CiscoBusiness-Setup ssid. If a second device attempts to connect, it will not be able to. If you are unable to connect to the SSID and have validated the password, some other device may have made the connection. Restart the AP and try again.
Step 5
Once connected, the web browser should auto-redirect to the CBW AP setup wizard. If not, open a web browser, such as Internet Explorer, Firefox, Chrome or Safari. In the address bar, type http://ciscobusiness.cisco and press Enter. Click Start on the webpage.
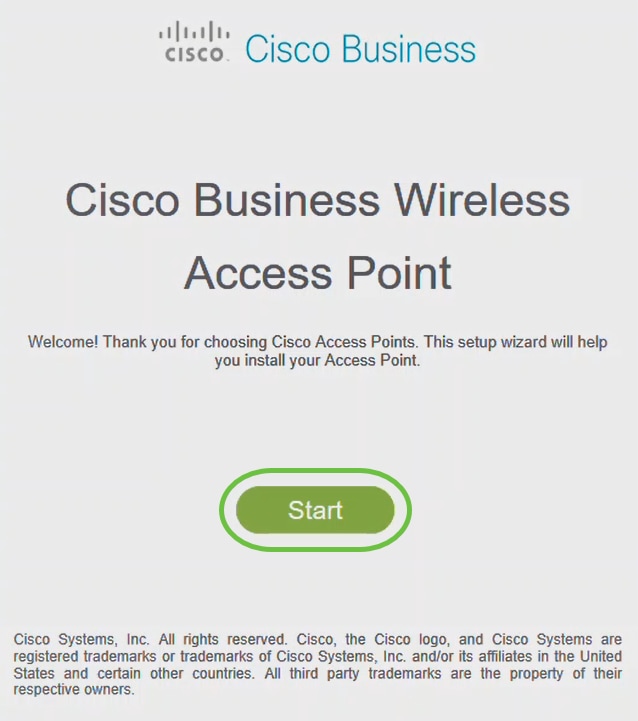
If you do not see the webpage, wait for a few more minutes or reload the page. After this initial setup, you will use https://ciscobusiness.cisco to log in. If your web browser auto-populates with http://, you need to manually type in the https:// to gain access.
Step 6
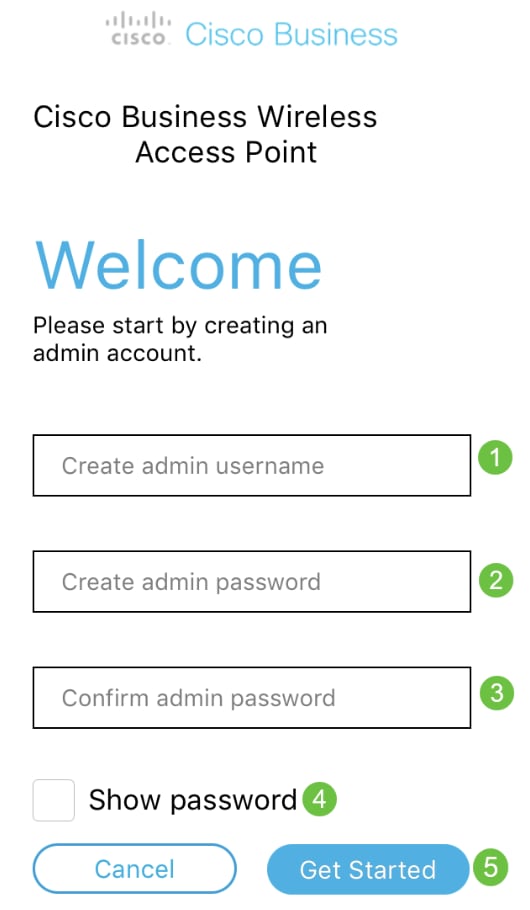
Create an admin account by entering the following:
- Admin username (Maximum of 24 characters)
- Admin password
- Confirm admin password
You can choose to show the password by checking the checkbox next to Show Password. Click Start.
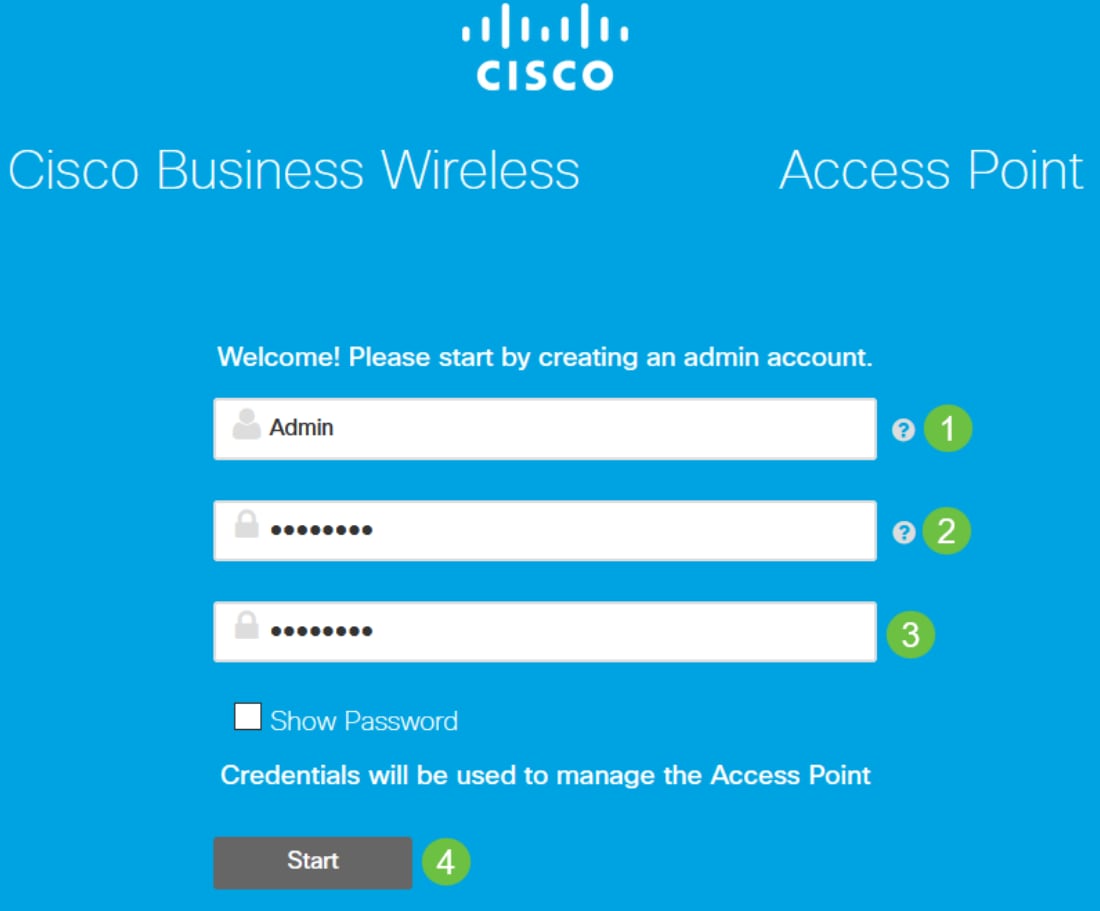
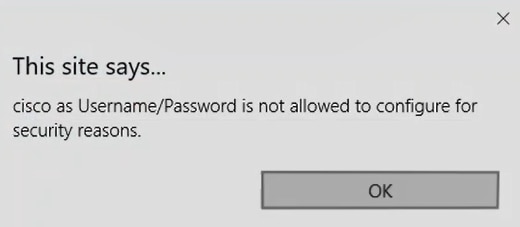
Do not use “cisco” or variations of it in the username or password fields. If you do, you will get an error message as shown below.
Step 7
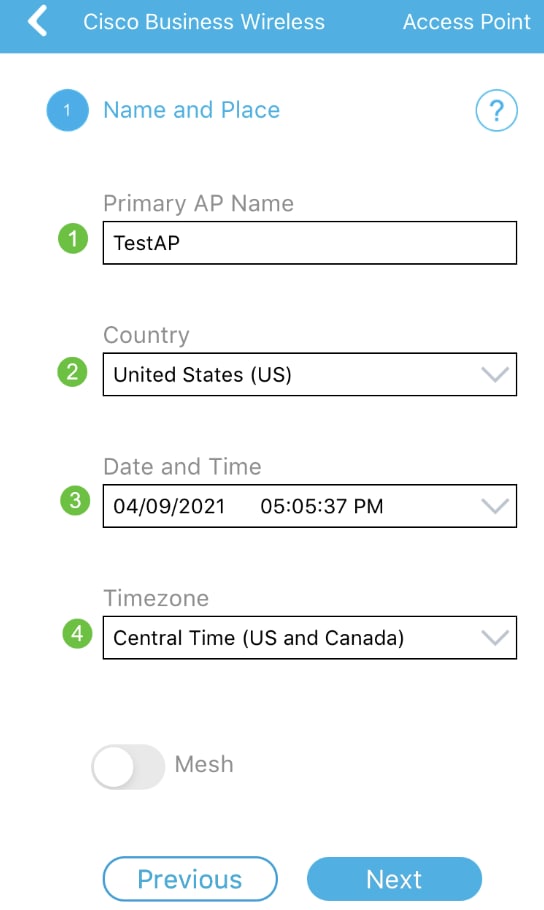
Set Up Your Primary AP by entering the following:
- Primary AP Name
- Country
- Date & Time
- Timezone
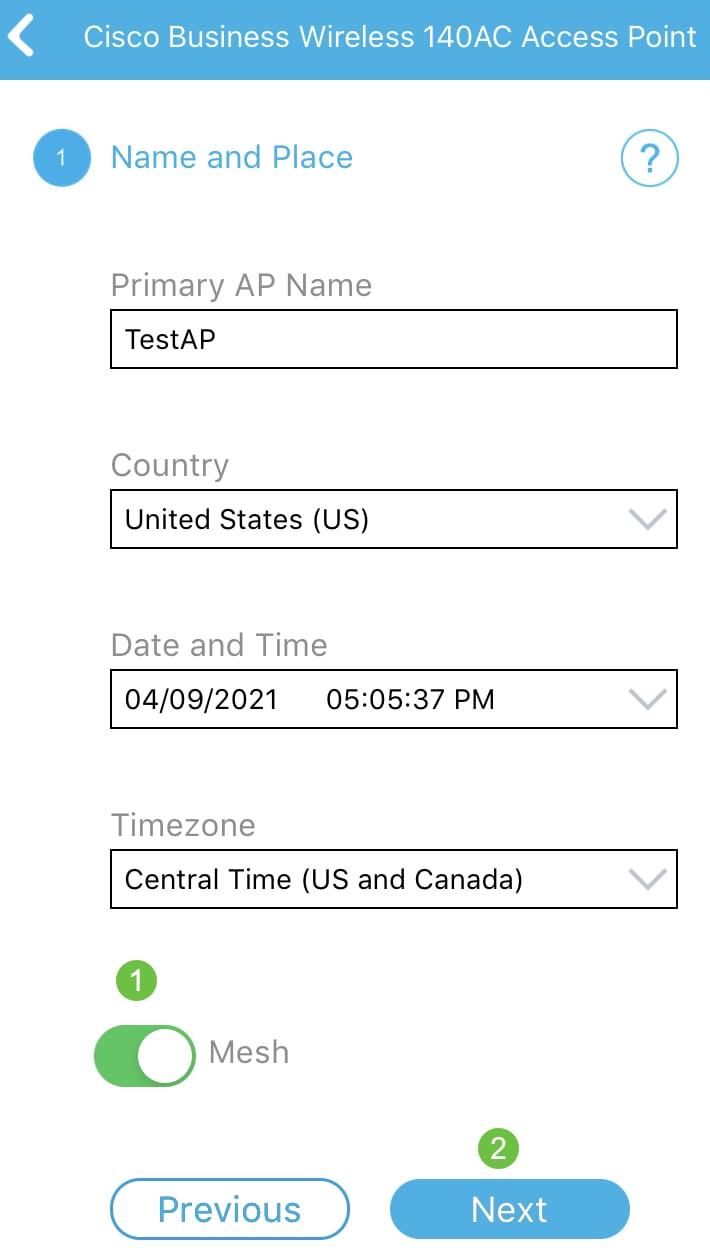
- (Optional) Mesh
Click Next.
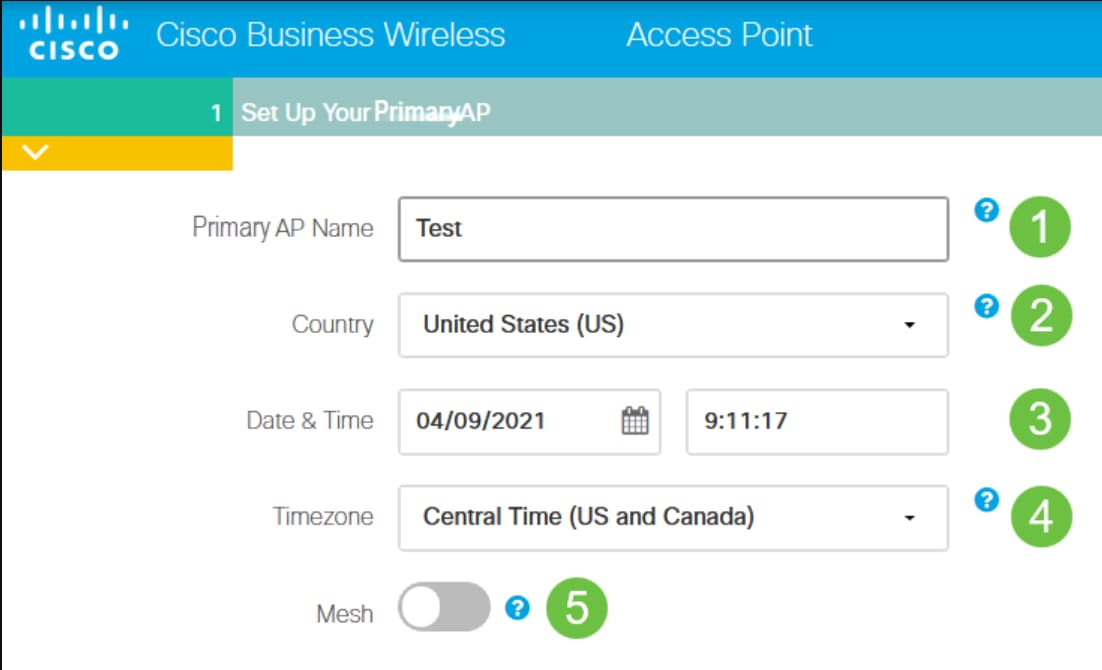
Mesh should be enabled only if you plan to create a mesh network. By default, it is disabled.
Step 8
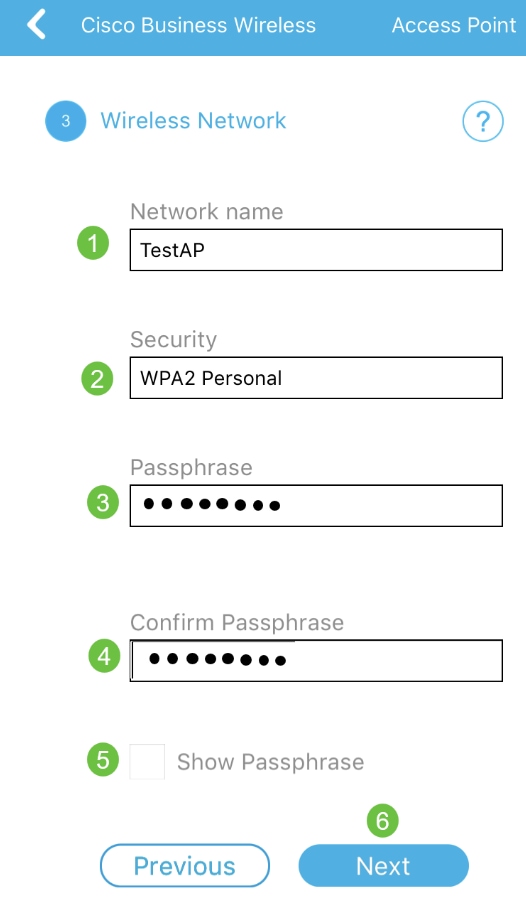
Create Your Wireless Networks by entering the following:
- Network Name
- Choose Security
- Passphrase
- Confirm Passphrase
- (Optional) Check the checkbox to Show Passphrase.
Click Next.
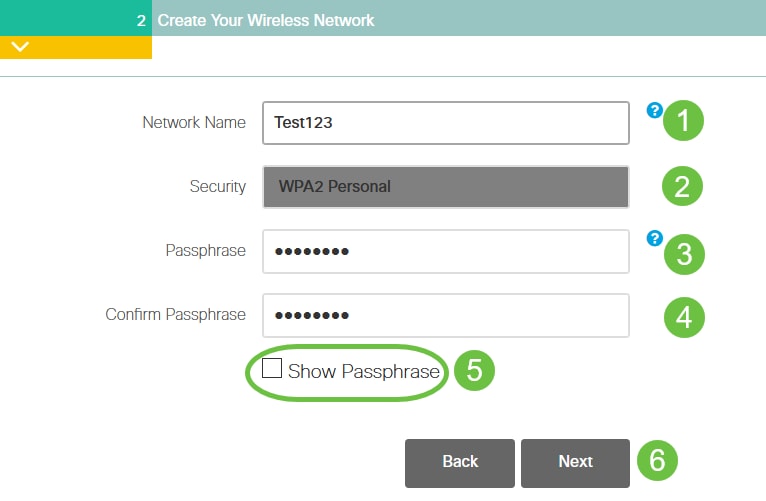
Wi-Fi protected Access (WPA) version 2 (WPA2), is the current standard for Wi-Fi security.
Step 9
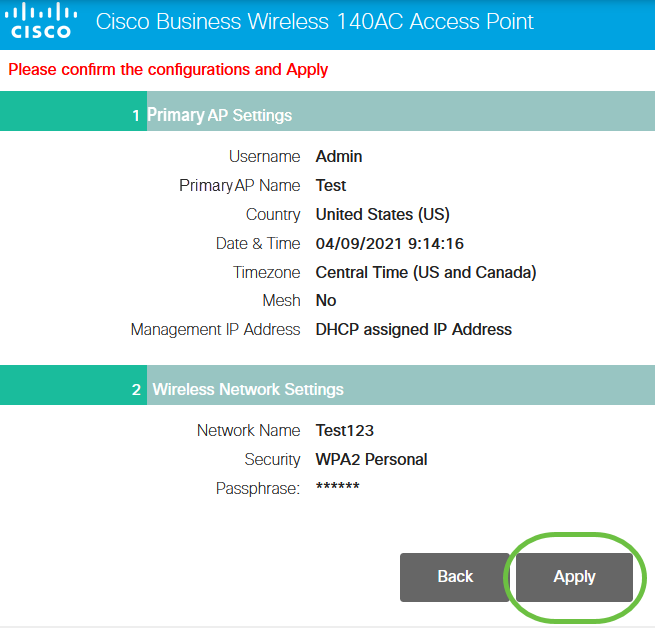
Confirm the settings and click Apply.
Step 10
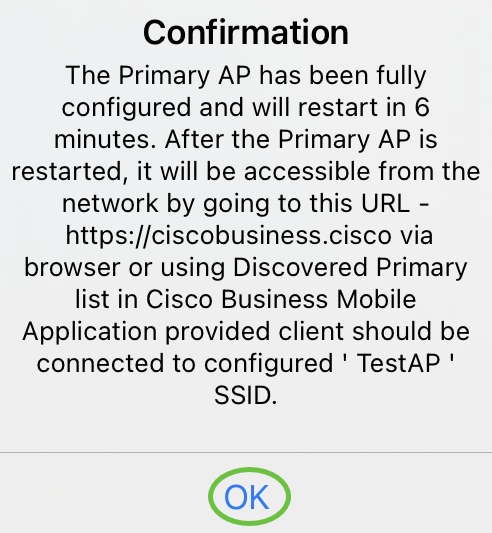
Click OK to apply the settings.

You will see the following screen while the configurations are being saved and the system reboots. This might take 5 - 6 minutes.
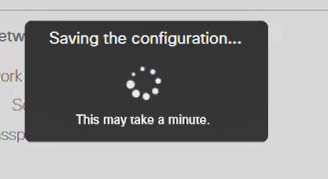
During reboot, the LED in the access point will go through multiple color patterns. When the LED is blinking green, proceed to the next step. If the LED does not get past red flashing pattern, it indicates that there is no DHCP server in your network. Make sure a DHCP server is present to provide IP addresses for CBW devices during the initial installation process. Ensure that the AP is connected to a switch or a router with a DHCP server.
Step 11
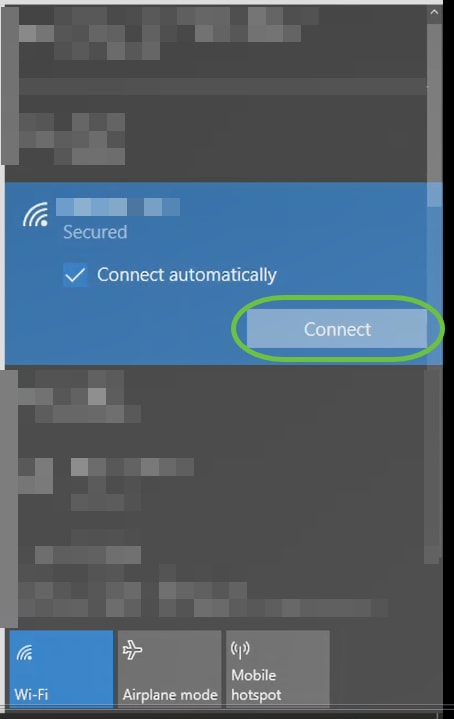
Go to the wireless options on your PC and choose the network that you configured. Click Connect.
In this example, the network is CBWWlan. The CiscoBusiness-Setup SSID will disappear after reboot.
Step 12
Open a web-browser and type in https:://[IP address of the CBW AP]. Alternatively you can type https://ciscobusiness.cisco in the address bar and press enter. Ensure that you type https and not http at this step.
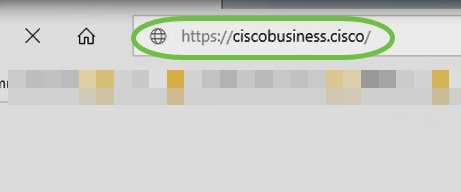
If you are using a wired connection after the initial setup, make sure to use https:://[IP address of the CBW AP] and not https://ciscobusiness.cisco. The latter will only work in a wireless setting.
Step 13
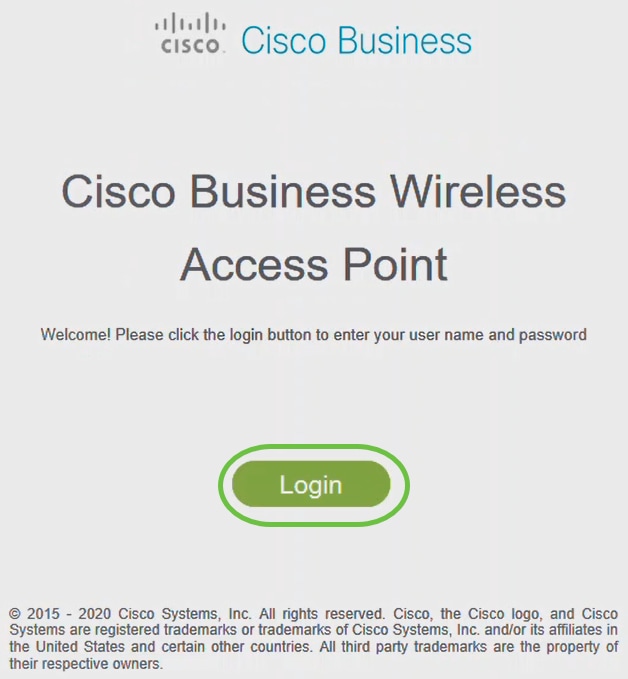
Click Login.
Step 14
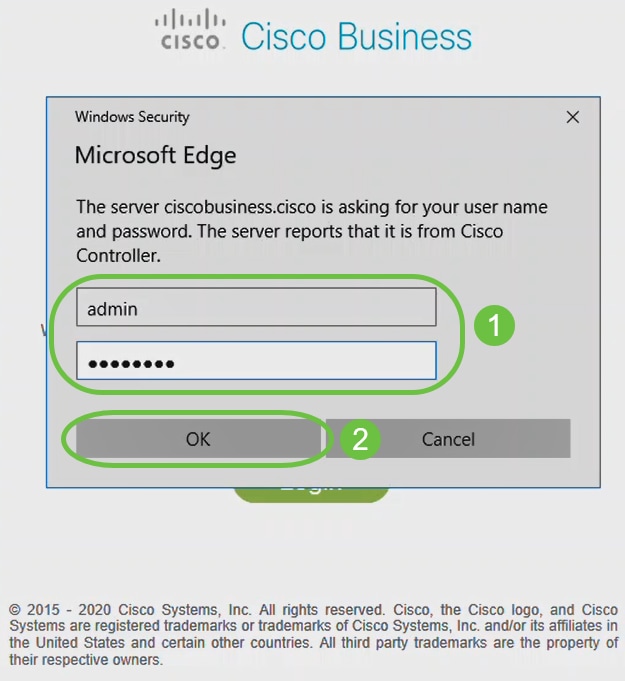
Log in using the credentials that were configured. Click OK.
Step 15
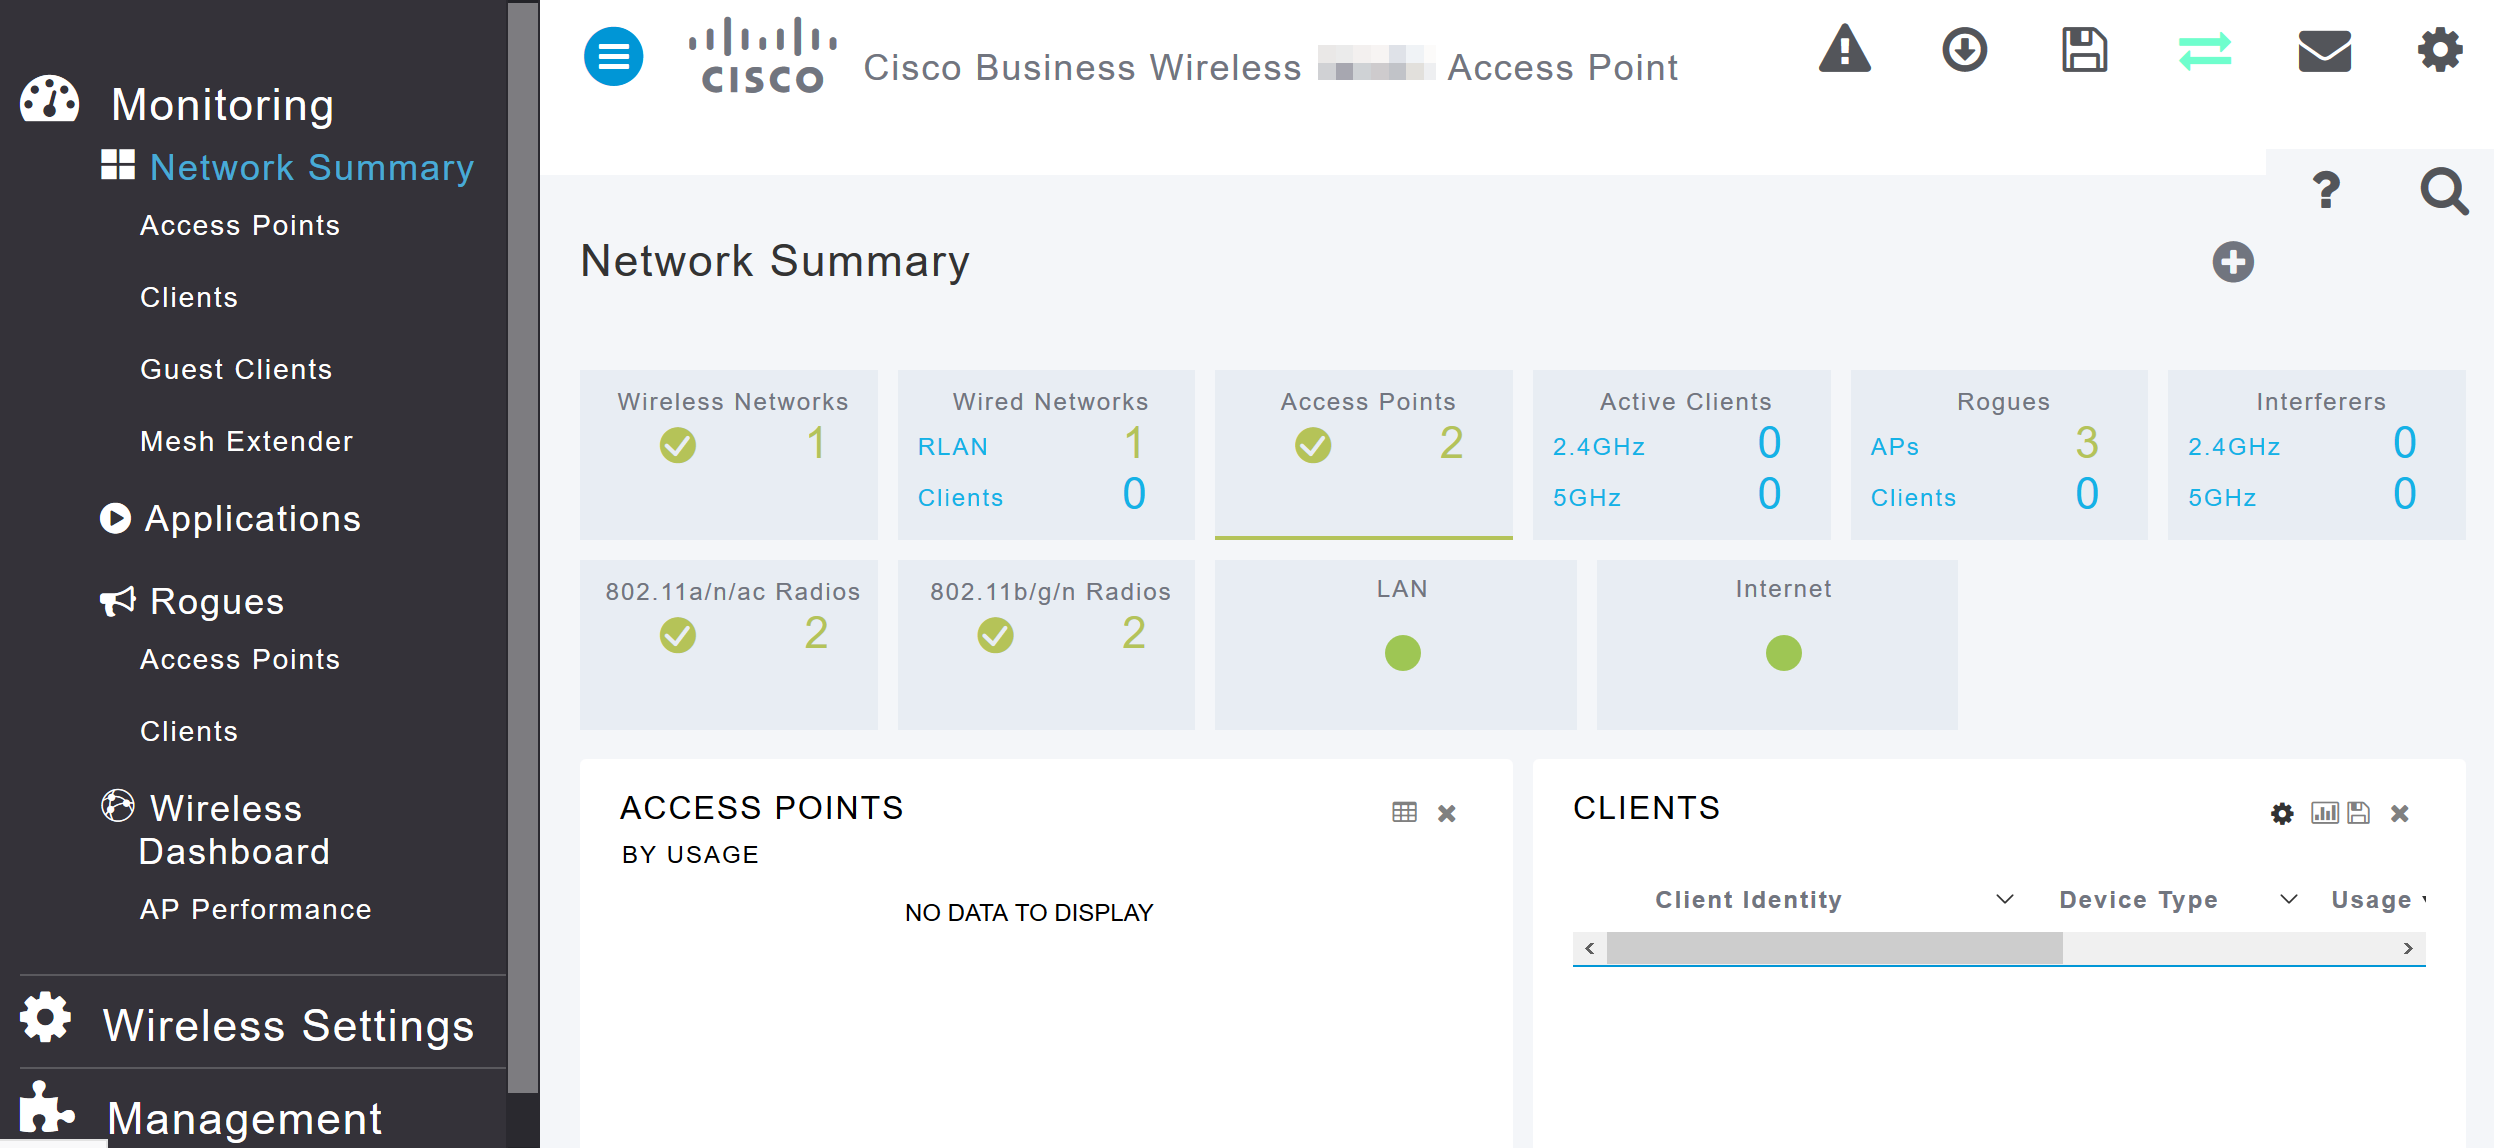
You will be able to access the web-configuration page of the AP.
If you have any issues, check out the following tips:
- Make sure the correct Service Set Identifier (SSID) is selected. This is the name that you created for the wireless network.
- Disconnect any VPN for either the mobile app or on a laptop. You might even be connected to a VPN that your mobile service provider uses that you might not even know. For example, an Android (Pixel 3) phone with Google Fi as a service provider there is a built-in VPN that auto-connects without notification. This would need to be disabled to find the Primary AP.
- Log into the Primary AP with https://<IP address of the Primary AP>.
- Once you do initial setup, be sure https:// is being used whether you are logging into ciscobusiness.cisco or by entering the IP address into your web browser. Depending on your settings, your computer may have auto-populated with http:// since that is what you used the very first time you logged in.
- To help with problems related to accessing the web UI or browser issues during the use of the AP, in the web browser (Firefox in this case) click on Open menu, go to Help > Troubleshooting Information and click on Refresh Firefox.
Conclusion
There you have it! You have now successfully configured the day zero setup of your CBW AP. Enjoy the benefits of adding a reliable and secure device to your network! For more advanced configurations, refer to the Cisco Business Wireless Access Point Administration Guide.
