RF Optimization
Available Languages
Objective
This article reviews the basic features of RF Optimization, via the web on Cisco Business Wireless 100 & 200 Series access points.
If you are unfamiliar with terms in this document, check out Cisco Business: Glossary of New Terms.
Applicable Devices | Firmware Version
- 140AC (Data Sheet) | 10.4.1.0 (Download latest)
- 145AC (Data Sheet) | 10.4.1.0 (Download latest)
- 240AC (Data Sheet) | 10.4.1.0 (Download latest)
Why would I use RF Optimization?
As a shared medium, wireless signal may be competing to broadcast. Broader technology trends see the density of clients continuing to increase dramatically. The Cisco Business Wireless series of products includes a feature that manages this complexity for you.
Getting to Primary AP Tools
Beginner Help
This toggled section highlights tips for beginners.
Logging In
Log into the Web User Interface (UI) of the Primary AP. To do this, open a web browser and enter https://ciscobusiness.cisco.com You may receive a warning before proceeding. Enter your credentials.You can also access the Primary AP by entering https://[ipaddress] (of the Primary AP) into a web browser.
Tool Tips
If you have questions about a field in the user interface, check for a tool tip that looks like the
following: ![]()
Trouble locating the Expand Main Menu icon?
Navigate to the menu on the left-hand side of the screen, if you don’t see the menu button, click
this icon to open the side-bar menu.
Cisco Business App
These devices have companion apps that share some management features with the web user interface. Not all features in the Web user interface will be available in the App.
Frequently Asked Questions
If you still have unanswered questions, you can check our frequently asked questions document. FAQ
Step 1
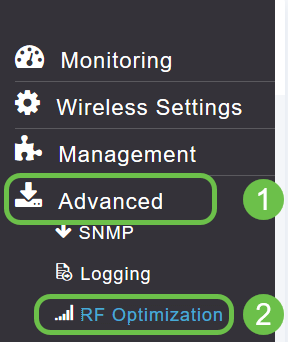
Click Advanced > RF Optimization.
Step 2
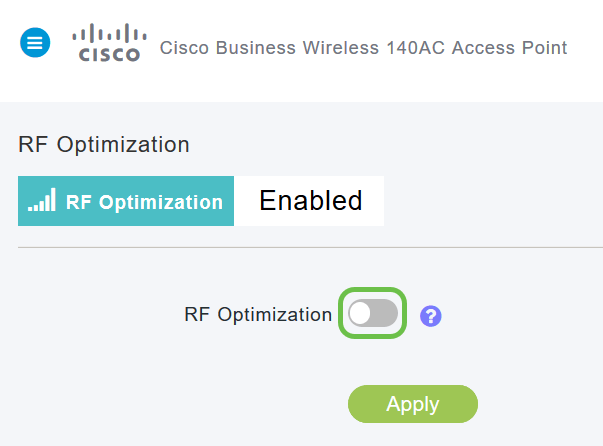
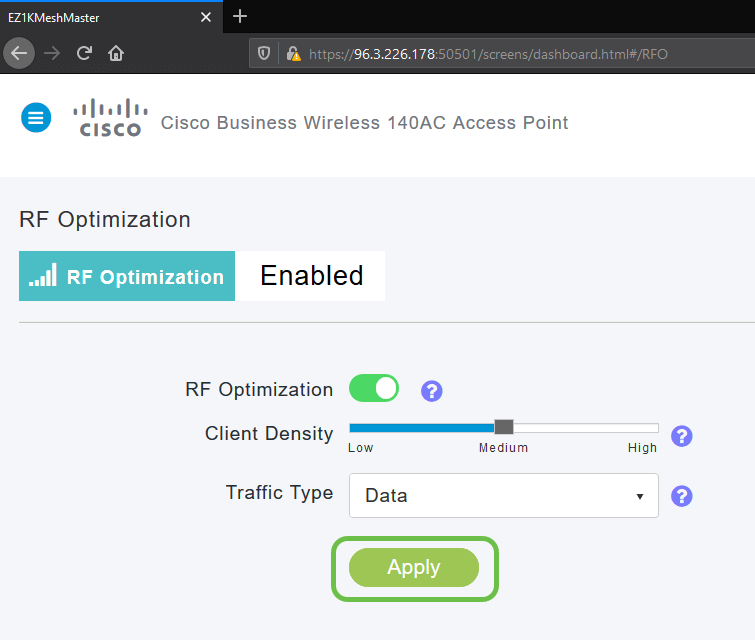
If RF Optimization is not already enabled, click the toggle button to activate RF Optimization.
Step 3
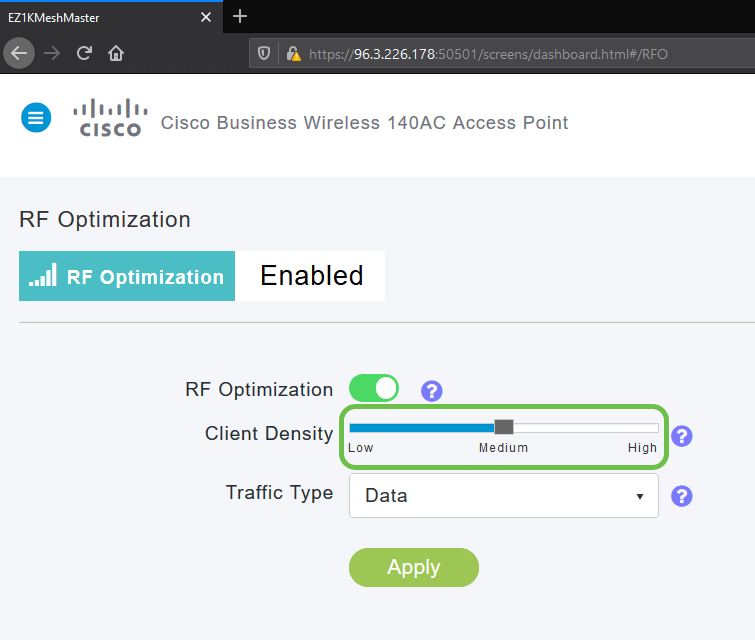
Once enabled the RF Optimization options become available. Client Density manages the signal to serve one of three settings:
-
Low – lesser number of devices expected to connect to the WLAN
-
Medium
-
High – More devices are expected to connect to the WLAN
Set the slider to your expected environment for device density.
Step4
Now you will decide which Traffic Type to apply RF Optimization. There are two options:
- Data
- Data and Voice
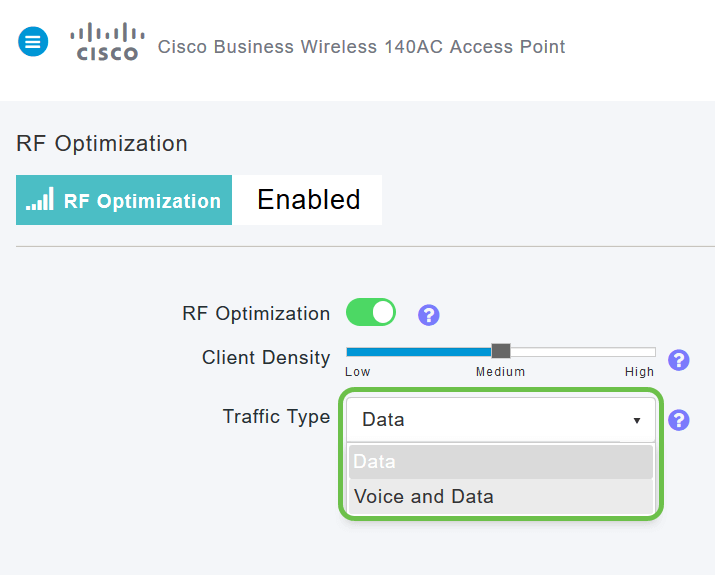
Data and Voice Traffic Type available on Client Density Medium & High. With lower client density, Voice stability is less of a concern.
Click the drop-down box and select your choice based on your WLAN’s needs. We’ve selected Data.
Step 5
Click the Apply button.
Conclusion
There you have it. RF Optimization analyses your WLANs so you can kick back and relax. If you’re still in the mood for some reading, check out our other configuration articles.