Configure RADIUS in Cisco Business Wireless Access Point
Available Languages
Objective
The objective of this document is to show you how to configure RADIUS in Cisco Business Wireless (CBW) Access Point (AP).
Applicable Devices | Firmware Version
- 140AC (Data Sheet) | 10.4.1.0 (Download latest)
- 145AC (Data Sheet) | 10.4.1.0 (Download latest)
- 240AC (Data Sheet) | 10.4.1.0 (Download latest)
Introduction
If you are looking to configure RADIUS in your CBW AP, you have come to the right place! The CBW APs support the latest 802.11ac Wave 2 standard for higher performance, greater access, and higher-density networks. They deliver industry-leading performance with highly secure and reliable wireless connections, for a robust, mobile end-user experience.
Remote Authentication Dial-In User Service (RADIUS) is an authentication mechanism for devices to connect and use a network service. It is used for centralized authentication, authorization, and accounting purposes. A RADIUS server regulates access to the network by verifying the identity of the users through the login credentials entered. For example, a public Wi-Fi network is installed in a university campus. Only those students who have the password can access these networks. The RADIUS server checks the passwords entered by the users and grants or denies access to the Wireless Local Area Network (WLAN) as appropriate.
If you are ready to configure RADIUS on your CBW AP, let’s get started!
Table of Contents
Configure RADIUS on your CBW AP
Beginner Help
This toggled section highlights tips for beginners.
Logging In
Log into the Web User Interface (UI) of the Primary AP. To do this, open a web browser and enter https://ciscobusiness.cisco. You may receive a warning before proceeding. Enter your credentials.You can also access the Primary AP by entering https://[ipaddress] (of the Primary AP) into a web browser.
Tool Tips
If you have questions about a field in the user interface, check for a tool tip that looks like the
following: ![]()
Trouble locating the Expand Main Menu icon?
Navigate to the menu on the left-hand side of the screen, if you don’t see the menu button, click
this icon to open the side-bar menu.
Cisco Business App
These devices have companion apps that share some management features with the web user interface. Not all features in the Web user interface will be available in the App.
Frequently Asked Questions
If you still have unanswered questions, you can check our frequently asked questions document. FAQ
Step 1
Login to your CBW AP using a valid username and password.
Step 2
Click on the bidirectional arrow symbol at the top of the web user-interface (UI) to Switch to Expert View.

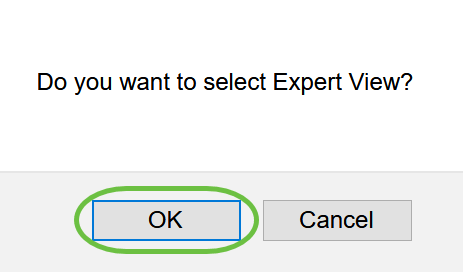
You will see the following pop-up screen. Click OK to proceed.
Step 3
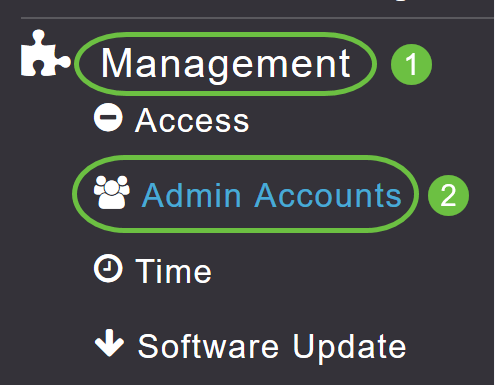
Navigate to Management > Admin Accounts.
Step 4
To add the RADIUS servers, click on the RADIUS tab.

Step 5
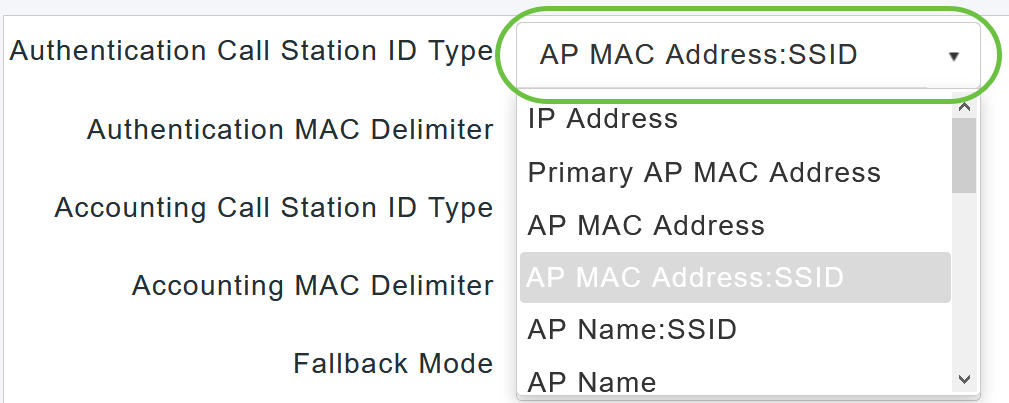
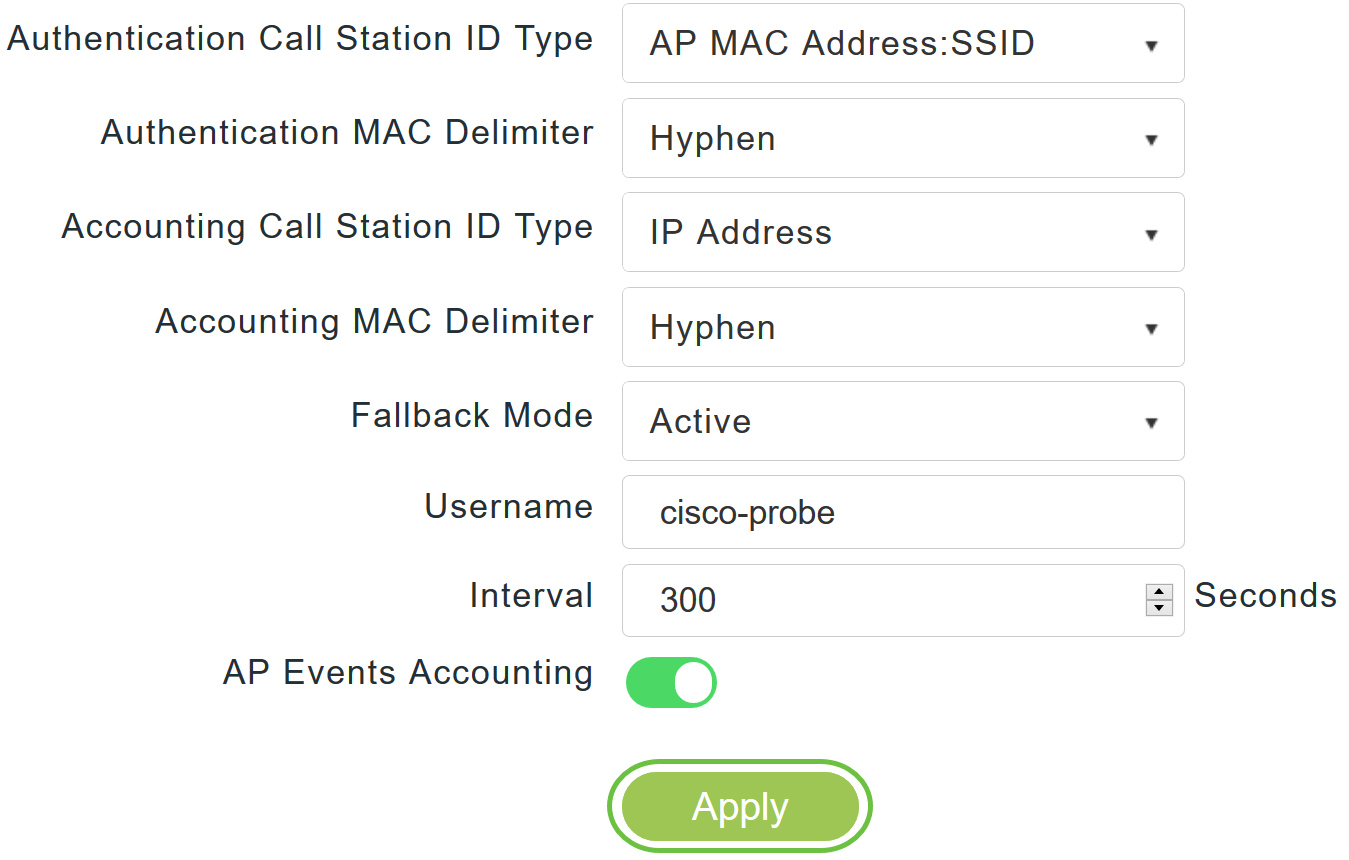
From the Authentication Call Station ID Type drop-down list, choose the option that is sent to the RADIUS server in the Access-Request message. The following options are available:
- IP Address
- Primary AP MAC Address
- AP MAC Address
- AP MAC Address:SSID
- AP Name:SSID
- AP Name
- AP Group
- Flex Group
- AP Location
- VLAN ID
- AP Ethernet MAC Address
- AP Ethernet MAC Address:SSID
- AP Label Address
- AP Label Address:SSID
- AP MAC:SSID AP Group
- AP Eth MAC:SSID AP Group
Step 6
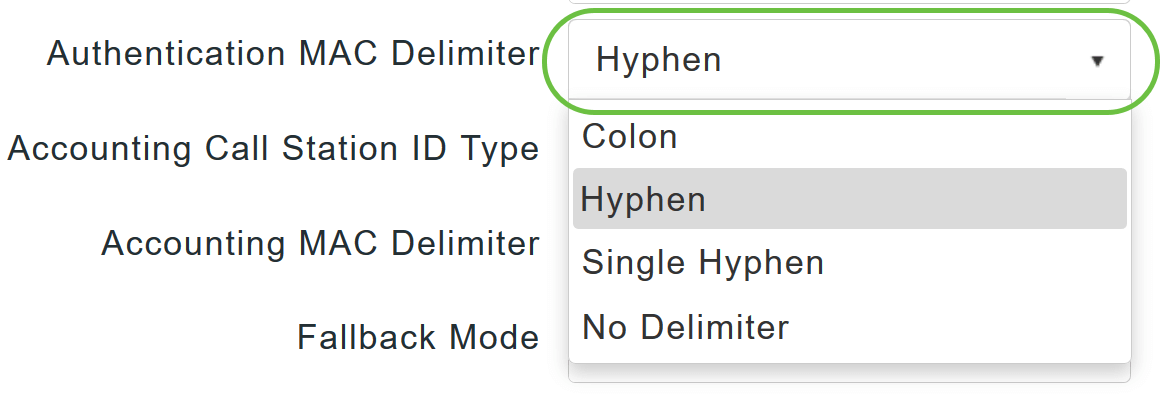
Select the Authentication MAC Delimiter from the drop- down list. The options are:
- Colon
- Hyphen
- Single-hyphen
- No Delimiter
Step 7
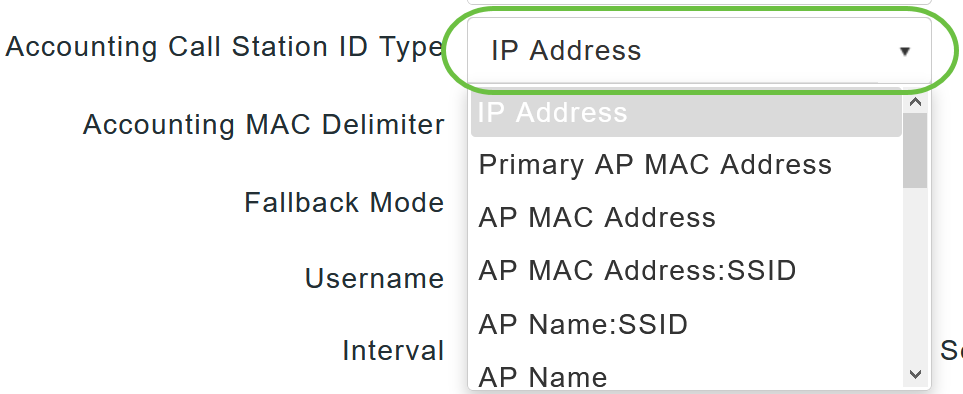
Choose the Accounting Call Station ID Type from the drop-down list.
Step 8
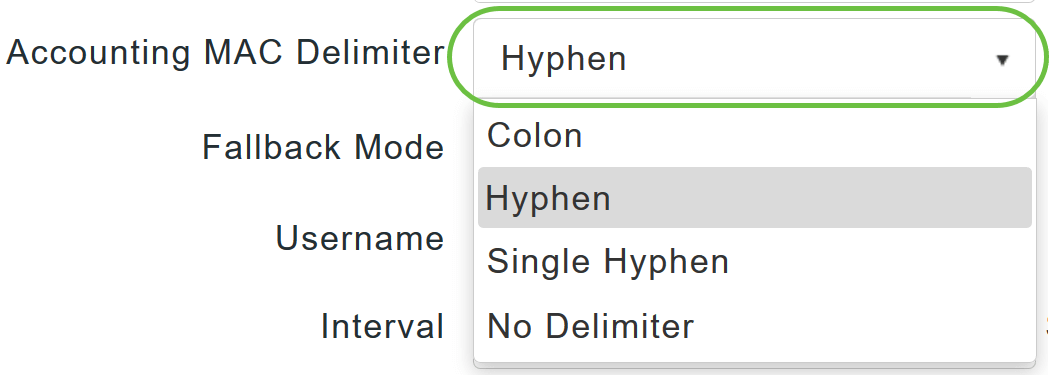
Choose the Accounting MAC Delimiter from the drop-down list.
Step 9
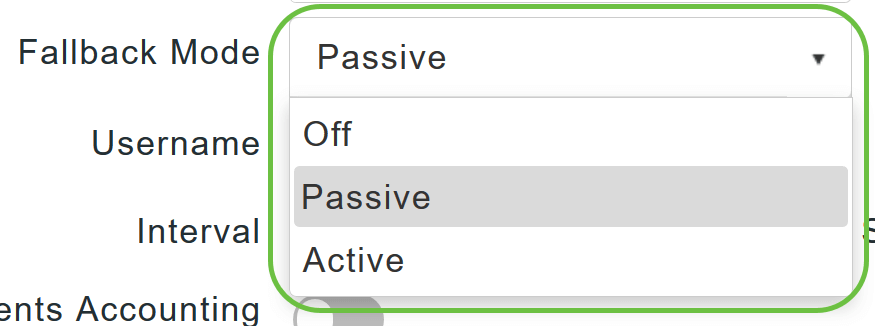
Specify the RADIUS server Fallback Mode from the drop-down list. It can be one of the following:
- Off - Disables RADIUS server fallback. This is the default value.
- Passive - Causes the primary AP to revert to a server with a lower priority from the available backup servers without using extraneous probe messages. The primary AP ignores all inactive servers for a time period and retries later when a RADIUS message needs to be sent.
- Active – Causes the primary AP to revert to a server with a lower priority from the available backup servers by using RADIUS probe messages to proactively determine whether a server that has been marked inactive is back online. The primary AP ignores all inactive servers for all active RADIUS requests. Once the primary server receives a response from the recovered ACS server, the active fall back RADIUS server no longer sends probe messages to the server requesting the active probe authentication.
Step 10
If you enabled Active Fallback mode, enter the name to be sent in the inactive server probes in the Username field.

You can enter up to 16 alpha numeric characters. The default value is cisco-probe.
Step 11
If you enabled Active Fallback mode, enter the probe interval value (in seconds) in the Interval field. The interval serves as inactive time in passive mode and probe interval in active mode.

The valid range is 180 to 3600 seconds, and the default value is 300 seconds.
Step 12
Enable the AP Events Accounting slider button to activate sending of accounting requests to RADIUS server.
During network issues, the APs join/disjoin from the primary AP. Enabling this option ensures that these events are monitored and the accounting requests are sent to the RADIUS server to help you detect the network issues.

Step 13
Click Apply.
Step 14
To configure the RADIUS Authentication server, click on Add RADIUS Authentication Server.

Step 15
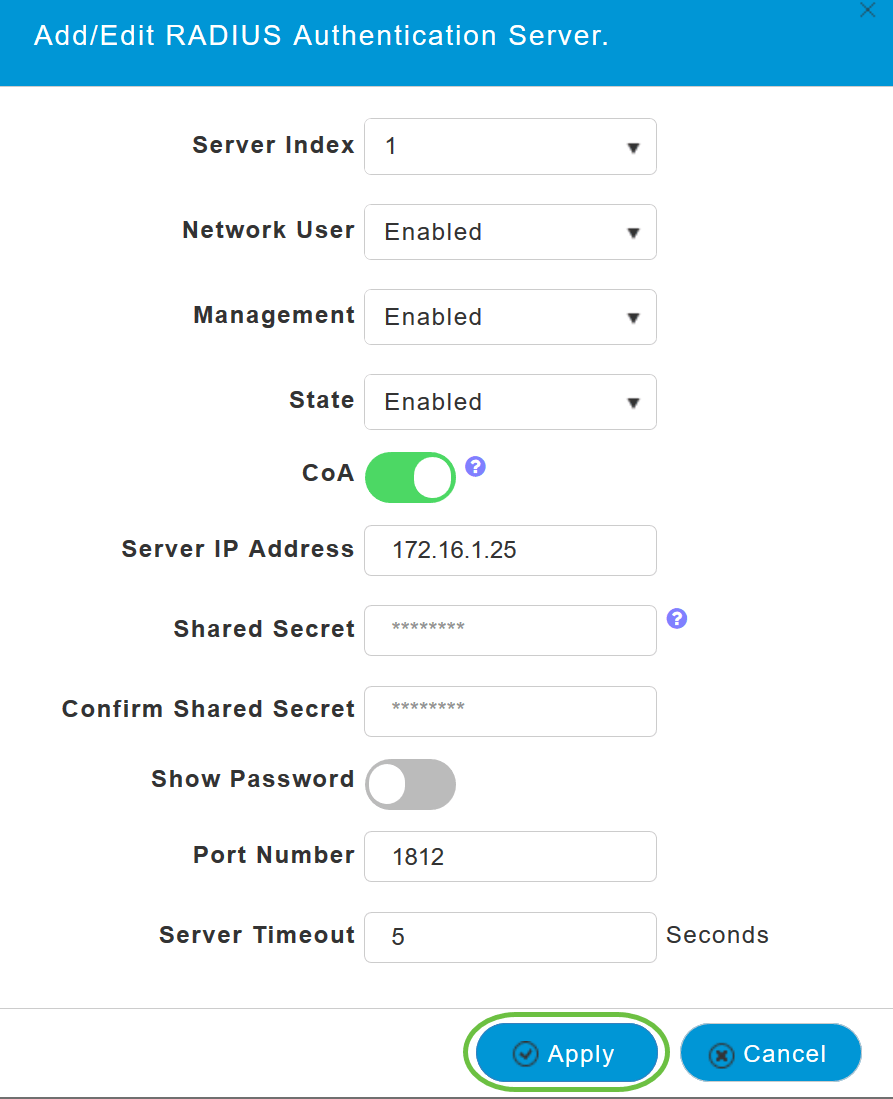
In the Add/Edit RADIUS Authentication pop-up window, configure the following:
- Server Index - Select 1 through 6
- Network User - Enable the state. By default this is Enabled
- Management - Enable the state. By default this is Enabled
- State - Enable the state. By default this is Enabled
- CoA - You can choose to enable this option by moving the slider button
- Server IP Address - Enter the IPv4 address of the RADIUS server
- Shared Secret - Enter the shared secret
- Port Number - Enter the port number being used for communicating with the RADIUS server.
- Server Timeout - Enter the server timeout
Click Apply.
Step 16
To Add RADIUS Accounting Server, you would follow the same steps as in Step 15 as the page contains similar fields.

Configure WLAN
Step 1
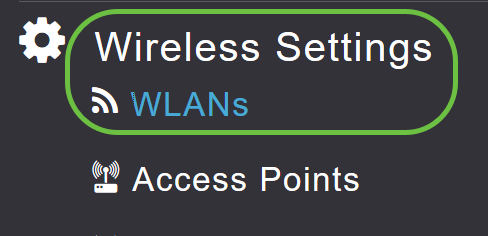
To configure WLAN that is going to handle WPA2 authentication with RADIUS, navigate to Wireless settings > WLAN.
Step 2
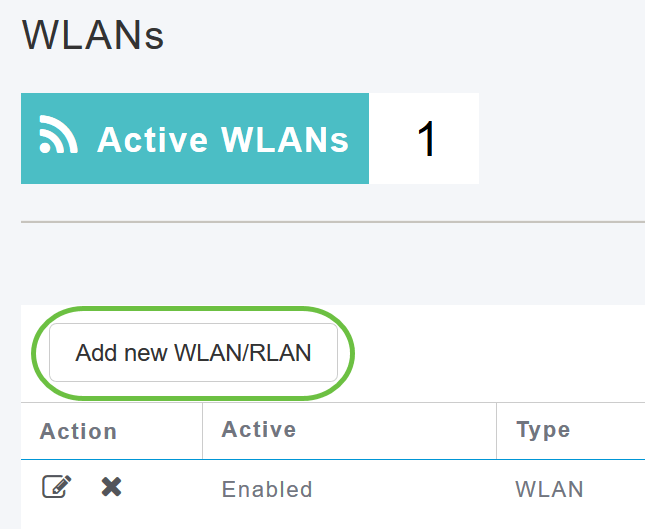
Click on Add New WLAN/RLAN.
Step 3
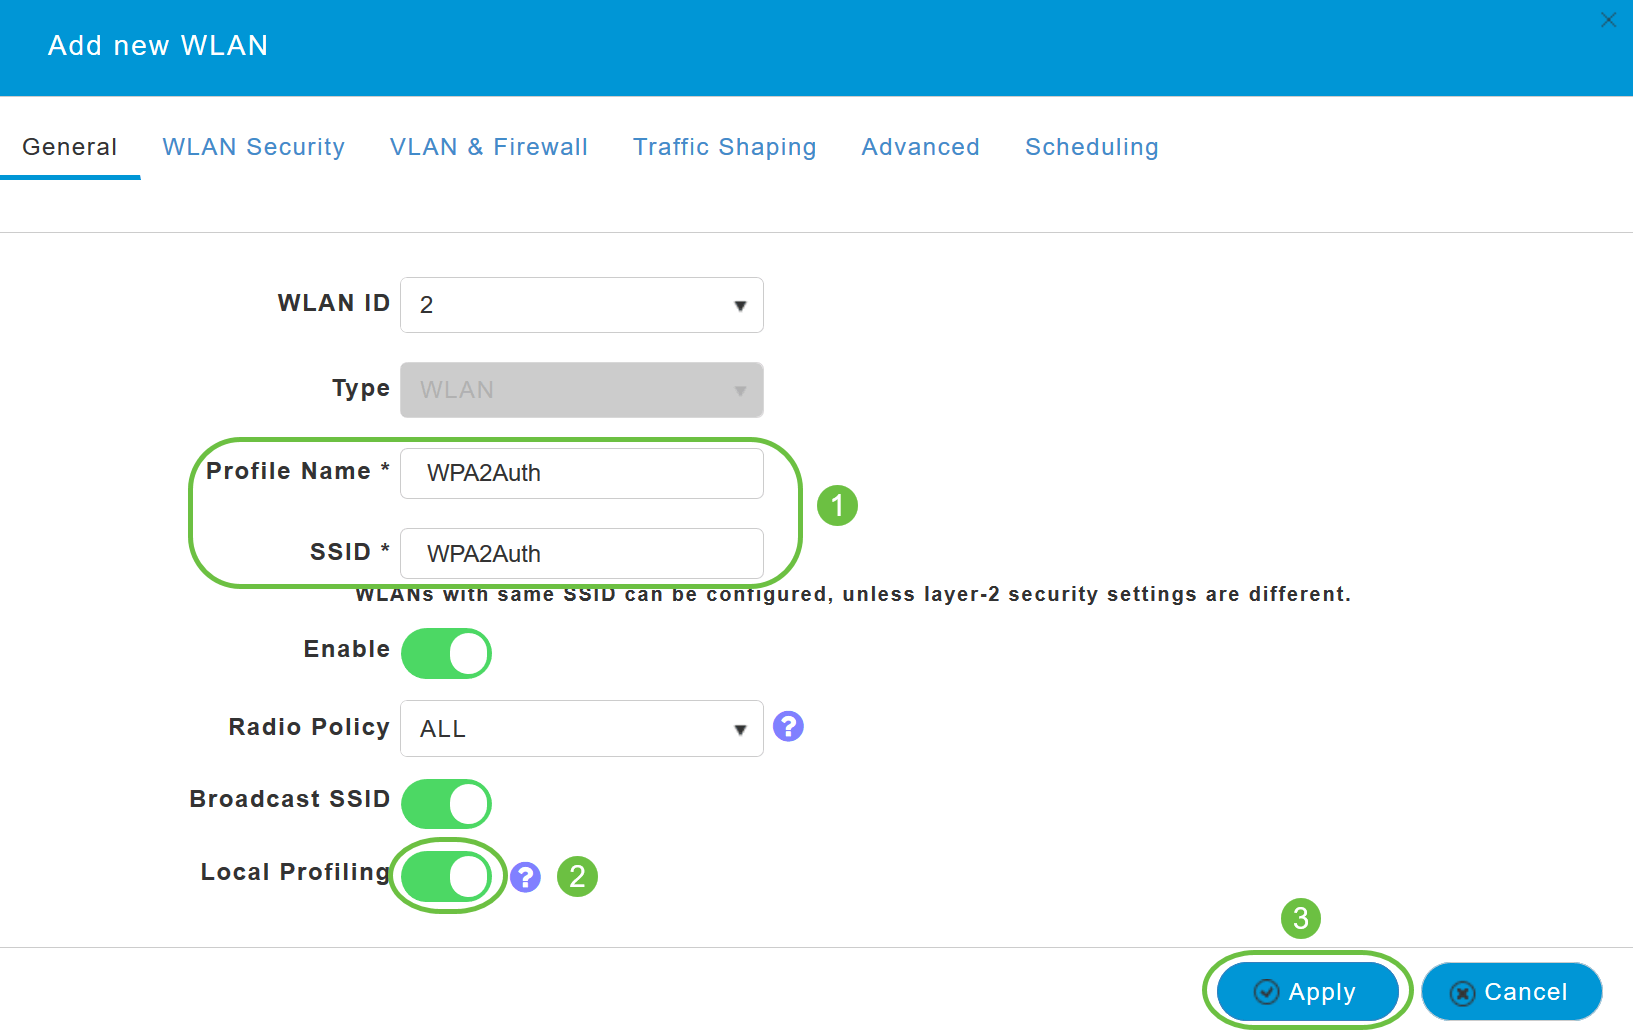
In the General tab, enter the Profile Name. The SSID field will auto-populate. You can choose to enable Local Profiling. Click Apply.
Step 4
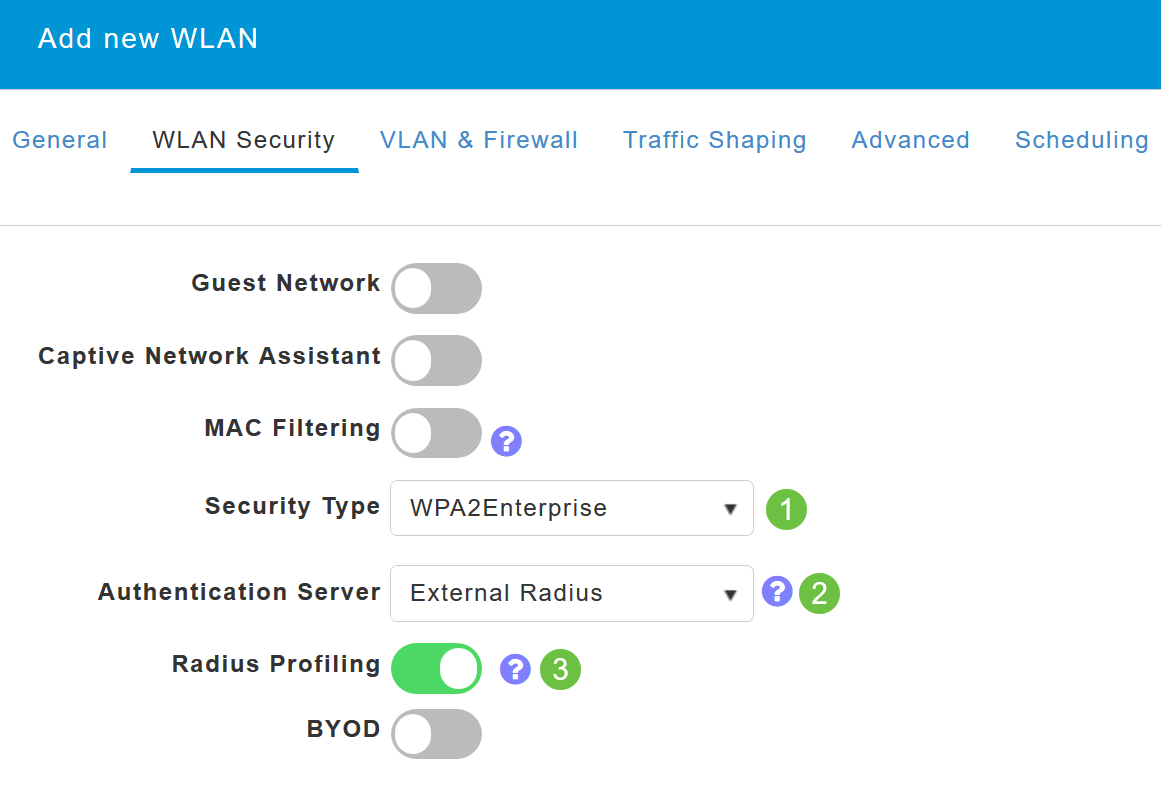
Navigate to WLAN Security tab. From the Security Type drop-down menu, choose WPA2Enterprise. Select External Radius as the Authentication Server. You can choose to enable Radius Profiling.
Step 5
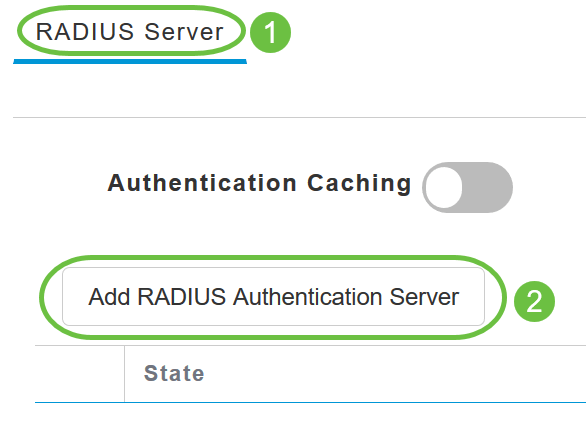
Navigate to RADIUS Server section. Click on Add RADIUS Authentication Server.
Step 6
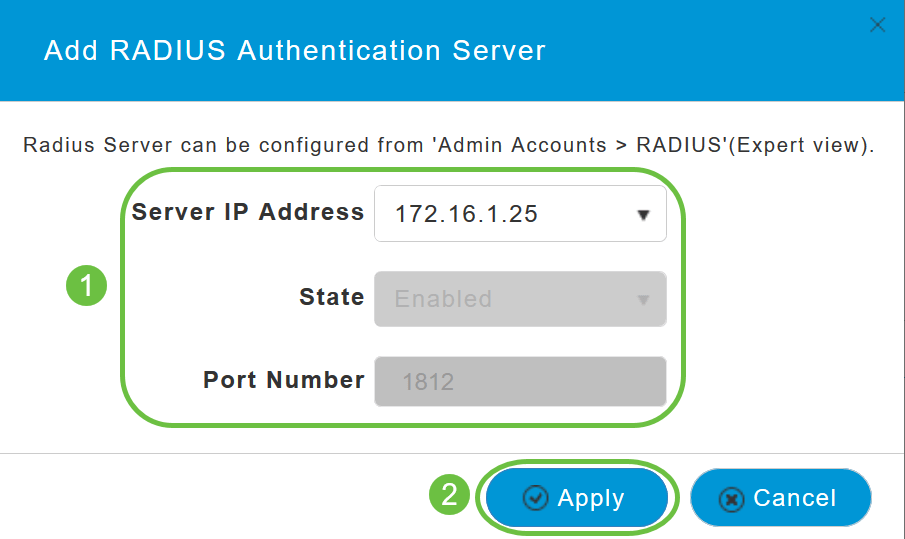
Verify the details of the RADIUS Authentication Server that you have configured and click Apply.
Step 7
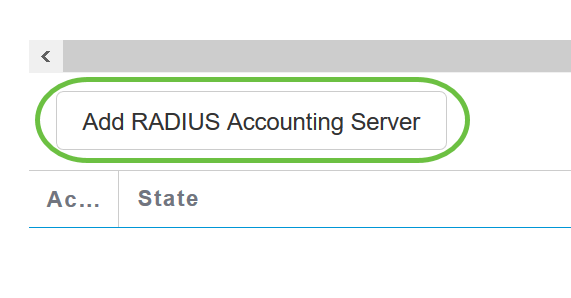
Click on Add RADIUS Accounting Server.
Step 8
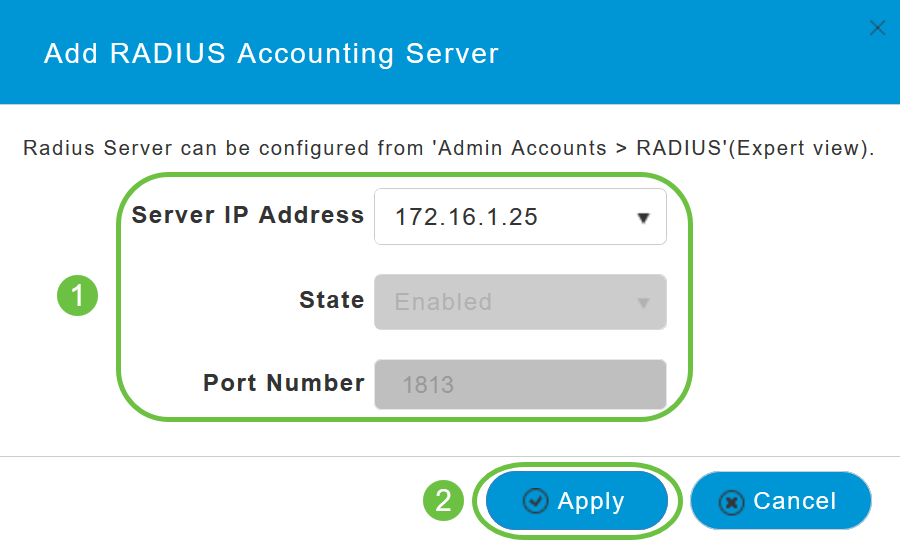
Verify the details of the RADIUS Accounting Server that you have configured and click Apply.
Step 9
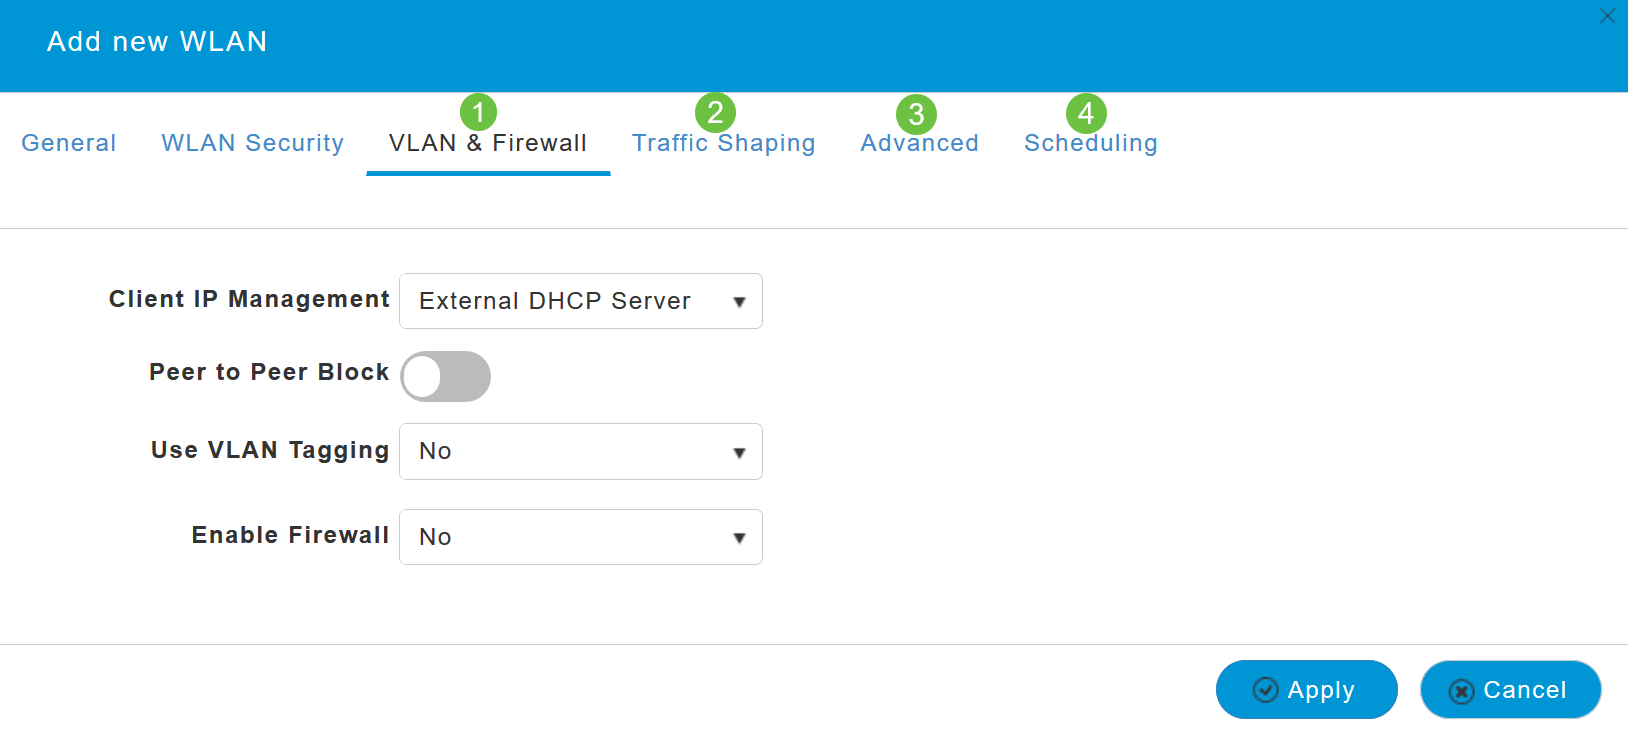
Navigate to VLAN & Firewall, Traffic Shaping, Advanced, and Scheduling tabs to configure the settings based on your network preferences. Click Apply.
Verification
To test the RADIUS authentication, do the following:
Step 1
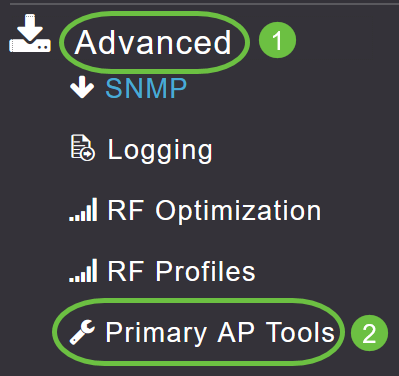
Navigate to Advanced > Primary AP Tools.
Step 2
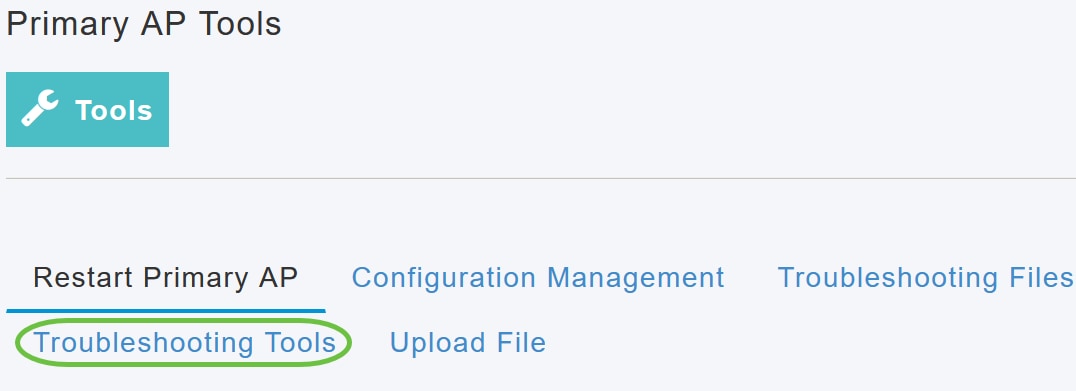
Click on Troubleshooting Tools.
Step 3
In the Radius Response section, enter the Username and Password for the WLAN Profile that you have configured previously and click Start.

Step 4
Once the verification is completed successfully, you will see the following notification on your screen.

Conclusion
There you have it! You have now learned the steps to configure RADIUS on your CBW AP. For more advanced configurations, refer to the Cisco Business Wireless Access Point Administration Guide.
