Cisco Business Wireless: Mobile App vs Web UI Features
Available Languages
Objective
The objective of this article is to explicitly outline the features Cisco Business Wireless App supports versus web User Interface (UI) in Cisco Business Wireless (CBW) network for indoor environments.
If you are unfamiliar with terms in this document, check out Cisco Business: Glossary of New Terms.
Applicable Devices | Software Version
- 140AC (Data Sheet) | 10.4.1.0 (Download latest)
- 141ACM (Data Sheet) | 10.4.1.0 (Download latest)
- 142ACM (Data Sheet) | 10.4.1.0 (Download latest)
- 143ACM (Data Sheet) | 10.4.1.0 (Download latest)
- 145AC (Data Sheet) | 10.4.1.0 (Download latest)
- 240AC (Data Sheet) | 10.4.1.0 (Download latest)
Introduction
Cisco Business Wireless (CBW) Access Points (APs) and Mesh Extenders deliver a simple-to-deploy solution designed for small and medium-sized businesses.
Cisco Business Wireless Access Points are administered through a web user interface. To use this interface, your browser must be one of the following:
• Microsoft Internet Explorer 10 or above
• Apple Safari version 7 or above
• Mozilla Firefox version 33 or above
• Google Chrome version 38 or above
Also, Cisco Business Wireless access points and mesh extenders are operated directly from your mobile device through the Cisco Business Wireles app, an intuitive client application that simplifies conventional wireless network deployment challenges. You will need one of the following Operating Systems to operate Cisco Business Wireless On the mobile app, navigate to
• Android version 5.0 or above
• iOS version 8.0 or above
Updates will occur to both the Web UI and the mobile application. This article was accurate at the time of the Cisco Business Wireless AP release. Features may be changed or added that were not available at the time this article was published. To have access to all the available features, make sure you are running the latest version of the software for the Web UI, and the latest version of the mobile application.
Cisco Business Wireless Support by Feature
Most of the options available in web UI and Mobile App are common. However, there are some options that are available in web UI but not in Mobile App and vice versa. Please refer the following comparison table to get more details about the options available. To jump to the section that you are interested in, you press ctrl + click on any of the hyperlinks below.
When using the Web UI, not all options are shown unless you are in Expert View. To enter Expert View, select the arrow icons on the top right of the Web UI.

Beginner Help
This toggled section highlights tips for beginners.
Logging In
Log into the Web User Interface (UI) of the Primary AP. To do this, open a web browser and enter https://ciscobusiness.cisco.com You may receive a warning before proceeding. Enter your credentials.You can also access the Primary AP by entering https://[ipaddress] (of the Primary AP) into a web browser.
Tool Tips
If you have questions about a field in the user interface, check for a tool tip that looks like the
following: ![]()
Trouble locating the Expand Main Menu icon?
Navigate to the menu on the left-hand side of the screen, if you don’t see the menu button, click
this icon to open the side-bar menu.
Cisco Business Wireless App
These devices have companion apps that share some management features with the web user interface. Not all features in the Web user interface will be available in the App.
Frequently Asked Questions
If you still have unanswered questions, you can check our frequently asked questions document. FAQ
Features Available on Both the Web UI and the App
Features Only Available on the Web UI
| Features | Present in Web User Interface | Present in Mobile Application |
|---|---|---|
| RF Optimization | Yes | No |
| Download Tech-support files | Yes | No |
| Radius Response test | Yes | No |
| Configure and view log details | Yes | No |
| Spectrum Intelligence | Yes | No |
| RF Troubleshoot | Yes | No |
| Configuration option for SNMP and NTP, mDNS and Umbrella | Yes | No |
Features Only Available on the App
| Features | Present in Web User Interface | Present in Mobile Application |
|---|---|---|
| Touch ID authentication | No | Yes |
| Details of top Operating Systems | No | Yes |
| Client Performance - (Connection Score, Connected Protocols) | No | Yes |
| Speed Test Tool (Internal and Internet) | No | Yes |
| Options to access online resource related to products | No | Yes |
Available on both the Web UI and the Mobile Application
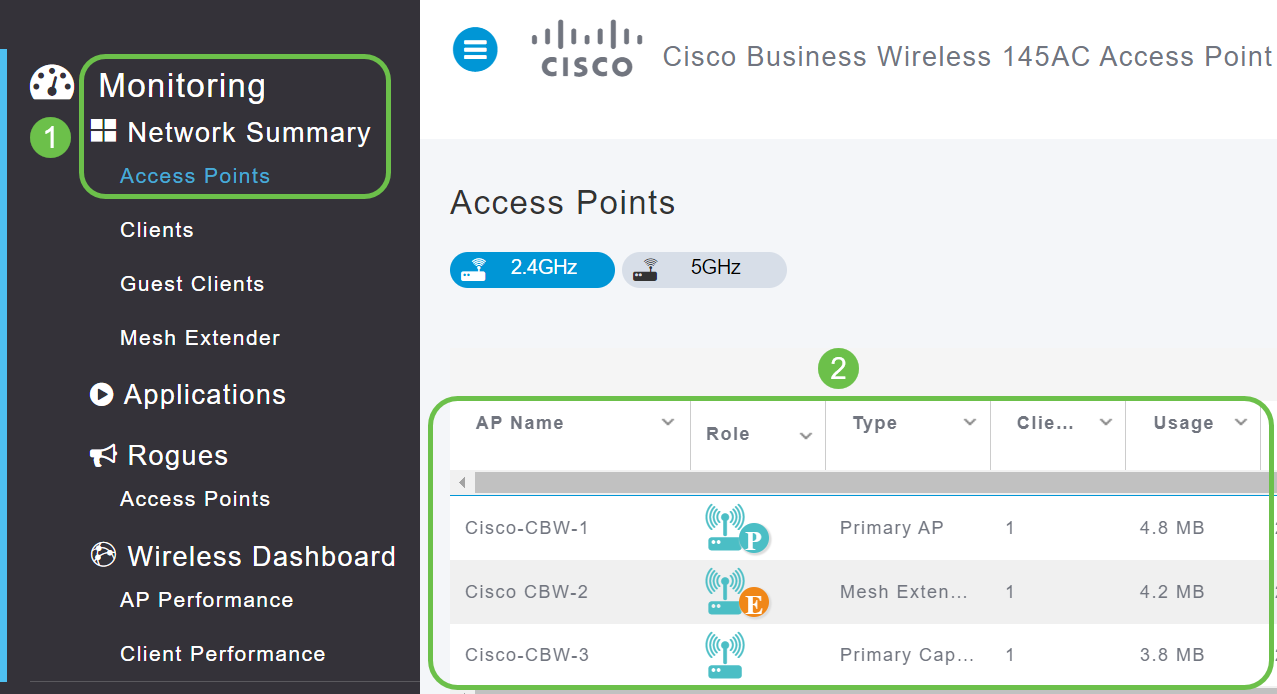
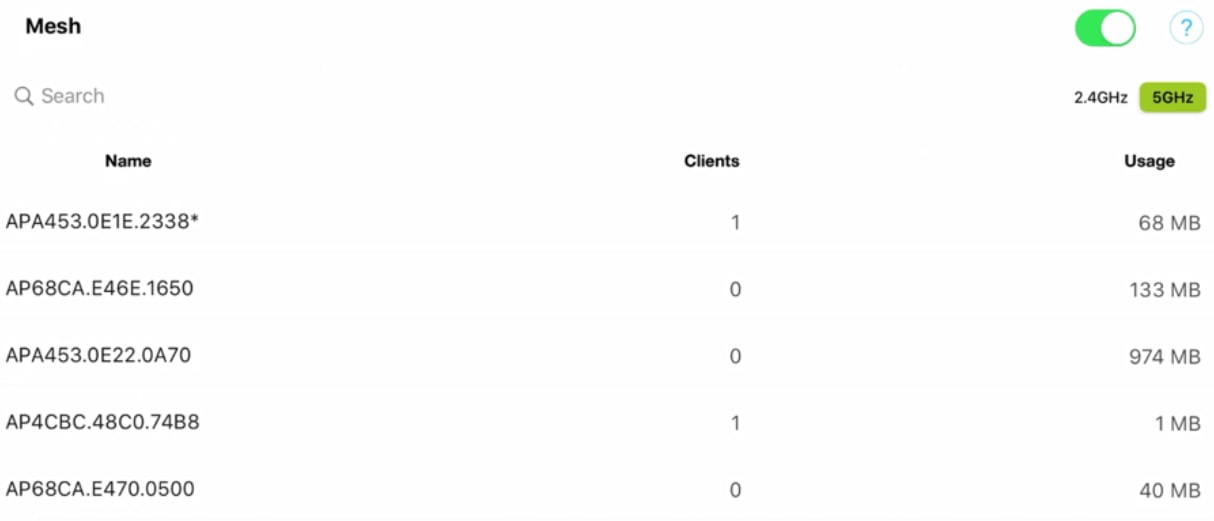
View the AP usage and Numbers of Clients Associated
On the Web UI, navigate to Monitoring > Network Summary > Access Points.
On the mobile app, select Devices.
Adding new Wireless LAN (WLAN)
On the Web UI, navigate to Wireless Settings > WLANs. Select Add new WLAN/RLAN.
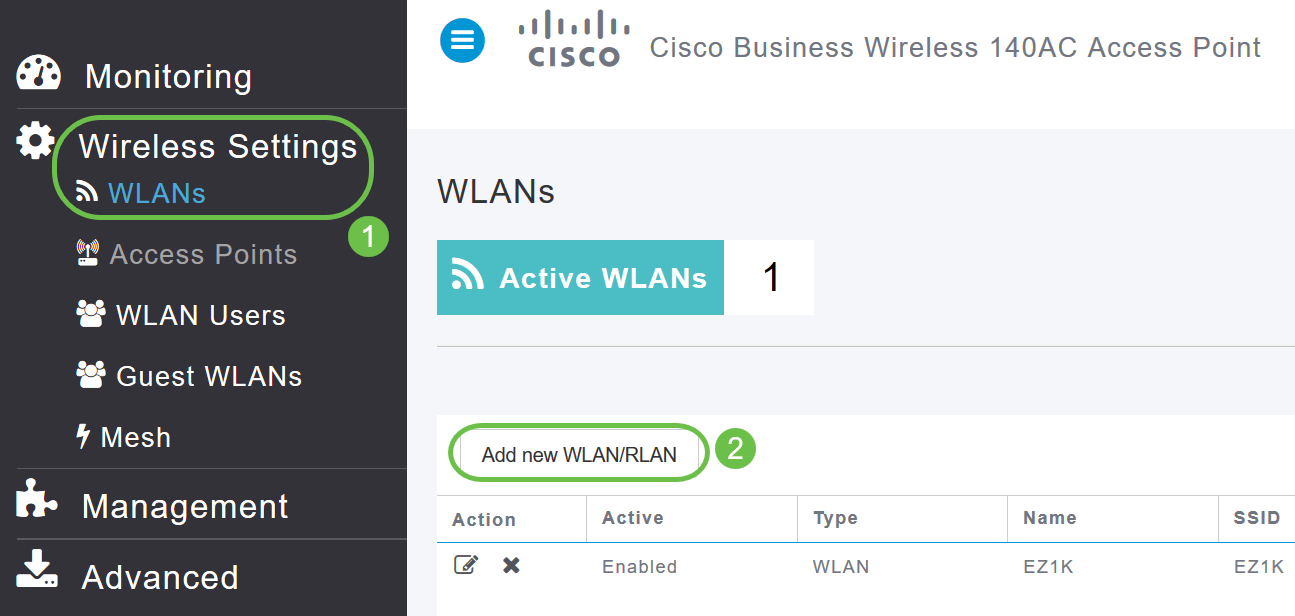
On the mobile app, select WLAN.
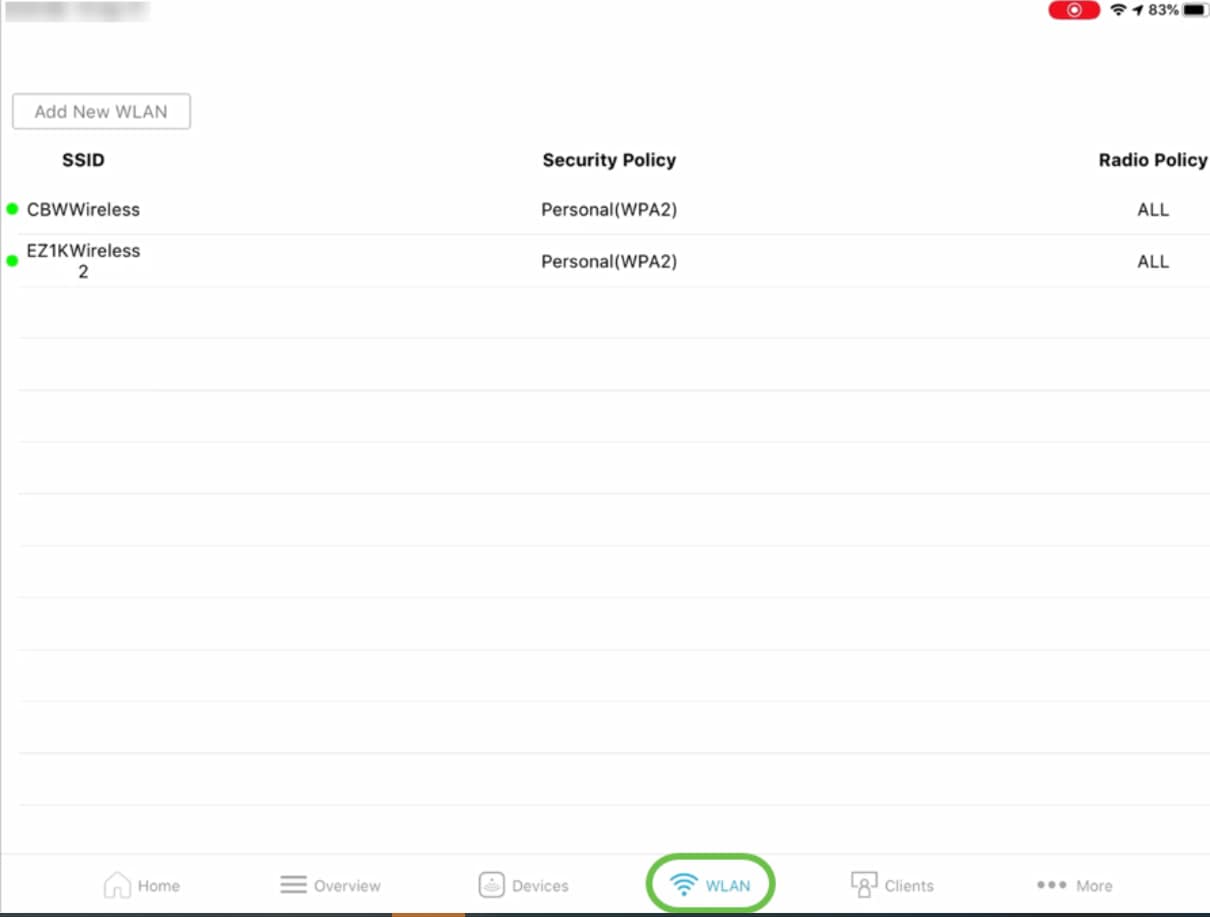
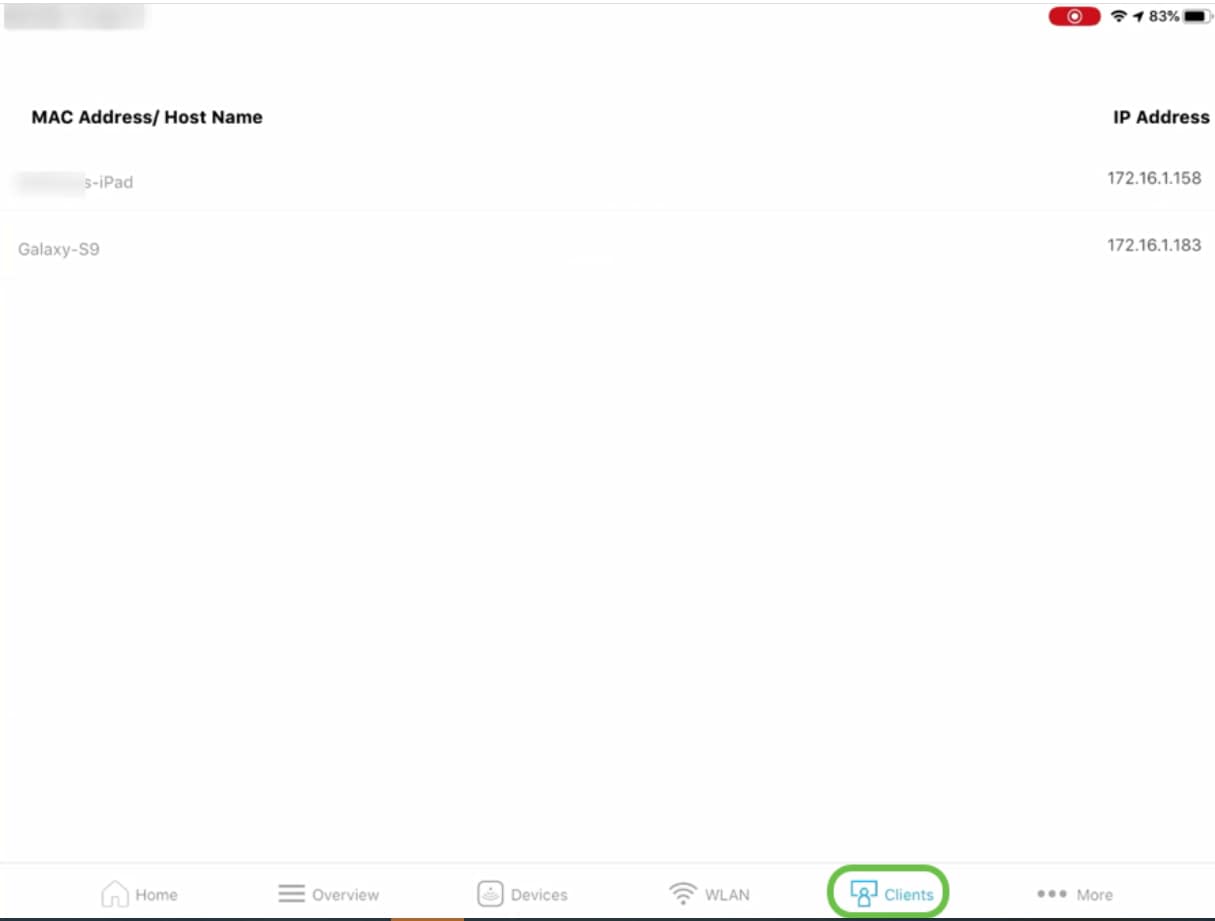
MAC Address / Hostname and IP address details of the associated clients
On the Web UI, navigate to Monitoring > Network Summary > Clients.

On the mobile app, select Clients.
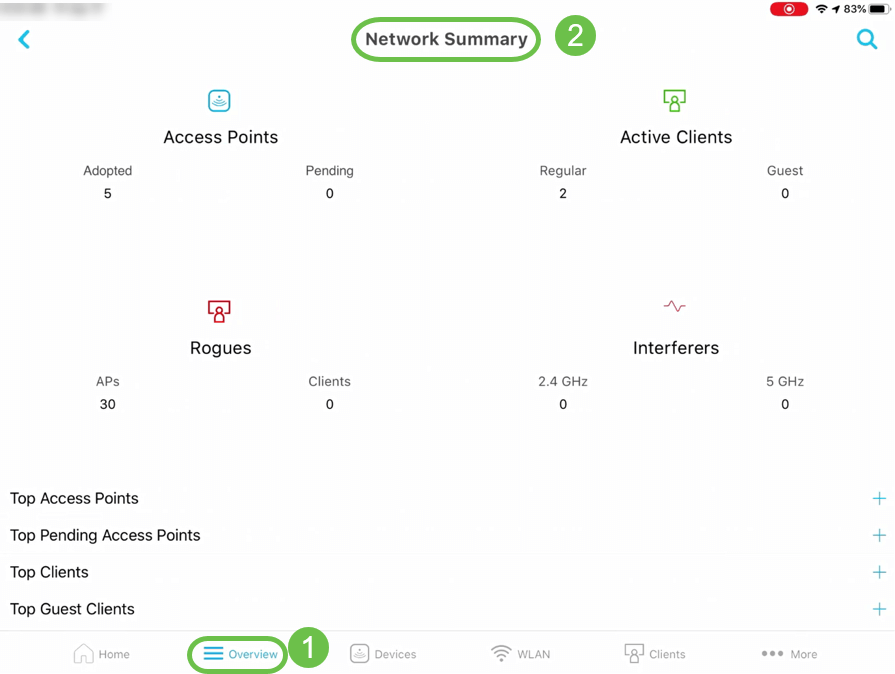
Network Summary (Access Points, Active Clients, Rogues, and Interferers)
On the Web UI, navigate to Monitoring > Network Summary.

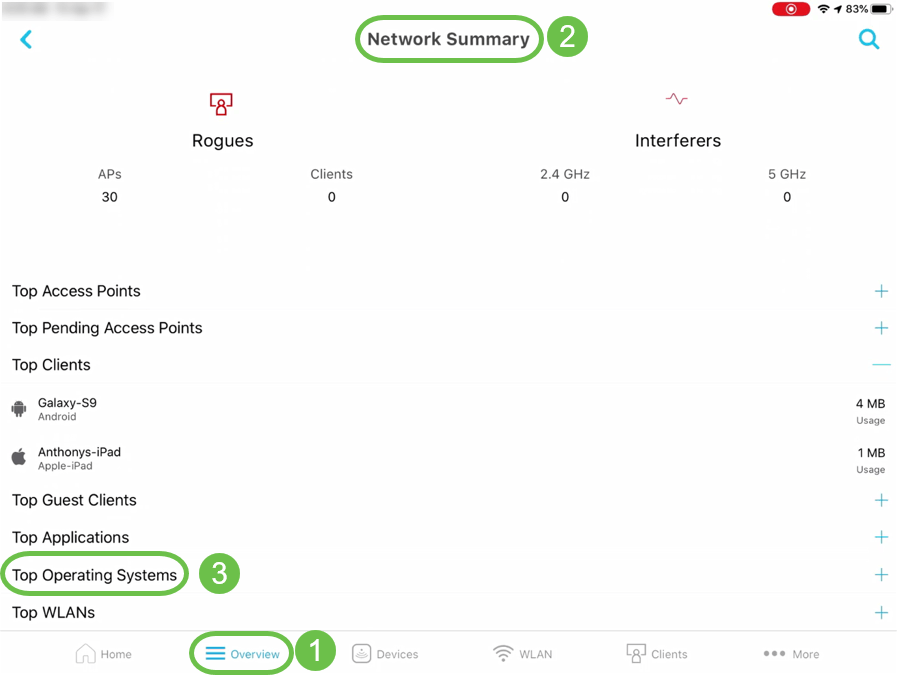
On the mobile app, select Overview and Network Summary.
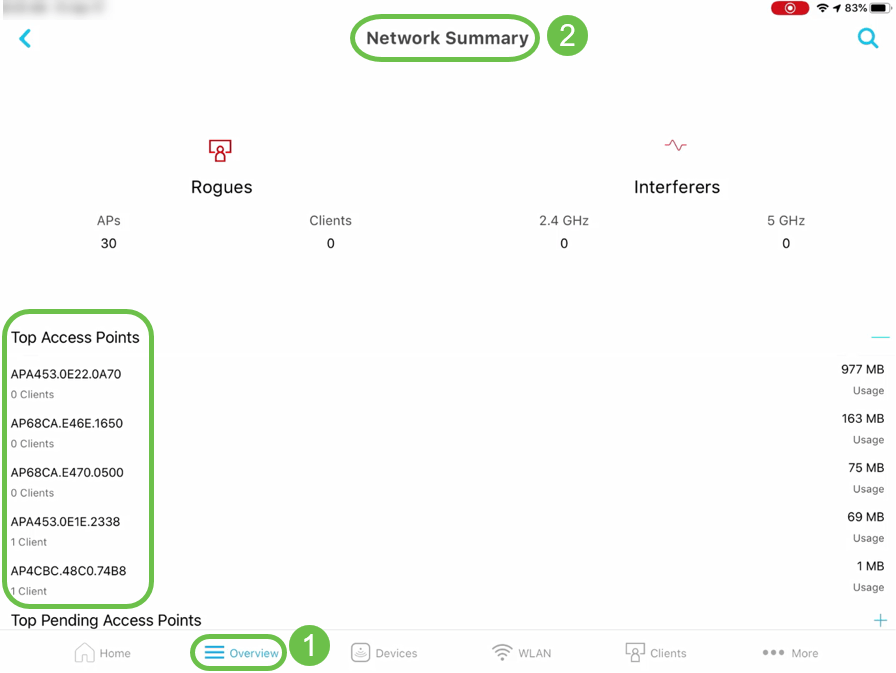
Details for top Access Points in terms of data usage
On the Web UI, navigate to Monitoring > Network Summary.

On the mobile app, select Overview and Network Summary.
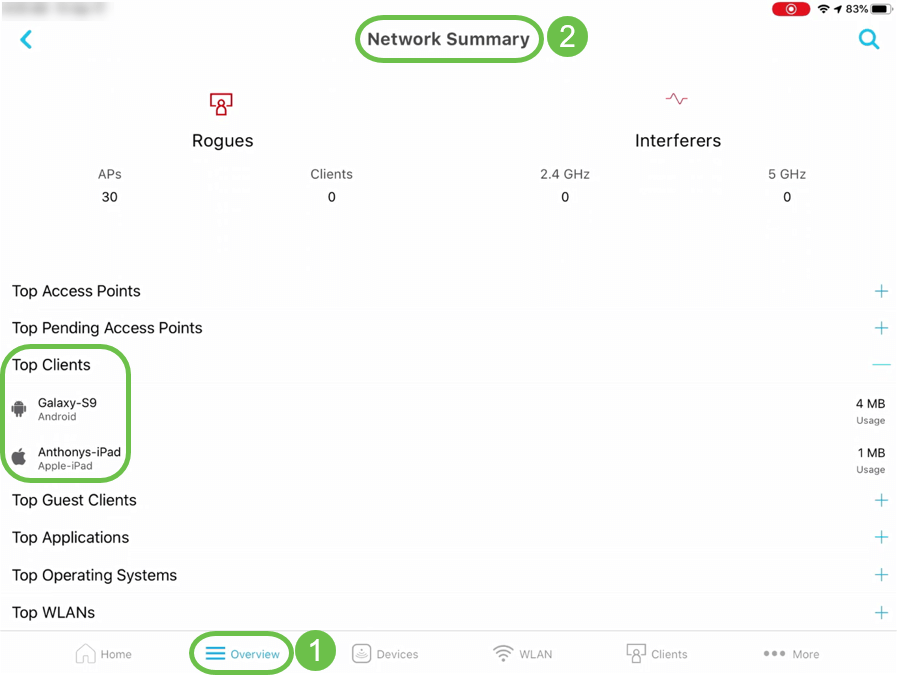
Details for top clients in terms of data usage
On the Web UI, navigate to Monitoring > Network Summary.

On the mobile app, navigate to Monitoring > Network Summary.
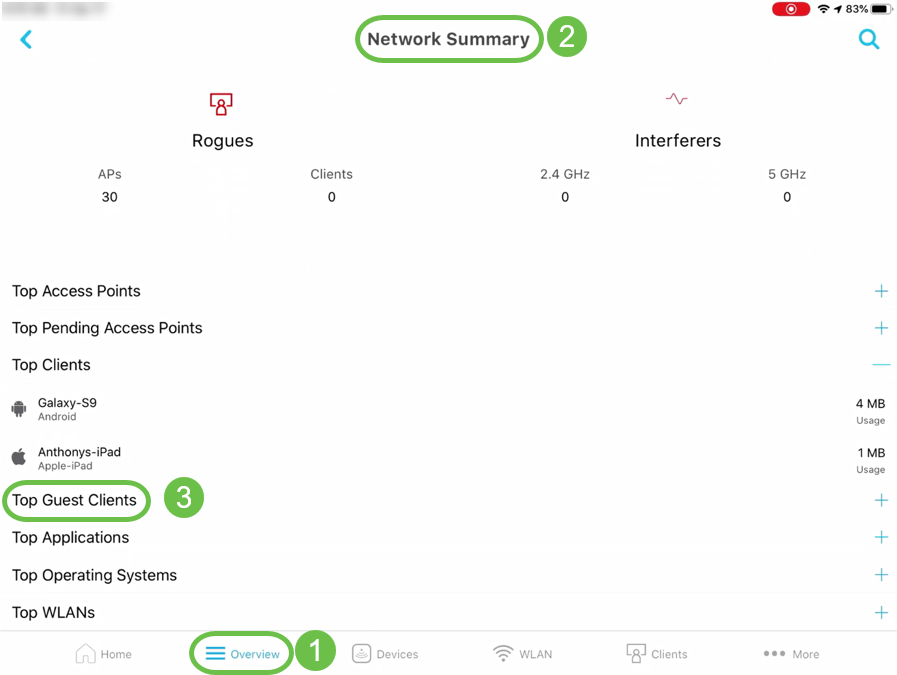
Details for top Guest Clients
On the Web UI, navigate to Monitoring > Network Summary > Guest Clients.

On the mobile app, navigate to Overview > Network Summary > Top Guest Clients.
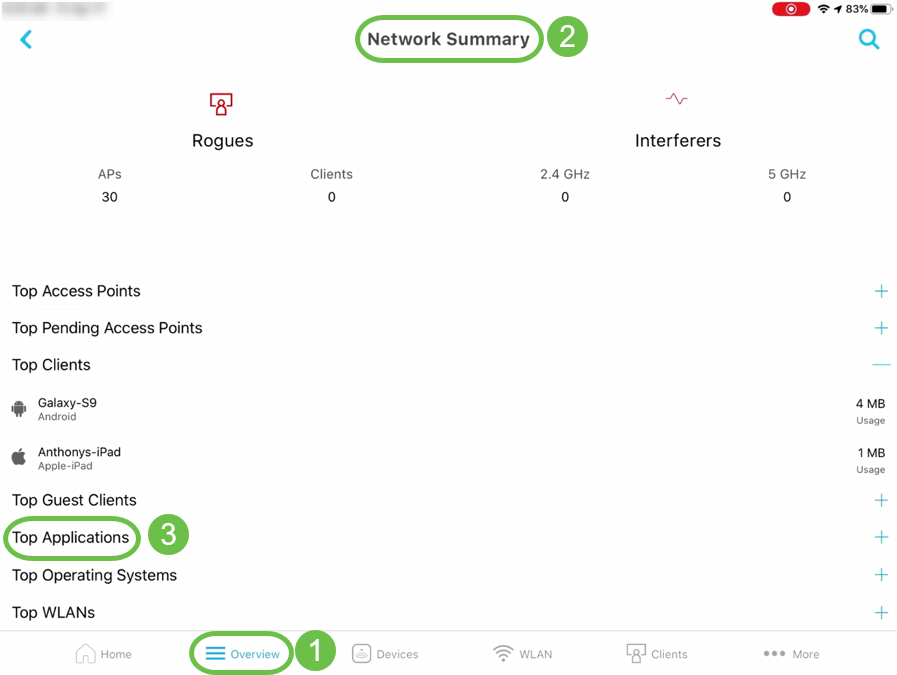
Details of top Applications
On the Web UI, navigate to Network Summary > Applications.

On the mobile app, navigate to Overview > Network Summary > Top Applications.
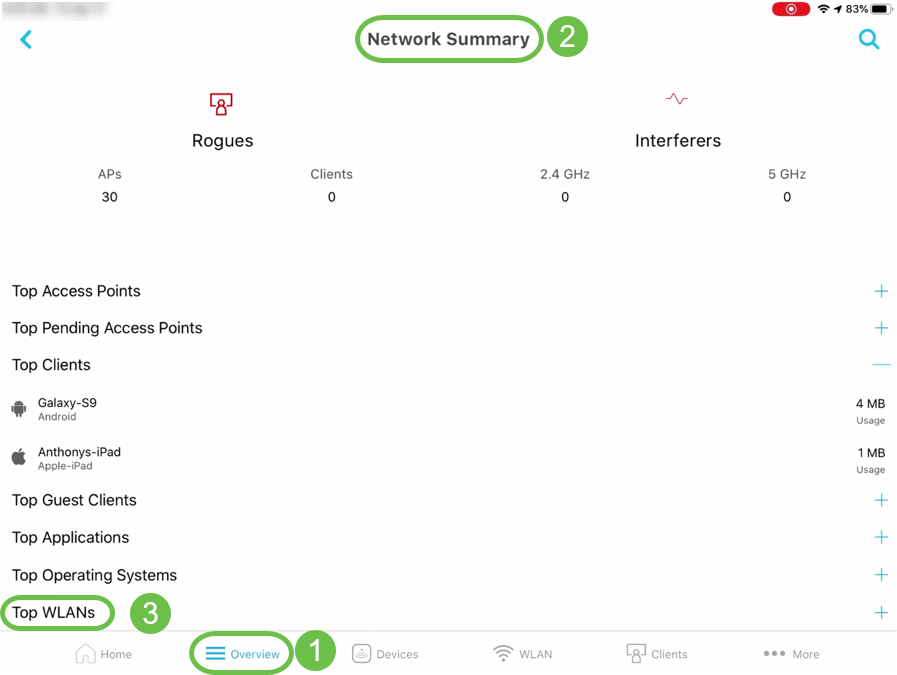
Details of top Wireless LANs (WLANs)
On the Web UI, navigate to Monitoring > Network Summary.

On the mobile app, navigate to Overview > Network Summary > Top WLANs.
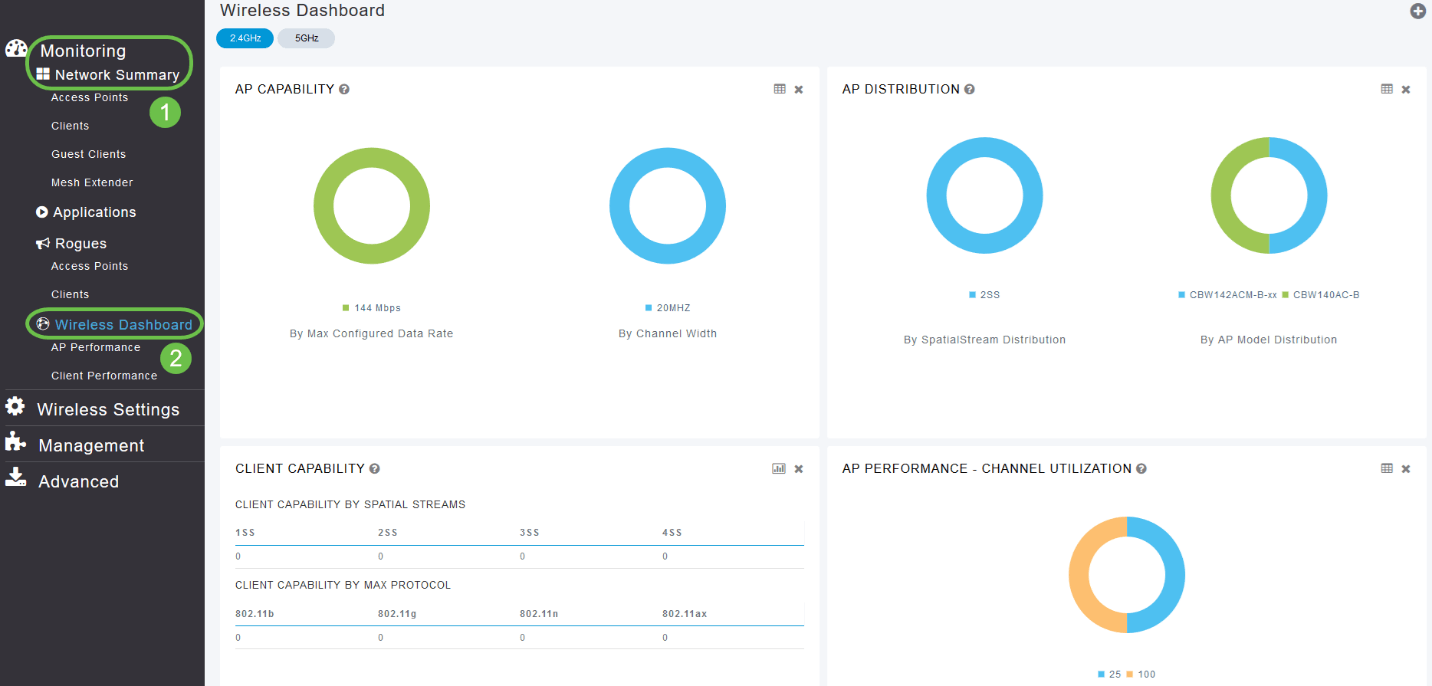
Wireless Dashboard (Max. Configured Data Rate, Client Capability - Spatial Streams, Max Protocol)
On the Web UI, navigate to Monitoring > Network Summary > Wireless Dashboard.
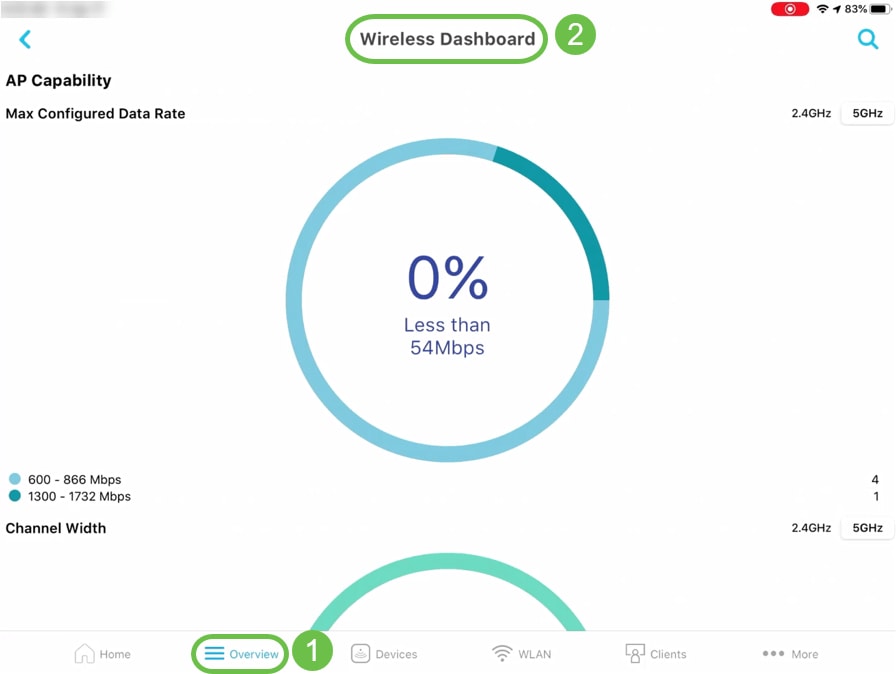
On the mobile app, navigate to Overview > Wireless Dashboard.
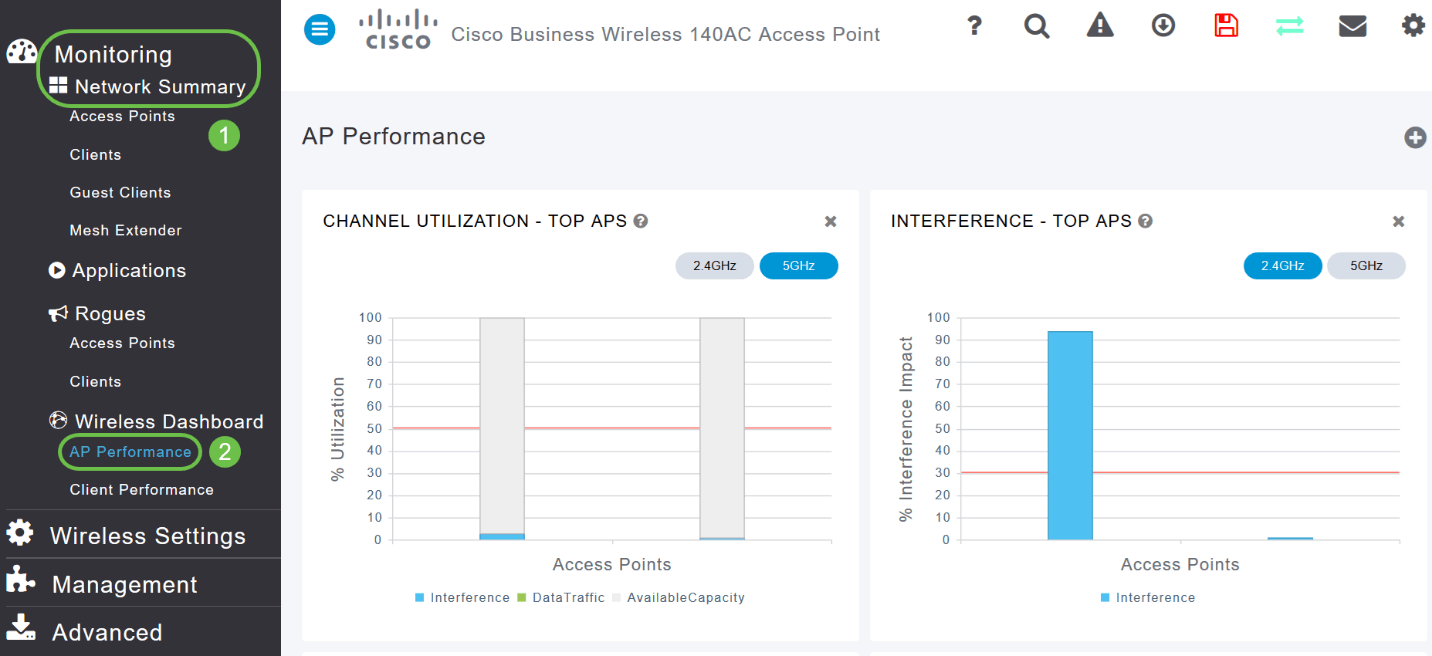
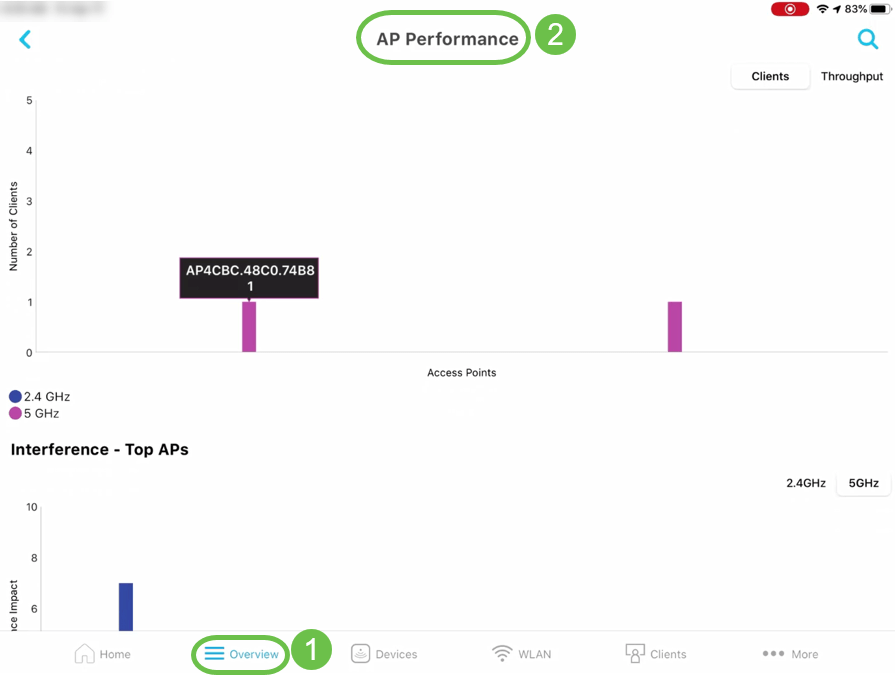
AP Performance - Channel Utilization - Top APs, Interference - Top APs
On the Web UI, navigate to Monitoring > Network Summary > AP Performance.
On the mobile app, navigate to Overview > AP Performance.
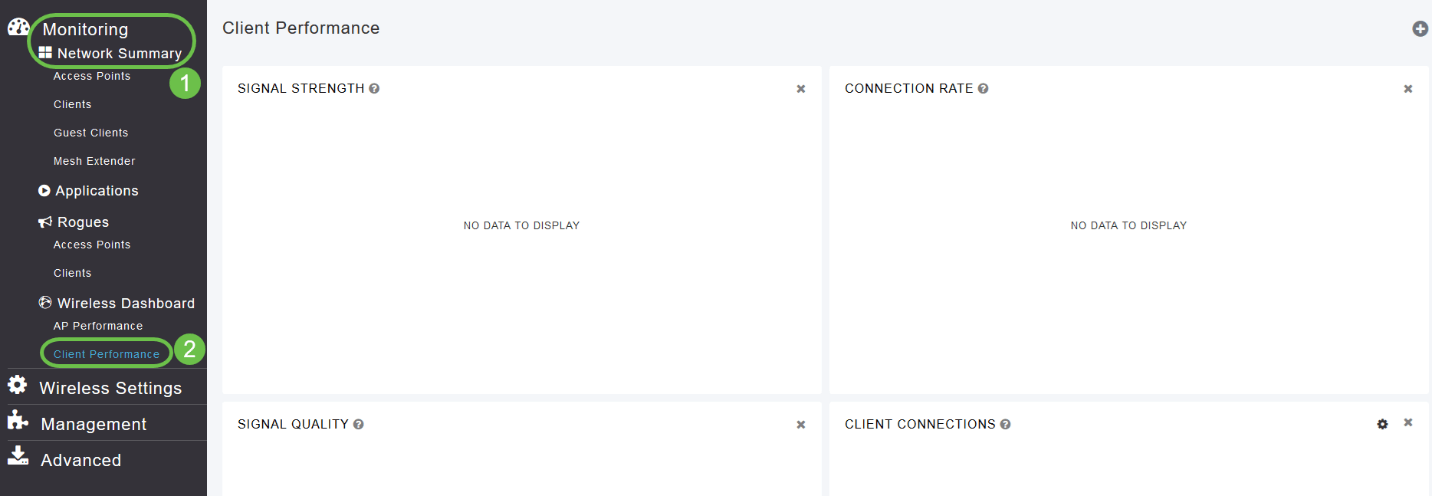
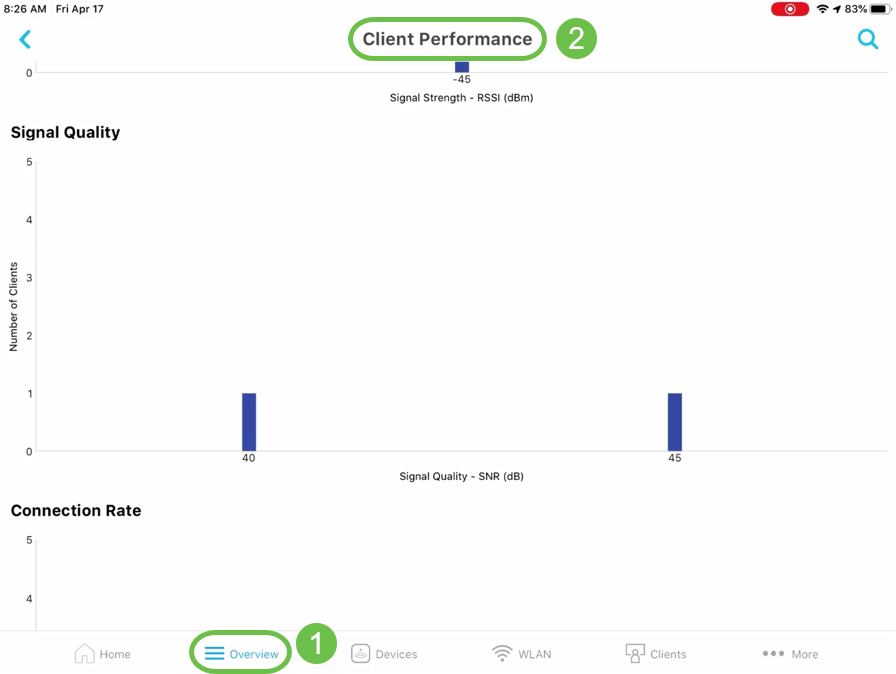
Client Performance - Signal Strength, Signal Quality, Connection Rate, Client Connectivity States
On the Web UI, navigate to Monitoring > Network Summary > Client Performance.
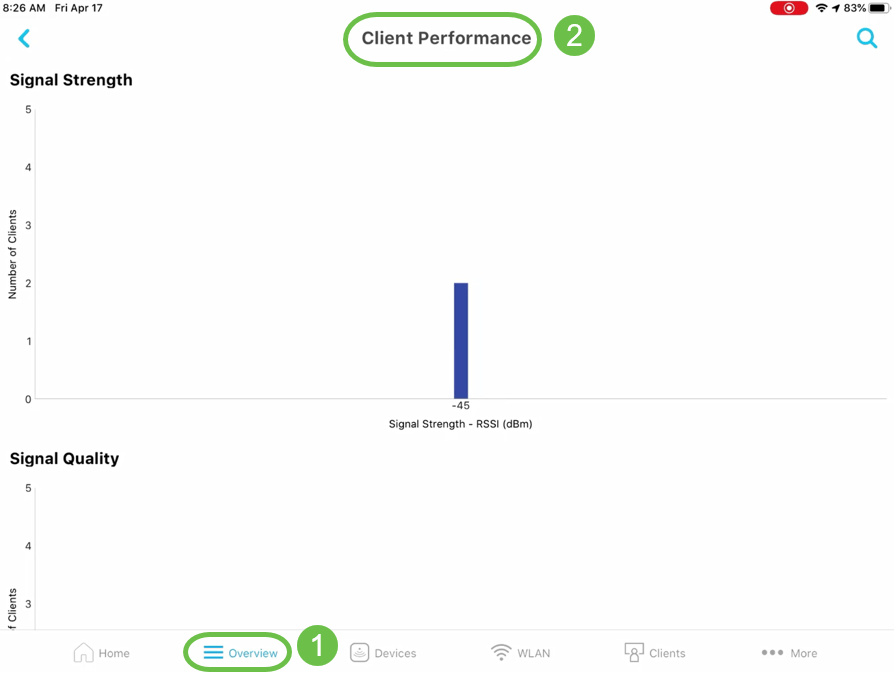
On the mobile app, navigate to Overview > Client Performance.
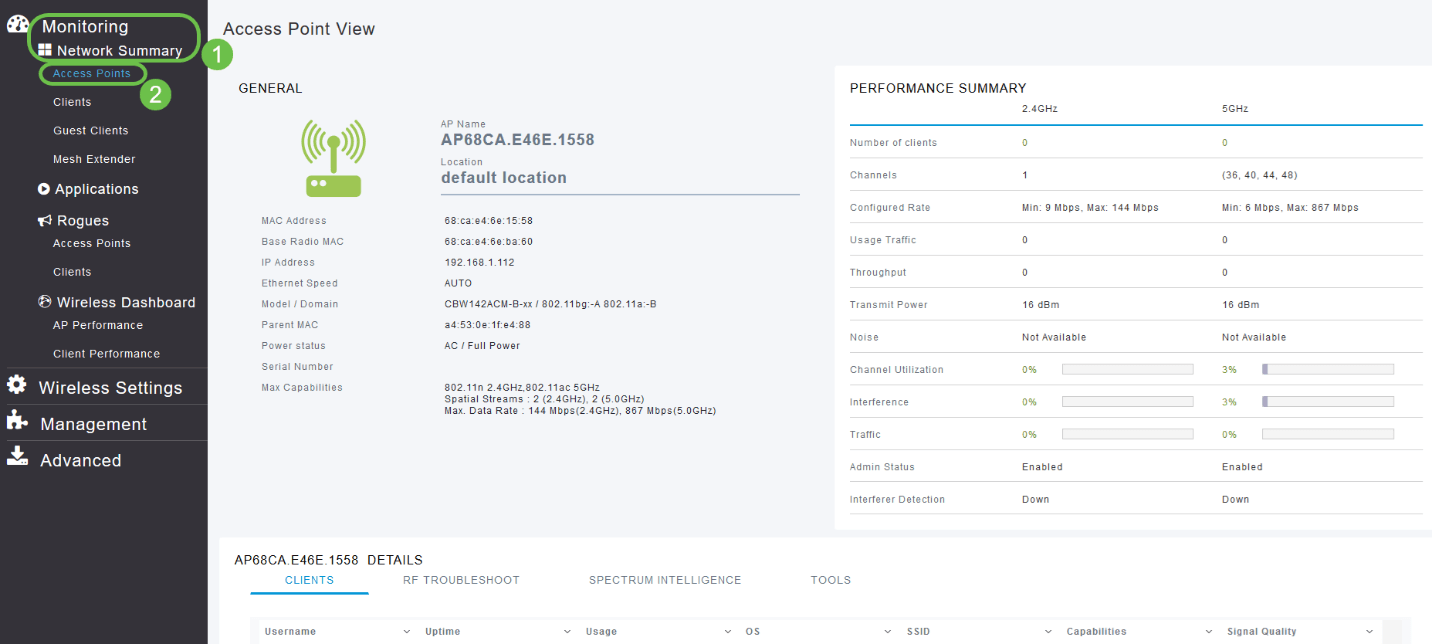
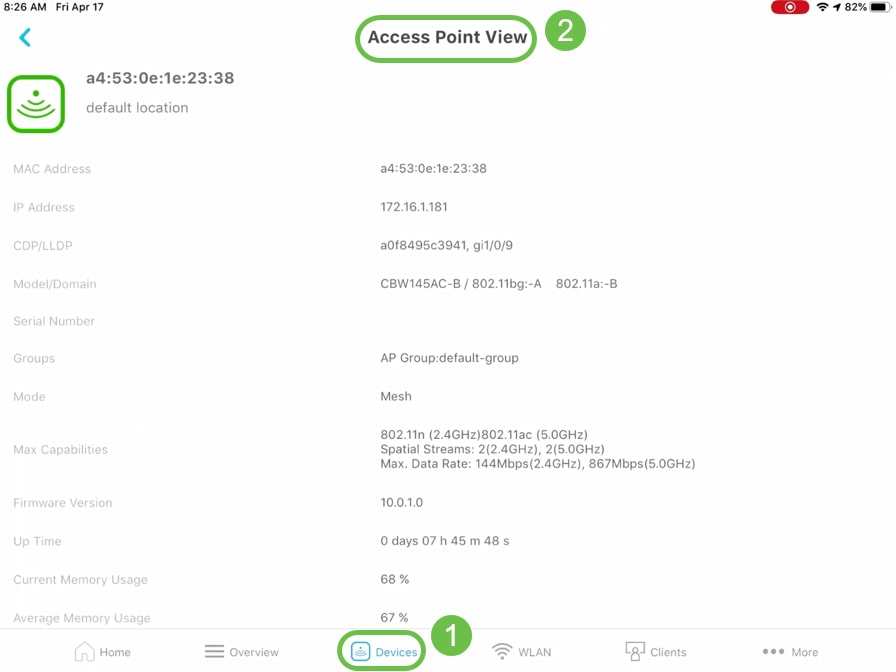
Access Point View - Complete summary of the AP
On the Web UI, navigate to Monitoring > Network Summary > Access Points.
On the mobile app, navigate to Devices > Access Point View.
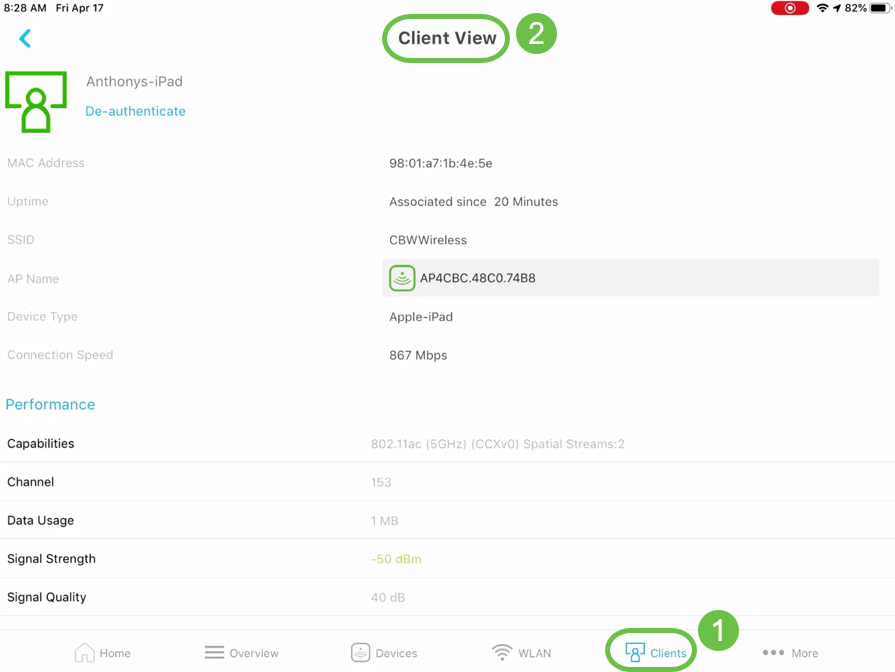
Client View - Complete summary of the client
On the Web UI, navigate to Monitoring > Network Summary > Clients.

On the mobile app, navigate to Clients > Client View.
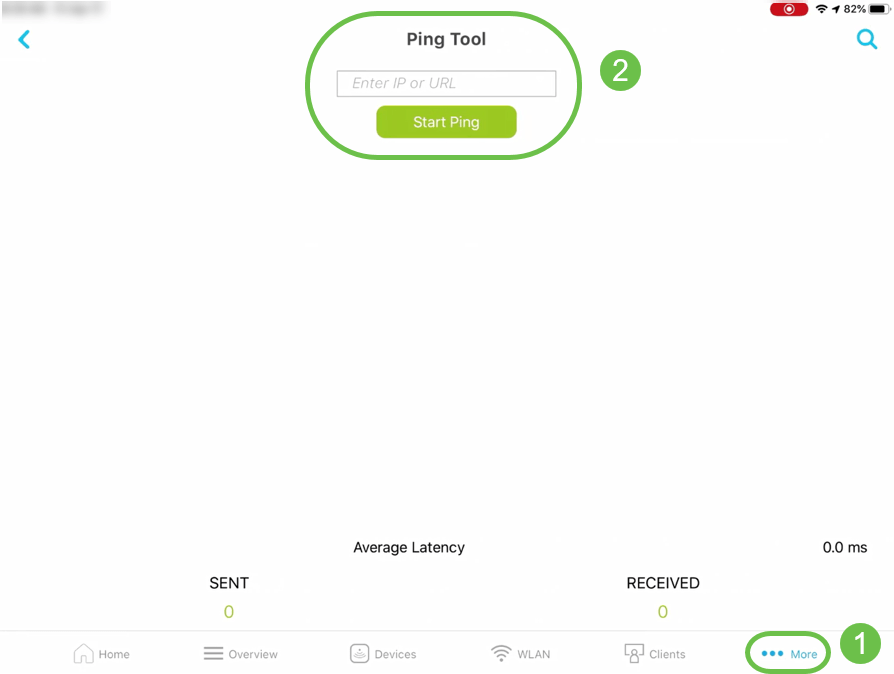
Ping Tool (IP and Domain Name)
On the Web UI, navigate to Advanced > SNMP > Primary AP Tools > Troubleshooting Tools. Scroll down to the Ping Test section.


On the mobile app, navigate to More > Ping Tool.
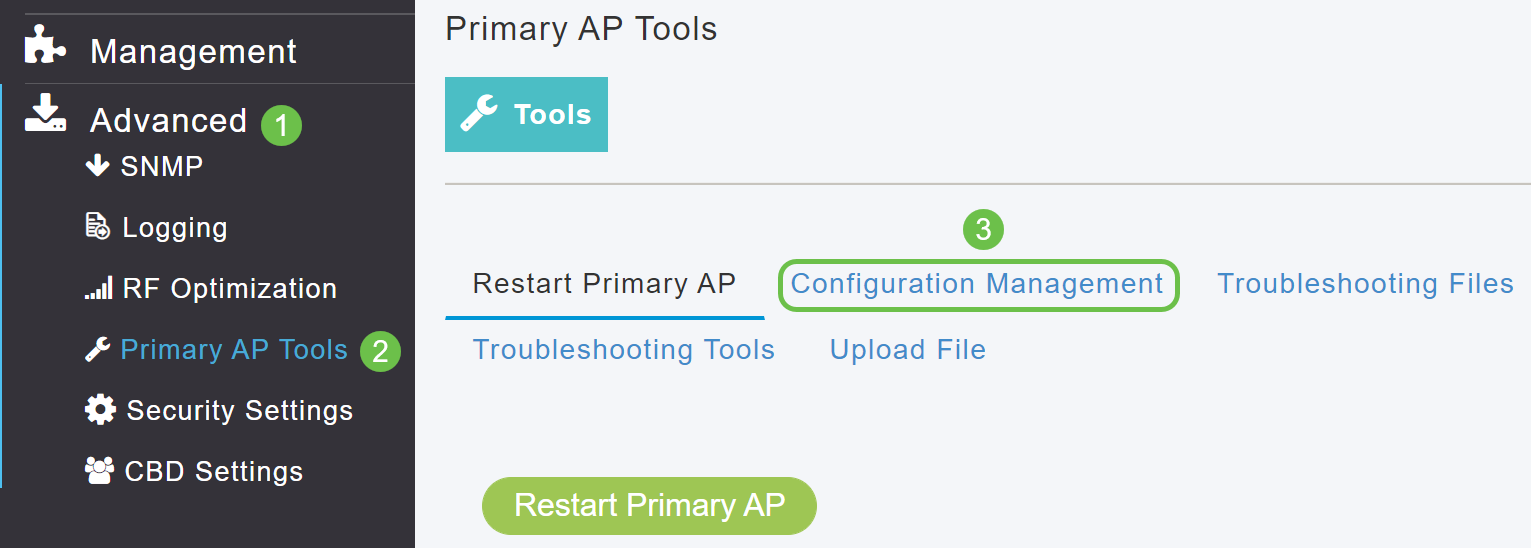
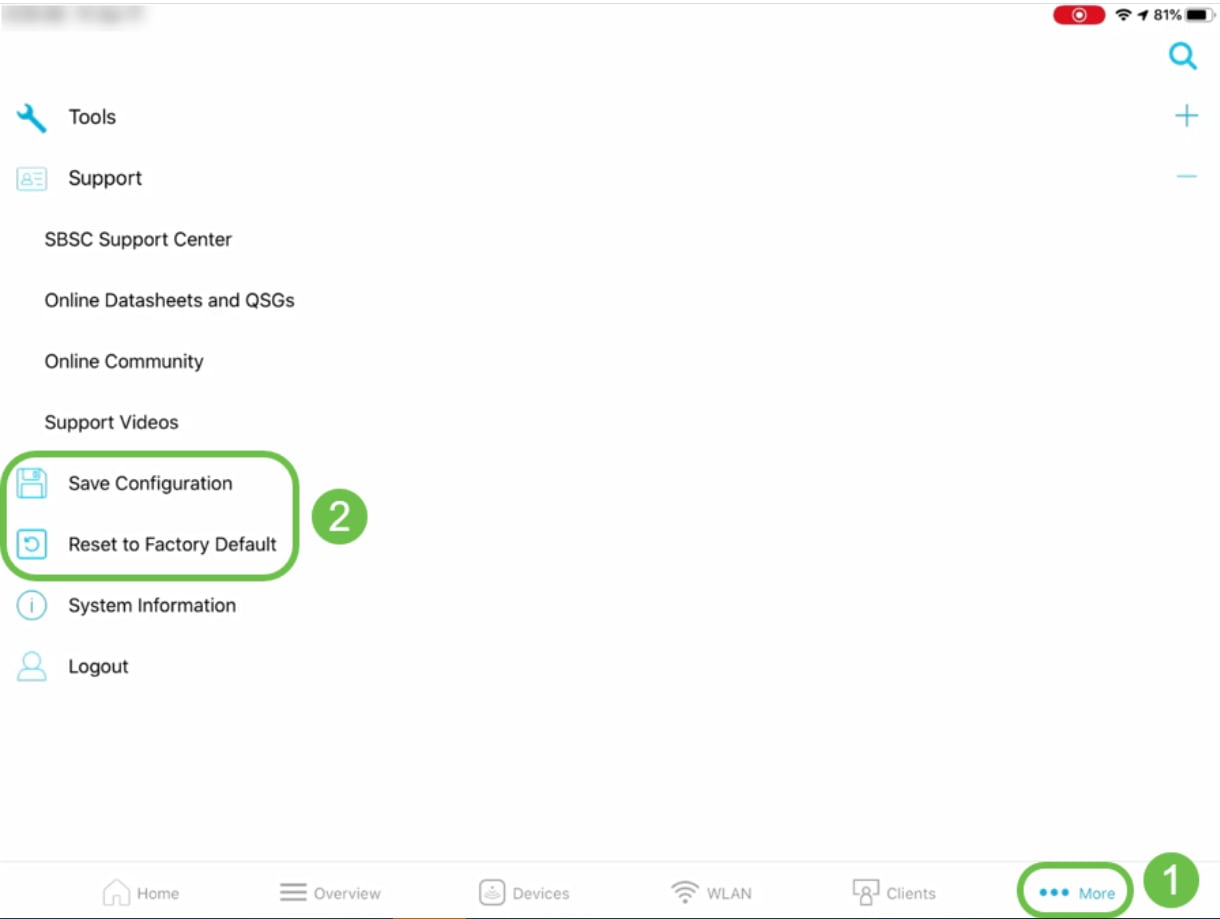
Option to save device configuration and restore the device to factory default settings
On the Web UI, navigate to Advanced > SNMP > Primary AP Tools > Configuration Management.
On the mobile app, navigate to More > Save Configuration or More > Reset to Factory Default.
Only Available on the Web UI
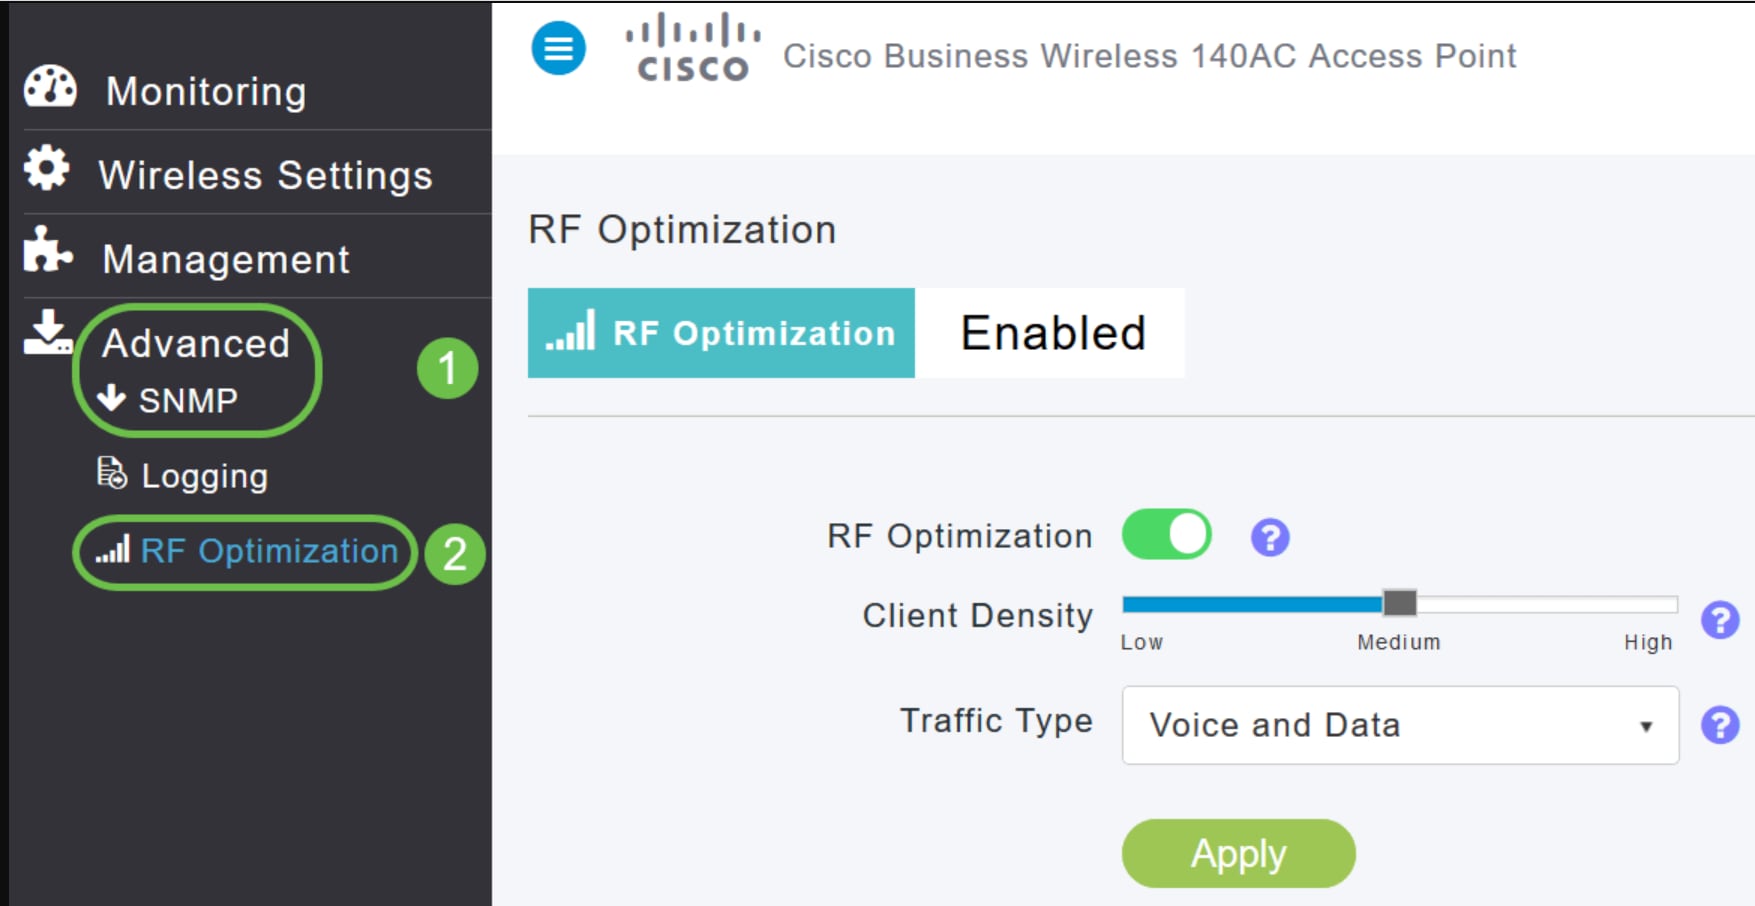
RF Optimization
On the Web UI, navigate to Advanced > SNMP > RF Optimization.
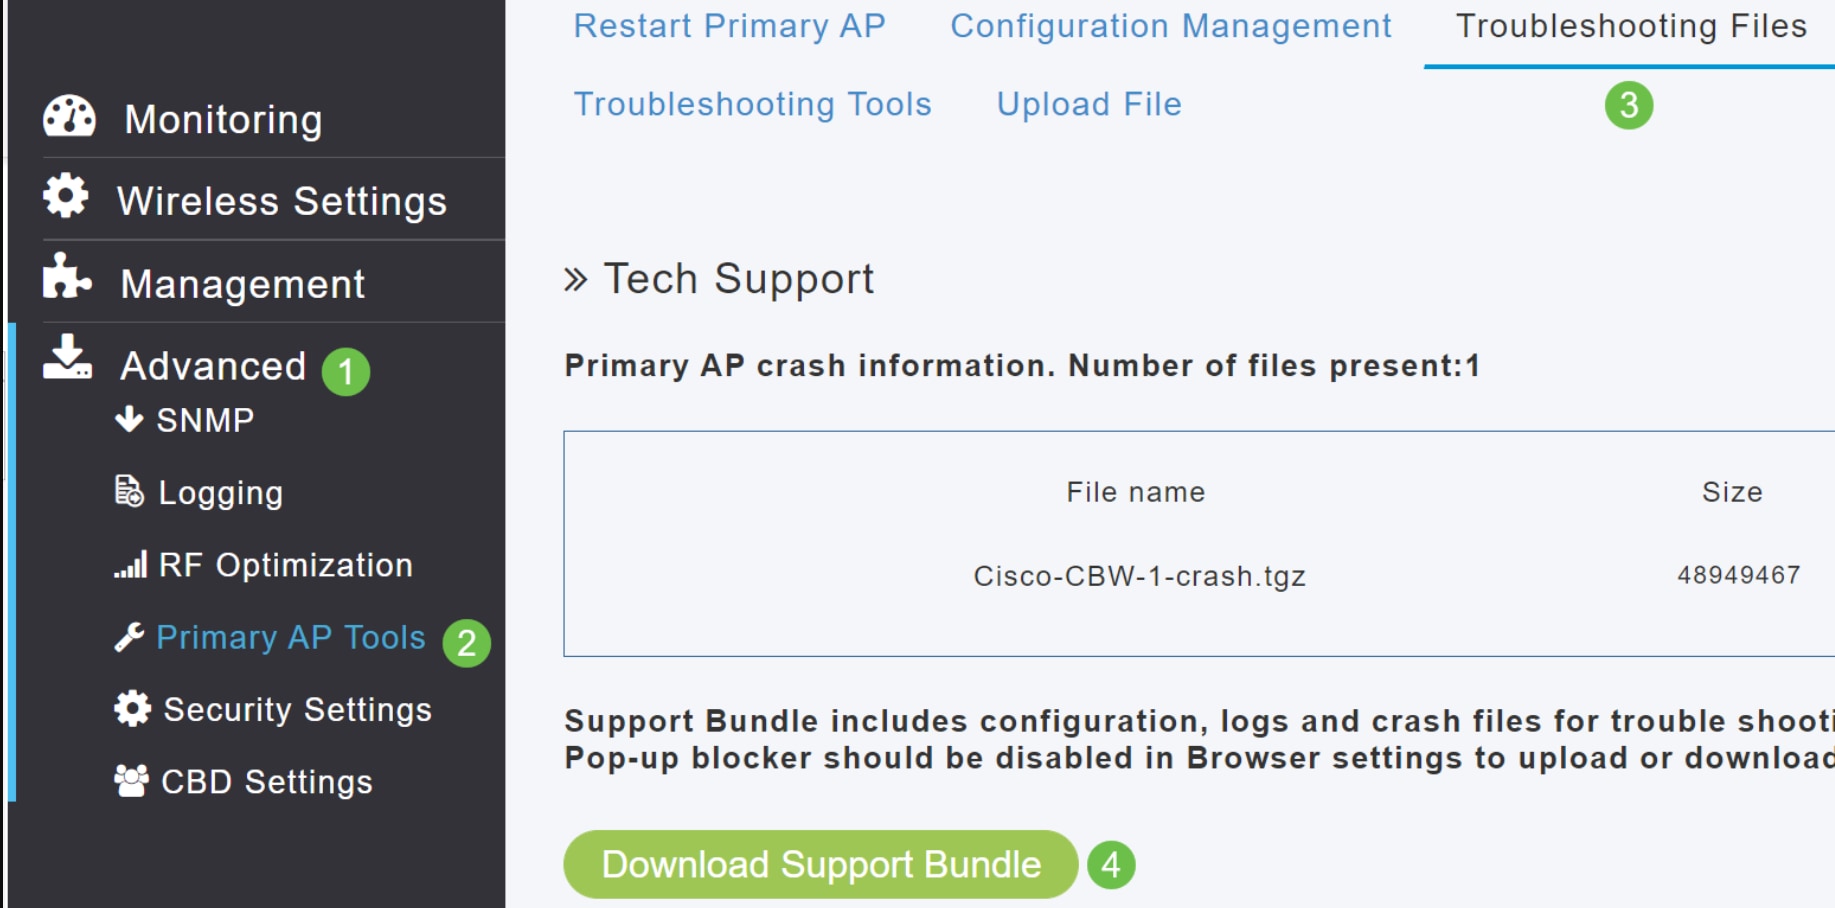
Download Tech-support files
On the Web UI, navigate to Advanced > SNMP > Primary AP Tools > Troubleshooting Files > Download Support Bundle.
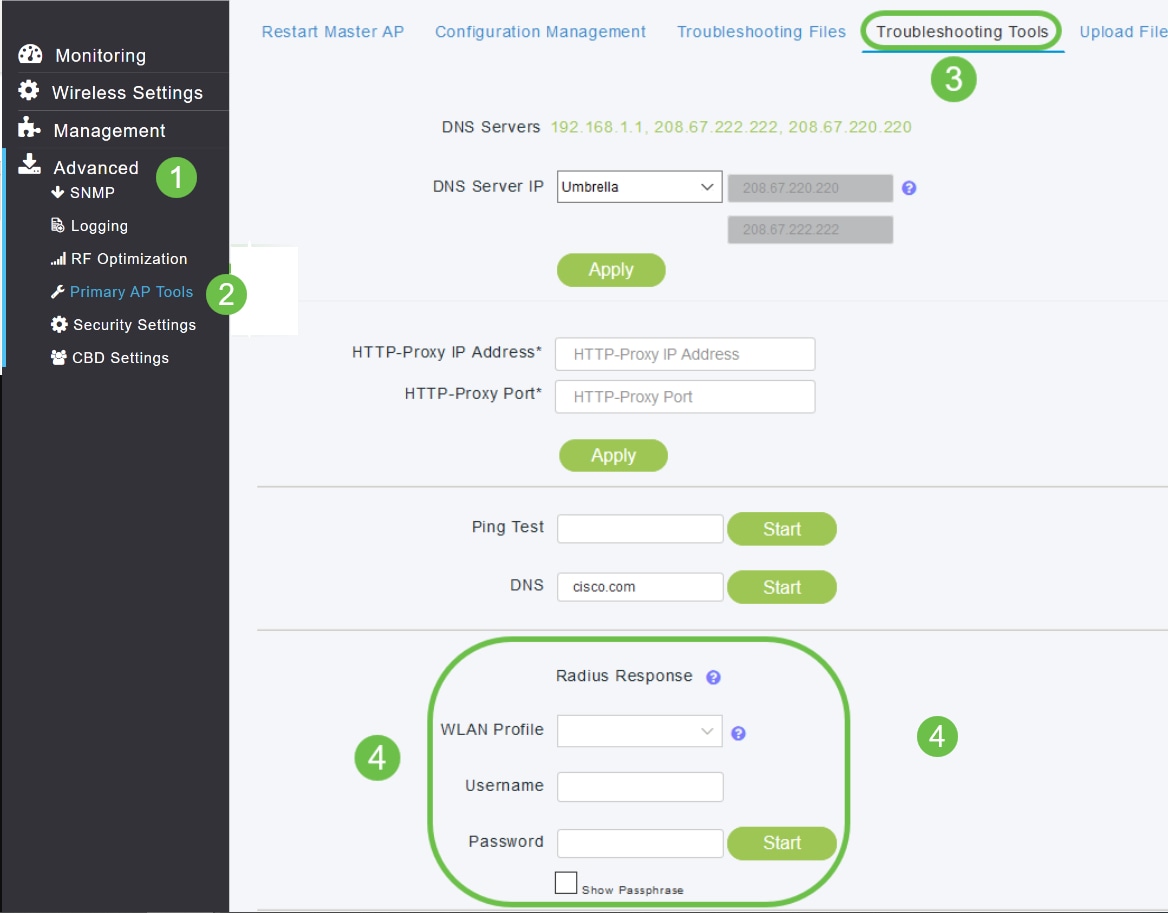
Radius Response test
On the Web UI, navigate to On the Web UI, navigate to Advanced > SNMP > Primary AP Tools > Troubleshooting Tools > Radius Response.
Configure and view log details
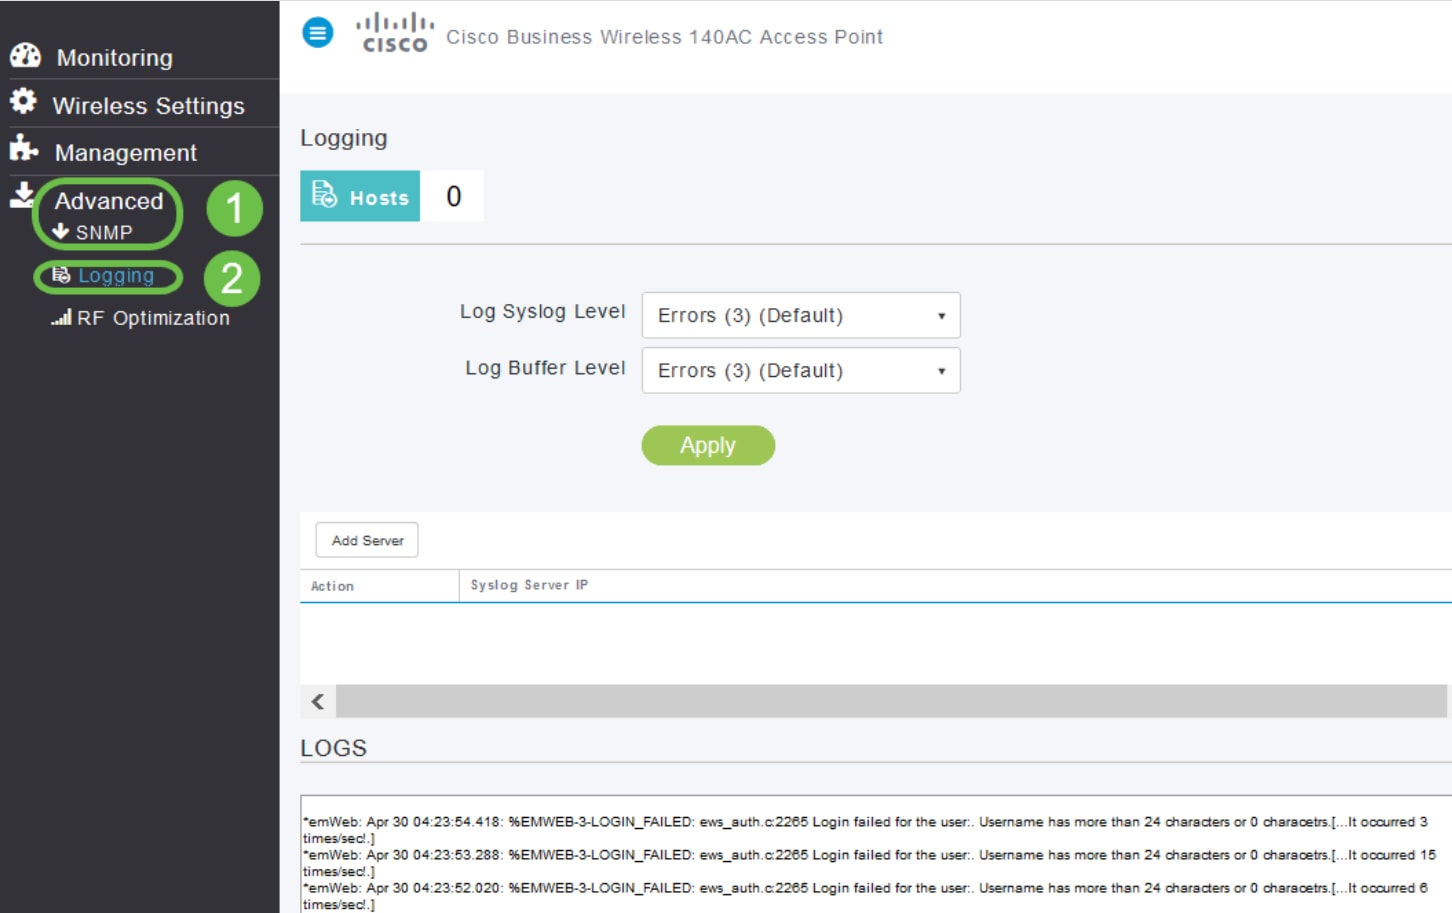
On the Web UI, navigate to On the Web UI, navigate to On the Web UI, navigate to Advanced > SNMP > Logging.
Software Update
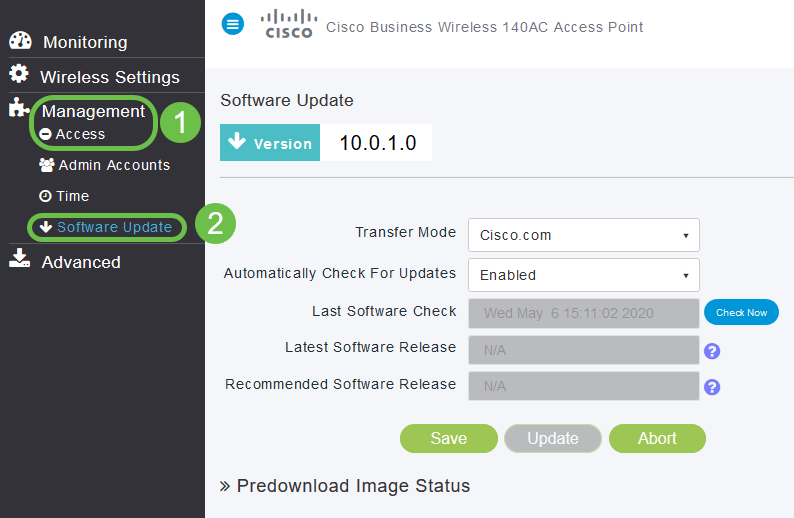
On the Web UI, navigate to Management > Access > Software Update.
Spectrum Intelligence
On the Web UI, navigate to Monitoring > Network Summary > Access Points > Spectrum Intelligence.

RF Troubleshoot
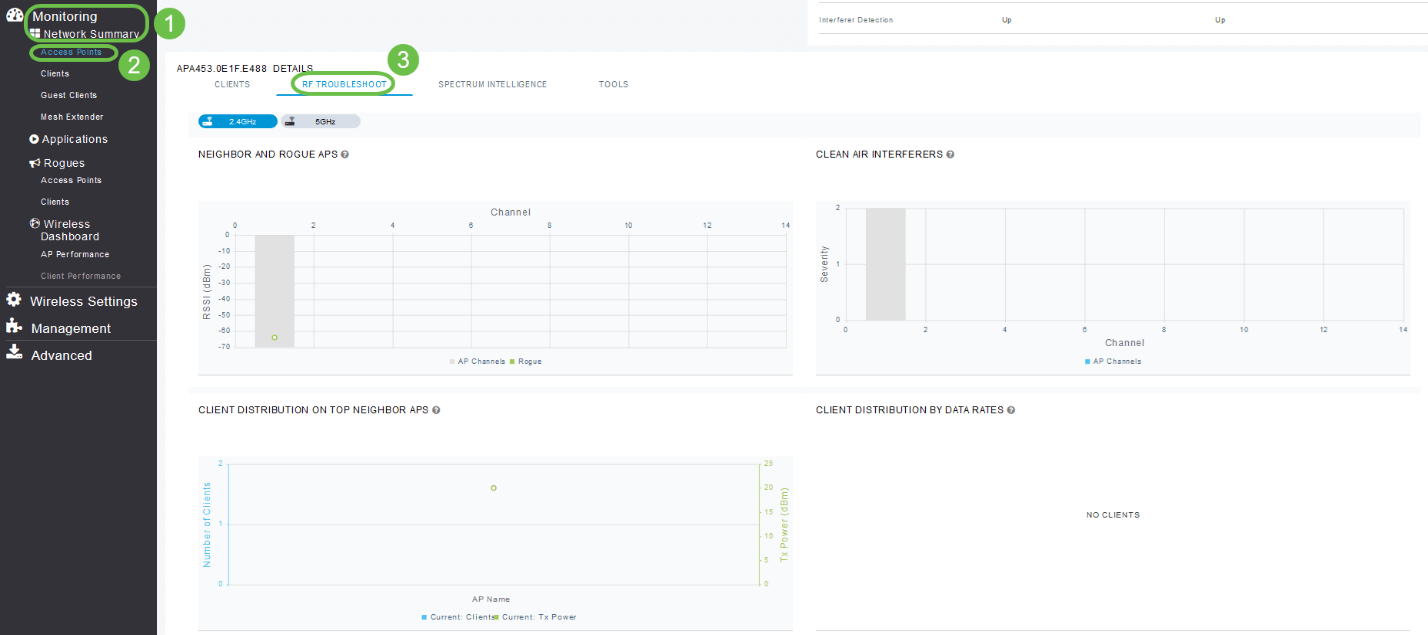
On the Web UI, navigate to On the Web UI, navigate to Monitoring > Network Summary > Access Points > RF Troubleshoot.
Configuration option for SNMP and NTP, mDNS and Umbrella
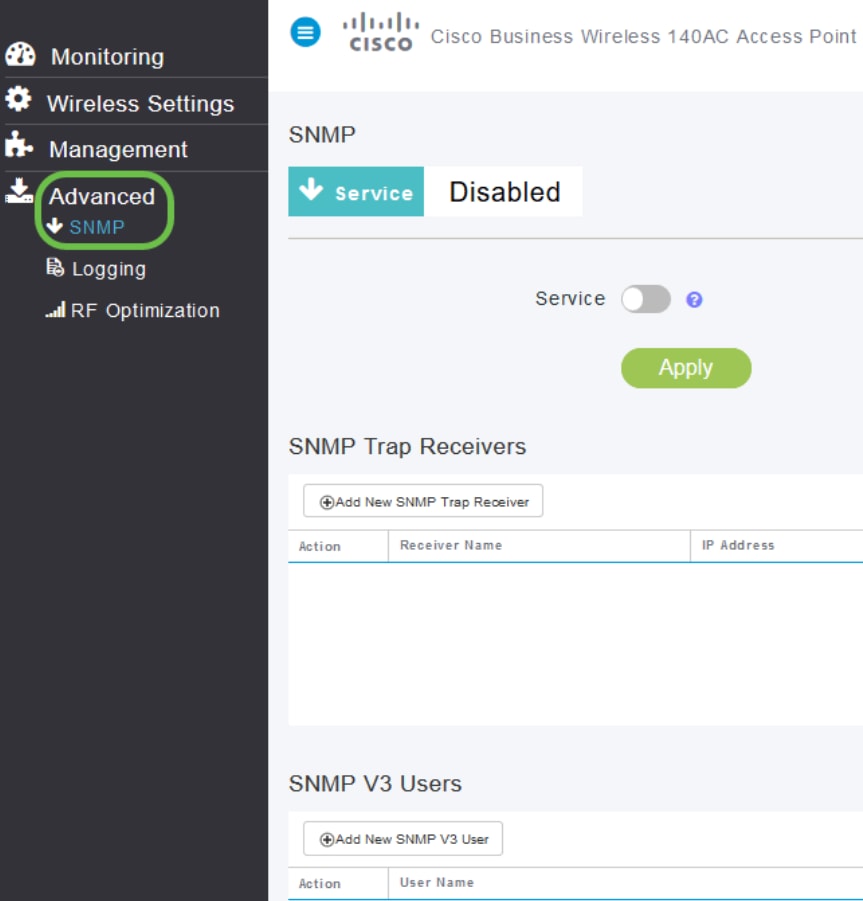
SNMP: On the Web UI, navigate to Advanced > SNMP.
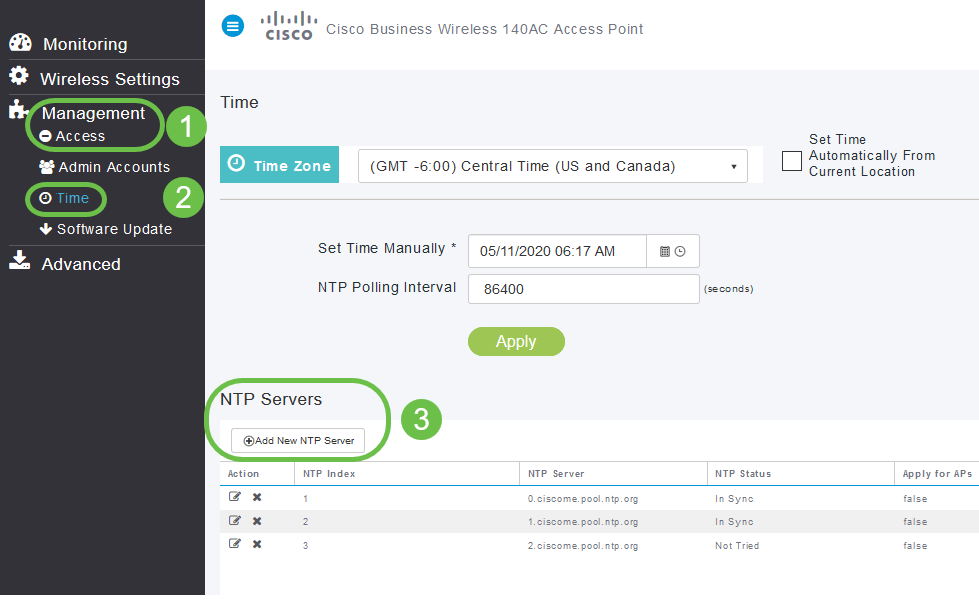
NTP: On the Web UI, navigate to Management > Access > Time > NTP Servers.
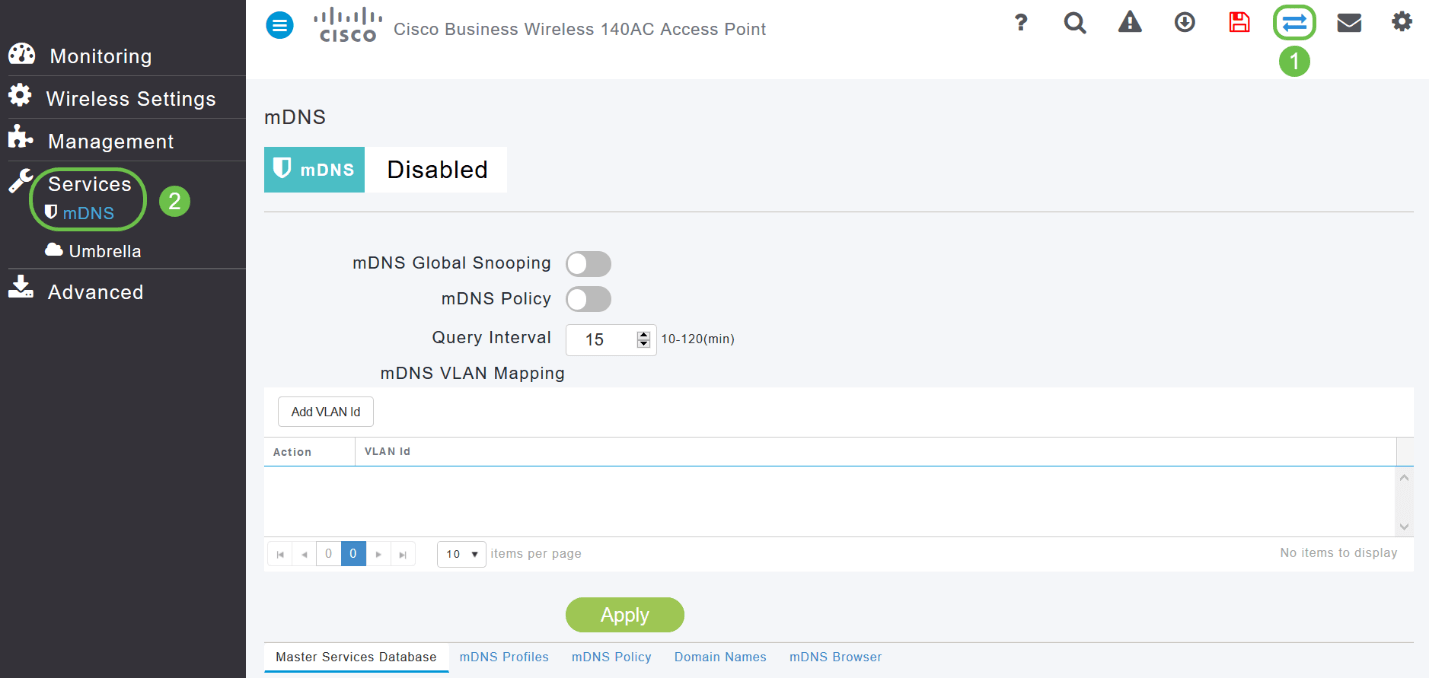
mDNS: On the Web UI, make sure you are in Expert View by clicking on the arrow icon. Navigate to Services > mDNS.
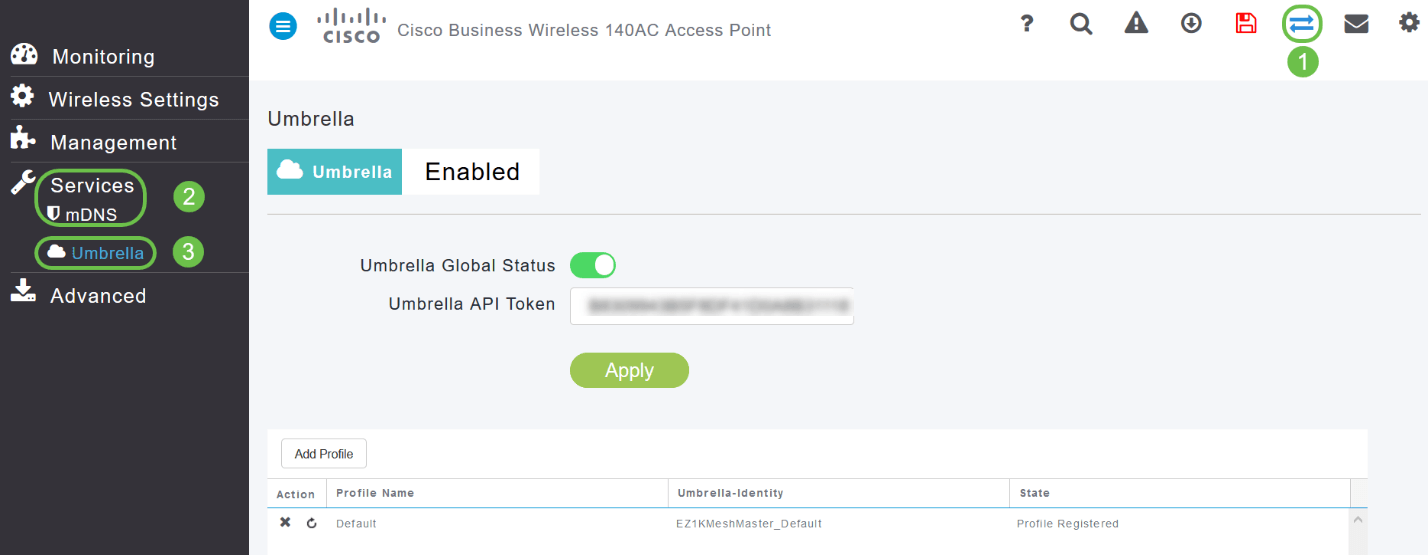
Umbrella: On the Web UI, make sure you are in Expert View by clicking on the arrow icon. Navigate to Services > mDNS > Umbrella.
Only Available on the Mobile App
Touch ID authentication:
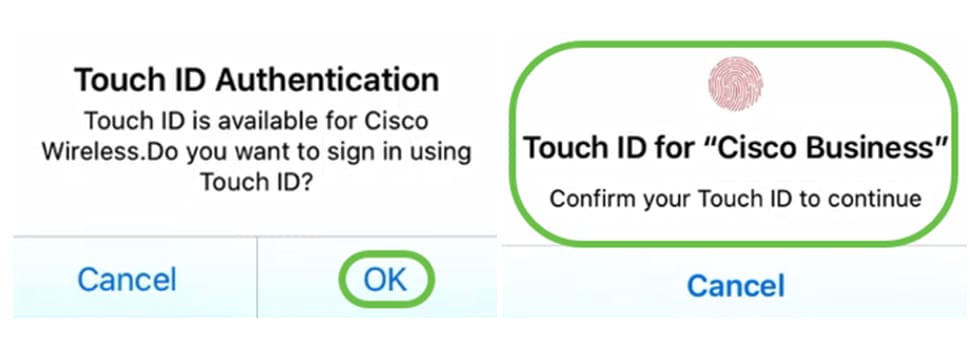
Touch ID authentication is available for Cisco Business Wireless Application. You can use Touch ID for fingerprint-based authentication to access Cisco Business Wireless network via Mobile App.
On the mobile app, select OK and Confirm.
Details of top Operating Systems
On the mobile app, navigate to Overview > Network Summary > Top Operating Systems.
Client Performance - (Connection Score, Connected Protocols)
On the mobile app, navigate to Overview > Client Performance.
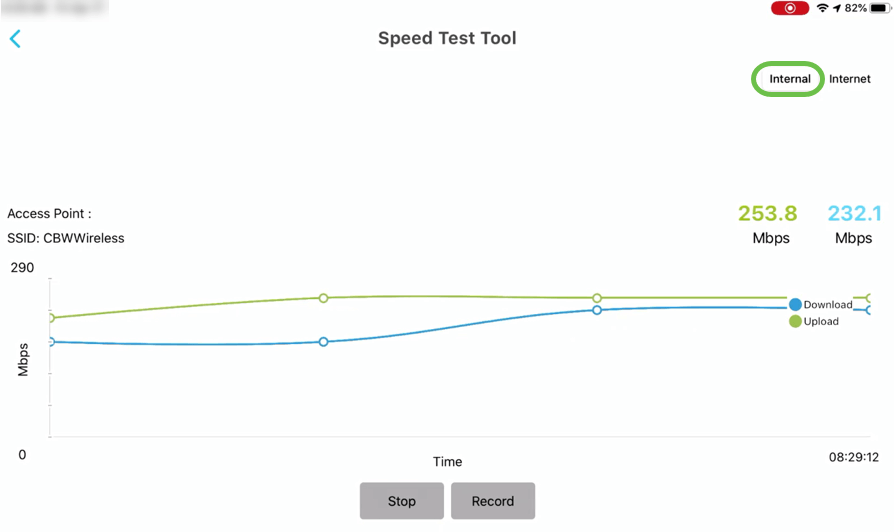
Speed Test Tool (Internal and Internet)
On the mobile app, navigate to Internal.
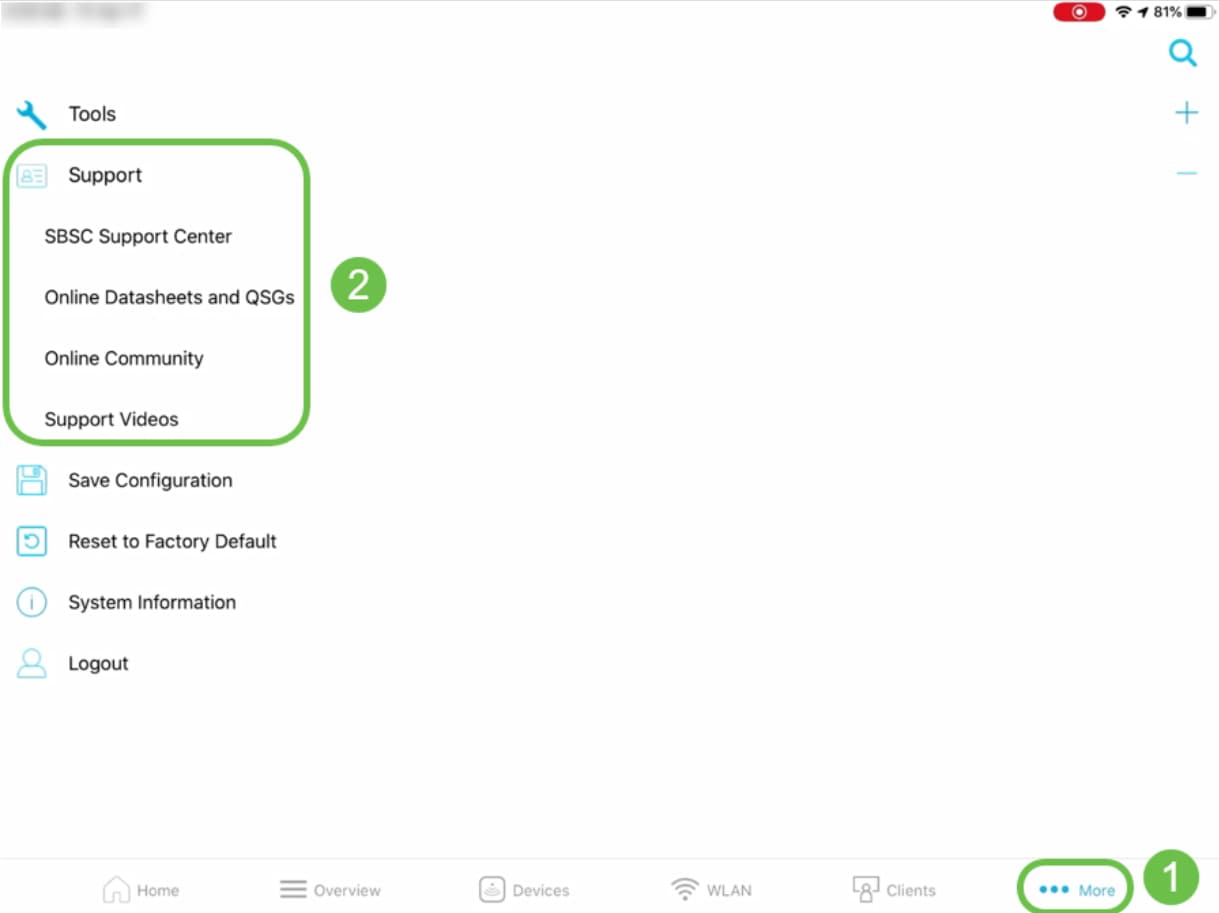
Options to access online resource related to products
On the mobile app, select More and select the online resource you would like to access.
Conclusion
You are now familiar with how to navigate through the features available in web UI and Cisco Business Wireless App for Cisco Business Wireless Access Points and Mesh Extenders. You can monitor and manage your Cisco Business Wireless Network with ease.
Check out these other related articles!
