Allow Lists on a Cisco Business Wireless Mesh Network
Available Languages
Objective
This article shows you how to create an Allow list on a Primary AP that includes all the subordinate Access Points (APs) on a Cisco Business Wireless (CBW) mesh network. This is required before the Primary AP can access and upgrade any other AP within its mesh network.
If you are unfamiliar with terms in this document, check out Cisco Business: Glossary of New Terms.
Applicable Devices | Firmware Version
- 140AC (Data Sheet) | 10.0.1.0 (Download latest)
- 141ACM (Data Sheet) | 10.0.1.0 (Download latest)
- 142ACM (Data Sheet) | 10.0.1.0 (Download latest)
- 143ACM (Data Sheet) | 10.0.1.0 (Download latest)
- 145AC (Data Sheet) | 10.0.1.0 (Download latest)
- 240AC (Data Sheet) | 10.0.1.0 (Download latest)
Introduction
Connectivity is essential for an effective Cisco Business Wireless (CBW) network. In order to connect other Primary-capable APs and mesh extenders, you need to create an Allow list on a Primary AP that includes the Media Access Control (MAC) address of all the APs. It’s like being on a permanent guest list for exclusive parties, and who doesn’t want that?
In addition, subordinate APs need to be Allow listed so that the Primary AP can access and upgrade the other APs, which is essential to keep the network up and running.
This Allow list, along with all APs having the same Bridge Group Name (BGN), helps the APs connect efficiently and consistently. A BGN was automatically created when you originally configured your mesh network and was copied throughout all APs. If you did not set up your network from default settings, or moved a configured AP from another network, it is possible to have a BGN mismatch. This can cause service to be interrupted every 10-15 minutes as the AP looks for a matching BGN. For more information, check out the article, Bridge Group Names.
If an AP can’t find a network with the same Bridge Group Name, and the AP is not Allow listed, it will not be able to join the network. The AP cannot join any network that doesn’t have its MAC address Allow listed. Since you don’t want that to happen, please continue!
Table of Contents
The Location of a MAC Address on an AP
Beginner Help
This toggled section highlights tips for beginners.
Logging In
Log into the Web User Interface (UI) of the Primary AP. To do this, open a web browser and enter https://ciscobusiness.cisco.com You may receive a warning before proceeding. Enter your credentials.You can also access the Primary AP by entering https://[ipaddress] (of the Primary AP) into a web browser.
Tool Tips
If you have questions about a field in the user interface, check for a tool tip that looks like the
following: ![]()
Trouble locating the Expand Main Menu icon?
Navigate to the menu on the left-hand side of the screen, if you don’t see the menu button, click
this icon to open the side-bar menu.
Cisco Business App
These devices have companion apps that share some management features with the web user interface. Not all features in the Web user interface will be available in the App.
Frequently Asked Questions
If you still have unanswered questions, you can check our frequently asked questions document. FAQ
To help each of your APs to quickly connect to a Primary AP, you can add each MAC address to the Allow list of the other APs. If you know the MAC address of each AP, you can skip to Configure Each AP for the Allow list.
Step 1
On most APs, the MAC address can be found on the outside of the actual AP. A MAC address includes numbers and letters in pairs, separated by colons.
On the 142ACM and 143ACM you need to slide out the power apparatus to view the MAC address. To do this, apply light pressure on the AP where the arrows indicate. Slide and lift the power component out.
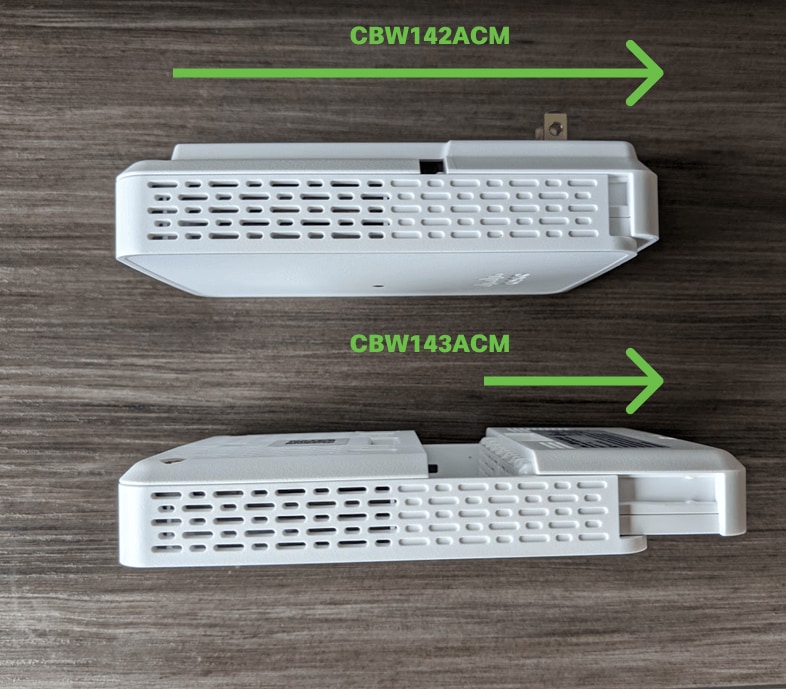
Step 2
On the 142ACM and 143ACM, you will see the MAC address in the locations pointed out below.
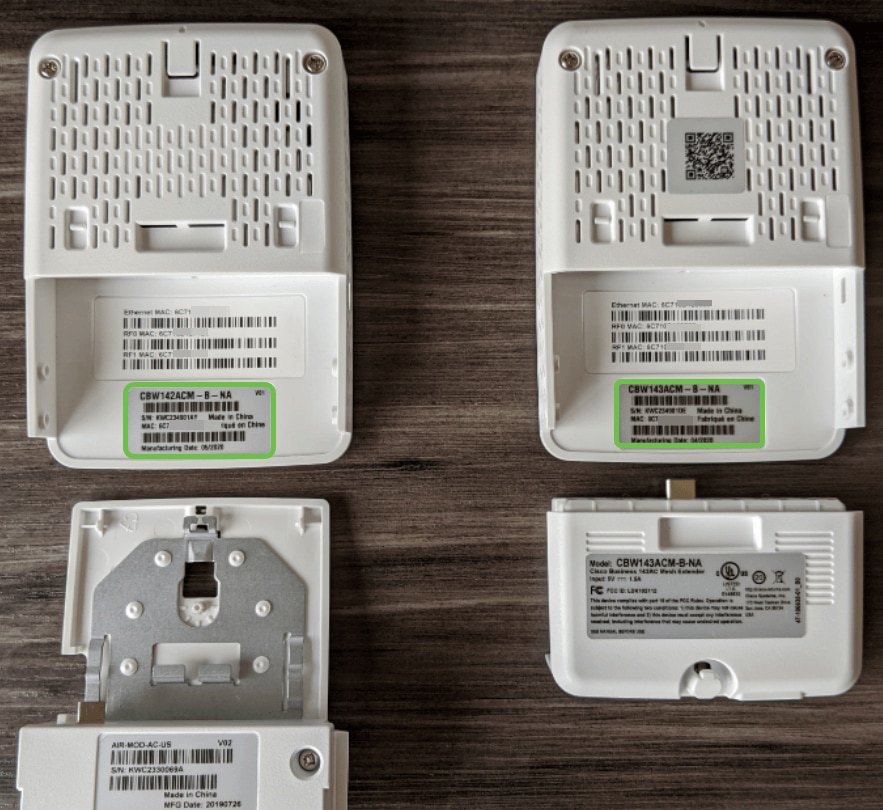
Configure Each AP for the Allow list
Step 1
Power up the Access Point if it isn’t already on. Check the status of the indicator lights. When the LED light is blinking green, proceed to the next step.
Booting up the access point will take about 8–10 minutes. The LED will blink green in multiple patterns, alternating rapidly through green, red, and amber before turning green again. There may be small variations in the LED color intensity and hue.
Step 2
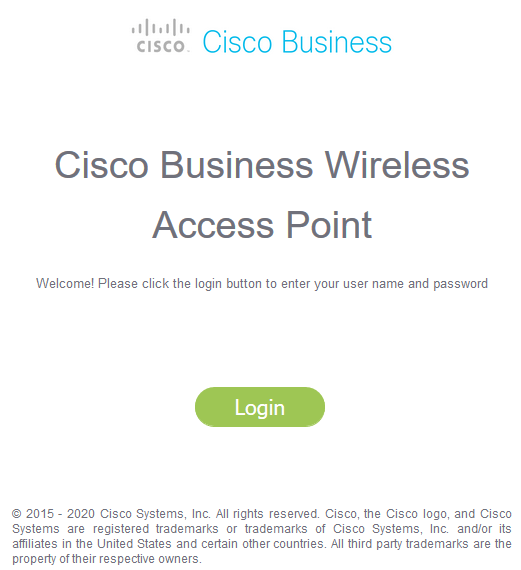
To log into the Web UI of the Primary AP, open a web browser and enter https://ciscobusiness.cisco. If you know the IP address, you could enter that instead. You may receive a warning before proceeding.
Enter your credentials.
Step 3
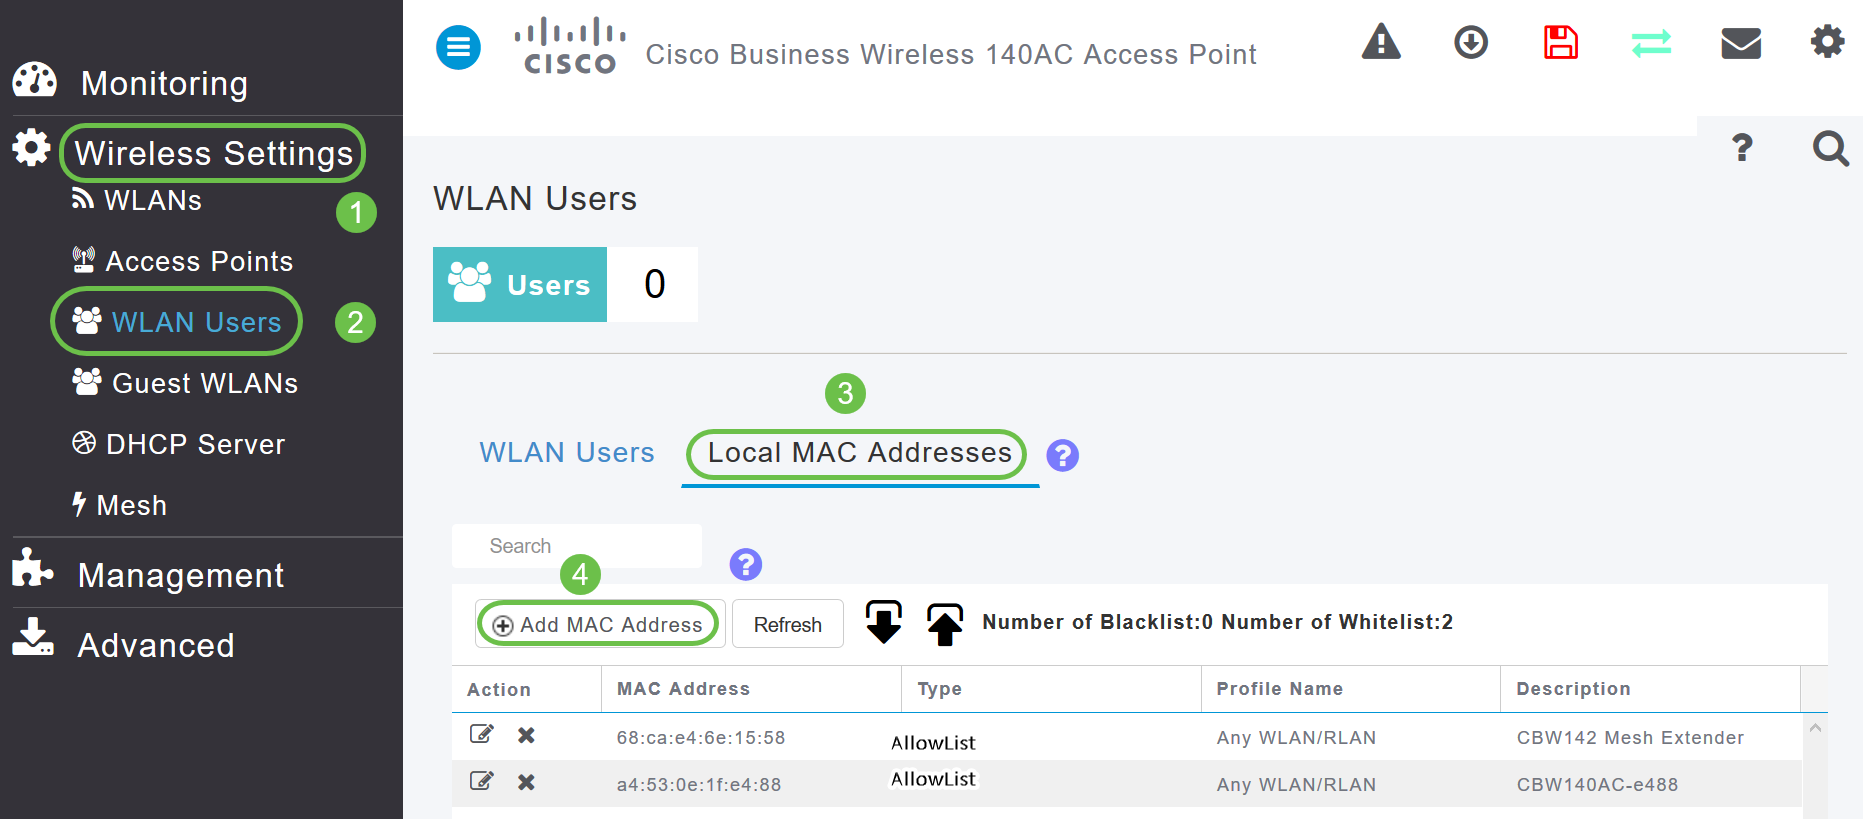
Once you are logged into the Primary AP:
- Select Wireless Settings
- Select WLAN Users
- Select Local MAC Addresses
- Select Add MAC Address
Step 4
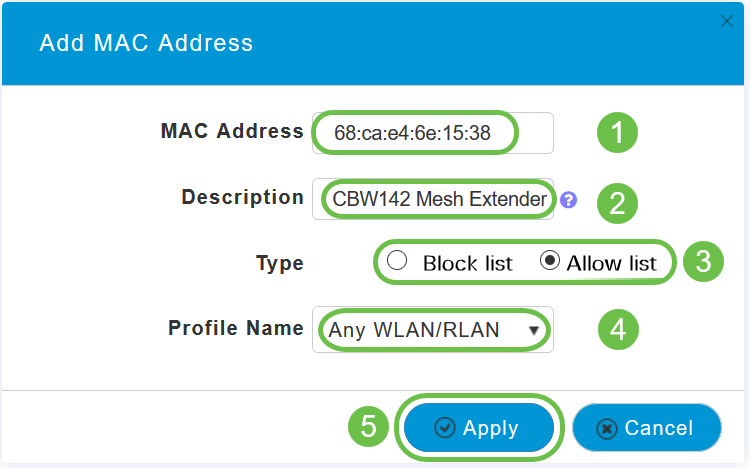
Enter the following information:
- MAC Address
- Description (up to 32 characters)
- Select the Allow list radio button
- Click Apply
If you have more APs to add, return to Step 3 and repeat as many times as necessary.
Conclusion
There you have it, your Allow list is up to date and helping you to stay connected in your mesh network. If you want to learn even more, check out the articles below.