Configure Wireless Security Settings on a WAP
Available Languages
Introduction
Configuring the wireless security on your Wireless Access Point (WAP) is highly-essential to protect your wireless network from intruders that may compromise the privacy of your wireless devices as well as the data transmitting over your wireless network. You can configure the wireless security on your wireless network by setting up MAC Filter, Wi-Fi Protected Access (WPA/WPA2) Personal, and WPA/WPA2 Enterprise.
MAC Filtering is used to filter the wireless clients to access the network using their MAC addresses. A client list will be configured to either allow or block the addresses on the list to access the network, depending on your preference. To learn more about MAC Filtering, click here.
WPA/WPA2 Personal and WPA/WPA2 Enterprise are security protocols used to protect privacy by encrypting the transmitted data over the wireless network. WPA/WPA2 is compatible with IEEE standards 802.11E and 802.11i. Compared to Wired Equivalent Privacy (WEP) security protocol, WPA/WPA2 have improved the authentication and encryption features.
WPA/WPA2 Personal is for home use and WPA/WPA2 Enterprise is for business-scaled network. WPA/WPA2 Enterprise provides greater security and centralized control over the network compared to WPA/WPA2 Personal.
In this scenario, wireless security is going to be configured on the WAP to protect the network from intruders using WPA/WPA2 Personal and Enterprise settings.
Objective
This article aims to show you how to configure WPA/WPA2 Personal and Enterprise security protocols to improve the security and privacy of your wireless network.
Note: This article assumes that a Service Set Identifier (SSID) or a Wireless Local Area Network (WLAN) has already been created on your WAP.
Applicable Devices
- WAP100 Series
- WAP300 Series
- WAP500 Series
Software Version
- 1.0.2.14 – WAP131, WAP351
- 1.0.6.5 – WAP121, WAP321
- 1.3.0.4 – WAP371
- 1.1.0.7 – WAP150, WAP361
- 1.2.1.5 - WAP551, WAP561
- 1.0.1.11 – WAP571, WAP571E
Configure Wireless Security Settings
Configure WPA/WPA2 Personal
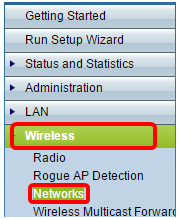
Step 1. Log in to the web-based utility of your access point and choose Wireless > Networks.
Note: In the image below, the web-based utility of the WAP361 is used as an example. Menu options may vary depending on the model of your device.

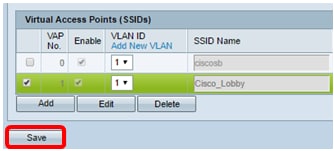
Step 2. Under the Virtual Access Points (SSIDs) area, check the check box of the SSID you want to configure and click Edit.
Note: In this example, VAP1 is chosen.

Step 3. Click WPA Personal from the Security drop-down list.

Step 4. Choose the WPA version (WPA-TKIP or WPA2-AES) by checking the check box. Two may be chosen at once.
- WPA-TKIP — Wi-Fi Protected Access-Temporal Key Integrity Tool. The network has some client stations that only support the original WPA and TKIP security protocol. Note that choosing only WPA-TKIP for access point is not allowed as per the latest Wi-Fi Alliance requirement.
- WPA2-AES — Wi-Fi Protected Access-Advanced Encryption Standard. All client stations on the network support WPA2 and AES-CCMP cipher/security protocol. This WPA version provides the best security per IEEE 802.11i standard. As per the latest Wi-Fi Alliance requirement, the WAP has to support this mode all the time.
Note: For this example, both check boxes are checked.

Step 5. Create a password consisting of 8-63 characters and enter it in the Key field.

Note: You can check the Show Key as Clear Text box to show the password you created.

Step 6. (Optional) In the Broadcast Key Refresh Rate field, enter a value or the interval at which the broadcast (group) key is refreshed for clients associated with this VAP. The default is 300 seconds and the valid range is from 0 to 86400 seconds. A value of 0 indicates that the broadcast key is not refreshed.

Step 7. Click Save.

You now have configured WPA Personal on your WAP.
Configure WPA/WPA2 Enterprise
Step 1. Log in to the web-based utility of your access point and choose Wireless > Networks.
Note: In the image below, the web-based utility of the WAP361 is used as an example.

Step 2. Under the Virtual Access Points (SSIDs) area, check the SSID you want to configure and click the Edit button below it.

Step 3. Choose WPA Enterprise from the Security drop-down list.

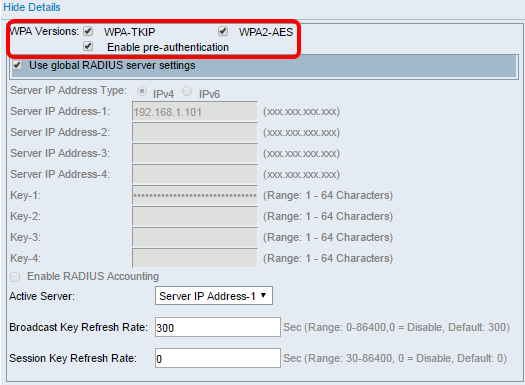
Step 4. Choose the WPA version (WPA-TKIP, WPA2-AES, and Enable pre-authentication).
- Enable pre-authentication— If you choose WPA2-AES only or both WPA-TKIP and WPA2-AES as the WPA version, you can enable pre-authentication for the WPA2-AES clients. Check this option if you want the WPA2 wireless clients to send the pre-authentication packets. The pre-authentication information is relayed from the WAP device that the client is currently using to the target WAP device. Enabling this feature can help speed up the authentication for roaming clients who connect to multiple Access Points (AP).
Note: This option does not apply if you selected WPA-TKIP for WPA versions because the original WPA does not support this feature.

Step 5. (Optional) Uncheck the Use global RADIUS server settings check box to edit the settings.

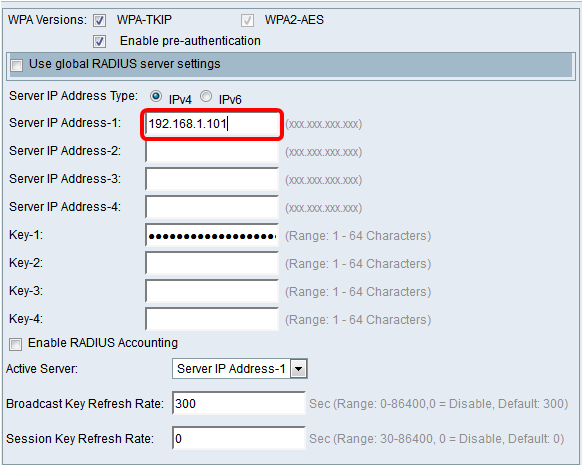
Step 6. (Optional) Click the radio button for the correct Server IP Address Type.
Note: For this example, IPv4 is chosen.

Step 7. Enter the IP address of the RADIUS server in the Server IP Address field.
Note: For this example 192.168.1.101 is used.

Step 8. In the Key field, enter the password key corresponding to your RADIUS server that the WAP uses to authenticate to the RADIUS server. You can use from 1 to 64 standard alphanumeric and special characters.
Note: The keys are case-sensitive and must match the key configured on the RADIUS server.
Step 9. (Optional) Repeat Steps 7-8 for every RADIUS server in your network that you want the WAP to communicate with.

Step 10. (Optional) Check the EnableRADIUS Accounting check box to enable tracking and measuring of the resources a user has consumed (system time, the amount of data transmitted). Enabling this feature will allow RADIUS accounting for both the primary and backup servers.

Step 11. Click  .
.
You now have successfully configured WPA/WPA2 Enterprise security on your WAP.
Revision History
| Revision | Publish Date | Comments |
|---|---|---|
1.0 |
13-Dec-2018 |
Initial Release |
 Feedback