Configure Event Logging on a Wireless Access Point
Available Languages
Objective
System events are activities that may require attention and necessary action to be taken to run the system smoothly and prevent failures. These events are recorded as logs. System Logs enable the administrator to keep track of particular events that take place on the device.
Applicable Devices
-
WAP100 Series
-
WAP300 Series
-
WAP500 Series
Software Version
-
1.0.1.4 — WAP131, WAP351
-
1.0.6.2 — WAP121, WAP321
-
1.2.1.3 — WAP371, WAP551, WAP561
-
1.0.1.2 — WAP150, WAP361
-
1.0.0.17 — WAP571, WAP571E
Configure Event Logging
Configure E-mail Alert
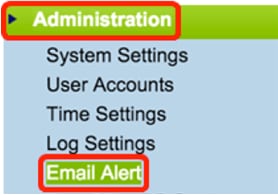
Step 1. Log in to the web-based utility, and choose Administration > Email Alert.
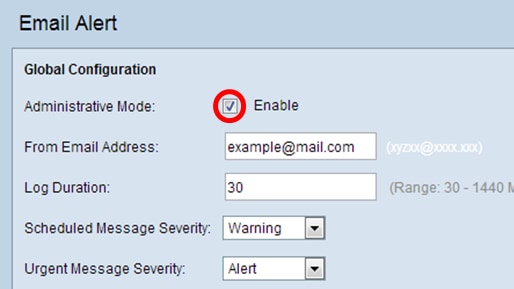
Step 2. Check Enable in the Administrative Mode check box to enable the email alert feature globally.
Step 3. Enter an email address in the From Email Address field. The address is displayed as the sender of the Email Alert. The default value is null.
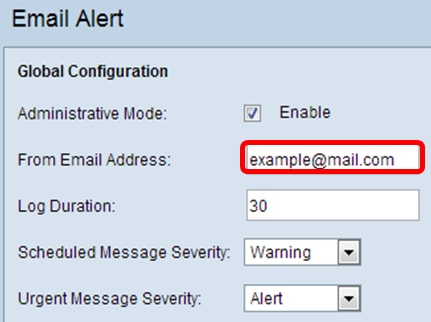
Note: It is highly recommended to use a separate email account instead of using your personal email to maintain privacy.
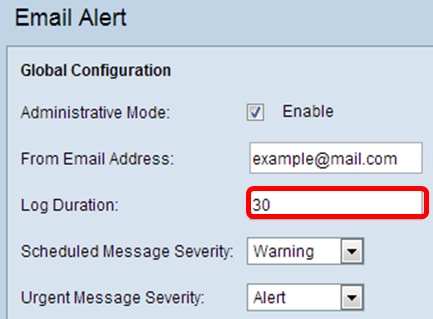
Step 4. In the Log Duration field, enter the time (in minutes) as to how often the email alerts should be sent to the configured email address. The range is 30-1440 minutes and the default value is 30.
Step 5. To set the Scheduled Message Severity, choose the appropriate type of message to be sent such as Emergency, Alert, Critical, Error, Warning, Notice, Info, or Debug. These messages are sent every time the Log Duration lapses. These options are displayed differently in the web-based utility depending on the model of the device you are using.
For WAP131, WAP150, WAP351, and WAP361, check the appropriate message type on the Scheduled Message Severity check boxes.

For WAP121, WAP321, WAP371, WAP551, WAP561, WAP571, and WAP571E, click the appropriate message type on the Scheduled Message Severity drop-down list.
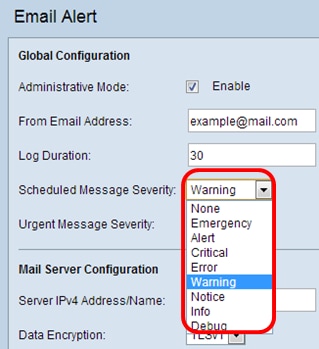
-
None — No messages are sent.
-
Emergency — This type of message is sent to the user when the device is in a critical situation and immediate attention is required.
-
Alert — This type of message is sent to the user when any action occurs that is different from the normal configuration.
-
Critical — This type of message is sent to the user when there is a situation where a port is down or the user cannot access the network. Immediate action is required.
-
Error — This type of message is sent to the user when there is a configuration error.
-
Warning — This type of message is sent to the user when another user tries to access the restricted areas.
-
Notice — This type of message is sent to the user when there are low priority changes on the network.
-
Info — This type of message is sent to the user to describe how the network behaves.
-
Debug — This type of message is sent to the user with the logs of the network traffic.
Step 6. To set the Urgent Message Severity, choose the appropriate type of urgent message to be sent such as Emergency, Alert, Critical, Error, Warning, Notice, Info, or Debug. These messages are sent immediately. These options are displayed differently in the web-based utility depending on the model of the device you are using.
For WAP131, WAP150, WAP351, and WAP361, check the appropriate urgent message type on the Urgent Message Severity check boxes.

For WAP121, WAP321, WAP371, WAP551, WAP561, WAP571, and WAP571E, click the appropriate urgent message type on the Urgent Message Severity drop-down list.
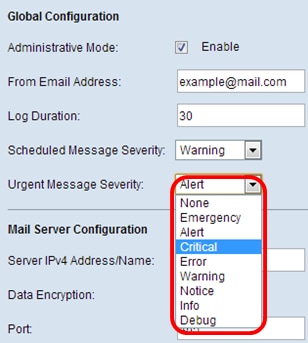
Note: If the option is set to None, no messages are sent.
Step 7. Enter the valid host name of the mail server or IP address in the Server IPv4 Address/Name field.
Note: In the example below, 200.168.20.10 is used.
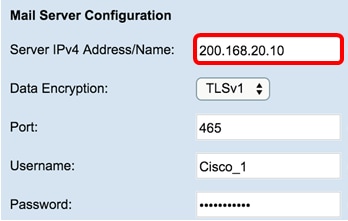
Step 8. Choose the mode of security from the Data Encryption drop-down list. The available options are:
-
TLSv1 — Transport Layer Security version 1 is a cryptographic protocol that provides security and data integrity for communication over the Internet.
-
Open — It is the default encryption protocol but has no security measures for data encryption.
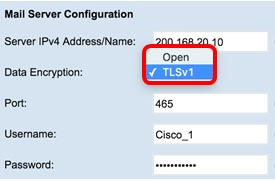
Note: In this example, TLSv1 is chosen. If you chose Open, skip to Step 12.
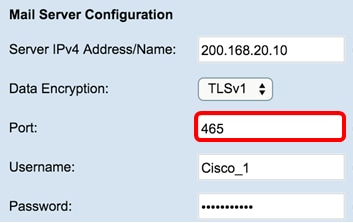
Step 9. Enter port number of the mail server in the Port field. It is an outbound port number used to send emails. The valid port number range is from 0 to 65535 and the default is 465 for Simple Mail Transfer Protocol (SMTP).
Step 10. Enter the username for authentication in the Username field.
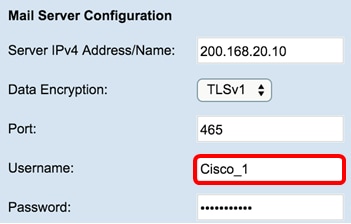
Note: Cisco_1 is used as an example.
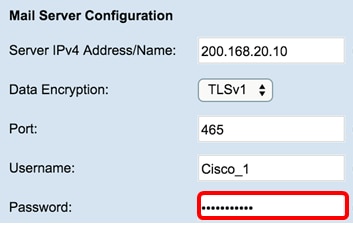
Step 11. Enter the password for authentication in the Password field.
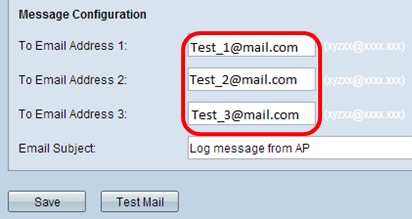
Step 12. Under Message Configuration, enter the required email address in the To Email Address 1, 2, and 3 fields.
Note: Based on the requirement, you can either enter values in all the To Email Address fields or enter only one email address and leave the remaining blank.
Step 13. Enter the subject of the email in the Email Subject field. The subject can be up to 255 alphanumeric characters.
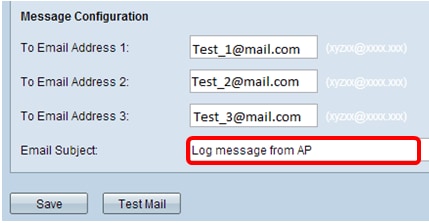
Note: In this example, Log message from AP is used.
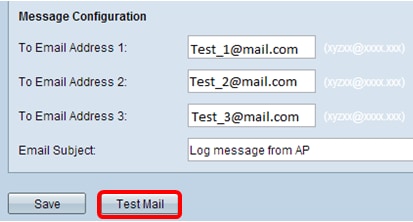
Step 14. Click Test Mail to validate the configured mail server credentials. This sends out an email to the configured email addresses to check that the configuration works.
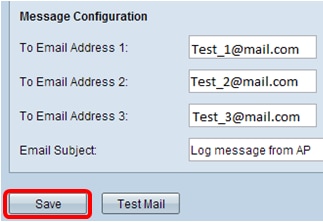
Step 15. Click Save.
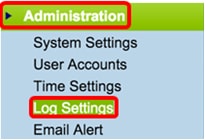
Configure Log Settings
Step 2. (Optional) If you want to have logs saved permanently so that settings will remain as the WAP reboots, enable Persistence by checking the Enable check box. This is especially useful in case of unexpected system reboots when an undesirable event or failure occurs. Up to 128 log messages can be saved in the NVRAM, after which logs are overwritten.
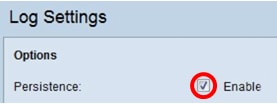
Note: If Enable is unchecked, logs are saved in volatile memory.
Step 3. To set the Severity, choose the appropriate type of message to be sent such as Emergency, Alert, Critical, Error, Warning, Notice, Info, or Debug. These messages are sent every time the Log Duration lapses. These options are displayed differently in the web-based utility depending on the model of the device you are using.

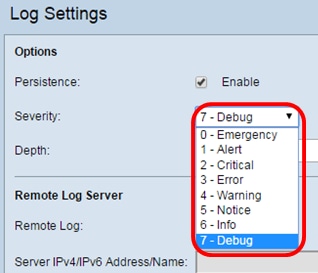
-
None — No messages are sent.
-
Emergency — This type of message is sent to the user when the device is in a critical situation and immediate attention is required.
-
Alert — This type of message is sent to the user when any action occurs that is different from the normal configuration.
-
Critical — This type of message is sent to the user when there is a situation where a port is down or the user cannot access the network. Immediate action is required.
-
Error — This type of message is sent to the user when there is a configuration error.
-
Warning — This type of message is sent to the user when another user tries to access the restricted areas.
-
Notice — This type of message is sent to the user when there are low priority changes on the network.
-
Info — This type of message is sent to the user to describe how the network behaves.
-
Debug — This type of message is sent to the user with the logs of the network traffic.
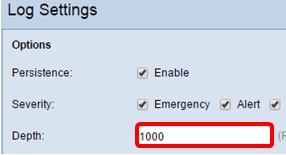
Step 4. As log messages are generated, they are placed in a queue for transmission. Specify the number of messages that can be queued at one time in the volatile memory in the Depth field. Up to 512 messages can be queued at one time.
For WAP131, WAP150, WAP351, and WAP361, enter the depth range in the Depth field. The range is 1-1000. The default value is 1000.
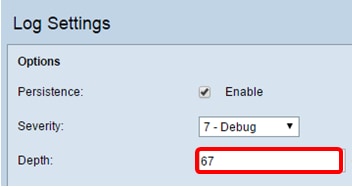
Step 5. Click Save.
Note: The access point acquires time and date information by use of a Network Time Protocol server. This data is in UTC format (Greenwich Mean Time).
Revision History
| Revision | Publish Date | Comments |
|---|---|---|
1.0 |
13-Dec-2018 |
Initial Release |
 Feedback