Configure SSID-to-VLAN Mapping on a Wireless Access Point
Available Languages
Objective
A Virtual Local Area Network (VLAN) is a switched network that is logically segmented by function, area, or application without regard to the physical locations of the users. VLANs are a group of hosts or ports that can be located anywhere in a network but communicate as if they are on the same physical segment. VLANs help to simplify network management by letting you move a device to a new VLAN without changing any physical connections.
A tagged VLAN between a trunk port and a switch port contains the VLAN information in the Ethernet frame. An untagged VLAN sends traffic without the VLAN tag. A VLAN tag inserts information into Ethernet frames identifying which frame belongs to which VLAN. A trunk port is a port that handles multiple VLANs.
The Service Set Identifier (SSID) is a unique identifier that wireless clients can connect to or share among all devices in a wireless network. It is case-sensitive and must not exceed 32 alphanumeric characters.
The SSID Broadcast feature allows the SSID to be broadcasted on the network. This feature is enabled by default to make the network discoverable by wireless devices.
This article provides instructions on how to configure SSID-to-VLAN mapping on wireless access points.
Applicable Devices | Firmware Version
- WAP121 | 1.0.6.5 (Download latest)
- WAP131 | 1.0.2.8 (Download latest)
- WAP150 | 1.0.1.7 (Download latest)
- WAP321 | 1.0.6.5 (Download latest)
- WAP351 | 1.0.2.8 (Download latest)
- WAP361 | 1.0.1.7 (Download latest)
- WAP371 | 1.3.0.3 (Download latest)
- WAP551 | 1.2.1.3 (Download latest)
- WAP561 | 1.2.1.3 (Download latest)
- WAP571 | 1.0.0.17 (Download latest)
- WAP571E | 1.0.0.17 (Download latest)
Configure SSID-to-VLAN Mapping
Using the Setup Wizard
Step 1. Run the setup wizard from the main dashboard of the access point web-based utility.
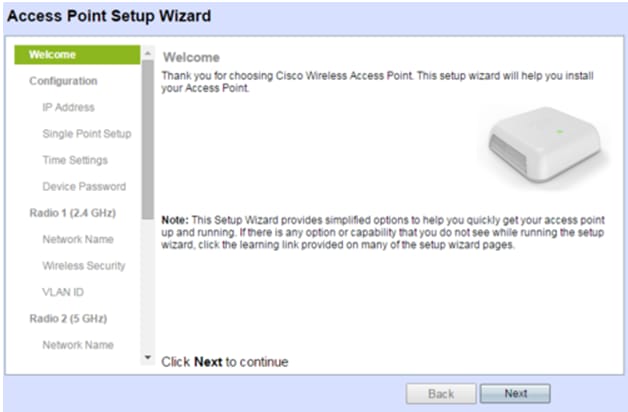
Step 2. Provide the configuration details required by the setup wizard.
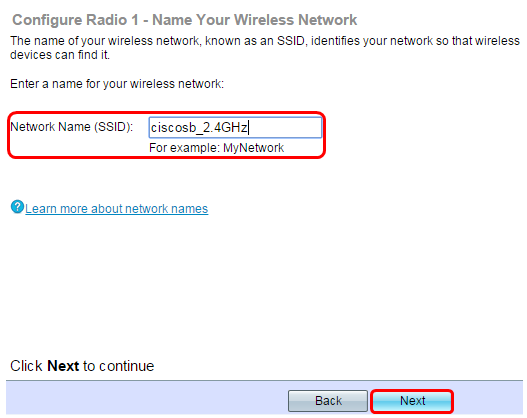
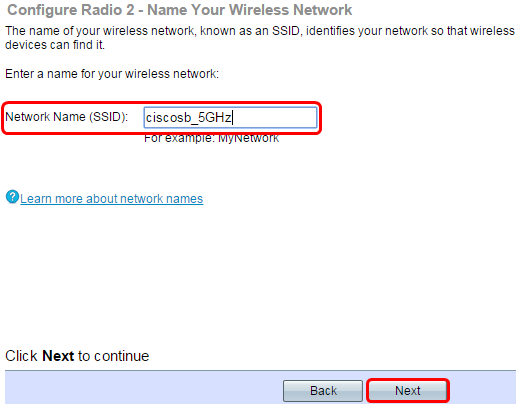
Step 3. In the Network Name (SSID) field, under Configure Radio 1 screen for the 2.4 GHz network, enter your preferred SSID. The default is ciscosb_2.4GHz. Click Next.
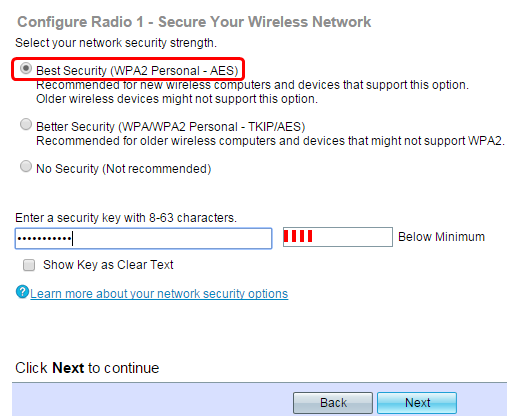
Step 4. Choose the security type for your wireless network.
Note: For this example, Best Security (WPA2 Personal – AES) is chosen.
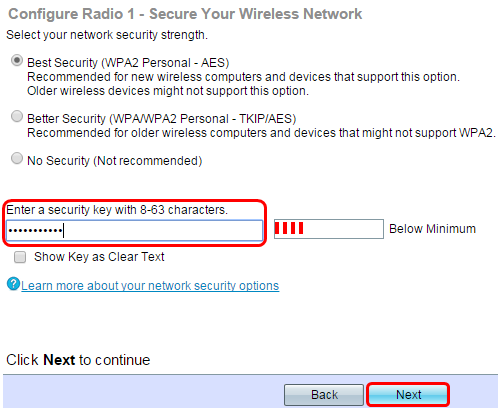
Step 5. Enter a security key or password that is 8-63 characters long. Click Next to continue.
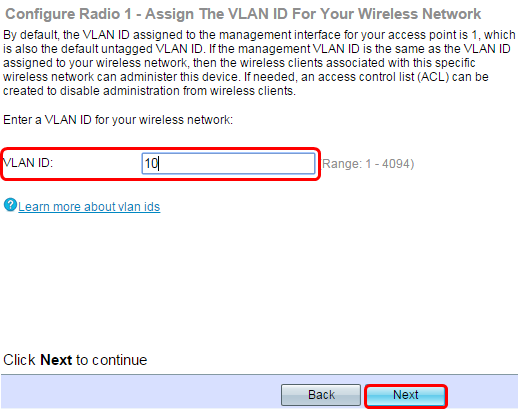
Step 6. In the VLAN ID field, enter the VLAN ID for your wireless network and click Next.
Note: In this example, 10 is used as the VLAN ID.
Step 7. In the Configure Radio 2 page for the 5 GHz network, enter your preferred SSID in the Network Name (SSID) field and then click Next. The default is ciscosb_5GHz.
Note: This step applies only to WAPs with dual-radio.
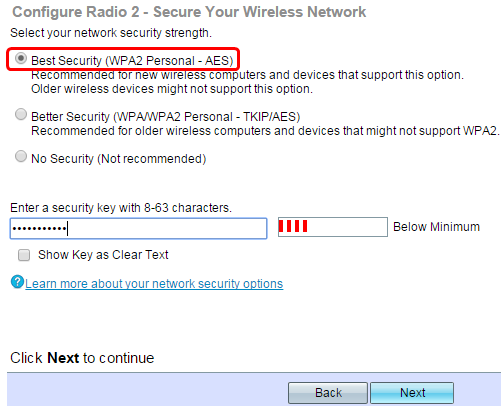
Step 8. Choose the security type for your wireless network.
Note: In this example, Best Security (WPA2 Personal - AES) is chosen.
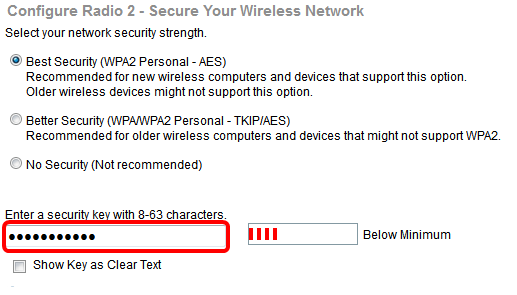
Step 9. Enter a security key or password that is 8-63 characters long. Click Next to continue.
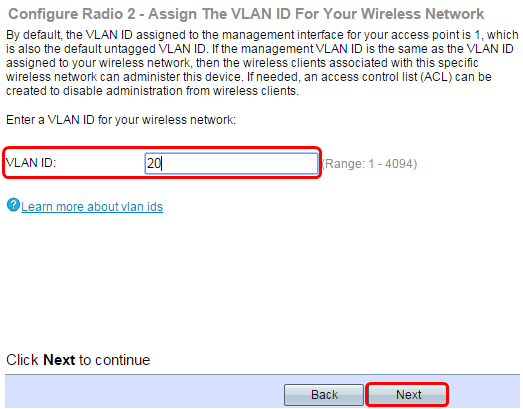
Step 10. Enter the VLAN ID then click Next.
Note: For this example, 20 is used as VLAN ID.
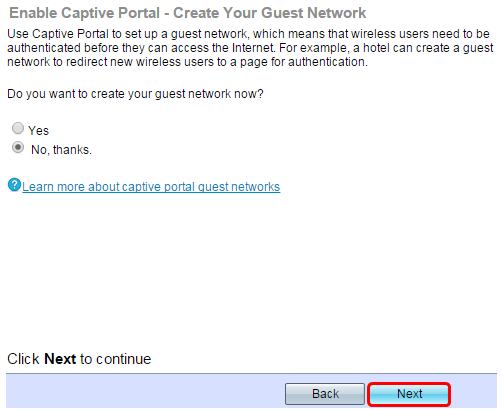
Step 11. Click Next to skip the Captive Portal configuration.
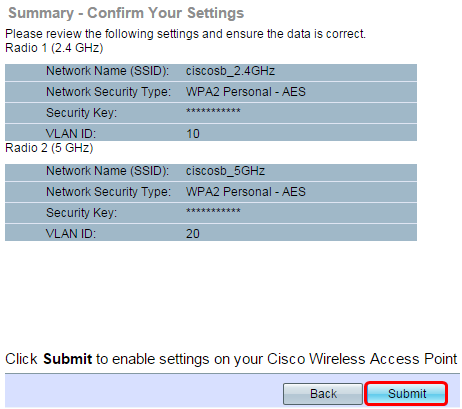
Step 12. Review and confirm your settings then click Submit.
Step 13. Once the Device Setup Complete screen appears, click Finish.
Note: You will be logged out of the web-based utility page.
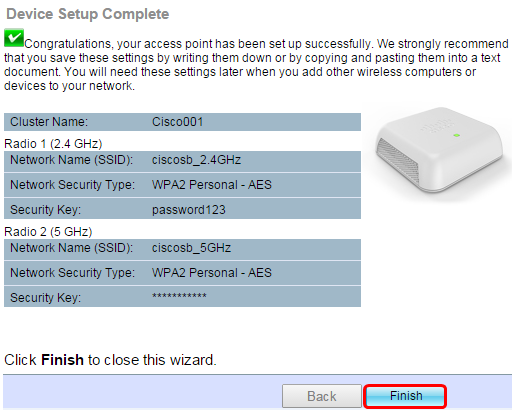
You have now successfully mapped an SSID to a VLAN on your access point.