Configure an Intel Wireless Network Card to Connect to a Management Frame Protection (MFP)-enabled Network
Available Languages
Objective
Management Frame Protection (MFP) is a wireless feature that increases the security of the management frames. Its wireless standard is IEEE 802.11w-2009 or Protected Management Frames (PMF) which aims to provide data confidentiality of the management frames and protect wireless connectivity. This feature only works if both the access point and the client have MFP enabled.
There are certain restrictions for some wireless clients to communicate with MFP-enabled infrastructure devices. MFP adds a long set of information elements to each probe request or SSID beacon. Some wireless clients such as Personal Digital Assistants (PDAs), smartphones, barcode scanners, and so forth have limited memory and CPU so you are not able to process these requests or beacons. As a result, you fail to see the Service Set Identifier (SSID) entirely, or you are not able to associate with these infrastructure devices due to mismatch of SSID capabilities. This issue is not specific to MFP. This also occurs with any SSID that has multiple information elements (IEs). It is always recommended to test MFP-enabled SSIDs on the environment with all your available client types before you deploy it in real time.
This article provides instructions on how to configure the Intel wireless network card on your Windows operating system to connect to your MFP-enabled access point.
Note: Your wireless client or operating system may or may not support this feature. Check with your wireless device or operating system manufacturer for more details. In this scenario, the wireless adapter used is Intel® Dual Band Wireless-N 7265 with version 17.13.0.9 on Windows 7 operating system.
Applicable Devices
- WAP300 Series – WAP361, WAP371
- WAP500 Series – WAP561, WAP571, WAP571E
Software Version
- 1.2.1.3 – WAP371, WAP561
- 1.0.0.17 – WAP571, WAP571E
- 1.0.1.6 – WAP361
Configure an Intel Wireless Network Card to Connect to an MFP-enabled Network
Important: Before proceeding with the configuration steps, make sure your wireless network card driver and operating system are updated.
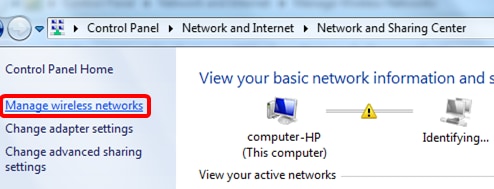
Step 1. On your Windows-based wireless computer, go to Start > Control Panel > Network and Internet > Network and Sharing Center > Manage wireless networks.
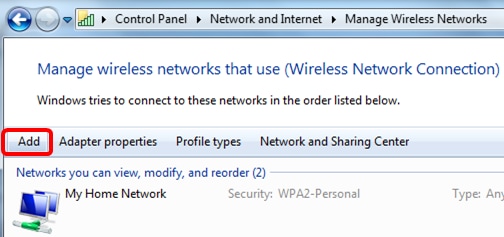
Step 2. In the Manage Wireless Networks screen, click Add.
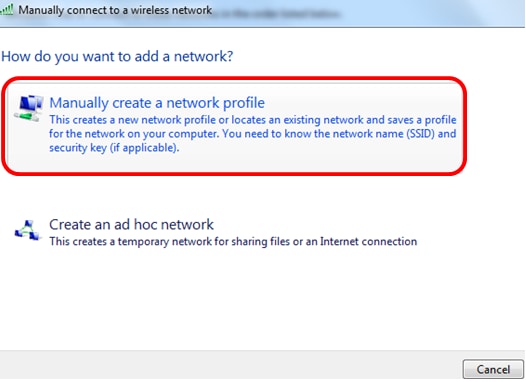
Step 3. Choose Manually create a network profile.
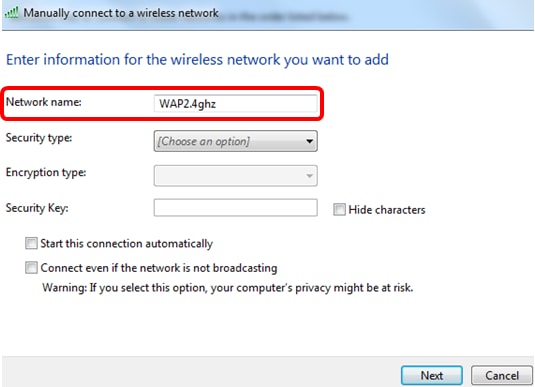
Step 4. Enter your SSID in the Network name field.
Step 5. Choose a security type from the Security type drop-down list.
Note: In this example, WPA2-Personal is chosen.
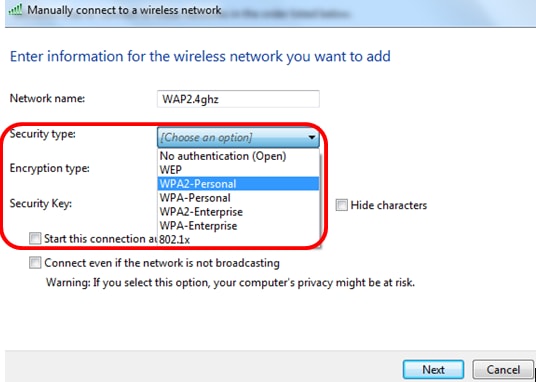
Step 6. (Optional) Choose an encryption type from the Encryption type drop-down list. The default value is AES.
Step 7. Enter your wireless network password in the Security Key field.
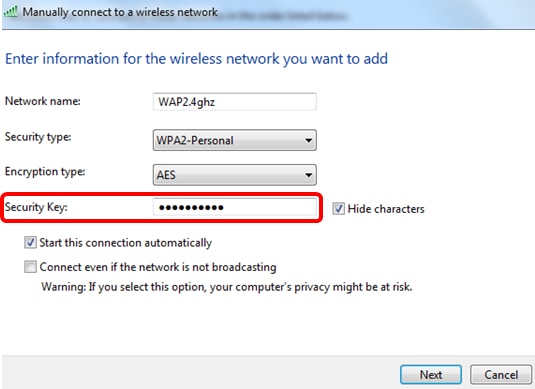
Step 8. Click Next.
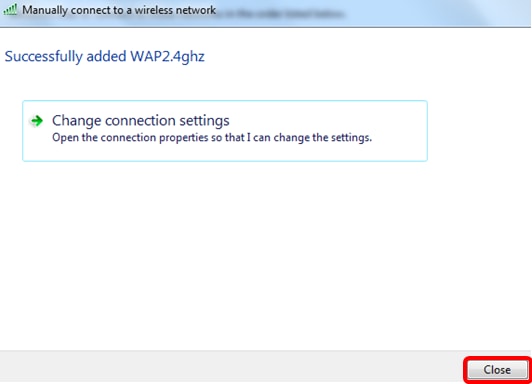
Step 9. Once you have successfully added your network, click Close.
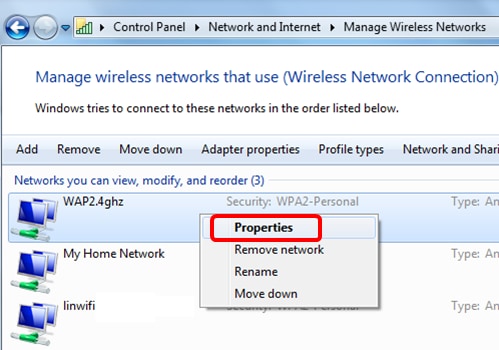
Step 10. Right-click on the created network profile then click Properties.
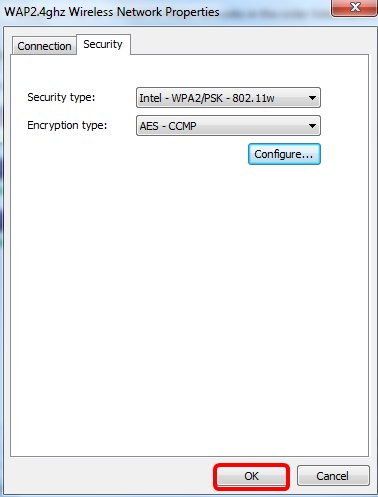
Step 11. Click on the Security tab.
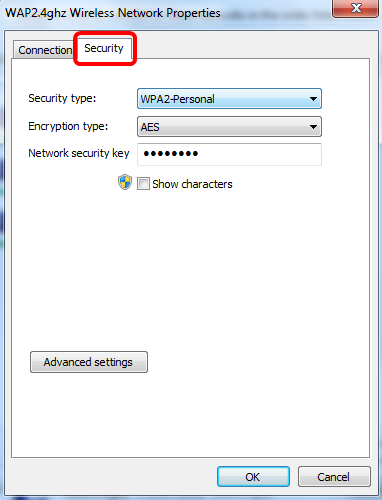
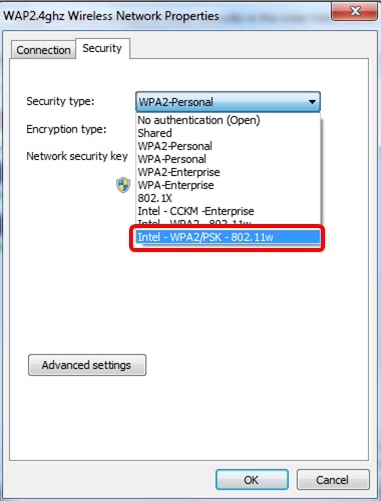
Step 12. Choose the 802.11w security type from the Security type drop-down list.
Note: In this example, Intel – WPA2/PSK – 802.11w is chosen.
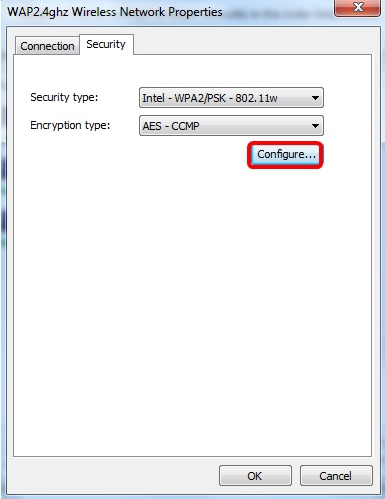
Step 13. (Optional) Choose an encryption type from the Encryption type drop-down list. The default value is AES – CCMP.
Step 14. Click Configure.
Step 15. Once the Security window appears, enter the wireless network password then click OK.
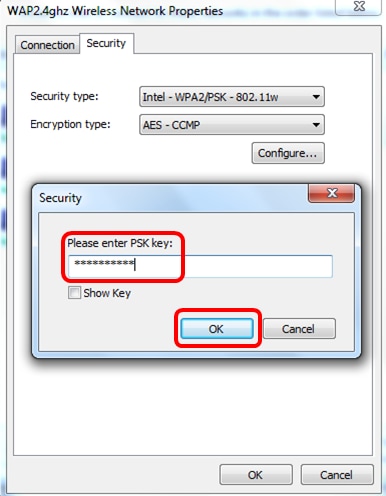
Step 16. Click OK.
Step 17. Click on the wireless icon on your computer. It should show that you are already connected to the SSID that you have configured.

You should now have configured your Intel wireless network card to connect to your MFP-enabled access point.
 Feedback