Using Wireshark on a Cisco Business WAP for Packet Analysis: Upload File
Available Languages
Objective
This article explains how to use a Cisco Business Wireless Access Point (WAP) and Wireshark to perform, save, and upload a packet capture.
Introduction
Configuration changes, monitoring, and troubleshooting are something a network administrator has to deal with often. Having a simple tool to use is invaluable! The goal of this article is to get more comfortable with the basics of packet captures as well as how to upload a file to Wireshark. If you are not familiar with this process, let us answer some questions you might have already.
First things first, Wireshark is a free packet analyzer for anyone looking to troubleshoot their network. Wireshark provides many options for the capture as well as sorting traffic by several different parameters. Head to Wireshark for details on this open-source option.
What is a packet capture?
A packet capture, also known as a PCAP file, is a tool that can be helpful in troubleshooting. It can record every packet sent between devices in your network, in real-time. Capturing packets allows you to dig into the details of the network traffic, which can include everything from device discovery, protocol conversations, and failed authentication. You can see the path of specific traffic flow and every interaction between devices on selected networks. These packets can be saved for further analysis as needed. It’s like an x-ray of the network’s inner workings via the transfer of packets.
What types of packets can be captured?
The WAP device can capture the following types of packets:
• 802.11 packets received and transmitted on the radio interfaces. Packets captured on the radio interfaces include the 802.11 header.
• 802.3 packets received and transmitted on the Ethernet interface.
• 802.3 packets received and transmitted on the internal logical interfaces, such as Virtual Access Points (VAPs) and Wireless Distribution System (WDS) interfaces.
What are the ways a packet capture can be done?
There are two methods of packet capture available:
- Remote Capture Method – Captured packets are redirected in real-time to an external computer running Wireshark. You can choose Stream to a Remote Host to select the remote capture method. If you prefer the remote capture method, check out Using Wireshark on a WAP for Packet Analysis: Stream Directly to Wireshark.
- Local Capture Method – Captured packets are stored in a file on the WAP device. The WAP device can transfer the file to a Trivial File Transfer Protocol (TFTP) server. The file is formatted in PCAP format and can be examined using Wireshark. You can choose Save File on this Device to select the local capture method.
The focus of this article is to upload a file to Wireshark featuring the latest Graphical User Interface (GUI). If you prefer to view an article that uses the older GUI for the local capture method, check out Configure Packet Capture to Optimize Performance on a Wireless Access Point.
What do I do with a packet capture once I have the PCAP file?
The wireless packet capture feature enables capturing and storing the packets received and transmitted by the WAP device. The captured packets can then be analyzed by a network protocol analyzer for troubleshooting or performance optimization. There are many third-party packet analyzer applications available online. In this article, we focus on Wireshark.
Devices | Software Version
- WAP125 | 1.0.2.0
- WAP150 | 1.1.1.0
- WAP121 | 1.0.6.8
- WAP361 | 1.1.1.0
- WAP581 | 1.0.2.0
- WAP571 | 1.1.0.4
- WAP571E | 1.1.0.4
Download Wireshark
Step 1. Go to the Wireshark website. Click Download. Select the appropriate version to download. You will see the progress of the download at the bottom left of the screen.
Step 2. Go to Downloads on your computer and select the Wireshark file to install its application.

Log into the WAP
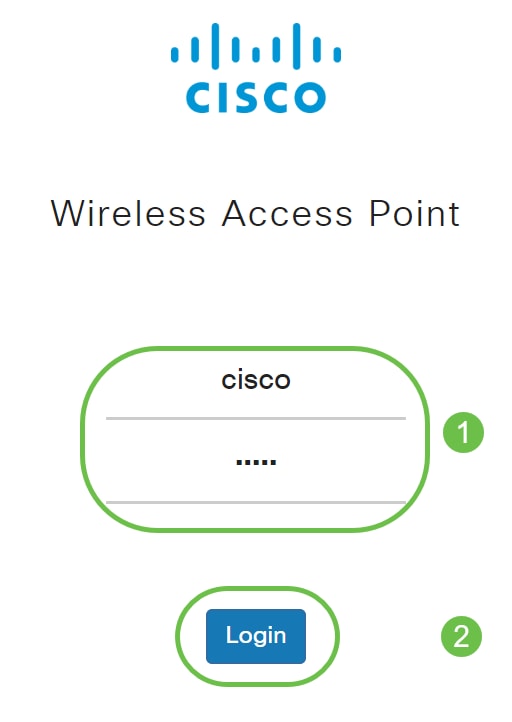
In your web browser, enter the IP address of the WAP. Enter your credentials. If this is your first time accessing this device or you did a factory reset, the default username and password is cisco. If you need instructions on how to log in, you may follow the steps in the Access the Web-based Utility of the Wireless Access Point (WAP) article.
Save a Packet Capture on a PC and Upload to Wireshark
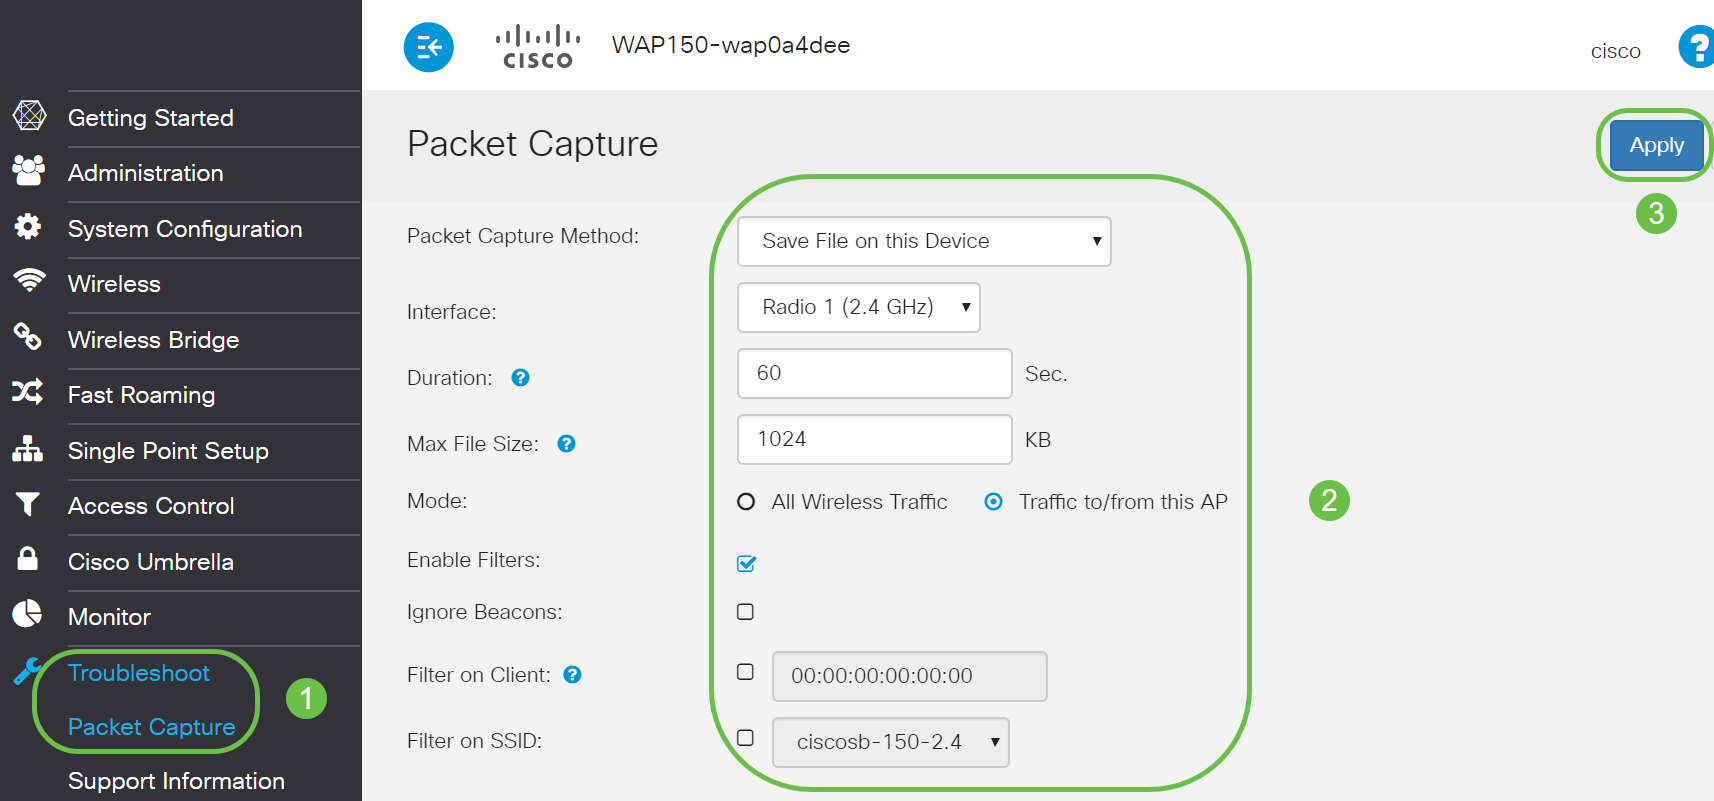
Step 1. Navigate to Troubleshoot > Packet Capture.
Ensure that Save File on this Device is selected for the Packet Capture Method.
Configure these parameters:
• Interface - Enter a capture interface type for packet capture:
• Ethernet - 802.3 traffic on the Ethernet port.
• Radio 1 (5 GHz) / Radio 2 (2.4 GHz) - 802.11 traffic on the radio interface.
• Duration – Enter the time duration in seconds for the capture. The range is from 10 to 3600. The default is 60.
• Max File Size – Enter the maximum allowed size for the capture file in kilobytes (KB). The range is from 64 to 4096. The default is 1024.
There are two modes for packet capture.
• All Wireless Traffic – Captures all wireless packets.
• Traffic to/from this AP – Captures the packets sent from the AP or received by the AP.
Click Enable Filters. There are three checkboxes available, Ignore Beacons, Filter on Client, and Filter on SSID.
• Ignore Beacons – Enable or disable the capturing of 802.11 beacons detected or transmitted by the radio. Beacon frames are broadcast frames that carry information regarding a network. The purpose of a beacon is to advertise the existing wireless network. If you are not looking for this type of traffic, you can select Ignore Beacons.
• Filter on Client – Specifies the MAC address for the WLAN client filter. Note that the Client filter is active only when a capture is performed on an 802.11 interface.
• Filter on SSID – Select an SSID name for packet capture.
Click Apply to save to the Startup Configuration.
Step 2. Click the Start Capture icon.
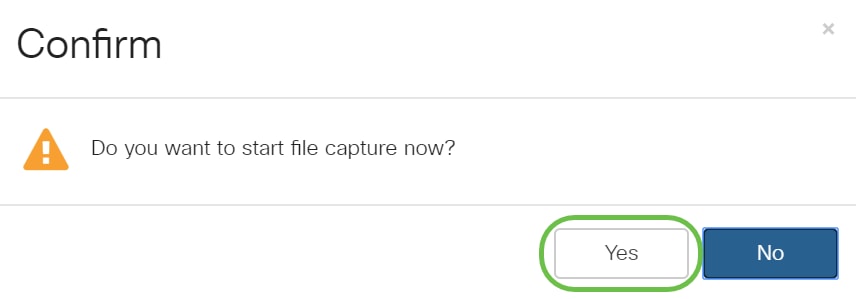
Step 3. A Confirm pop-up window will open to get the confirmation to download the file, click Yes to start the file download.
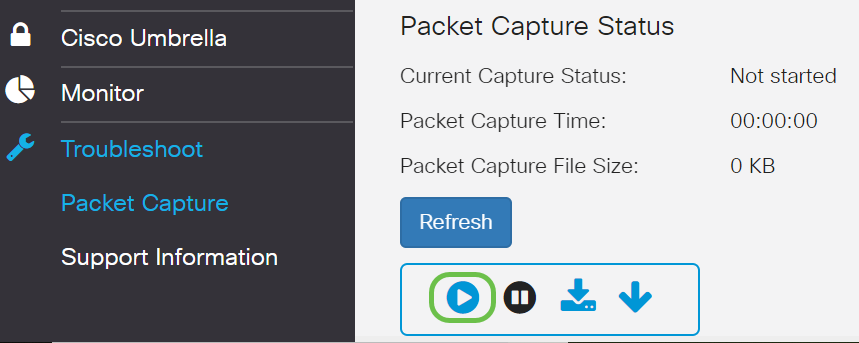
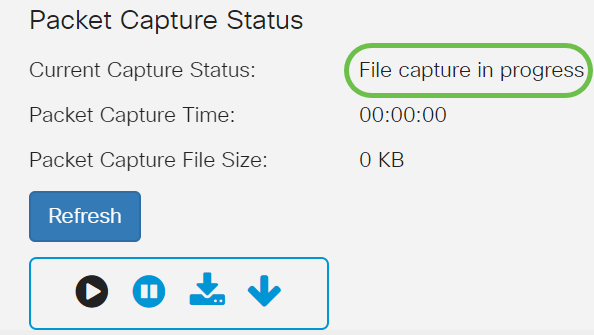
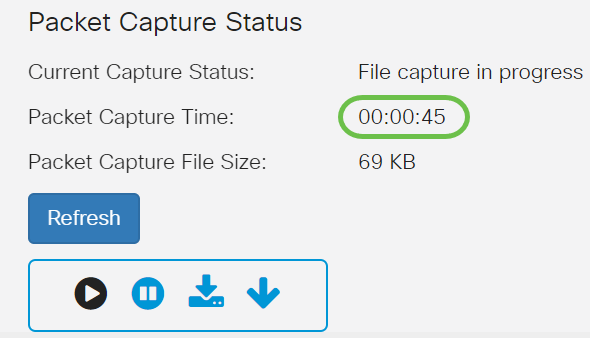
Step 4. Click Refresh to obtain the Packet Capture Status which contains the following data:
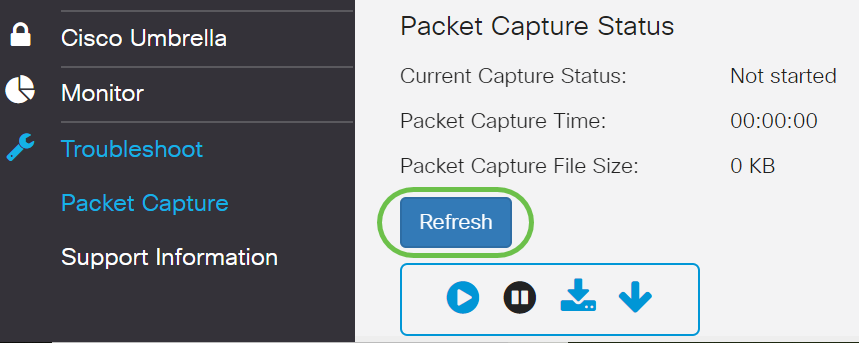
- Current Capture Status
- Packet Capture Time
- Packet Capture File Size
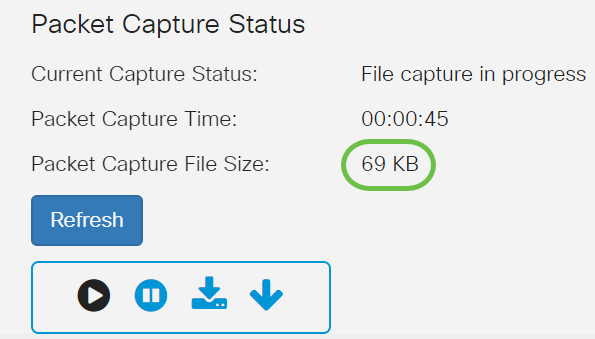
- In Packet File Capture mode, the WAP device stores the captured packets in the Random Access Memory (RAM) file system. Upon activation, the packet capture proceeds until one of these events occurs:
• The capture time reaches the configured duration.
• The capture file reaches its maximum size.
• The administrator stops the capture.
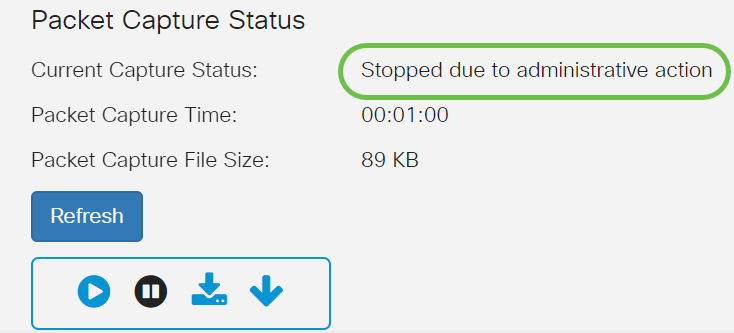
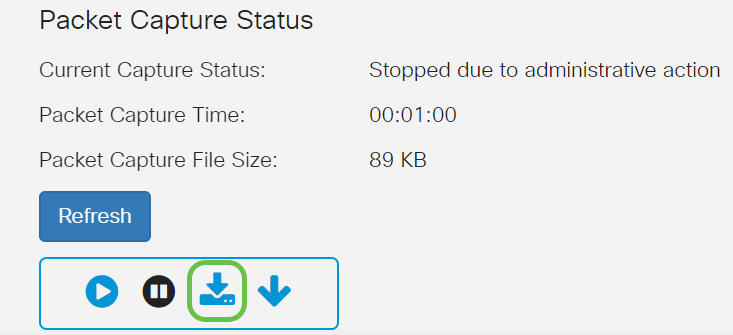
Step 5. Click on the Download to this Device icon to download the recently captured file.
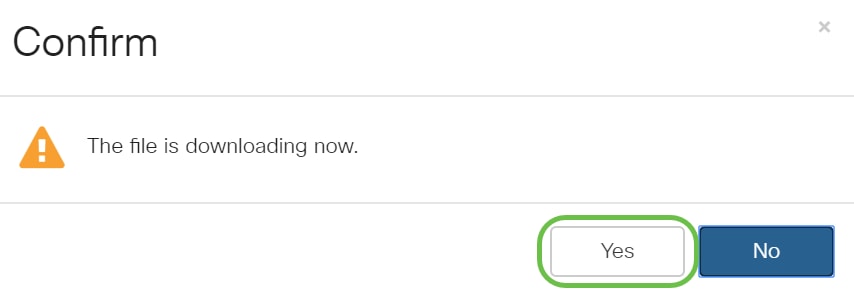
Step 6. A Confirm pop-up window will open to confirm the file download, click Yes.
Step 7. The packet capture file will download to your computer. In this example, apcapture.pcap is the name of the file.

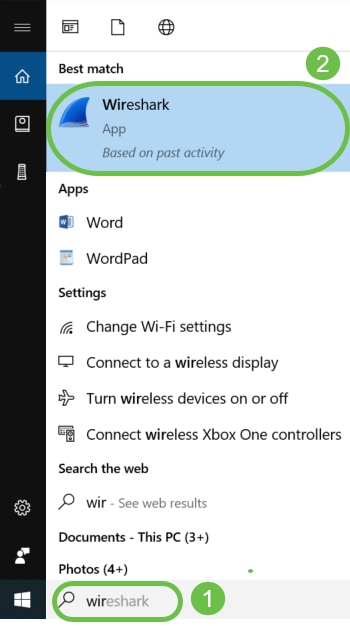
Step 8. Since Wireshark has already been downloaded, it can be accessed by typing Wireshark in the search bar of Microsoft Windows and selecting the application when it is an option.
Step 9. Navigate to File > Open.

Step 10. On the new pop-up window, browse to locate the file, in this case, apcapture.pcap. Click Open.
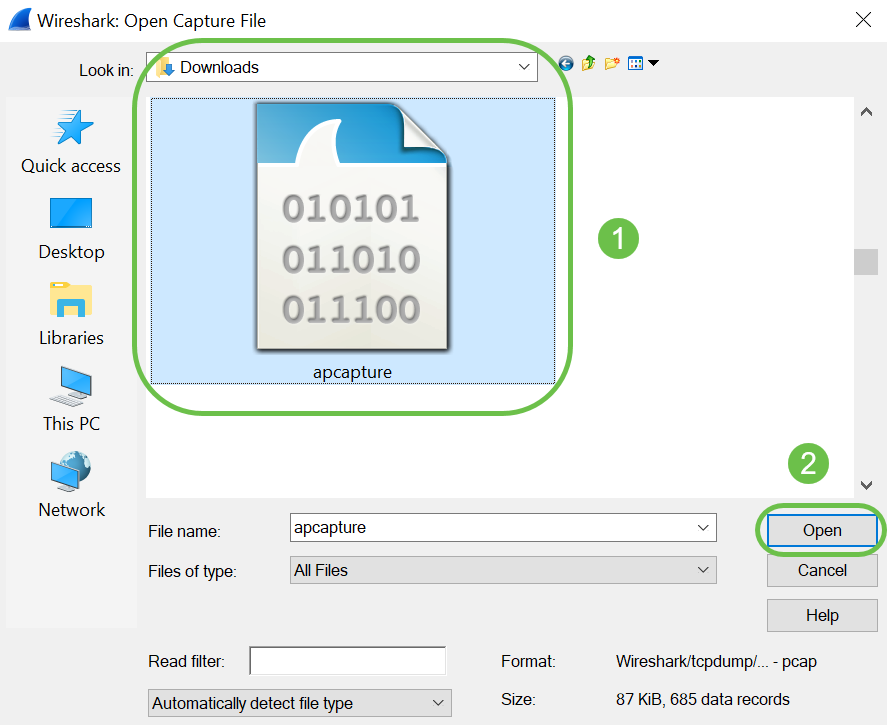
Step 11. The file will open on the Wireshark application and you will be able to see the details of the packets.

Conclusion
You have your packet captured and uploaded to Wireshark, you can now get to work analyzing it. Not sure where to go from here? There are plenty of videos and articles available online to explore. What you search for depends on the needs of your situation. You’ve got this!
Contact Cisco
- Open a Support Case

- (Requires a Cisco Service Contract)
 Feedback