Introduction
This document describes how to configure boot from Storage Area Network (SAN) in servers managed by Intersight Managed Mode (IMM).
Prerequisites
Requirements
Cisco recommends that you have knowledge of these topics:
- Basic knowledge of SAN topologies
- Basic understanding of UCS Server Profiles in Intersight Managed Mode.
Components Used
The information in this document is based on these software and hardware versions:
- UCS-FI-64108, Firmware 4.2(1l)
- UCSX-210C-M6, Firmware 4.2(1l)
The information in this document was created from the devices in a specific lab environment. All of the devices used in this document started with a cleared (default) configuration. If your network is live, ensure that you understand the potential impact of any command.
Background Information
Ensure that you have these requirements before you attempt this configuration:
- Virtual Storage Area Network (VSAN) ID
- World Wide Port Name (WWPN) from initiators and targets
- Logical Unit Number (LUN) ID
Server and Domain profiles configuration, the Policies and Pools required are:
- VSAN Policy
- Port Policy
- Boot Order Policy
- SAN Connectivity Policy
- WWPN Pool
Configure SAN
UCS Domain Profile
Step 1. Configure VSAN Policy.
- Navigate to Policies > Create Policy and select VSAN.
- Name the policy and add the required VSAN(s) to it. This example uses VSAN-A 100 and VSAN-B 200 as shown in the image.

Note: Storage option is revelant when Fibre Channel (FC) Zone policy is configured, not mandatory for this configuration.
Step 2. Configure Port Policy.
- Navigate to Policies > Create Policy and select Port.
- Enter a Name and select the Switch model from the list. Once that is done, configure Unified Ports.
- Go to Port roles and select the ports needed for FC uplink and click on Configure.

- Select the Role as FC Uplink, Admin speed and desired VSAN.

- You can add the policies to the Domain profile. Go to Profiles > UCS Domain Profiles > Edit Domain profile (if profile already exists) or Create domain profile then Add the required polices to your Domain Profile.
Server Profile
Step 3. Create Server Profile.
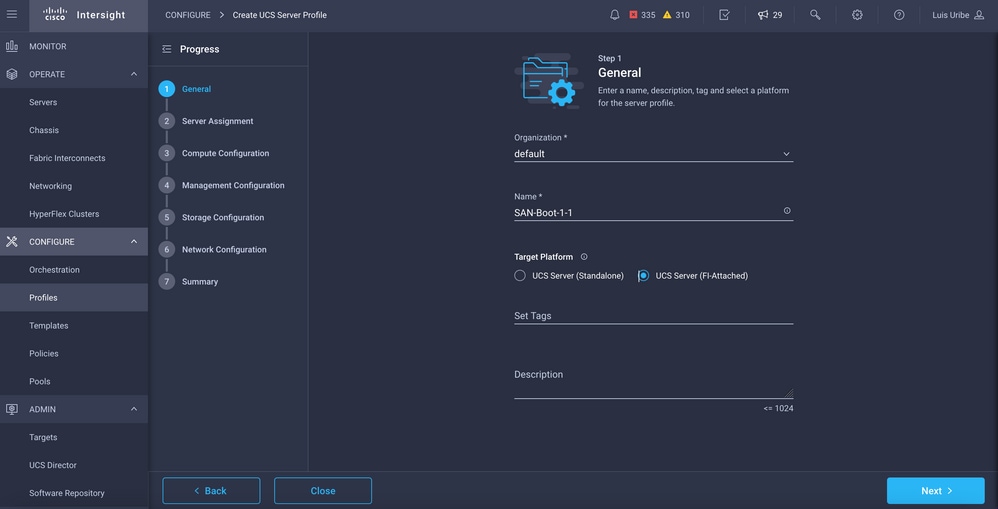
- Navigate to Policies > Create UCS Server Profile.
- Enter a Name and select the Target Platform.

- On Compute Configuration add Boot Order policy where Boot SAN options are configured.
Step 4. Create a Boot Order Policy
- Name the Boot Policy and add SAN Boot options from the drop down list.

- Enter the settings for the Virtual Host Bus Adapter (vHBA).

Device Name is the name for reference on the Policy.
LUN identifier for the physical or virtual storage.
Slot is the slot adapter and port. This example is Modular Lan on Motherboard (MLOM).
- You can verify Slot on the Inventory of the server by Servers Tab > Select server > Inventory > Network Adapter > Adapter ID.
- You can add extra Virtual Media Option to install iso through KVM.

- Add extra policies on Compute Configuration, Management Configuration and Storage Configuration as needed (optional).
Step 5. Create SAN Connectivity Policy.
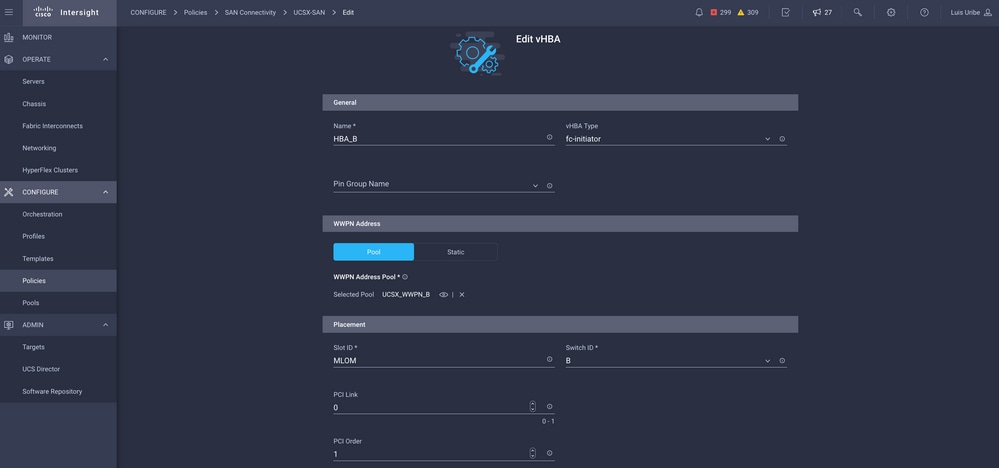
- Name the policy and add the WWNN (pool or static) and then add the vHBA(s).

Note: VHBA name must be the same as the one that was previously configured.
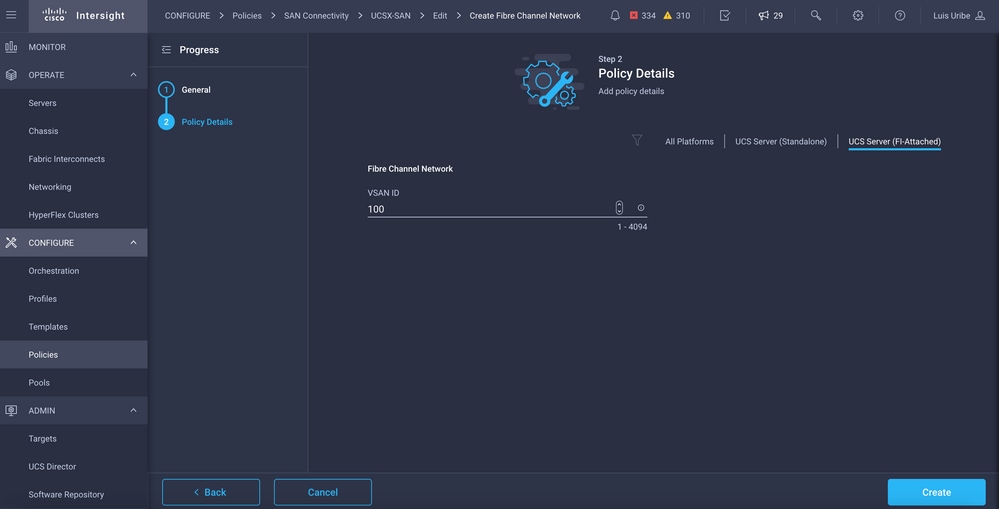
Step 6. Create a Fibre Channel Network Policy.
- Fibre Channel Network is required to assign VSAN to VHBA and for Boot from SAN. Select Select Policy(s) and Create New.

- Configure the required VSAN.

Note: The rest of the policies in VHBA configuration are not mandatory for boot from SAN.
- Add extra vHBA(s) to complete the SAN Connectivity Policy configuration (optional).
- SAN configuration for the Server Profile is complete now, if configuration at the storage switch for access control between hosts and storage devices is done, also called Zoning, target(s) are displayed through KVM while server is in the boot process.
- Add LAN Connectivity Policy to configure Virtual Network Interface Cards (VNIC).
Verify
To verify SAN configuration navigate to pools and policies you created as this information is not displayed on Server Profile.
For WWPN:
- Navigate to Pools, look for the WWPN Pool created and click on the usage tab. It shows the WWPN in use and which Server Profile uses it.

For Boot Process:
- Target WWPN(s) are displayed while the server is in the Boot Process.
Troubleshoot
Press F6 Key while the server is in the boot process. This interrupts the initialization and takes the server to the boot menu, where we you connect to adapter and type commands to check connectivity.
Open an SSH session to any of the fabric interconnects IP addresses and execute the next commands:
FI-A # connect adapter x/y/z        -> (x = Chassis, y = Blade, z = Adapter)


Entering character mode
Escape character is '^]'.

(none) login: dbgsh

adapter (top):2# attach-fls
adapter (fls):1# lunlist

lunlist
vnic : 16 lifid: 16
• FLOGI State : flogi est (fc_id 0x010303)
• PLOGI Sessions
• WWNN 58:cc:f0:98:49:62:0b:fa WWPN 58:cc:f0:98:49:62:0b:fa fc_id 0x000000
• LUN's configured (SCSI Type, Version, Vendor, Serial No.)
LUN ID : 0x0000000000000000 access failure
• REPORT LUNs Query Response
• WWNN 58:cc:f0:90:49:62:0b:fa WWPN 58:cc:f0:90:49:62:0b:fa fc_id 0x000000
• LUN's configured (SCSI Type, Version, Vendor, Serial No.)
LUN ID : 0x0000000000000000 access failure
• REPORT LUNs Query Response
• Nameserver Query Response


vnic : 17 lifid: 17
• FLOGI State : flogi est (fc_id 0x010303)
• PLOGI Sessions
• WWNN 58:cc:f0:90:49:63:0b:fa WWPN 58:cc:f0:90:49:63:0b:fa fc_id 0x000000
• LUN's configured (SCSI Type, Version, Vendor, Serial No.)
LUN ID : 0x0000000000000000 access failure
• REPORT LUNs Query Response
• WWNN 58:cc:f0:98:49:63:0b:fa WWPN 58:cc:f0:98:49:63:0b:fa fc_id 0x000000
• LUN's configured (SCSI Type, Version, Vendor, Serial No.)
LUN ID : 0x0000000000000000 access failure
• REPORT LUNs Query Response
• Nameserver Query Response
Tip: If fc_id is equal to 0x0000 like in this example review Zoning configuration in Fibre Switch and LUN Masking in storage array. Verify WWPN of initiators are configured properly in Storage Array.
Related Information
Troubleshoot SAN Boot and SAN Connectivity Issues
Domain Profile Configuration
Server Profile Configuration
Technical Support & Documentation - Cisco Systems


 Feedback