Introduction
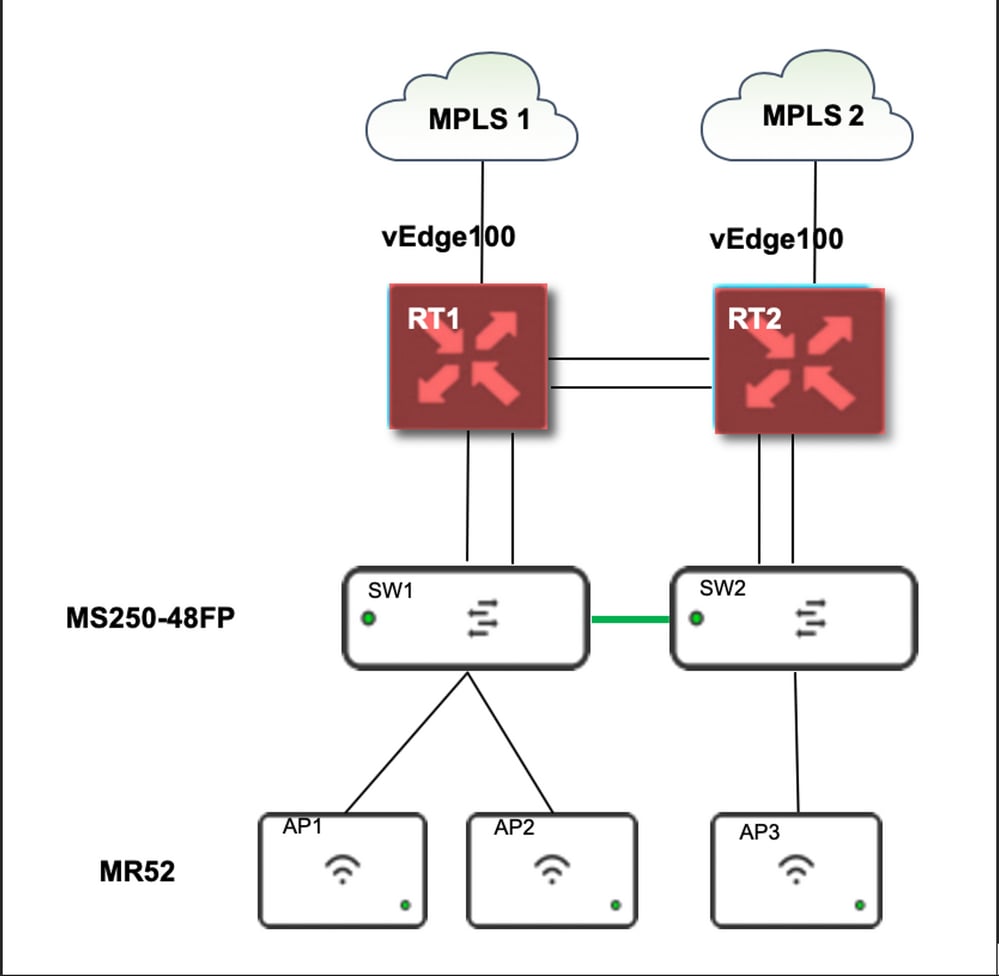
This document describes the procedure to move site A Access Point (AP) 1 to the recommended profile (AB & CD) and AP2 to the temporary profile.
Prerequisites
Requirements
Cisco recommends that you have knowledge of these topics:
- Understand basic Meraki Software-Defined Wide Area Network (SDWAN) solution
- Understand basic profiles and settings in Meraki Dashboard
Components Used
This document is not restricted to specific software and hardware versions.
The information in this document was created from the devices in a specific lab environment. All of the devices used in this document started with a cleared (default) configuration. If your network is live, ensure that you understand the potential impact of any command.
Problem
The AP profile in Meraki needs to be changed.

Solution
Steps to change the Access point profile in Meraki:
- Log in to Meraki GUI
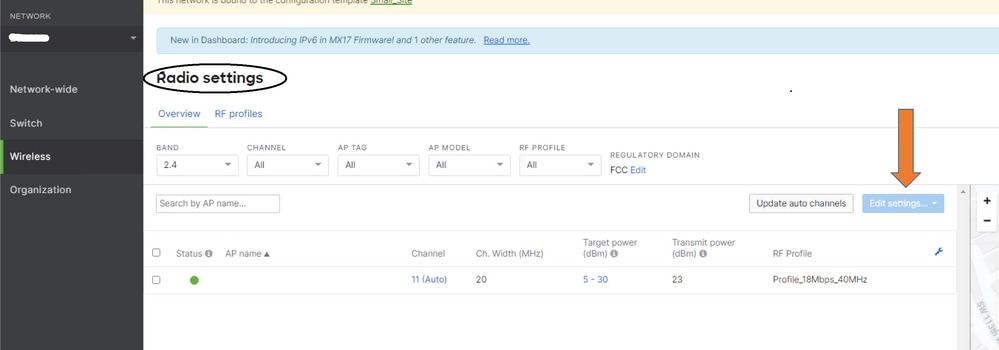
- Navigate to Network > Site ID > Wireless > Radio Settings
- Select all APs except AP2 (x2), and then Edit Settings > Assign profile
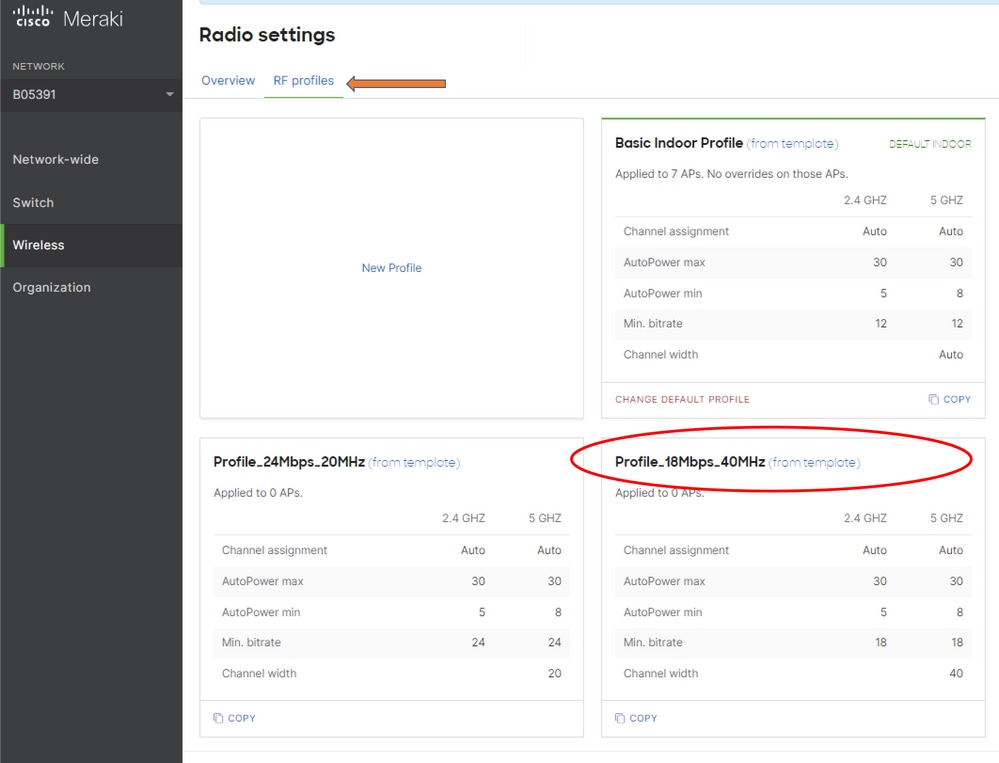
- Choose Profile_18Mbps_40MHz, click next and save
- Navigate to Network > Site ID > Wireless > Radio Settings
- Choose both radios for AP2 and then Edit Settings > Assign profile
- Choose Profile_18Mbps_40MHz_Exclude_161, click next and save
Reference as shown in this picture:


Risk
- The risk involved in change: If the Dashboard fails to assign APs to a new profile, APs then require to be reloaded for change to take place.
- The risk of non-implementation of this change: The site continues to face issues in specific exam rooms which makes it difficult to see the patients.
- The impact of the change: If you disconnect on the WLAN, an engineer is on-site with the staff to test.
Troubleshoot
There is currently no specific troubleshoot information available for this configuration.


 Feedback