Introduction
This document describes the steps required to install the Secure Web Appliance (SWA) on Microsoft Hyper-V.
Prerequisites
Requirements
Cisco recommends that you have knowledge of these topics:
- SWA administration.
- Fundamental networking principles.
- Microsoft Hyper-V administration.
Cisco recommends that you have:
- Microsoft Hyper-V Installed.
- Administrative Access to the Microsoft Hyper-V.
- Valid Cisco Account to Download the SWA Image file.
Components Used
This document is not restricted to specific software and hardware versions.
The information in this document was created from the devices in a specific lab environment. All of the devices used in this document started with a cleared (default) configuration. If your network is live, ensure that you understand the potential impact of any command.
Microsoft Hyper-V
Hyper-V is a powerful virtualization platform developed by Microsoft that allows users to create and manage virtual machines (VMs) on a Windows operating system. It provides a robust environment for running multiple operating systems simultaneously on a single physical host, making it an ideal choice for businesses looking to optimize their IT infrastructure.
In this article, we guide you through the essential steps to install SWA on Hyper-V. Cisco SWA is a dedicated web security solution designed to protect organizations from cyber threats by monitoring and controlling Internet traffic. Our step-by-step instructions help you configure and deploy Cisco SWA efficiently on your Hyper-V environment, ensuring enhanced security and performance for your network.
Download the Image
To download the desired and latest SWA Images, use these steps:
Step 1. Navigate to https://software.cisco.com/.
Step 2. Log in with your Cisco Account
Step 3. Choose Access Downloads.
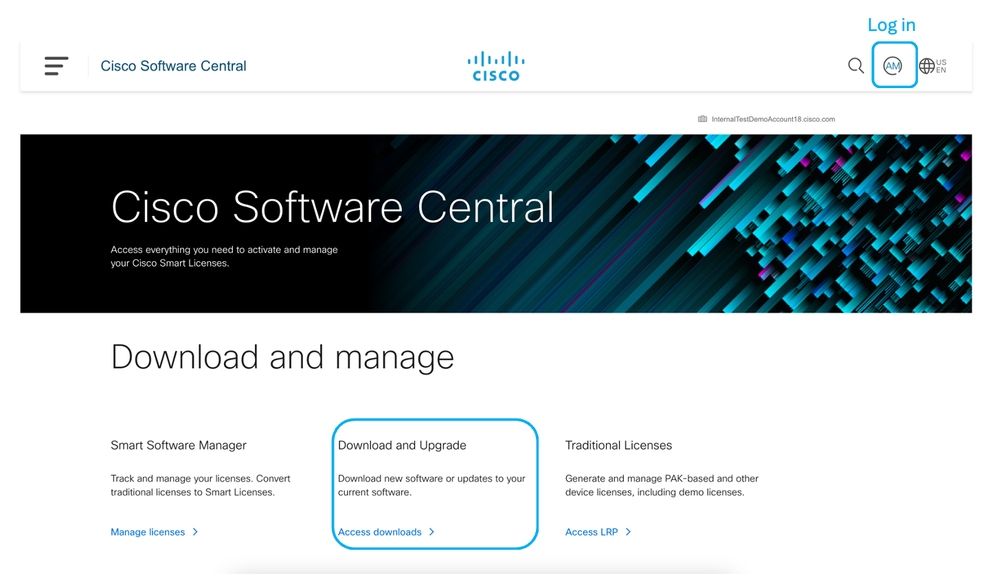 Image - Cisco Software Central
Step 4. Search for "Secure Web Appliance Virtual".
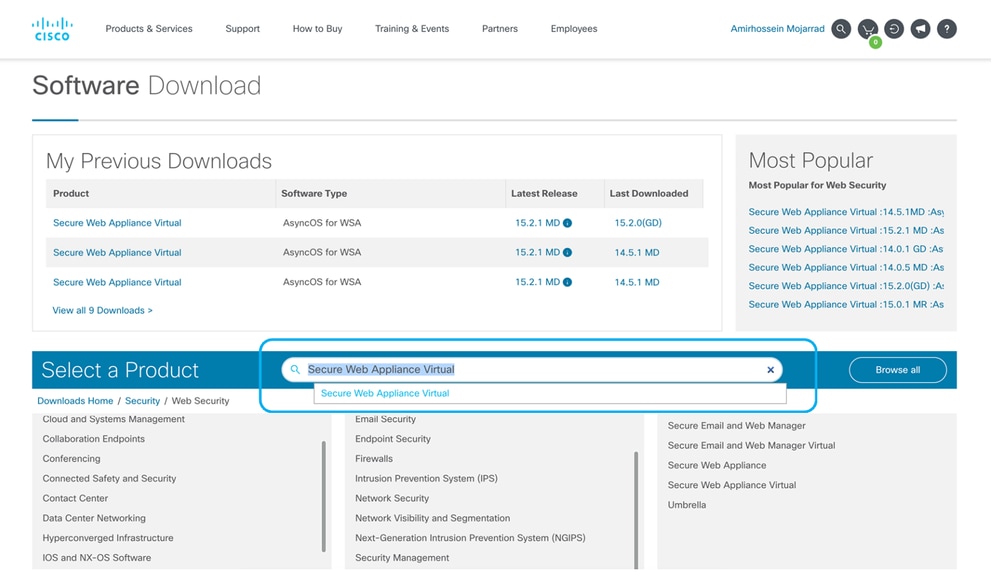 Image- Search for Secure Web Appliance Virtual
Step 5. Choose AsyncOS for WSA.
 Image - Choose AsyncOS for WSA
Step 6. Choose your desired version.
Step 7. Download the Virtual Disk Image (.vhdx) file associated with the model you would like to install.
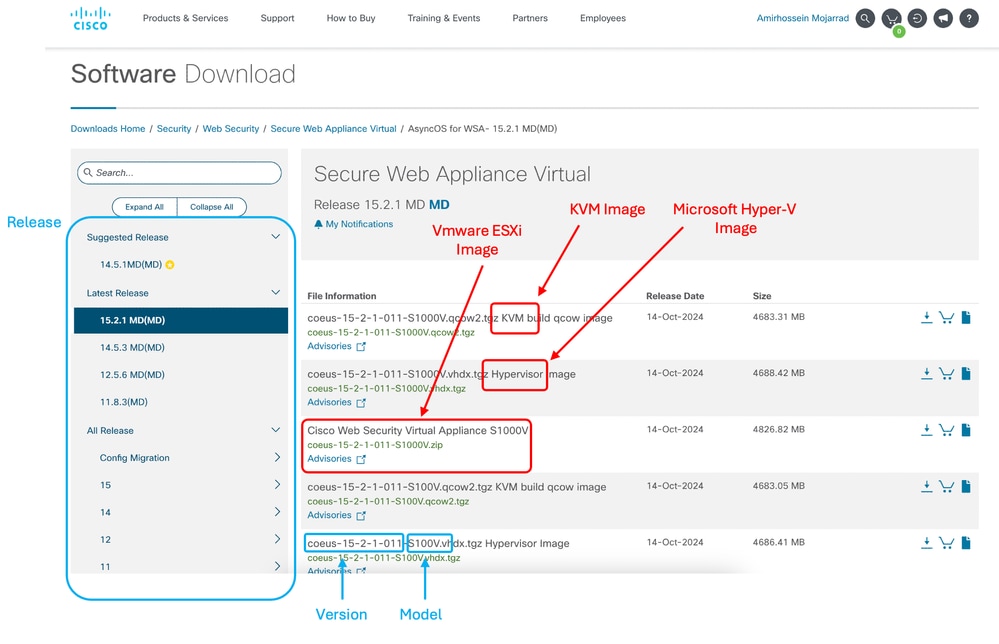 Image - Download Hyper-V Disk Image
Installing SWA Setup
Use these steps to install the SWA on Hyper-V:
Step 1. Open your Hyper-V Manager console.
Step 2. Click New from the right menu.
Step 3. Choose Virtual Machine.
 Image - Create a New Virtual Machine
Step 4. Click Next in the Before You Begin Page.
Step 5. Choose a Name for your Virtual Machine.
Step 6. (Optional) If you would like to change the path to store the Virtual Machine files, Select the Check box next to "Store the virtual machine in a different location" and Browse to the new path.
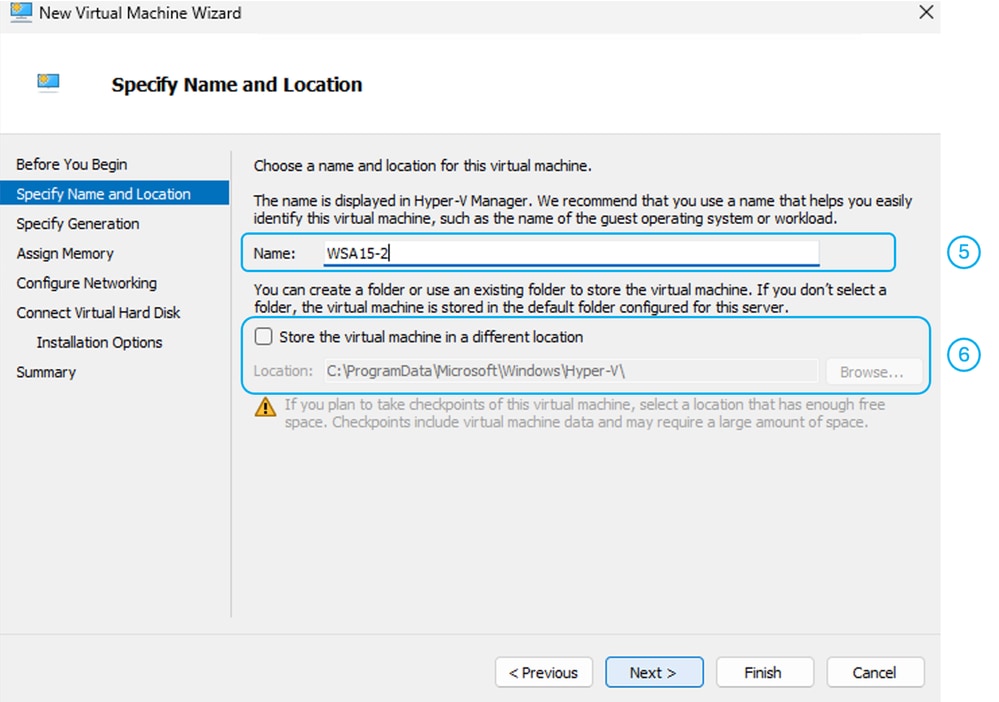 Image - Specify Name and Location
Step 7. On the Specify Generation page, Choose Generation 2, then click Next.
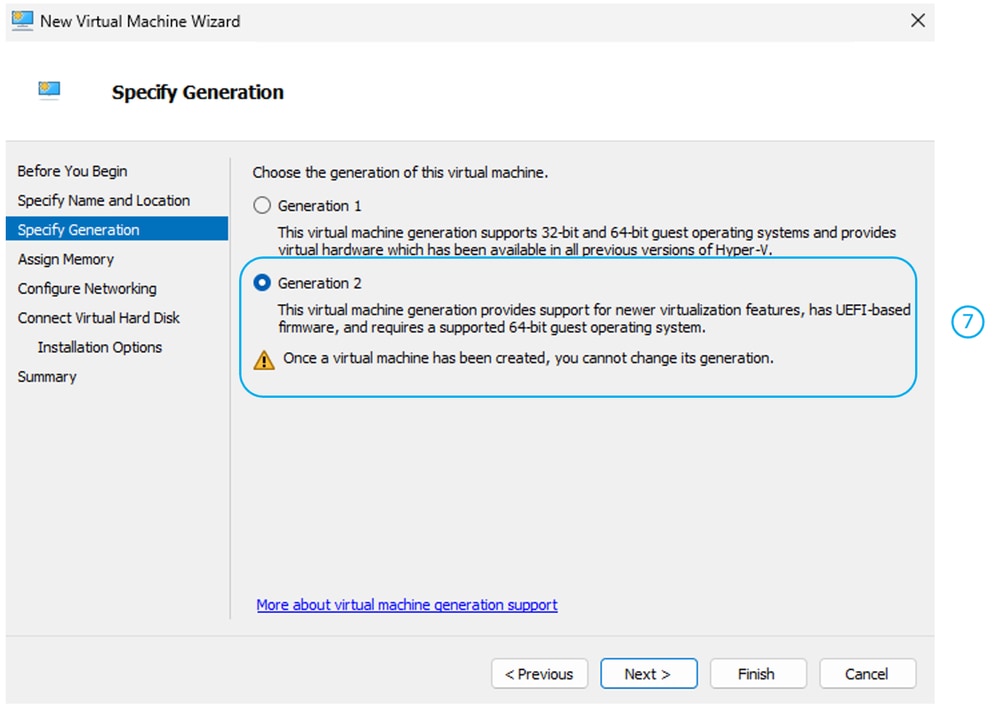 Image - Choose Generation 2
Step 8. Assign memory as recommended in Supported Virtual Appliance Models and AsyncOS Releases for Hyper-V Deployments .
Step 9. To have a better performance, uncheck Use Dynamic Memory for this virtual machine, then click Next.
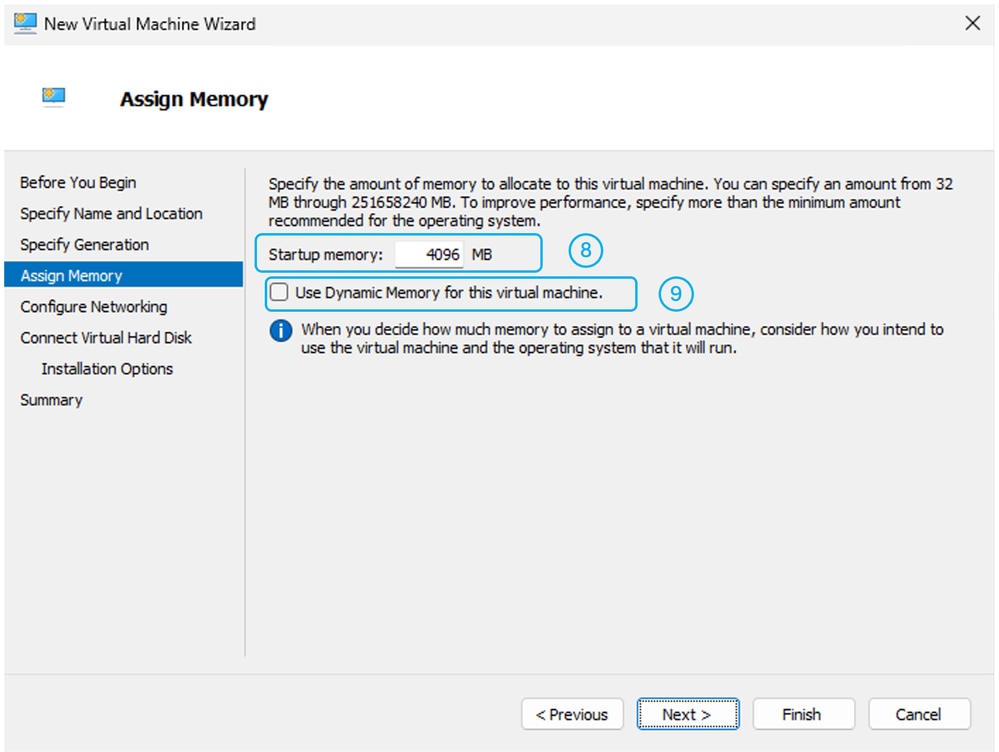 Image - Assign Memory
Step 10. Choose your desired Virtual Switch, then click Next.
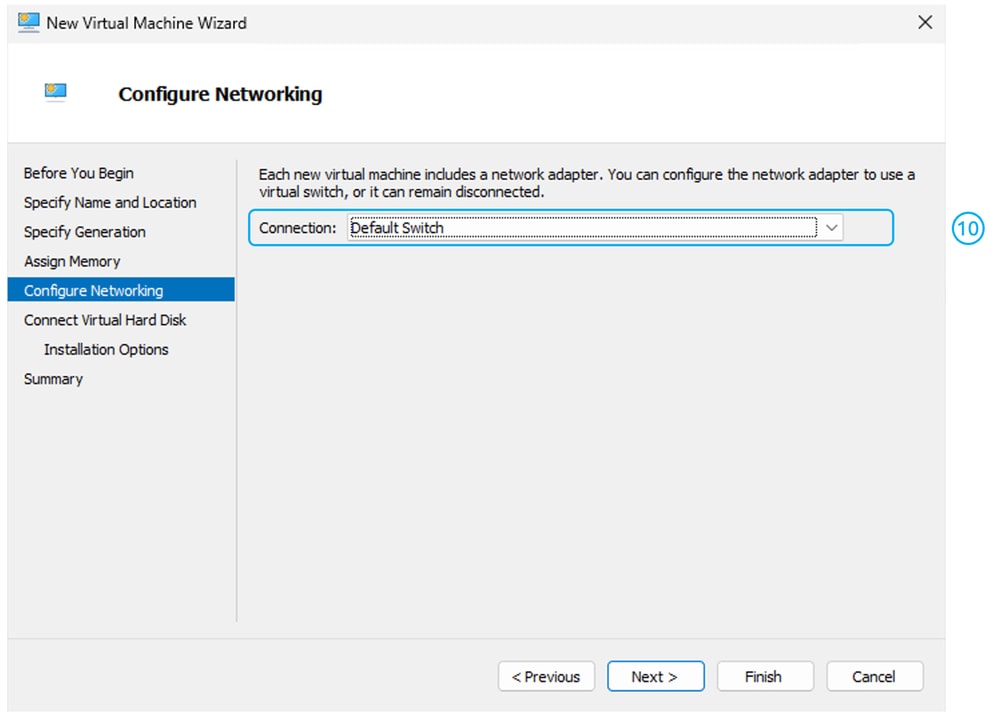 Image - Choose the Virtual Switch
Step 11. Extract the Virtual Disk Image file that you have downloaded previously.
Tip: To extract a .tgz file you can use 7zip application.
Step 12. Copy the extracted files to the path you would like to host the virtual machine disk.
Step 13. Choose Use an Existing Virtual Hard Disk, then select the path to the virtual disk file (.vhdx).
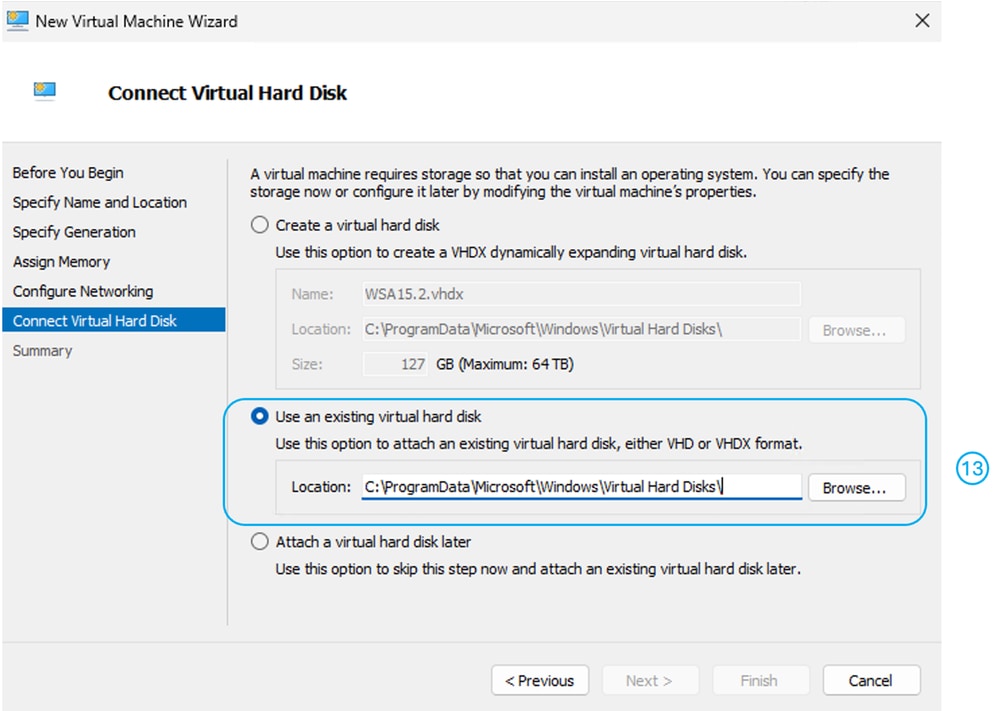 Image - Use an Existing Virtual Hard Disk
Step 14. Click Next.
Step 15. Review the Configuration summary, then click Finish.
Note: Wait for the Virtual Machine to get ready before Starting the VM. You must modify the settings.
Step 16. Right-click on the virtual Machine name, then select Settings.
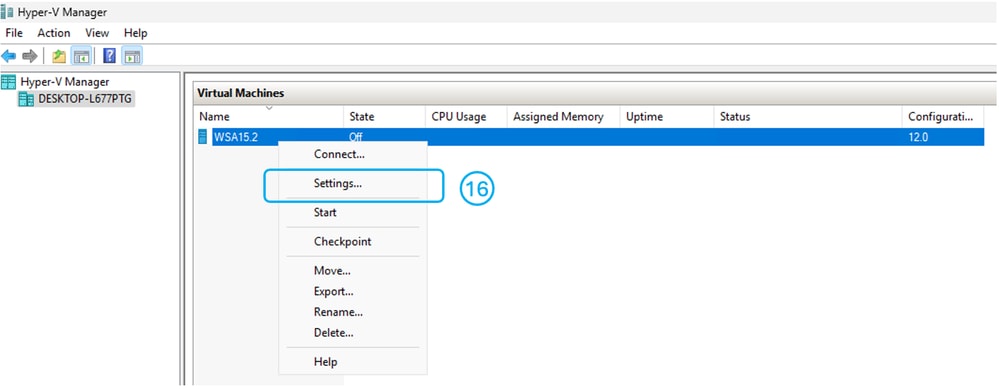 Image - Edit Virtual Machine Settings
Step 17. From the left menu ,choose Security.
Step 18. Uncheck Enable Secure Boot.
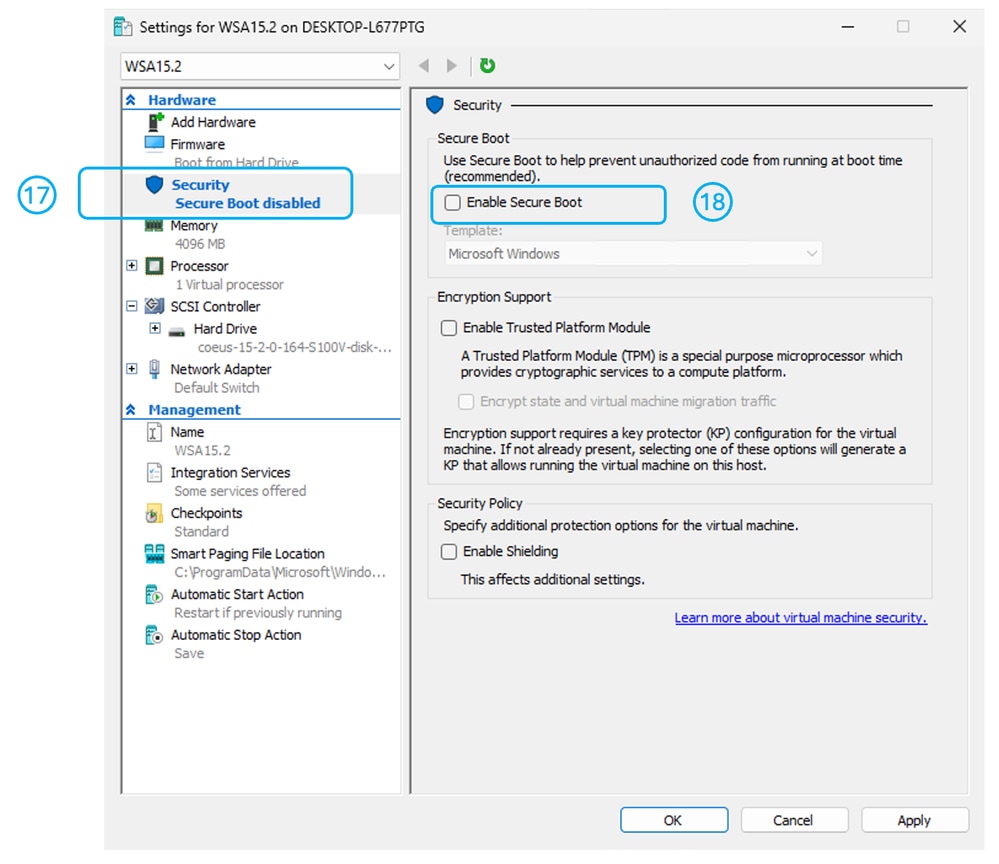 Image - Disable the Secure Boot
Step 19. From the settings window, choose Processor.
Step 20. Increase the number of processors as recommended in Supported Virtual Appliance Models and AsyncOS Releases for Hyper-V Deployments
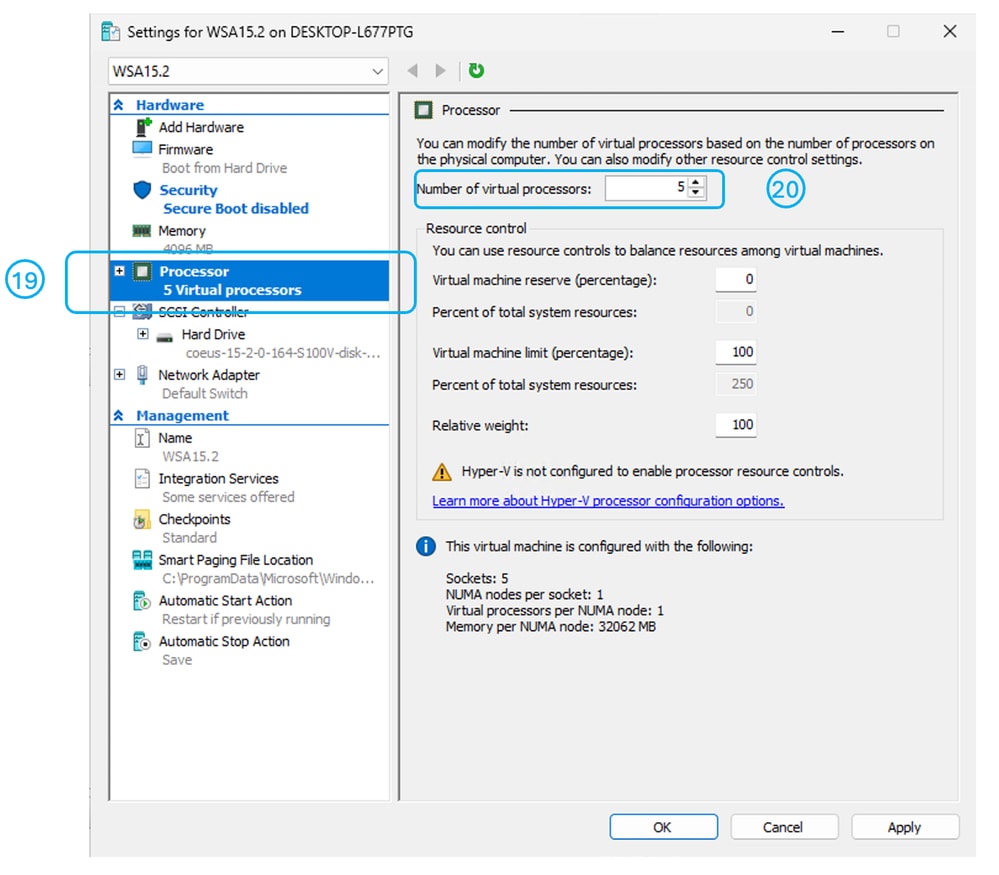 Image - Increase the Number of Processors
Step 21. From the settings window, choose Add Hardware.
Step 22. Select "Network Adapter" and click Add.
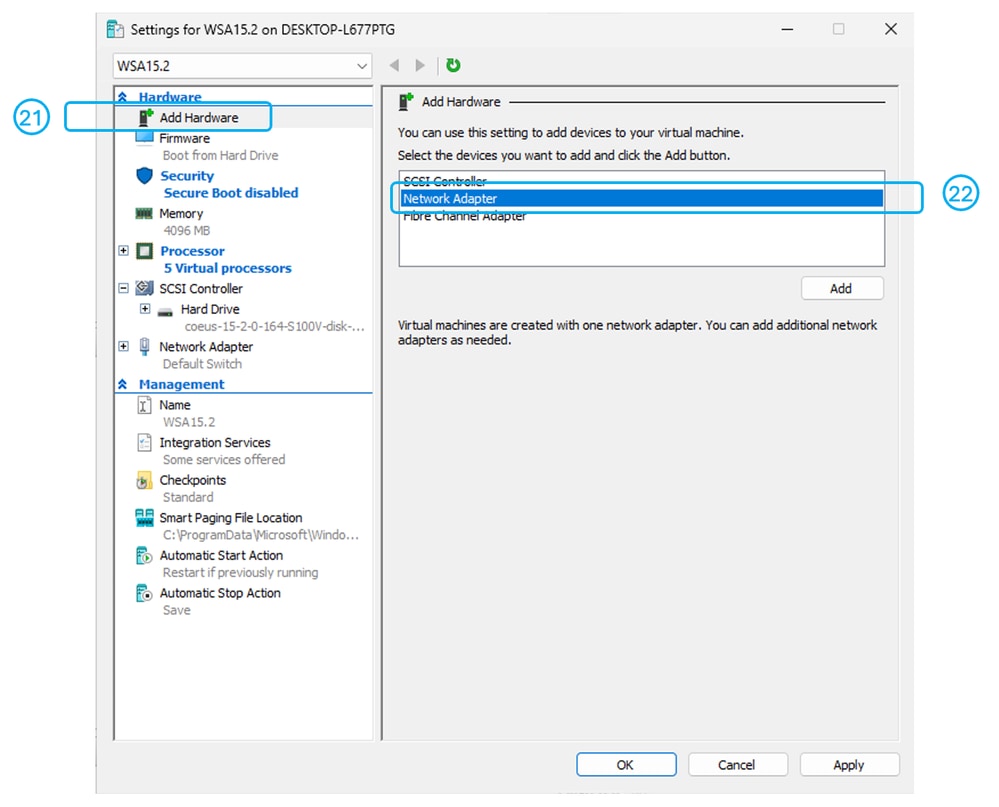 Image - Add Network Adapters
Step 23. Select the virtual switch.
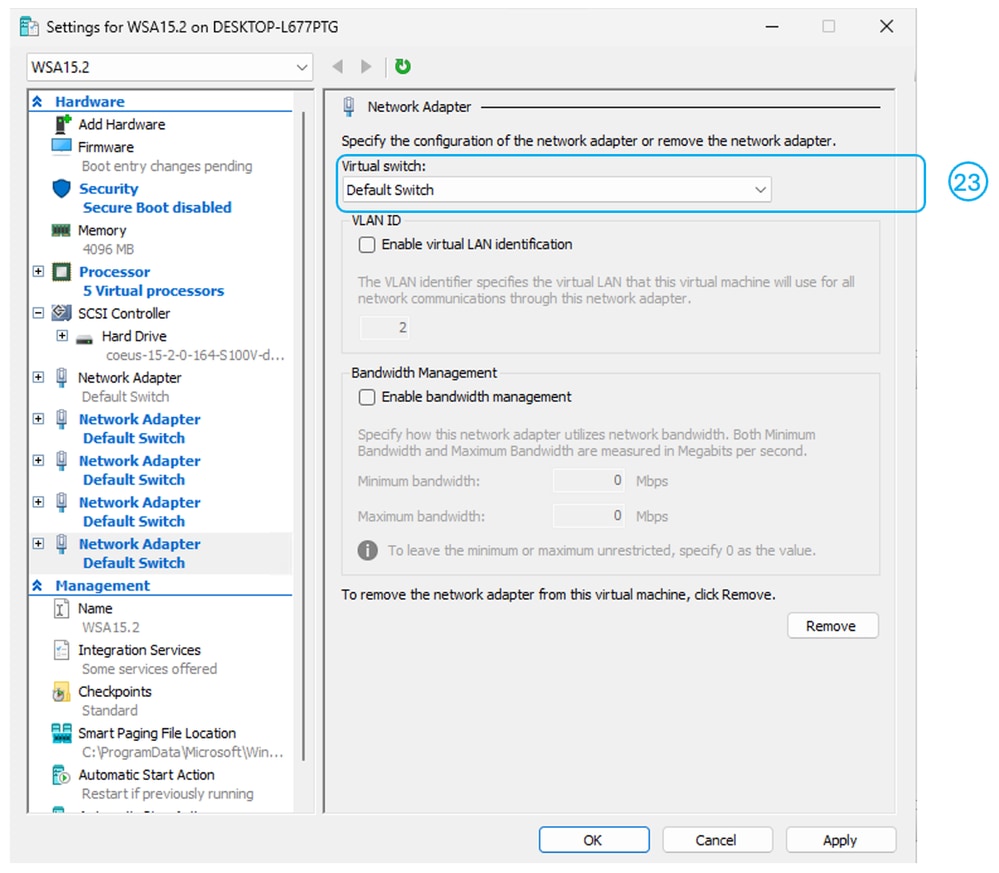 Image - Select the Virtual Switch
Step 24. Repeat Steps 21 to 23 until you have a total of five network interfaces.
Caution: Even if you do not plan to use all five interfaces on the SWA, it is still necessary to add them to the virtual machine. Failing to do so can result in unexpected behavior.
Step 25. Apply.
Step 26. Start the virtual Machine.
Tip: To setup the SWA kindly visit: Configure Secure Web Appliance Initial Setup
Related Information


 Feedback