Introduction
This document describes the process to update trust anchors for the CTI Interface in Webex for Broadworks.
Prerequisites
Requirements
Cisco recommends that you have knowledge of these topics:
- Familiarity with configuring settings in the Control Hub
- Understanding how to configure and navigate the Broadworks Command Line Interface (CLI).
- Basic understanding of SSL/TLS protocols and certificate authentication
Components Used
The information in this document is based on Broadworks R22 and above.
The information in this document was created from the devices in a specific lab environment. All of the devices used in this document started with a cleared (default) configuration. If your network is live, ensure that you understand the potential impact of any command.
Background Information
This document assumes Broadworks XSP/ADP hosts are internet facing.
Configure
This procedure involves downloading specific certificate files, splitting them, copying them to certain locations on your XSP, and then uploading these certificates as new trust anchors. It is an important task that helps ensure secure and trusted communication between your XSP and Webex.
This document shows the steps to install Trust Anchors for the CTI Interface for the first time. This is the same process when you need to update them. This guide outlines the steps to acquire the necessary certificate files, split them into individual certificates, and then upload them to new trust anchors on the XSP|ADP.
Setting Up and Renewing Trust Anchors
Initial setup and any subsequent updates are the same process. When adding trusts for the first time, complete the steps and confirm the trusts are added.
When updating, you can add the new trusts and either delete the old trusts after the new ones are installed or leave both trusts. Old and new trusts can work in parallel as W4B services support presenting the relevant certificate to match any of both trusts.
To summarize:
- The new Cisco trust certificate can be added any time before the old trust expires.
- The older trust can be removed at the same time as the new one is added or at any later date if the operation team prefers that approach.
Overview of Process
Here is an overview of the process, which applies to both initial installation and updates to Trust Anchors:
- Download Webex CA Certificate: Obtain the CombinedCertChain2023.txt file from the Partner Hub under Settings > BroadWorks Calling.
- Split Certificate Chain: Split the combined certificate chain file into two separate certificate files, root2023.txt and issuing2023.txt, using a text editor.
- Copy Files: Transfer both certificate files to a temporary location on the XSP|ADP.
- Update Trust Anchors: Use the updateTrust command within the XSP|ADP command-line interface to upload the certificate files to new trust anchors.
- Confirm Update: Verify that the trust anchors are updated successfully.
Download Webex CA Certificate
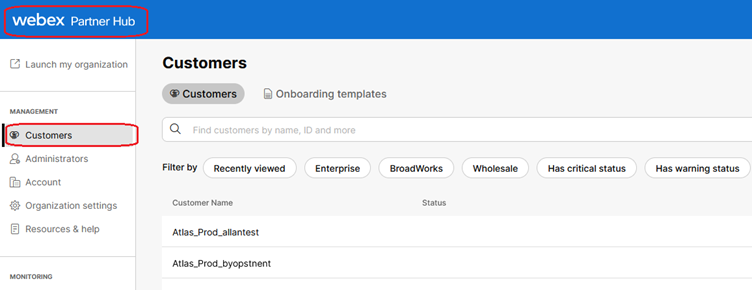
1. Sign in to Partner Hub.
 Webex Partner Hub

Note: Partner Hub is different from Control Hub. In Partner Hub, you see Customers in the left pane and Partner Hub in the title pane.
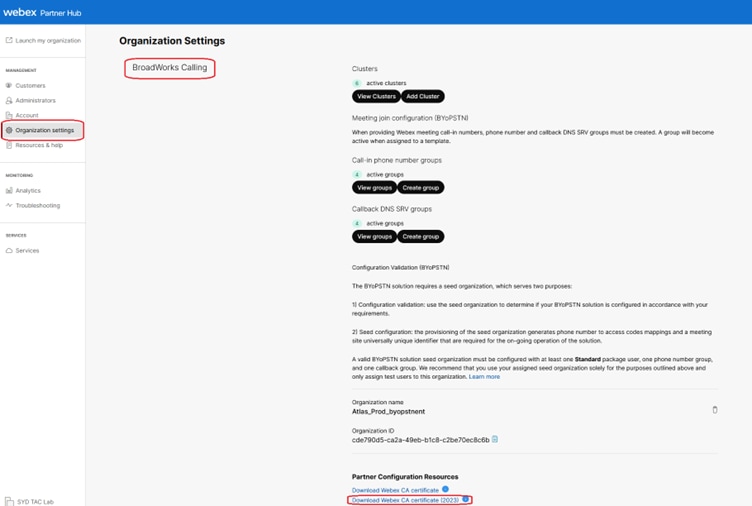
2. Go to Organization Settings > BroadWorks Calling and click Download Webex CA.
 Organization Setting Page Showing Certificate Download Link

Note: Choose the latest option. In this screenshot, you can see the latest is Download Webex CA certificate (2023)
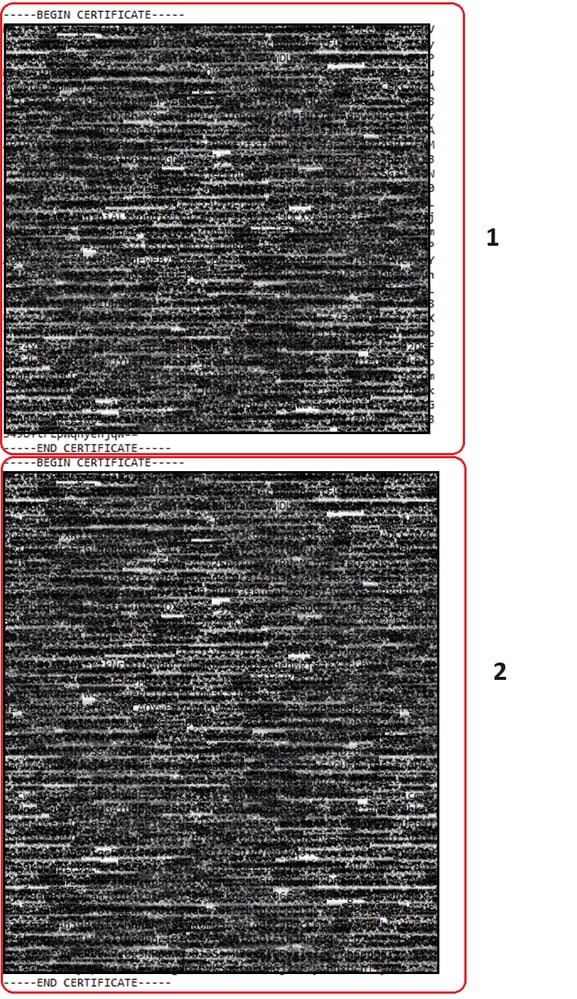
3. The certificate shown here. The image is obfuscated for security reasons.
 Redacted Combined Certificate
Split Certificate Chain
The file downloaded consists of two certificates. It is necessary to split the files before they are uploaded to your XSP. To split a certificate chain into individual certificates, complete these steps. This process shows steps to separate the combined certificate file into root and issuing certificates.
- The combined certificate file is split into 2 separate certificates.
- root2023.txt
- issuing2023.txt
- Identify the Individual Certificates.
- The file contains multiple certificates delineated by the markers -----BEGIN CERTIFICATE----- and -----END CERTIFICATE-----. Each of these blocks represents a single certificate.
- Split the Certificates
- To split the chain, you must create new text files for each certificate block you identify.
For the First Certificate (Root Certificate):
- Select the first block of text, including the -----BEGIN CERTIFICATE----- and -----END CERTIFICATE----- lines.
- Copy the selected text.
- Open a new text file and paste the copied text into this file.
- Save the new file as root2023.txt
For the Second Certificate (Issuing Certificate):
- Return to the original combined certificate chain file.
- Select the second block of text (the next certificate in the chain), including the -----BEGIN CERTIFICATE----- and -----END CERTIFICATE----- lines.
- Repeat the process of copying the selected text, pasting it into a new text file, and saving the file as issuing2023.txt
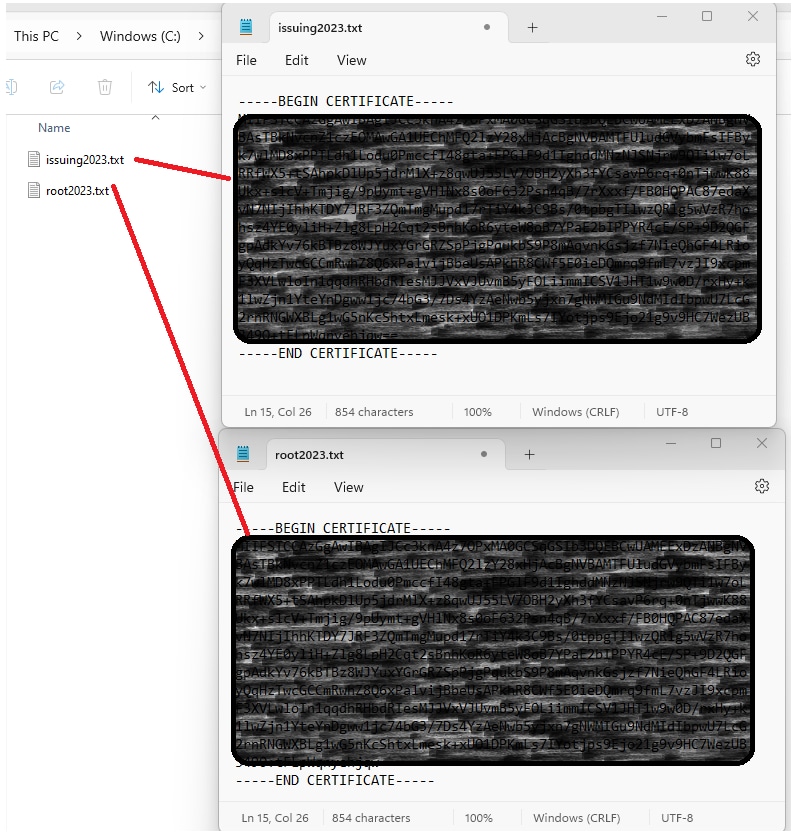
 Redacted Split Certificates

Note: It is good practice to verify that each new file contains only one certificate and that the BEGIN and END markers are correctly included.
Copy Files
Copy both root2023.txt and issuing2023.txt to a temporary directory on the XSP/ADP such as /var/broadworks/tmp/. This can be done using WinSCP or any other similar application.
bwadmin@tac-ucaas.cisco.com$ ls -l /var/broadworks/tmp/
-rwxrwxrwx 1 bwadmin bwadmin 2324 Jul 21 2023 issuing2023.txt
-rwxrwxrwx 1 bwadmin bwadmin 1894 Jul 21 2023 root2023.txt
Update Trust Anchors
Upload certificate files to establish new trust anchors. From within CTI XSP/ADP BWCLI, issue these commands:
XSP|ADP_CLI/Interface/CTI/SSLCommonSettings/ClientAuthentication/Trusts> updateTrust webexclientroot2023 /var/broadworks/tmp/root2023.txt
XSP|ADP_CLI/Interface/CTI/SSLCommonSettings/ClientAuthentication/Trusts> updateTrust webexclientissuing2023 /var/broadworks/tmp/issuing2023.txt

Note: Each alias must be unique. For instance, webexclientroot2023 and webexclientissuing2023 serve as sample aliases for the trust anchors. Feel free to create custom aliases, ensuring that each one is distinct.
Confirm Update
Confirm the anchors are updated by issuing this command
XSP|ADP_CLI/Interface/CTI/SSLCommonSettings/ClientAuthentication/Trusts> get
Alias Owner Issuer
=============================================================================
webexclientissuing2023 Internal Private TLS SubCA Internal Private Root
webexclientroot2023 Internal Private Root Internal Private Root[self-signed]
Your CTI Interface has now been updated with latest certificate.
Check TLS Handshake
Note that the Tomcat TLS log needs to be enabled at FieldDebug severity to view SSL handshake.
ADP_CLI/Applications/WebContainer/Tomcat/Logging/InputChannels> get
Name Enabled Severity
============================================
TLS true FieldDebug
TLS debug is only in ADP 2022.10 and later. See Cisco BroadWorks Log Cryptographic Connection Setup and Teardown.
Related Information


 Feedback