Introduction
This document describes the installation of an Activation Key and Feature Key to a Cisco Telepresence ISDN Gateway (ISDN GW) via the web interface.
Prerequisites
Requirements
Cisco recommends that you have knowledge of these topics:
Have successfully installed the ISDN GW and have applied a valid IP address that is reachable via web interface.
Have applied for and received an Activation key and or Feature key valid for the ISDN GW serial number.
Have access to the ISDN GW with an administrator account by web interface.
Have knowledge of the various platforms of ISDN GW 3241 and Cisco Telepresence MSE ISDN GW 8321 using the web interface.
Have used a web browser such as Firefox, Internet Explorer or Chrome.
Note: ISDN GW Installation guides can be found here:
http://www.cisco.com/c/en/us/support/conferencing/telepresence-isdn-gateway/products-installation-guides-list.html
Components Used
The information in this document is based on these software versions:
Cisco ISDN GW 8321 release 2.2(1.114)
Cisco ISDN GW 3241 and Cisco Telepresence MSE ISDN GW 8321 all releases
License email with an Activation key or Feature key.
A web browser such as Firefox, Internet Explorer or Chrome.
The information in this document was created from the devices in a specific lab environment. All of the devices used in this document started with a cleared (default) configuration. If your network is live, make sure that you understand the potential impact of any command.
Configure
Add Product Activation or Feature Key via the Web Interface
This web interface example video supplements this document:
Configuration
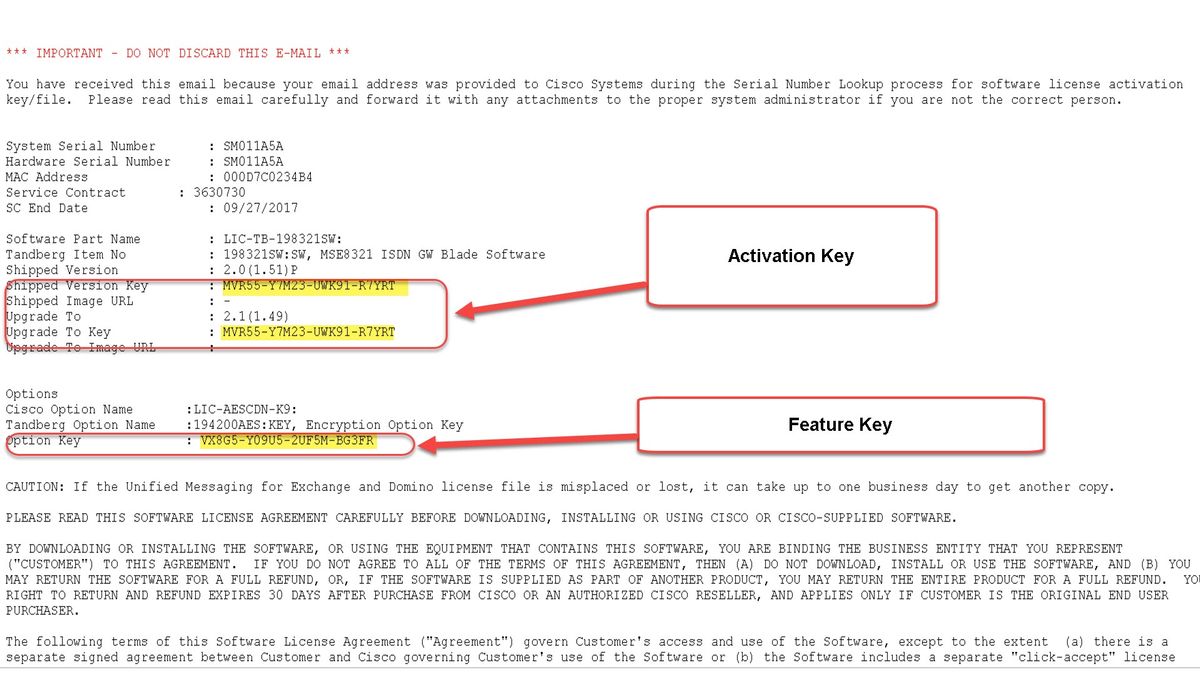
Step 1. Once you have installed your ISDN GW, have your serial number and applied for your Activation key or Feature Key using your PAK and serial number, you receive a license email from the Cisco licensing team.
Note: Examples of PAK are outside the scope of this document.
EMAIL EXAMPLE
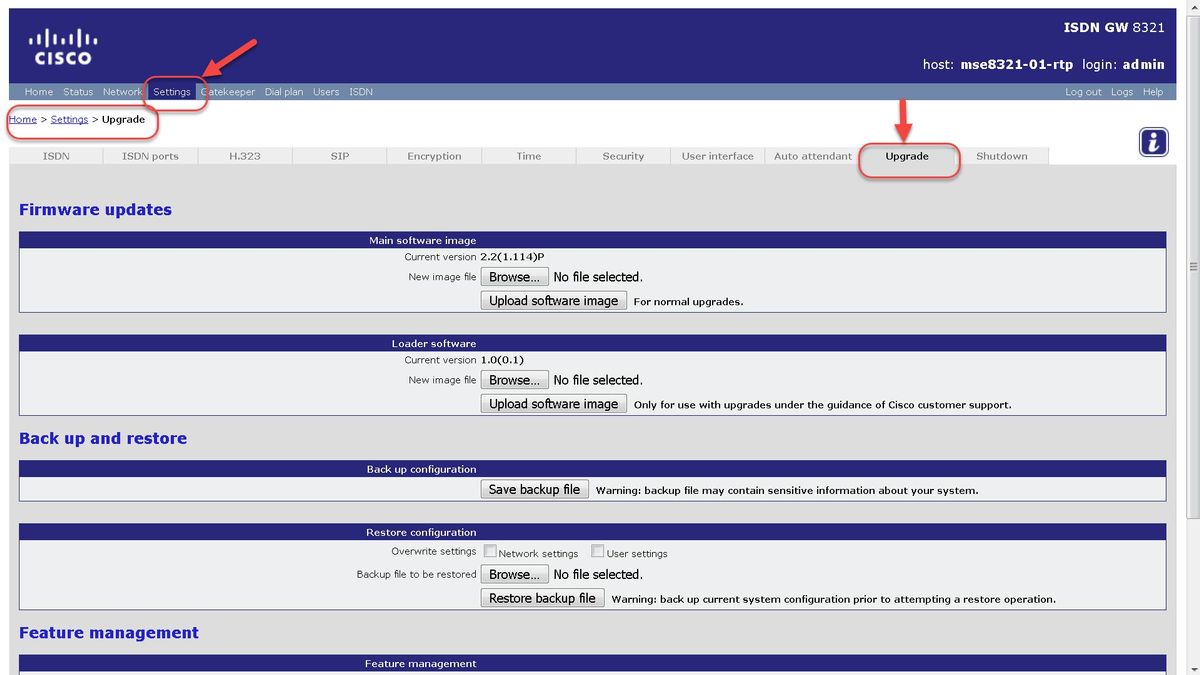
Step 2. Enter the IP address of the ISDN GW in your web browser and log in to the ISDN GW web interface with an administrator account. Navigate to Settings > Upgrade:
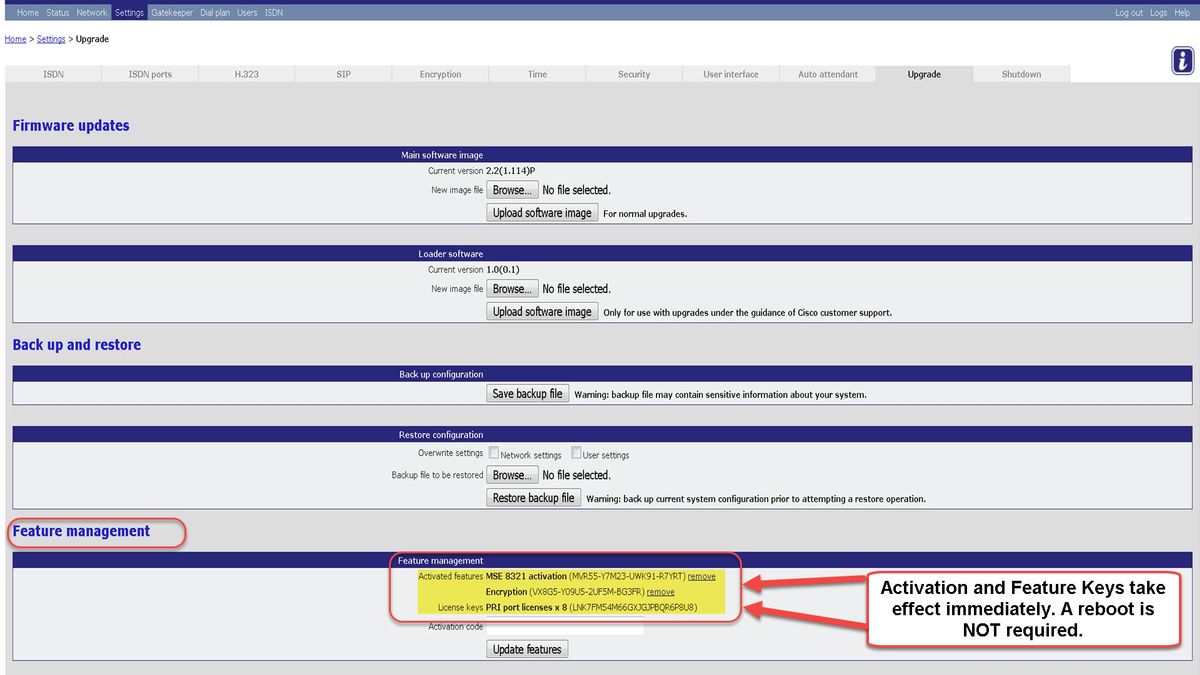
Step 3. Locate the Feature managementsection on the Upgrade Page. Enter the Activation Key value or Feature Key value in the Activation code field:

Note: Add the Activation key or Feature Key exactly as it appears in the license email. Be sure to include any dashes and make sure there are no extra spaces or characters.
Note: Once added, the keys take effect immediately. A reboot is NOT required.
Note: Cisco recommends that you record the Activation key and Feature keys, in a safe location, in case you need to re-enter them in the future.
Verify
Navigate to Settings > Upgrade and scroll down to the Feature management section. Notice the Activated Features section which shows both the Activation key and Feature keys installed:

Troubleshoot
Step 1: Check the Feature key or Activation key received, ensure it is for the correct Product ID (PID) and issued for the correct serial number of your ISDN GW.
Step 2: Ensure you install the correct key for the correct serial number of your ISDN GW.
Step 3: Ensure you enter the key value in the Activation Code field of the Feature management section of the Settings > Upgrade page.
Step 4: Assess steps one through three again. If all is correct, add the keys once more. Ensure there are no extra spaces or characters in the value entered and be sure to include any dashes.
If you encounter any errors after following the steps in this guide and steps one through four in the Troubleshoot section of this guide, engage Cisco TAC.
