Introduction
This document desribes how to install Replication for Cisco Unified Attendant Console (CUAC) Advanced for the Replication of configuration and login databases between the Publisher and Subscriber.
Prerequisites
Requirements
Cisco recommends that you have knowledge of these topics:
- CUAC Advanced of same version
- Publisher and Subscriber can communicate with each other via hostname
- Time on Publisher and Subscriber match each other
Components Used
The information in this document is based on Cisco Unified Replicaiton.
The information in this document was created from the devices in a specific lab environment. All of the devices used in this document started with a cleared (default) configuration. If your network is live, make sure that you understand the potential impact of any command.
Configure
Configurations
Step 1. Browse to the PUB and log in. Default username/password is admin/cisco.
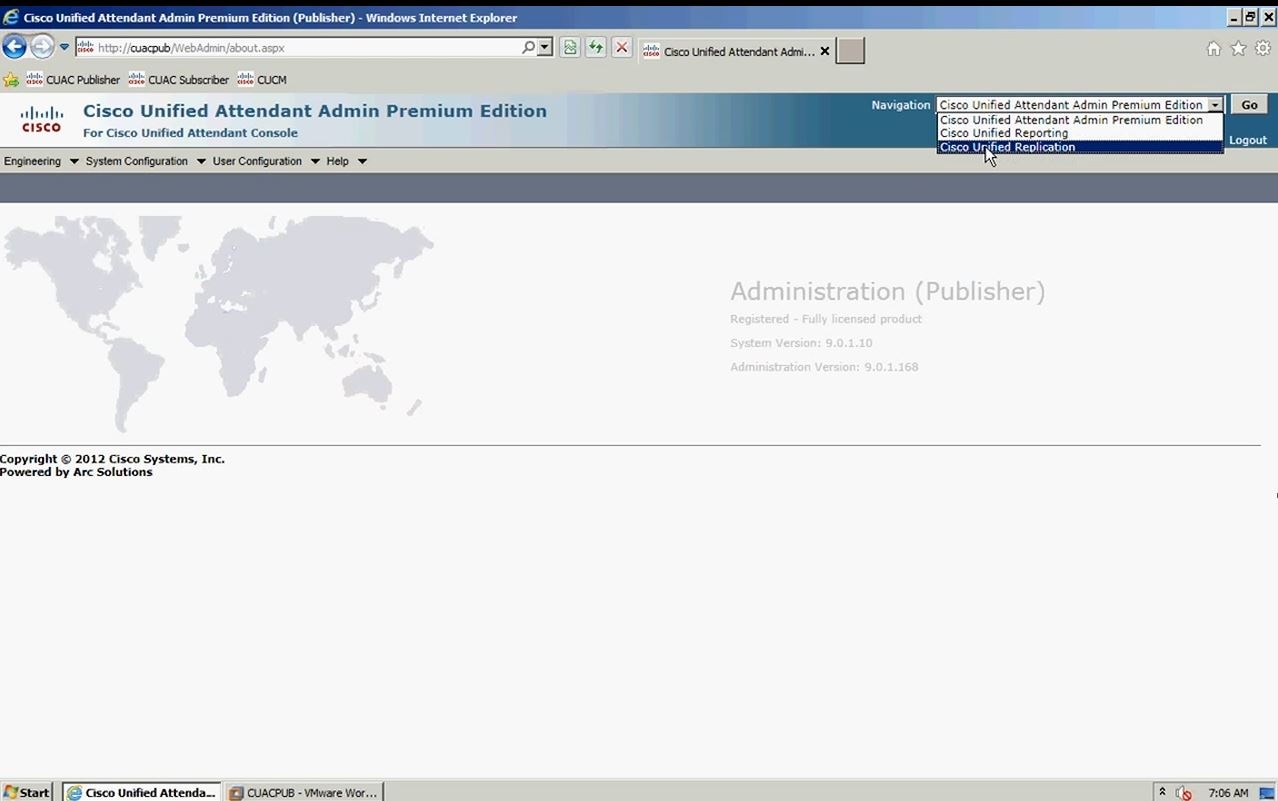
Step 2. As shown in the image, go to navigation drop down in top right corner, select Ciso Unified Replication and click Go.
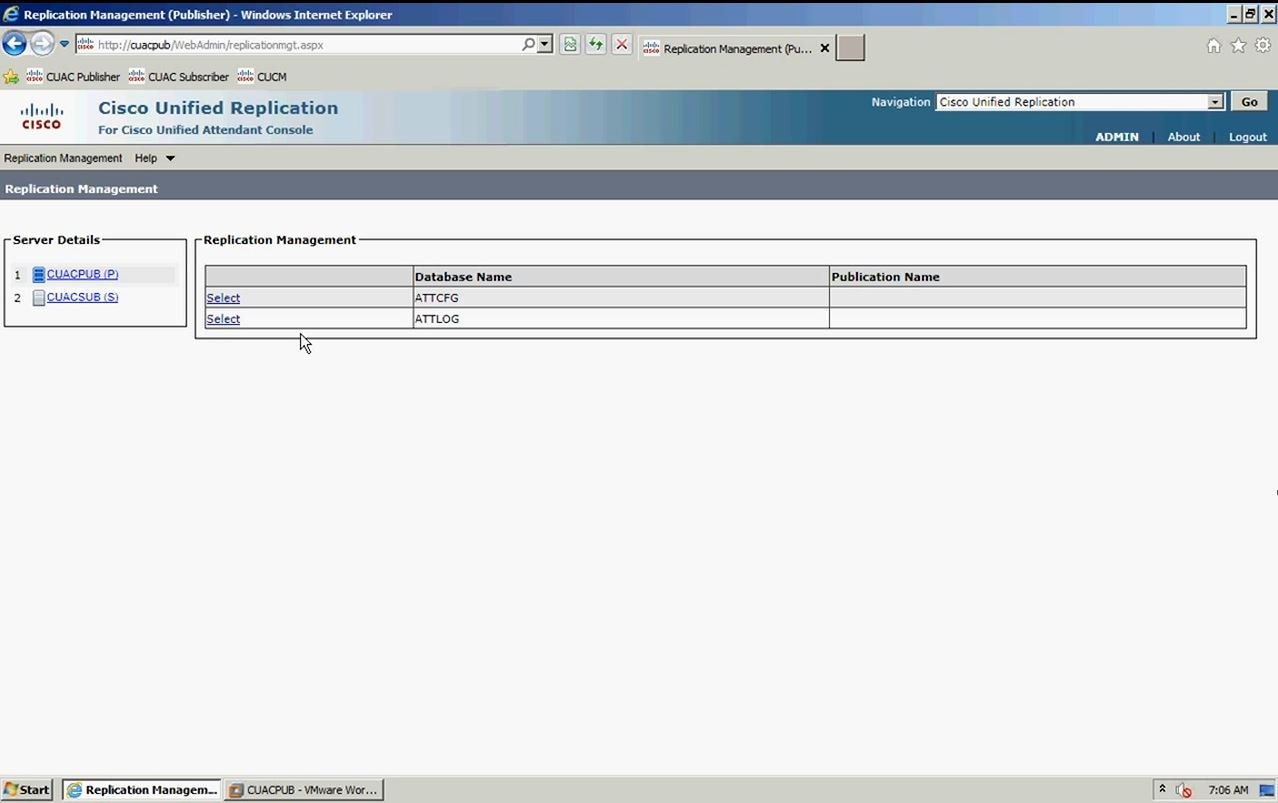
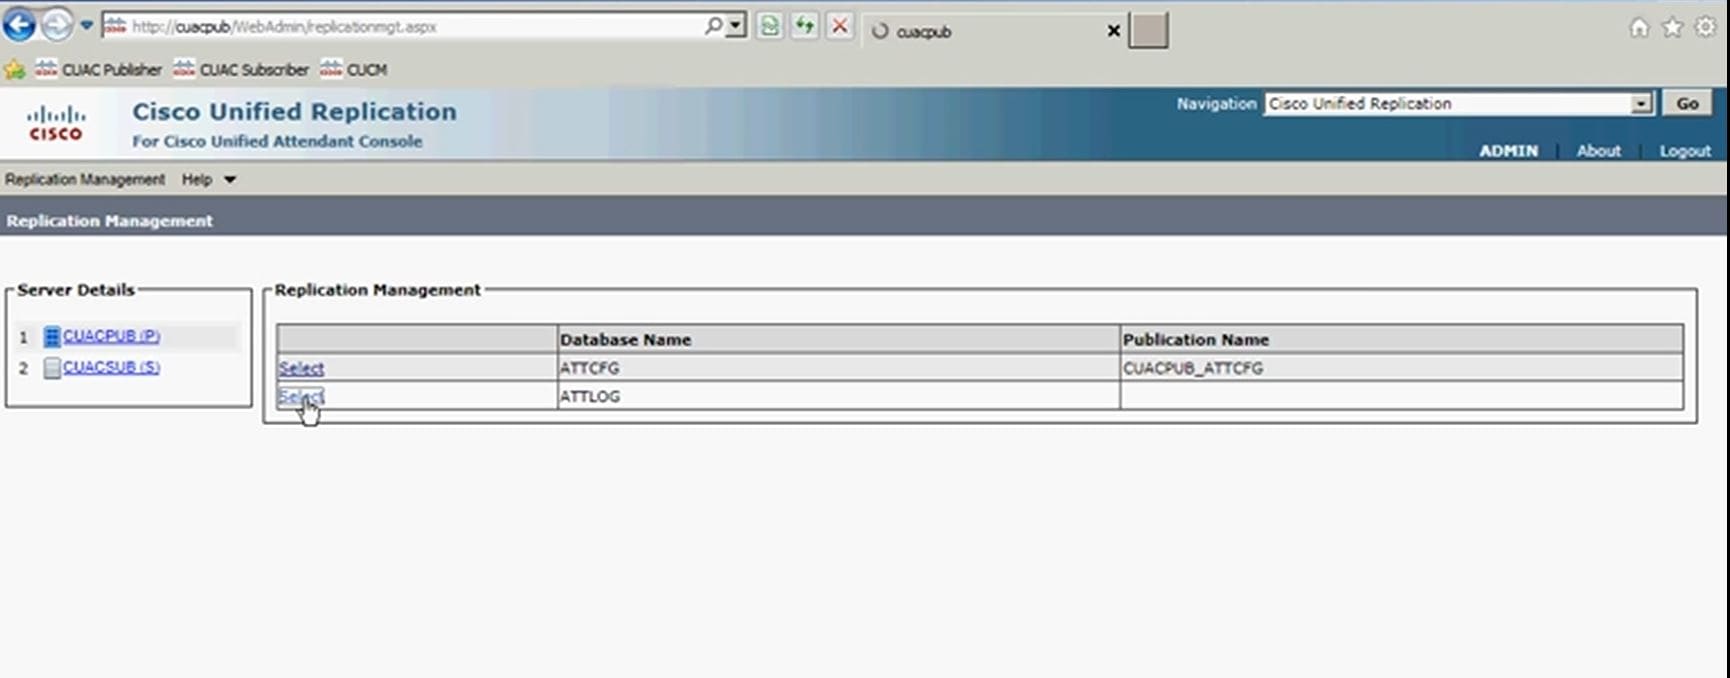
Step 3. Click on Replication Management. Publisher and Subscriber is listed on the left under Server Details, as shown in the image:
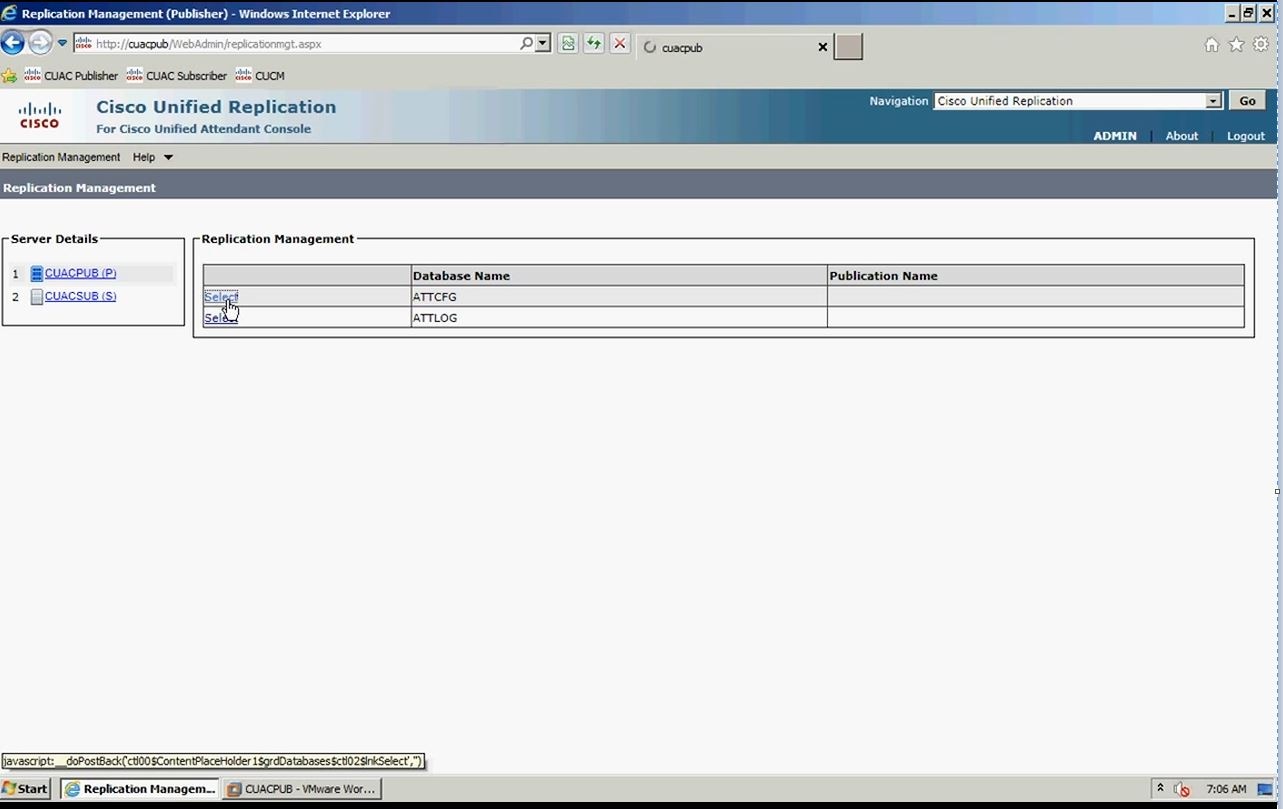
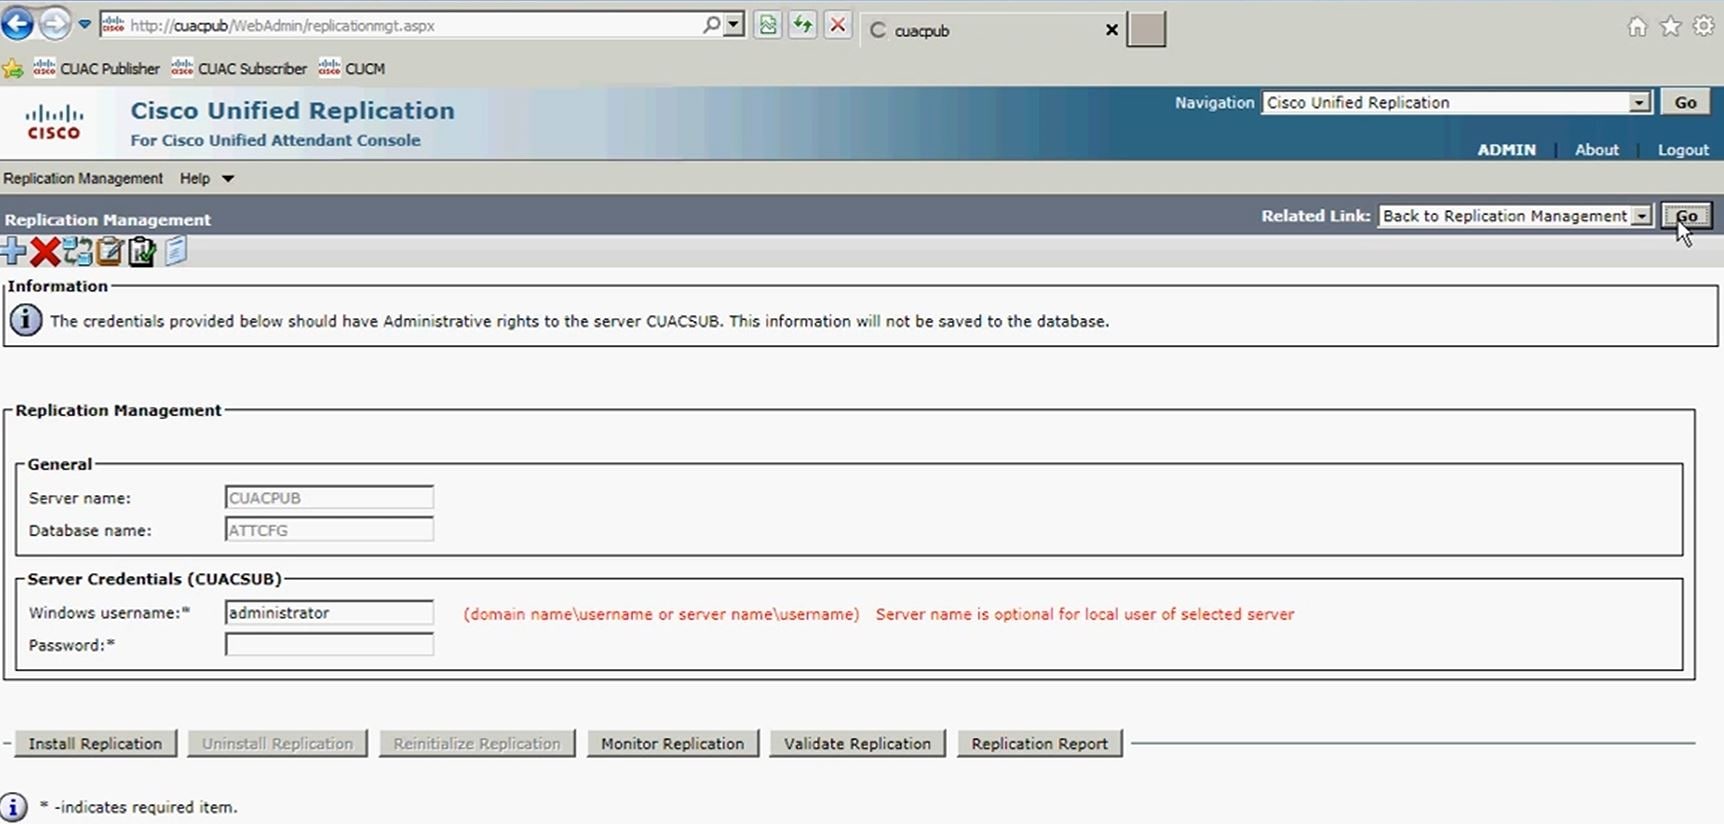
Step 4. Select the Publisher and then select the configuration database, as shown in the image. This database holds all of your configuration information
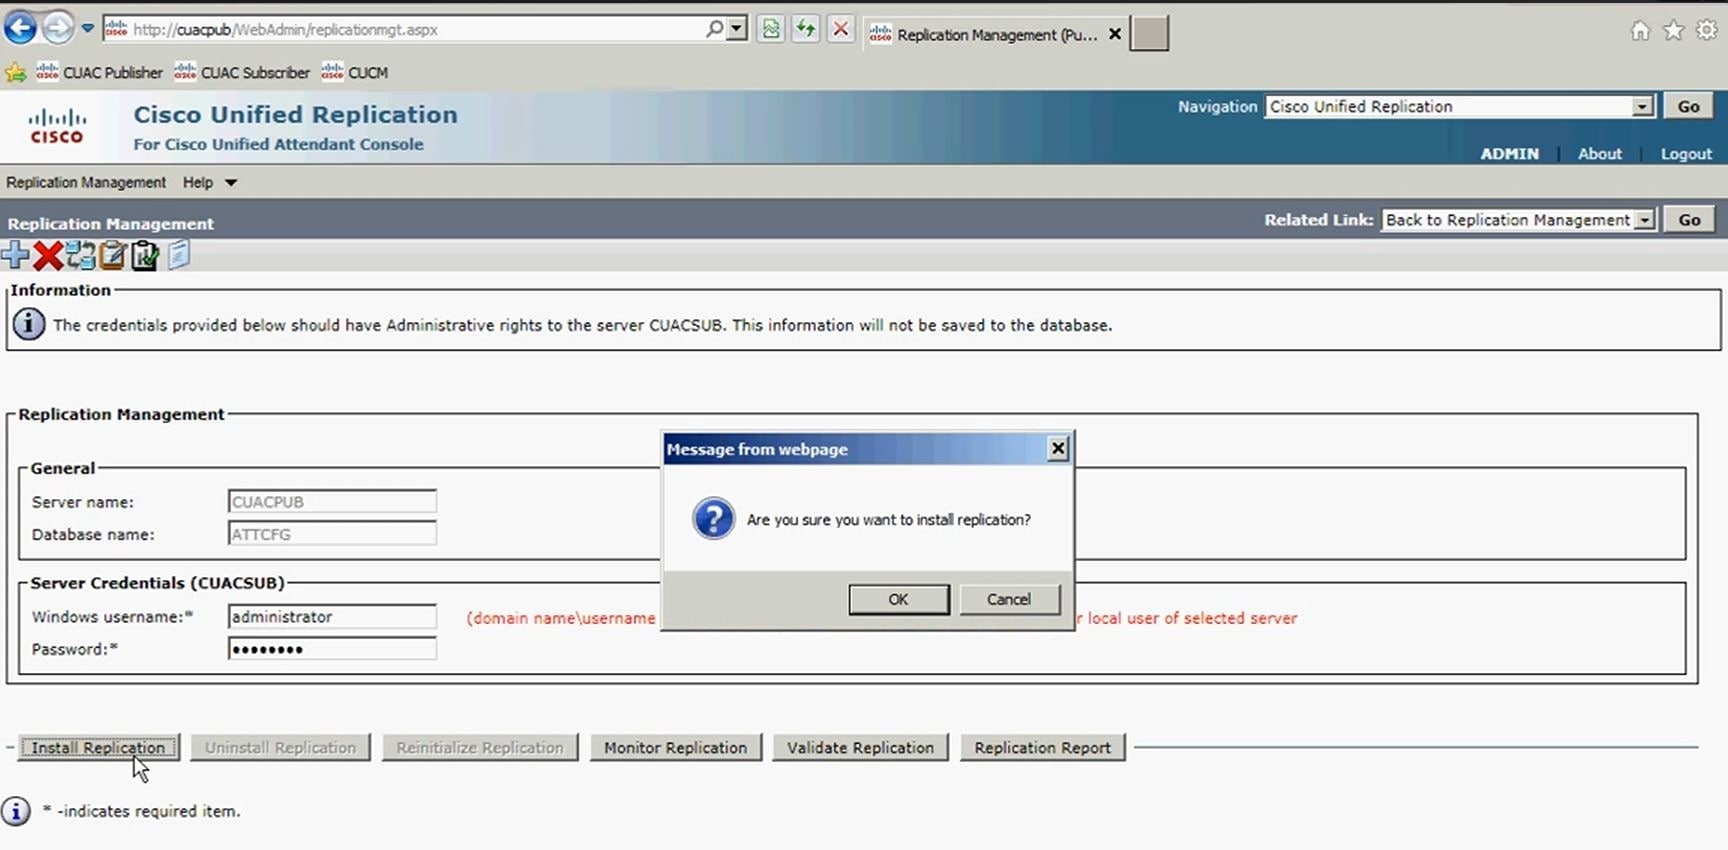
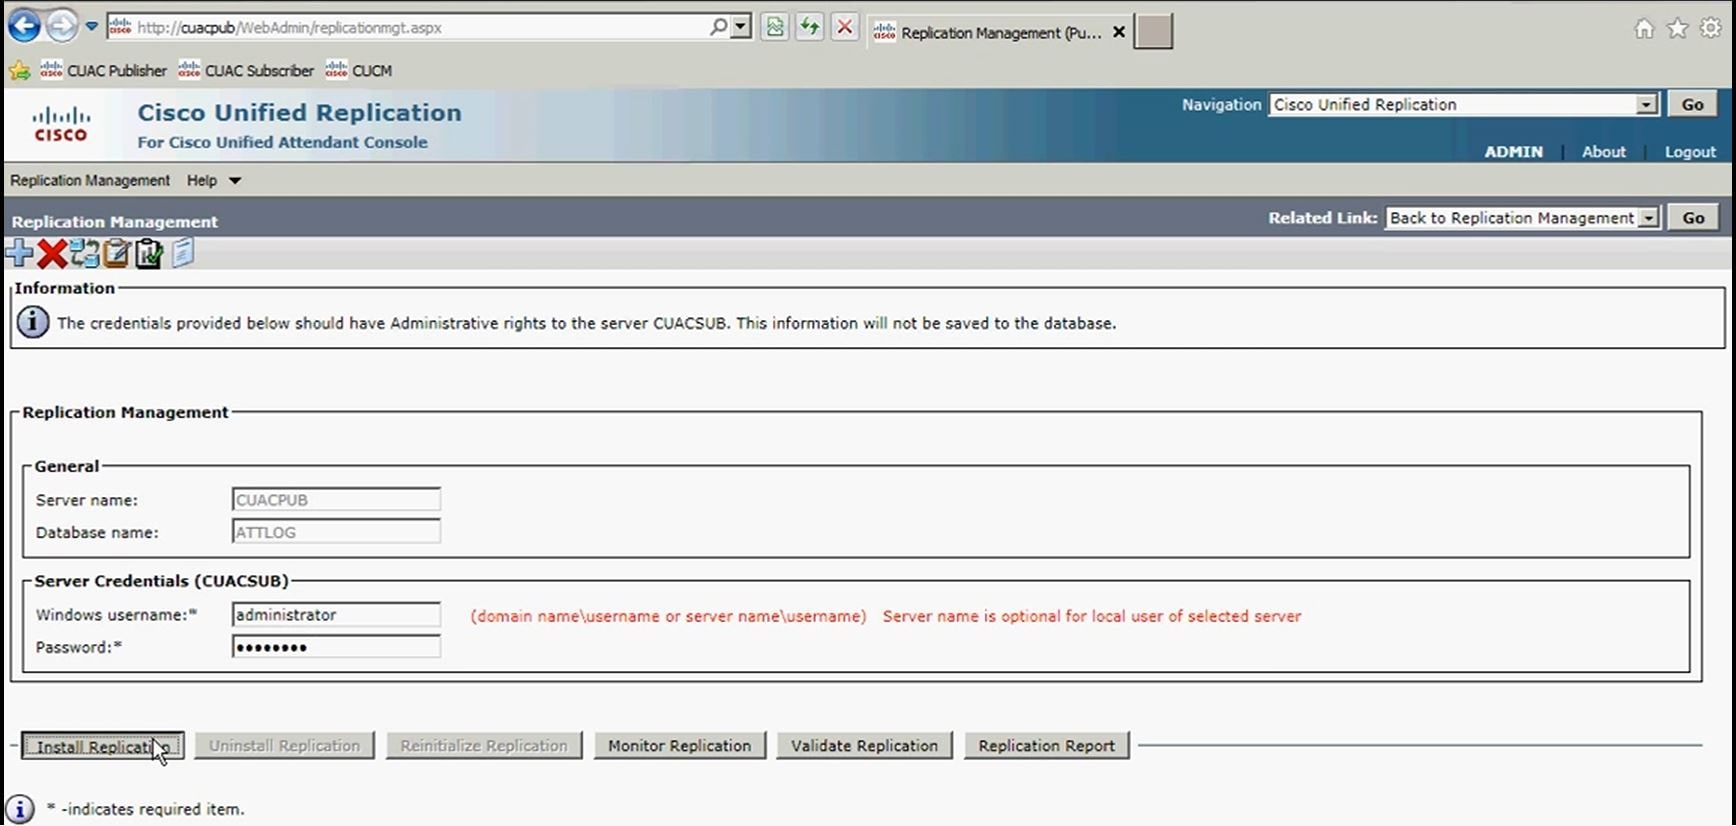
Step 5. Enter the Windows Username/Password, as shown in the image. This is used to authenticate with the subscriber server.
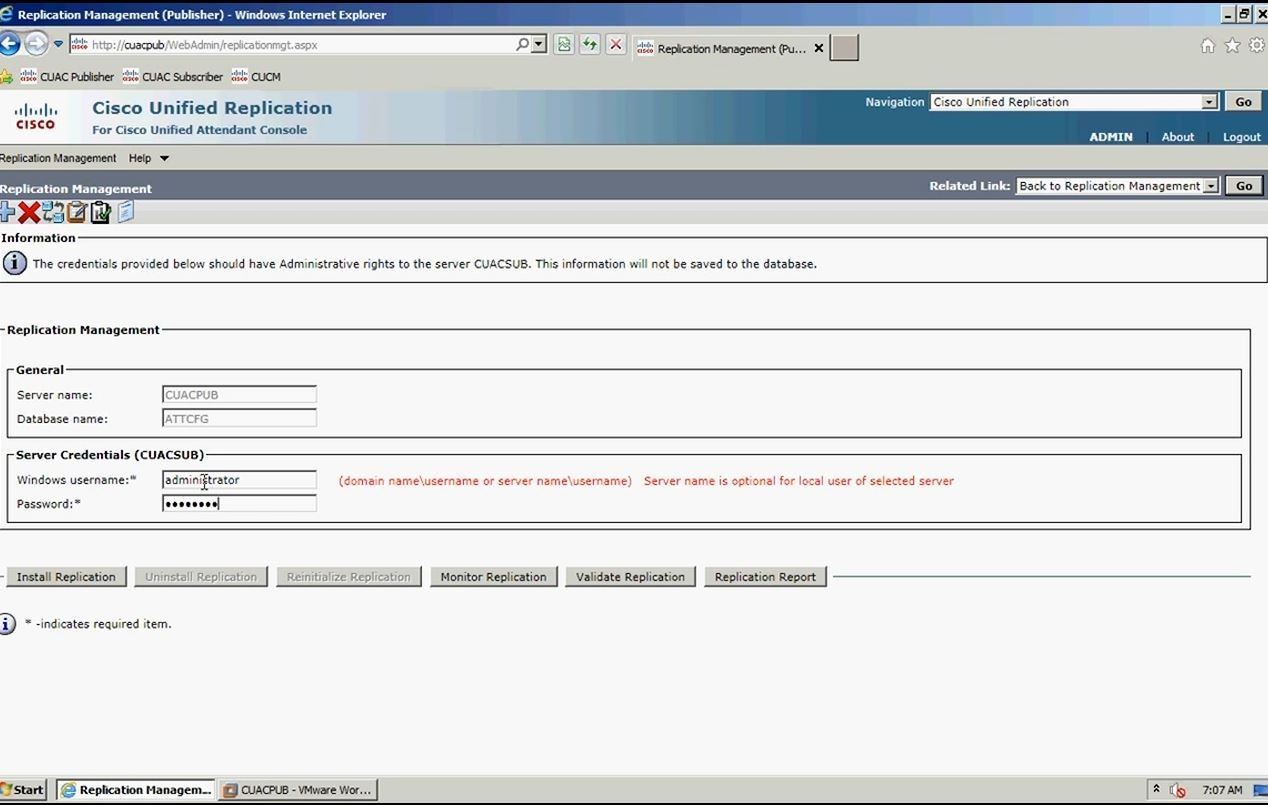
Note: Before you go for step 5, ensure that your two servers can communicate with each other via the hostname. If they can't you have to add the information in DNS or add an entry in host file.
Note: Also, ensure that the time on both of the servers match each other. If they are a few minutes apart, through client software you can find that when the replication is installed. If there is a failover scenario, the client failovers to the subscriber correctly. However, when it comes to the reconnect with the publisher, you may have some issues once it is back on line.
Step 6. Click on Install Replication and then click OK. This starts the process for installation.
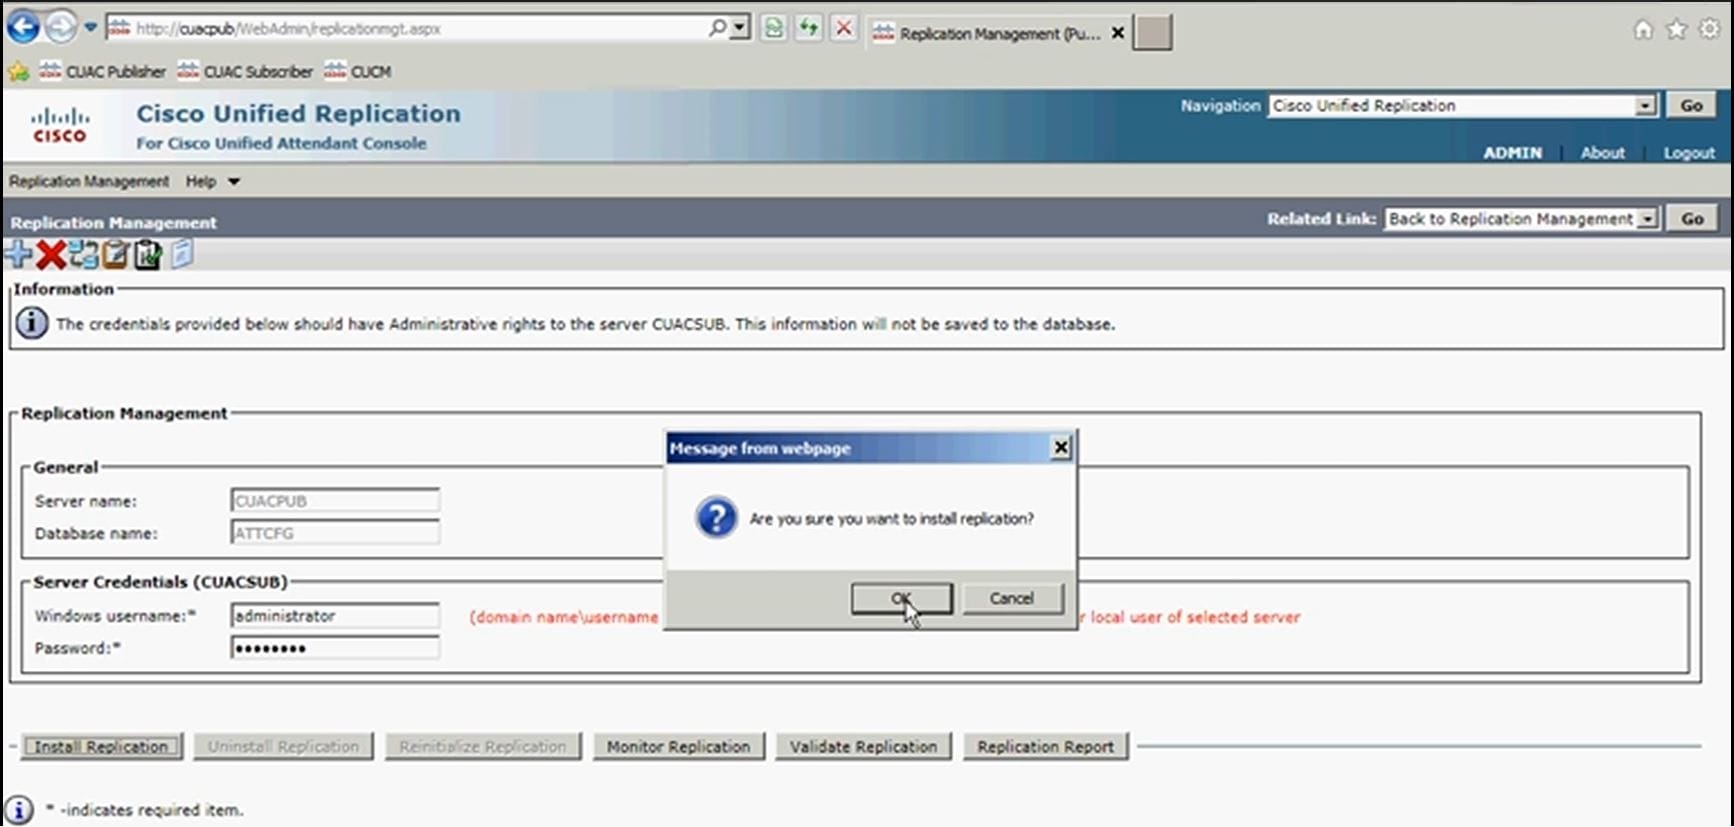
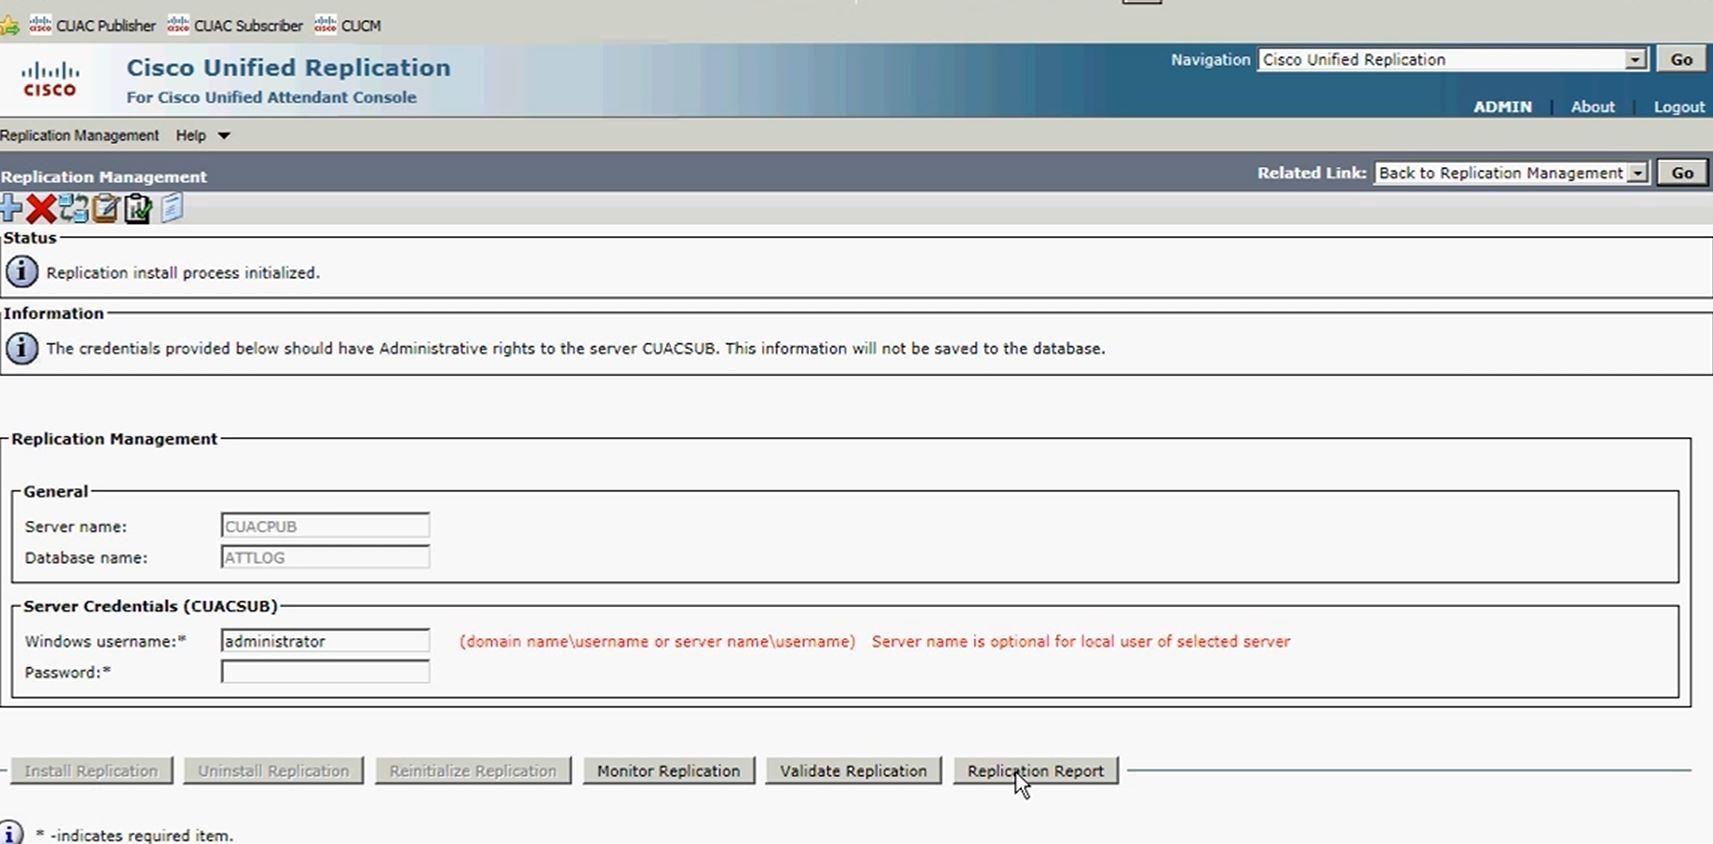
Step 7. As shown in the image, you can watch the progress. If you click on Replication Report a new window popups, so you need to allow the popup from this page.
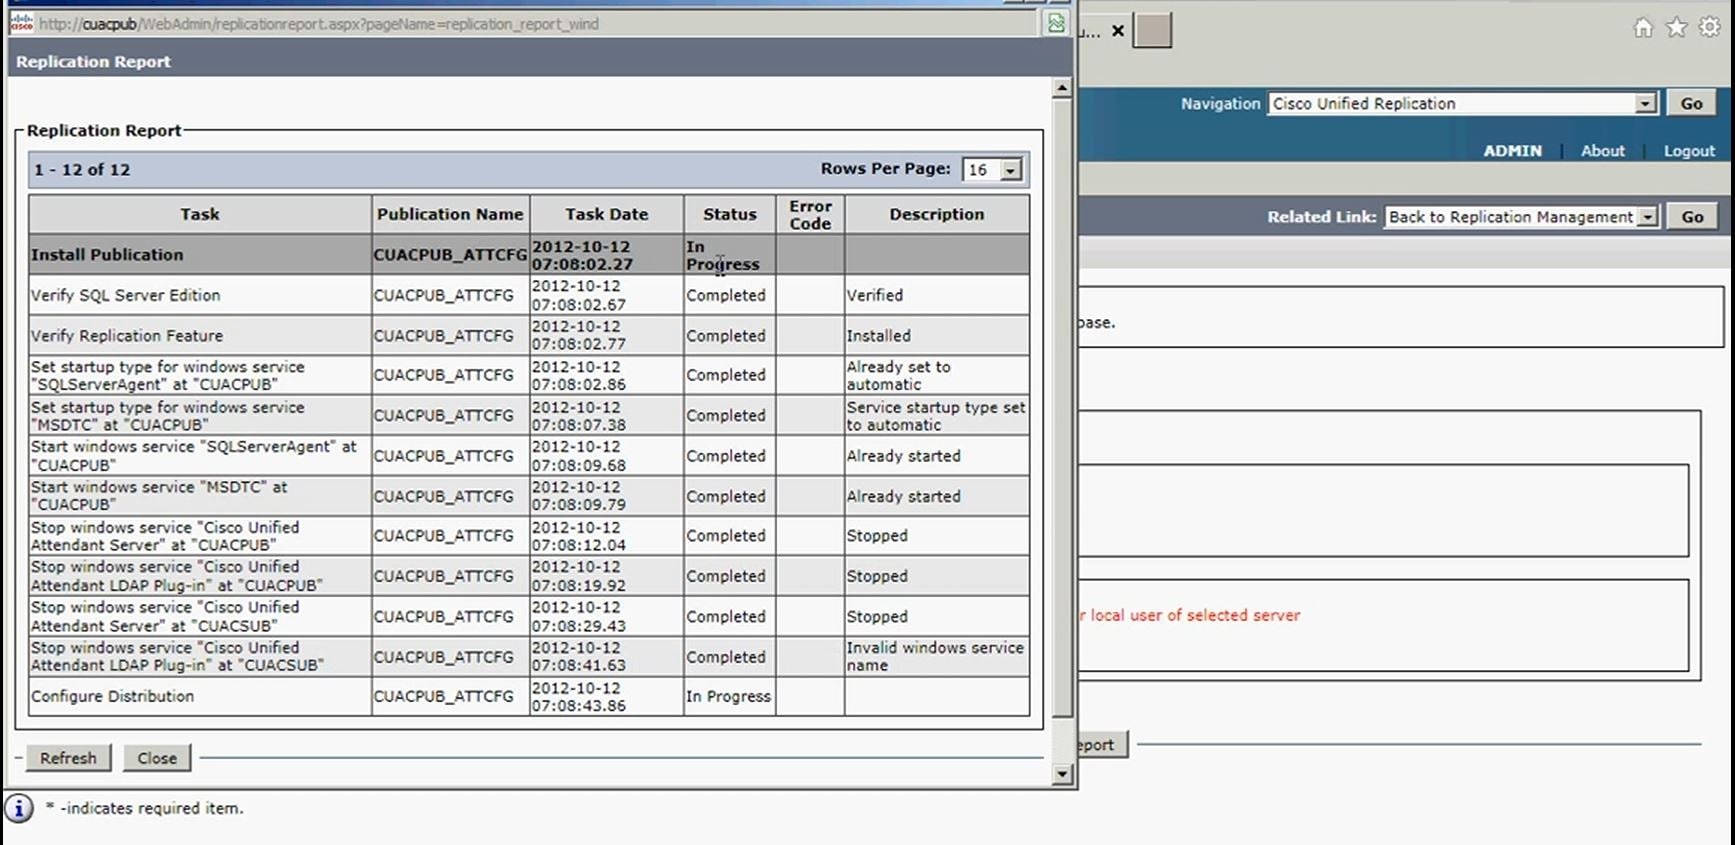
From the Replication Report, you can see the status of the Resilience installation and at the top the Resilience installation is in Progress for the configuration database.
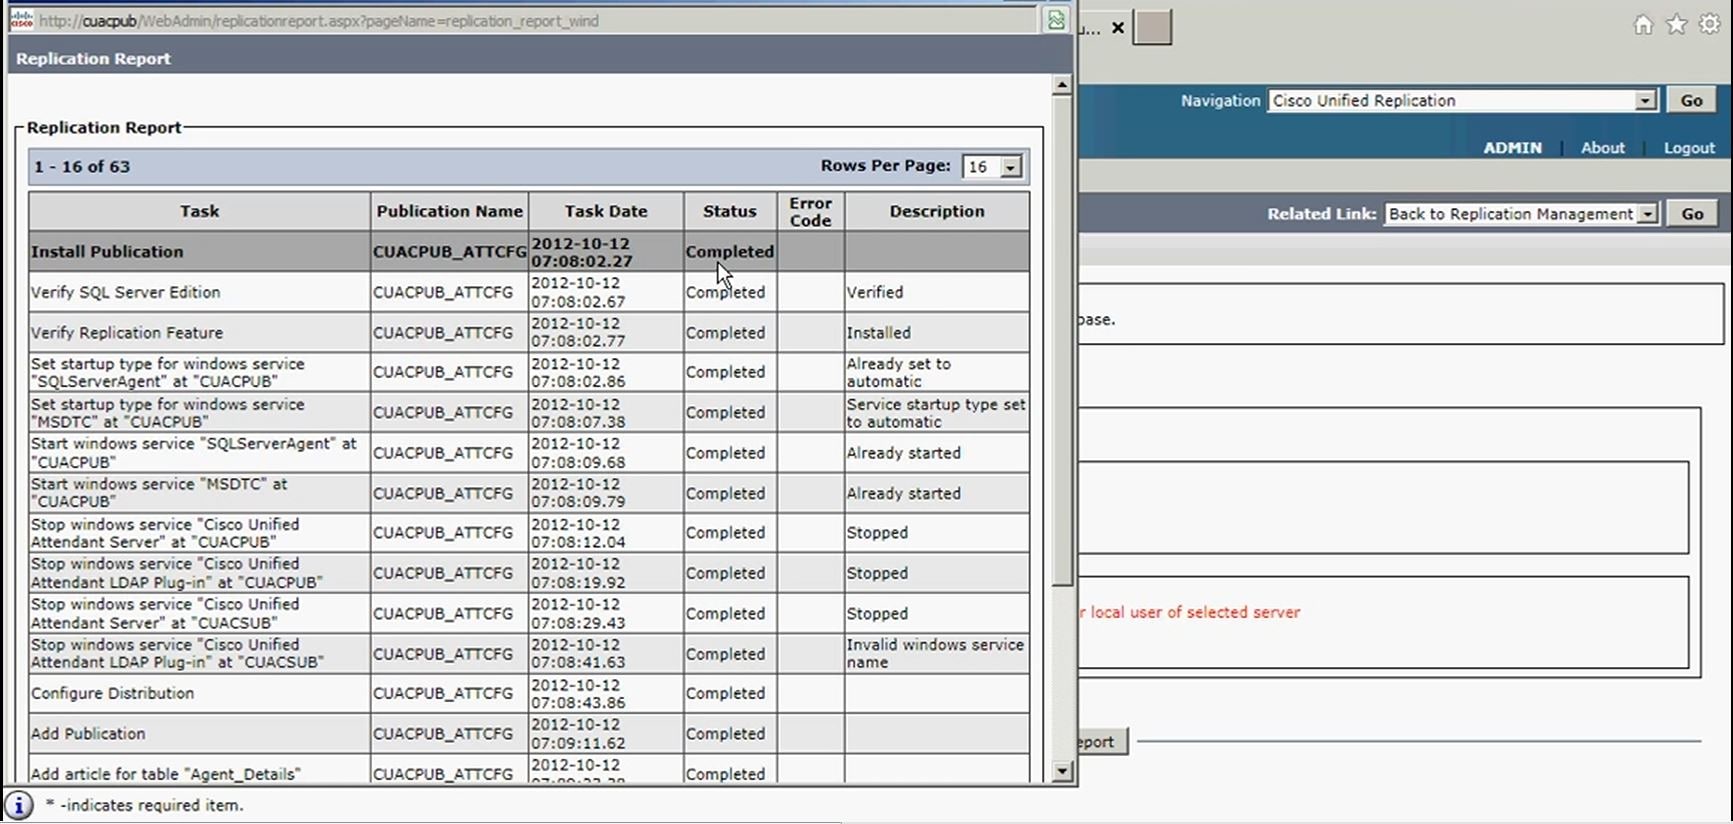
When installation is completed in the Replication Report, as shown in the image, Install Publication is completed at the top for the configuration database:
Step 8. After all this is completed for the configuration database, click Go, Back to Replication Management and repeat for the process of logging database as you select ATTLOG and run their previous steps after the windows username/password is entered. This database contains call history and is used to run the reports.
Step 9. Once the Replication for Publisher Logging database install progress is initiazed, run the Replication Report as before.
When the Publisher logging database installation is completed, in the Replication Report you can see the Install Publication completed at the top for the Logging database, as shown in the image:
Step 10. Again click Go, Back to Replication Server. This time select the subscriber server and follow the same process to go forth with the Replication Installation of the CFG database and after this is completed follow the same process for Replication installation of the LOG database.


Verify
Use this section in order to confirm that your configuration works properly.
Use the Replication Report, to the status of the Resilience installation after resilience install progress has been initiazed . At first, at the top of the report, you will see that the Resilience installation is In Progress for the particular database you are replicating. Later, when replication is completed, you can see the completed Install at the top for the partiular database you are replicating.
Troubleshoot
There is currently no specific troubleshooting information available for this configuration.
