Introduction
This document describes how to install phone locale on a Cisco 7841 Series IP phone.
Prerequisites
Requirements
There are no specific requirements for this document.
Components Used
The information in this document is based on these software and hardware versions:
- Cisco Unified Communcication Manager 12.x
- Cisco IP phone 7841
The information in this document was created from the devices in a specific lab environment. All of the devices used in this document started with a cleared (default) configuration. If your network is live, ensure that you understand the potential impact of any command.
Background Information
Cisco Unified Communications Manager (CUCM) provides system-defined localization support for 12 languages including English and 16 countries including the United States. Network locales specify country-specific tones and cadences; user locales specify the language to use for text displays.
Configure
Configurations
This is the procedure to perform a hard factory reset of the phone:
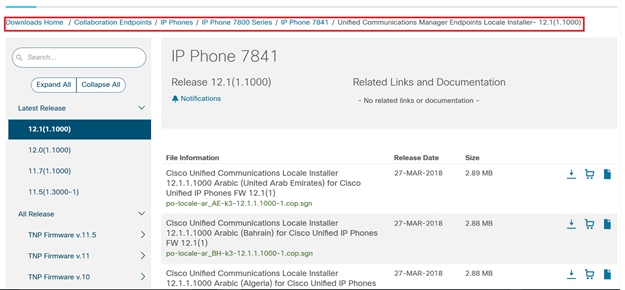
Step 1. Download the locale from the Cisco website.
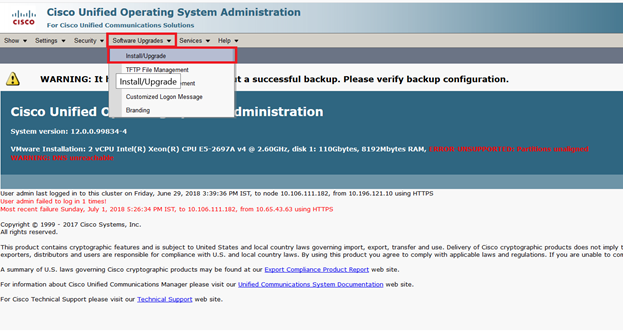
Step 2. Navigate to OS Administration > Software Upgrades > Install/Upgrade.
Step 3. As shown in the image, enter the credentials for the SFTP server.

Step 4. Select the locale from the Options/Upgrades drop down menu and click on Next, as shown in the image. Installation of the locale starts.

5. Click on Next, as shown in the image, after the Checksum Details are verified.
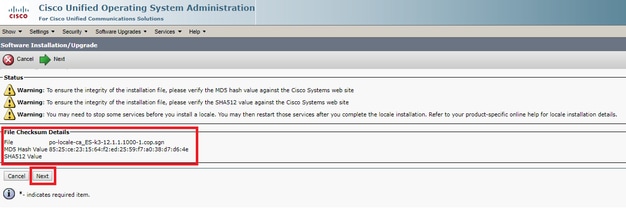
Step 6. Installation of the locale is successful

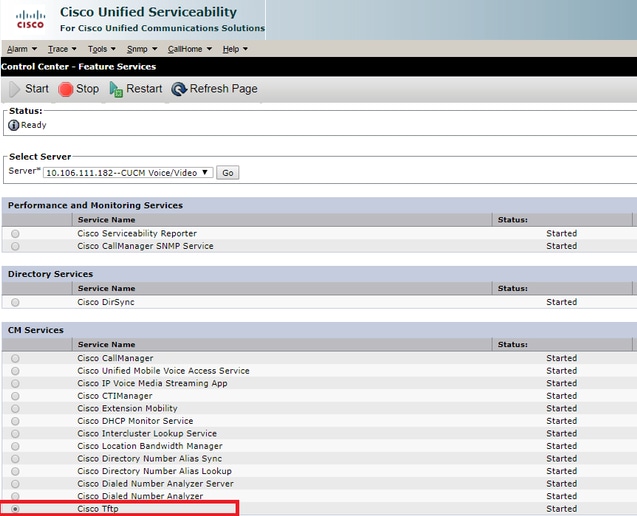
Step 7. Reset the Cisco TFTP service on all the nodes which runs it as you navigate to Servicability Page > Tools > Contol Center Feature services. Select Cisco TFTP service there and click on restart, as shown in the image.
Step 8. Navigate to the phone.

Step 9. Under User Locale select the locale that you just download.

Step 10. Save, apply configuration and reset the phone .
Verify
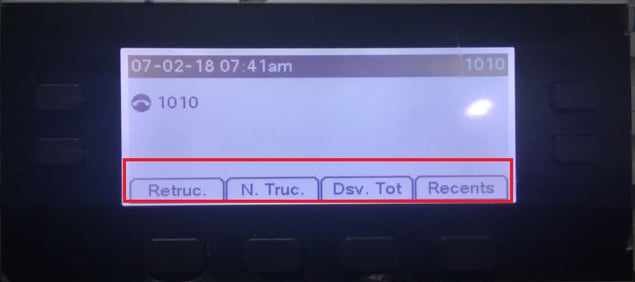
If the locale is successfully installed, you are able to see the softleys in the native language as shown in the image:
Troubleshoot
There is currently no specific troubleshooting information available for this configuration.
 Feedback