Introduction
This document describes one of the best practices for migrating phones from secured Cisco Unified Communication Manager (CUCM) to a non-secure CUCM.
Prerequisites
Requirements
Cisco recommends that you have knowledge of these topics:
Components Used
The information in this document is based on these software versions:
- CUCM versions - 12.5.1.16065-1 and 12.5.1.14900-63
- IP Phone model - 8865 and version - 12.8(1)
The information in this document was created from the devices in a specific lab environment. All of the devices used in this document started with a cleared (default) configuration. If your network is live, ensure that you understand the potential impact of any command.
Configure
Network Diagram
IP_Phone > Cisco Switch > Cisco Router > Cisco Switch > CUCM Cluster
Configurations
These scenarios explain the phone migration from secure to non-secure CUCM cluster. During each stages, the status of Certificate Trust List (CTL) and Identity Trust List (ITL) files on the phone are documented.
- Register a phone to a non-secure CUCM cluster.
- Convert non-secure cluster to secure CUCM cluster.
- Convert back to non-secure cluster from secure
- Migrate the phone to a new non-secure CUCM cluster.
1. Register a phone to a non-secure CUCM cluster.
These are the information about the non-secure source cluster.
- IP Address - 10.201.251.171
- FQDN - cucm1052.domain.com
- Version: 12.5.1.16065-1
Register a phone to a non-secure CUCM cluster. For this, configure Dynamic Host Configuration Protocol (DHCP) option 150 / 66 to point to the Trivial File Transfer Protocol (TFTP) IP Address (This would be the CUCM node where the TFTP service is turned ON).
For the infrastructure where you do not have the DHCP servers, you have to configure the TFTP IP manually on the physical phone.
On the physical Phone, navigate to Settings > Admin Settings > Network Setup > Ethernet setup > IPv4 setup.
Turn Off the DHCP and provide static IP details of your network. After that, provide the non-secure CUCM IP in the TFTP Server 1 section as shown in the screenshot.

Note: This process is equivalent to changing the TFTP IP on the DHCP scope – option 150 / 66. And If the cluster is configured with domain name, then you have to set appropriate Domain Name System (DNS) servers in the DHCP scope too.
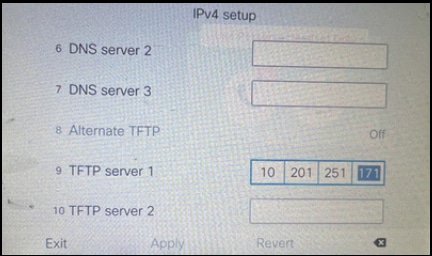 Configure the TFTP IP on the Phone
The IP phone gets register to the mentioned non-secure CUCM cluster successfully.
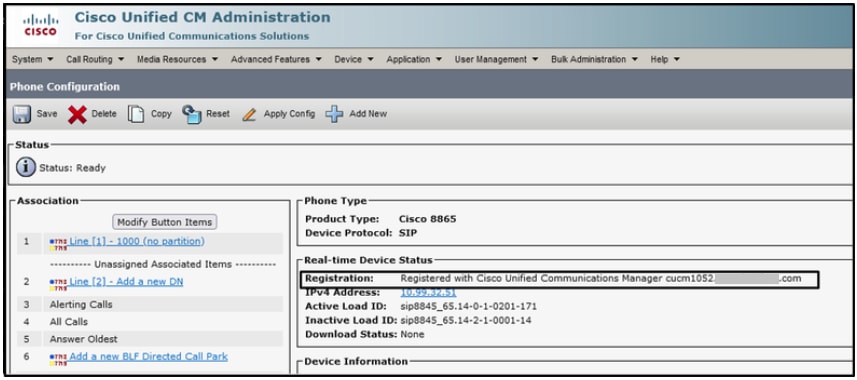 Phone Registered with the CUCM
Log in to CUCM Administation web interface and navigate to System > Enterprise Parameters.
These are the parameters’ value set under the Enterprise parameter page of the non-secure CUCM cluster.
- Cluster security Mode is set as 0, this confirms the cluster is non-secure.
 Cluster Security Mode is Set to 0
- Prepare Cluster for Rollback to pre 8.0 is set as False. So, the content of the ITL & CTL files are retained with appropriate values.
 Prepare Cluster for Rollback to pre 8.0 is Set as False
Since the cluster is non-secure, there is no CTL file in the TFTP server. You can verify this by running the command show ctl on the Secure Shell (SSH) session of the CUCM node.
 CTL File is not present
On the physical phone, you can confirm that there is no CTL file installed. However, you do see the ITL file.
ITL is present due to Security by Default (SBD) feature in the CUCM. For more information about SBD, please click here .
On the physical phone Navigate to Settings > Admin settings > Security setup > Trust list.
Here you can find the status of both the CTL and the ITL files.
CTI is not installed on the phone.
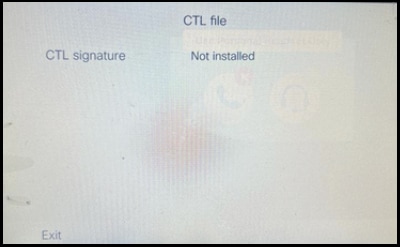 CTL File on the Phone
Phone has the ITL file.
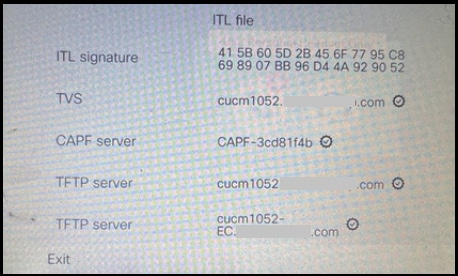 ITL File on the Phone
2. Convert non-secure cluster to secure CUCM cluster.
Enable mixed-mode by running the command utils ctl set-cluster mixed-mode on the Command Line Interface (CLI) of the CUCM Publisher. This converts the cluster from non-secure to secure.
 Convert to a Secure Cluster
After running the command, restart the Cisco CallManager (CCM) & Cisco CTIManager (CTI) services on all the nodes in the cluster.
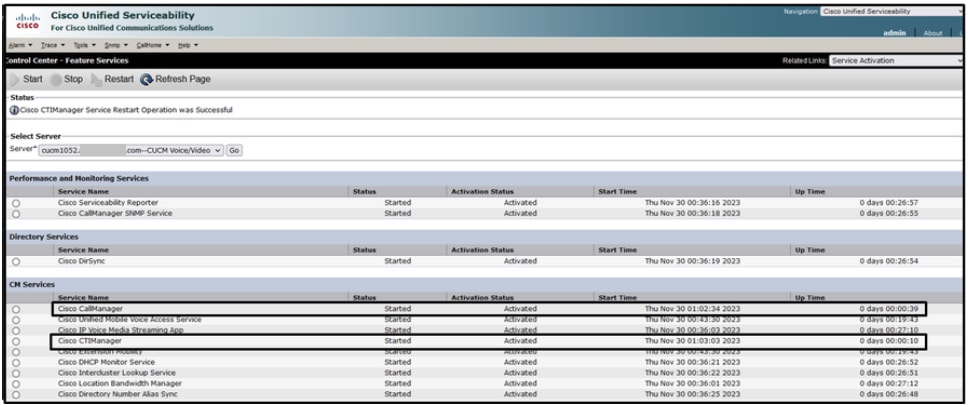 Restart the CCM and CTI Services
Now on the physical phone, you could see the presence of the CTL file.
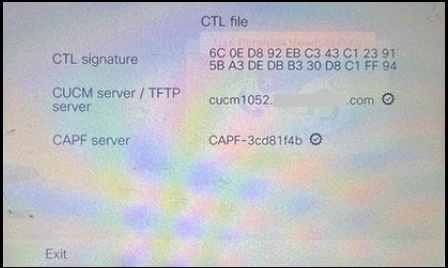 CTL File on the Phone
ITL file remained with the same values.
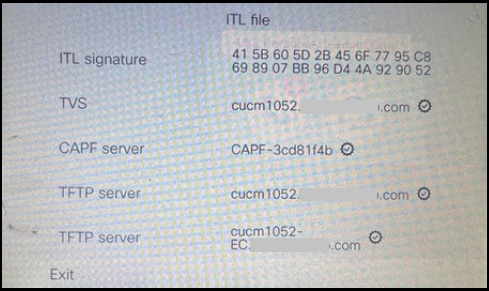 ITL File on the Phone
3. Convert back to non-secure cluster from secure.
In order to convert the cluster from secure to non-secure, you need to run the command utils ctl set-cluster non-secure-mode on the CLI of the CUCM Publisher.
 Convert to a Non-Secure Cluster
Restart the CCM and CTI services on all the nodes in the cluster for making the change to reflect in all the nodes in the CUCM cluster.
After converting the cluster to non-secure, the CTL does not contain the CUCM and TFTP entries. CTL file contains only the CAPF entry.
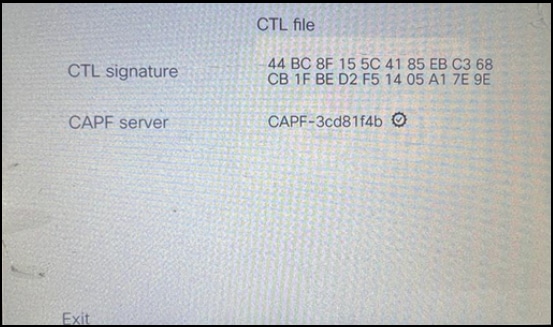 CTL File on the Phone
ITL file remained with the same entries.
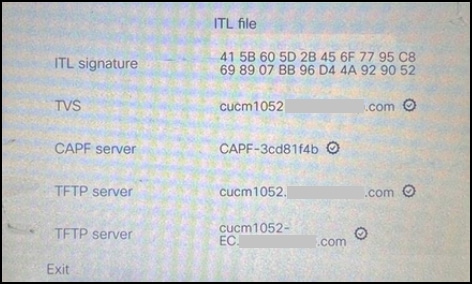 ITL File on the Phone

Note: Changing the Device Security Profile in the phone configuration page (in the CUCM Administration web page) to either secure or non-secure has no effect on the ITL or CTL files. So, you can keep the setting like how it was before and no need to alter them.
4. Migrate the phone to a new non-secure CUCM cluster.

Note: Before you proceed with migration, it is good practice to restart the Trust Verification Service (TVS) and TFTP services on all the nodes (only on these services enabled nodes) in the source cluster. This eliminates any hung or leak sessions in the TVS / TFTP service.
Log in to CUCM Administation web interface and navigate to System > Enterprise Parameters.
Set the value of Prepare Cluster for Rollback to pre 8.0 to True. Then proceed with clicking the Apply Config and the Reset buttons.
Help section for this parameter is provided in this screenshot.
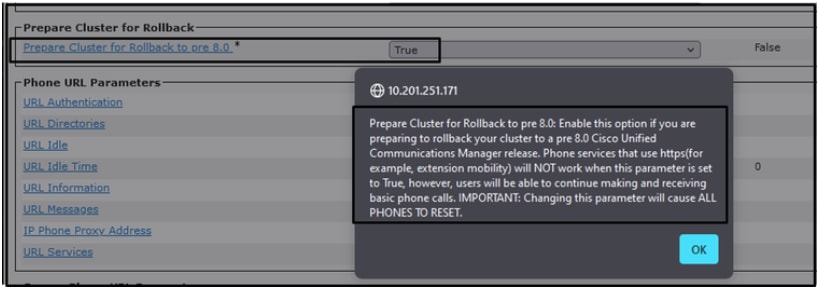 Information on the Prepare Cluster for Rollback to pre 8.0 Parameter
Monitor the phone registration counts on the cluster (via Real Time Monitoring Tool - RTMT) before and after changing the parameter value. This way can validate whether these changes are applied to all the devices in the cluster or not.
On the physical phone, you could see only the CAPF entries in both the ITL & CTL files. You can also observe this by opening phone web page in the web browser.
ITL File
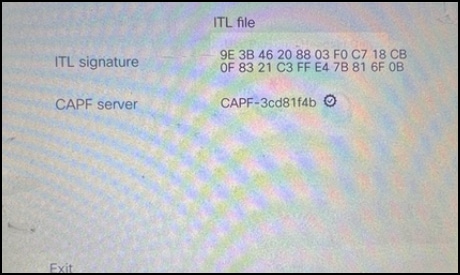 ITL File on the Phone
CTL File
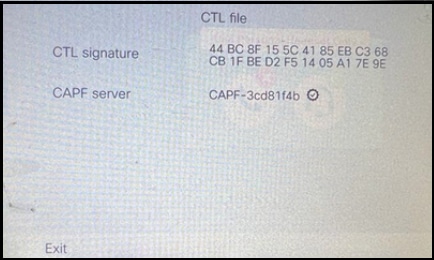 CTL File on the Phone
Before you start the migration, it is good to validate the ITL & CTL files in few phones to ensure the changes have taken place.
Now the phones are ready for the migration.
Migrating the phones from source cluster to the destination cluster. Currently, both the clusters are non-secure.
Source cluster:
- IP Address - 10.201.251.171
- FQDN - cucm1052.domain.com
- Version: 12.5.1.16065-1
Destination Cluster:
- IP Address - 10.88.11.163
- FQDN - cucmpub.domain.com
- Version : 12.5.1.14900-63
On the physical phone set the TFTP Server 1 value to the Destination new cluster IP address and click the Apply button.

Note: This process is equivalent to changing the TFTP ip on the DHCP scope – option 150 / 66. If the destination cluster is in the different domain, then you have to set appropriate DNS servers in the DHCP scope too.
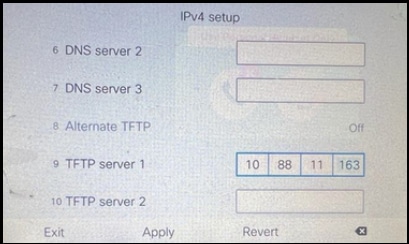 Configure the TFTP IP on the Phone
Click the Continue button, this retains the old CTL and ITL files (contains only the CAPF entry) from the source cluster.
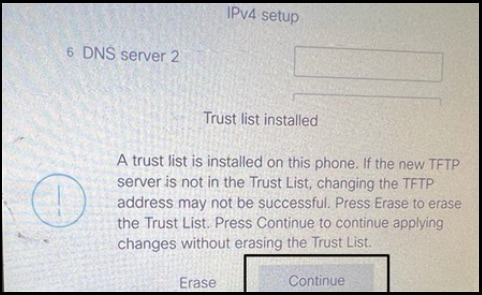 Pressing the Continue Button can retain the old CTL and ITL Files
Verify
The phone is registered to the destination cluster successfully.
 Phone Registered with the CUCM
The phone contains the destinations cluster Trust list entries.
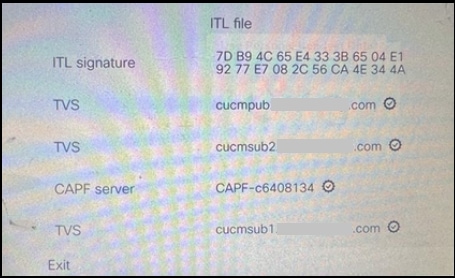 ITL File on the Phone
Troubleshoot
There is currently no specific troubleshooting information available for this configuration.
Related Information


 Feedback