Unity Connection Upgrade with COBRAS Instead of DRS
Available Languages
Contents
Introduction
This document describes how to upgrade Cisco Unity Connection (CUC) with the use of the Cisco Unified Backup and Restore Application Suite (COBRAS) instead of the Cisco Disaster Recovery System (DRS).
Background Information
When you want to upgrade your version of CUC, it might be easier to use the COBRAS in order to jump directly to the correct version instead of the need to run an upgrade or a DRS restore, which has its own requirements. A DRS restore requires that you restore to the same exact version of CUC from which the restore is taken. The COBRAS allows you to take a backup and then restore to a newer version of CUC. This can be especially useful if you change hardware or if you are in a virtual environment.
Advantages
When you use the COBRAS instead of the DRS in order to upgrade the CUC, it helps to avoid the need to troubleshoot upgrade issues that might take hours to review and fix. This document describes the reasons that the COBRAS can be a better choice for a CUC upgrade or in order to move hardware. The COBRAS documentation is excellent and contains detailed information about the various processes, but it is often overlooked in regards to the upgrade path.
Back Up CUC
Complete these steps in order to back up CUC:
- Install COBRAS onto your PC.
- Within CUC, create an account that does not have a mailbox and has the Remote Administrator role.
- Browse to the CUC web page and click Add New.
- Choose User Without Mailbox in the User Type field and input the appropriate information.
- Enable Database Proxy Service so that COBRAS can connect to the database.
- From the CUC web page, navigate to System Settings > Advanced > Connection Administration.
- Search for the Database Proxy: Service Shutdown Timer (In Days) field, input a value of 30, and click Save.
- Browse to the CUC Serviceability web page and navigate to Tools > Service Management.
- In the Optional Services field, locate Connection Database Proxy, click Activate, and then click Start. The COBRAS should now have the ability to establish a connection to the database in order to perform the backup.
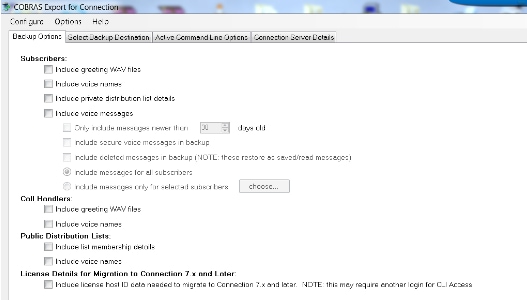
- Select the settings that are appropriate for a backup of your current system setup.

COBRAS Backup Limitations
It is important to understand that COBRAS does not back up certain system settings, so you must ensure that you build these manually before you attempt to restore. Here is a list of the most common settings, but Cisco recommends that you reference the COBRAS documentation for a full list:
- Custom Class of Service
- Custom schedules
- Custom changes to Restriction tables
- Switch integration with the Cisco Unified Communications Manager (CUCM)
- Lightweight Directory Access Protocol (LDAP) integration
Restore to the New CUC
Complete these steps in order to restore your system to the new version of CUC:
- Within CUC, create a new account for the restore that has no mailbox and has the Remote Administrator role.
- As applicable for your setup, manually build the components described in the previous section that are not restored through COBRAS.
- You can now perform the system restoration process.
Related Information
Contact Cisco
- Open a Support Case

- (Requires a Cisco Service Contract)
 Feedback