Introduction
This document describes the configuration of Webex Go for Webex Calling Organizations that support this feature.
Prerequisites
Requirements
Cisco recommends that you have knowledge of these topics:
- Control Hub administration of User Calling Feature for the Webex Calling Organization
- Control Hub administration of Add Device configuration for the Webex Calling Organization
- iPhone or Samsung Galaxy S21 device cellular configuration
Components Used
The information in this document was created from the devices in a specific lab environment. All of the devices used in this document started with a cleared (default) configuration. If your network is live, ensure that you understand the potential impact of any command.
Configure
Requirements and Limitations
- Available in the US through Webex calling certified partners (Trial and paid)
- Available to users on Webex Calling in US or UK region and US or UK locations
- Organization has Webex Go licenses (paid or trial)
- Sold through Webex Calling certified partners
- Requires user to have a unique Public Switched Telephone Network (PSTN) phone number
- Supported PSTN options include Cisco PSTN, Cloud Connected Calling Provider (CCP) or local gateway
- Requires user to have a carrier unlocked and eSIM compatible mobile device
- Supports voice calling only (SMS (Short Message Service) not in scope)
- Supported on unlocked and eSIM compatible mobile phones
Supported iPhone Models:
iPhone XS/XR, 11 and 12 series - supports only one active eSIM
iPhone 13 series and later - supports two active eSIMs
Supported Samsung Models:
Samsung Galaxy S21 - supports only one active eSIM
To check iPhone Device Lock Status: (Applies only to customers in the U.S.)
Navigate to Settings > General > About
Under Carrier Lock you see No SIM restrictions. If this message is not displayed, contact:
- Your IT administrator (if you are on a corporate plan)
- Carrier (if you are on a personal plan)
To check Samsung Device Lock Status: (Applies only to customers in the U.S.)
If you are on a corporate plan, work with your IT admin to get your device unlocked.
If you are on a personal plan, contact your service provider.
Links to IMEI tools offered by service providers:
Verizon: IMEI tools offered by Verizon
AT&T: IMEI tools offered by AT&T
T-Mobile: IMEI tools offered by T-Mobile
Configurations
Control Hub is used to provision and manage Webex Go devices. There are 2 methods available:
1) At the User page, add a Webex Go device to a User.
2) At the Device page, add a device and associate with a user. Once a device is provisioned, a QR code with activation details is emailed to the user.
Provision Users for Webex Go in Control Hub
Method 1: At the User page, add a Webex Go device to a User
Step 1. Select the User.
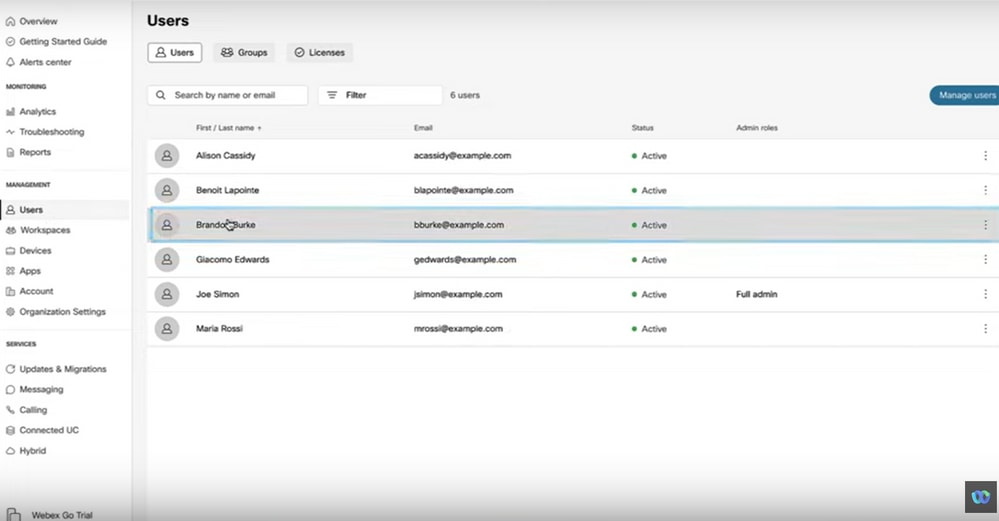
Step 2. Go to Devices Page.
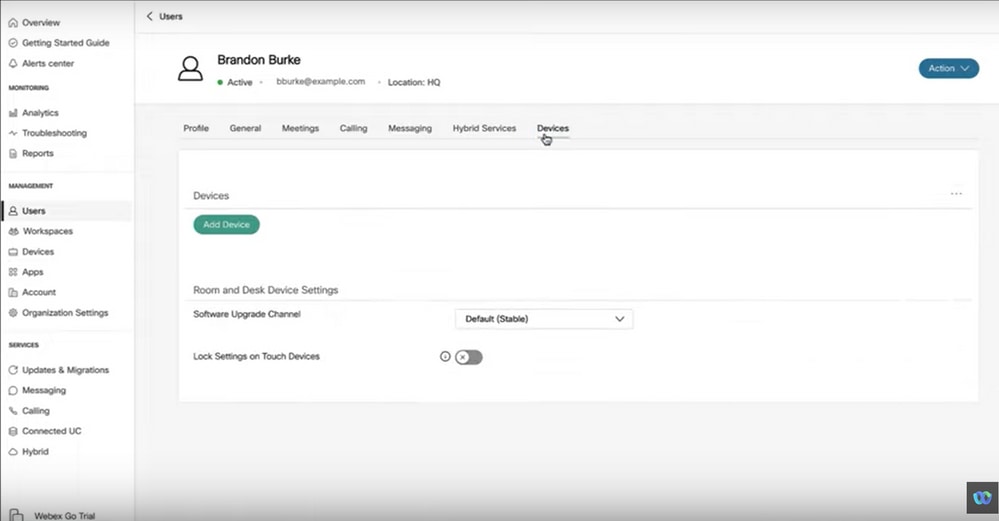
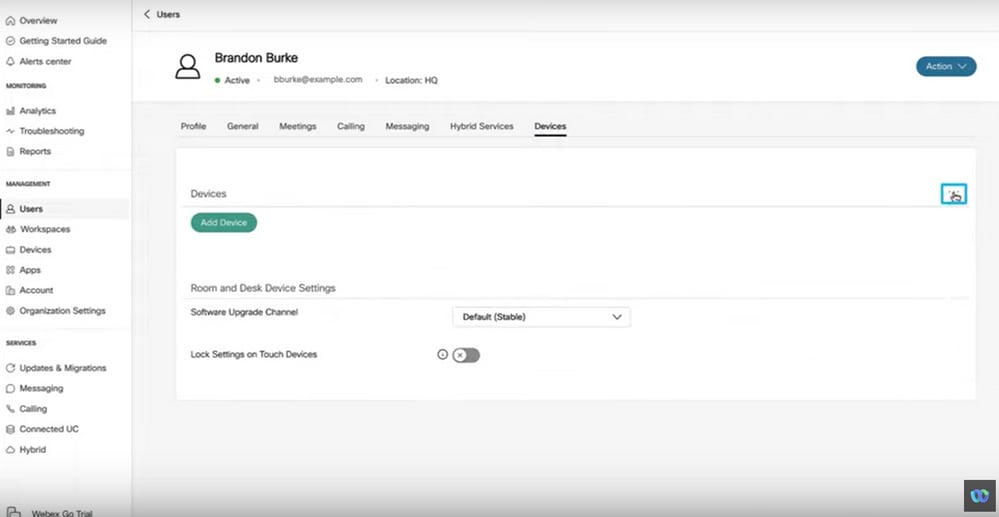
Step 3. Click the More icon (...) to add the Webex Go Device.
Step 4. Select Add Webex Go Device.
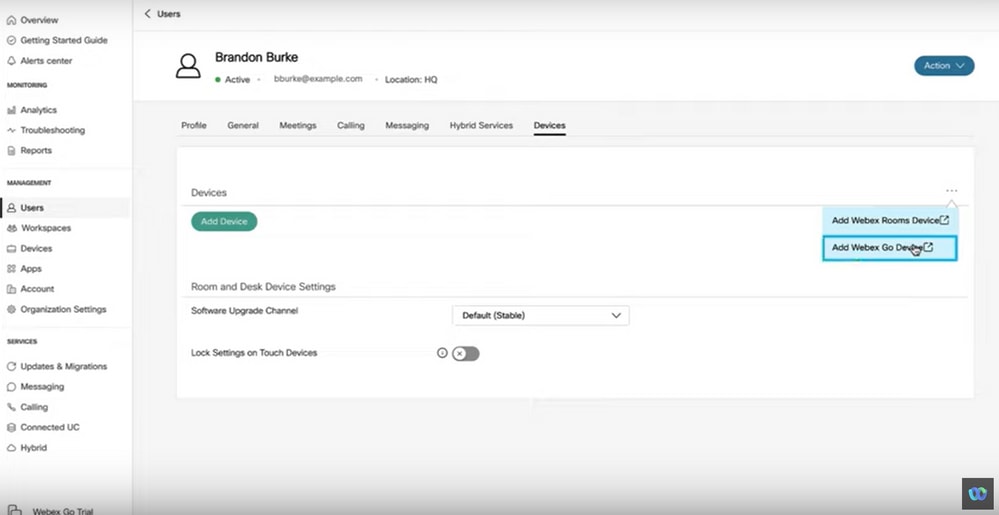
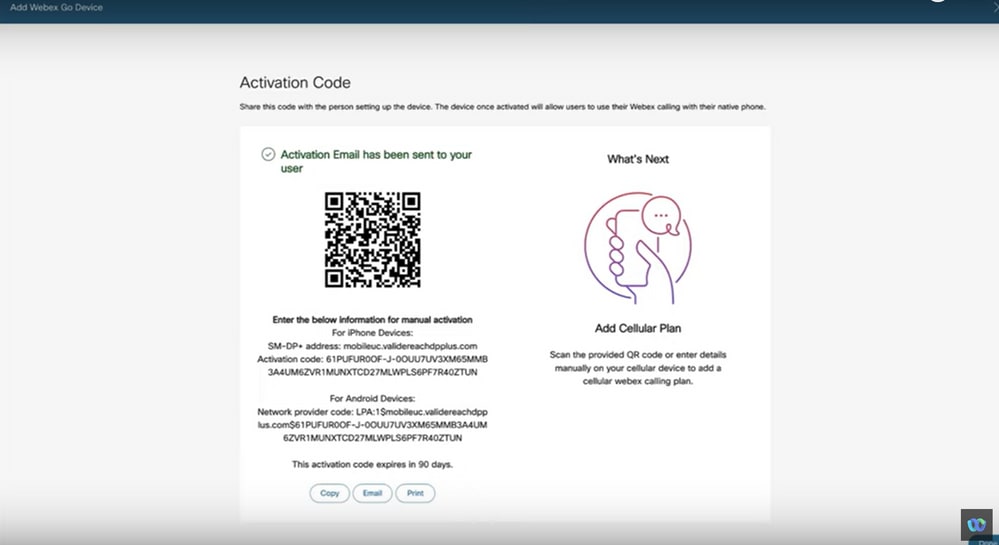
Step 5. An activation code is returned that can be used to add a mobile plan on a supported mobile device.
- Once the user receives the activation code, you need to scan the QR code / manually enter the activation details to extend Webex Calling to the mobile device.
- As an Administrator, you can copy, email or print the alpha-numeric Activation code to provide it to the User.
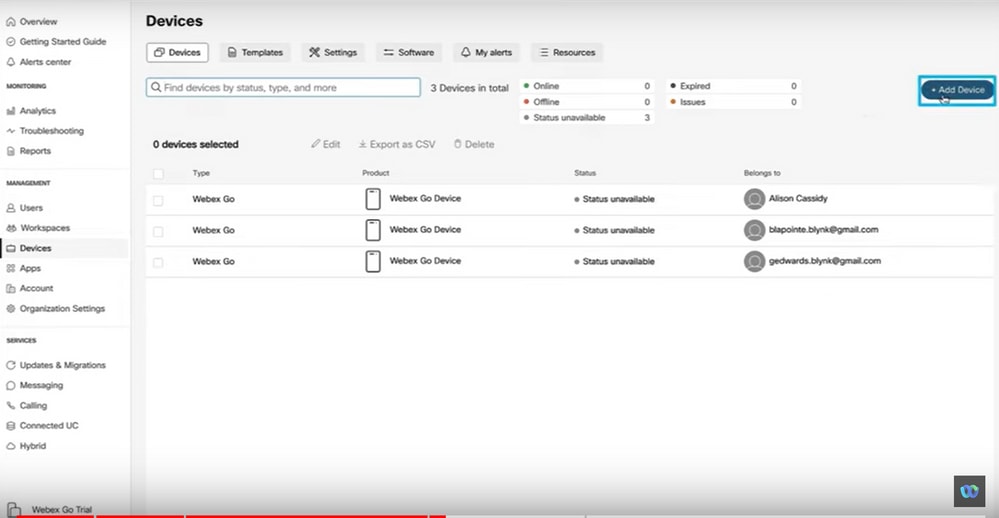
Method 2: At the Device page, add a device and associate with a user.
Step 1. Click Add device button on the Devices page.
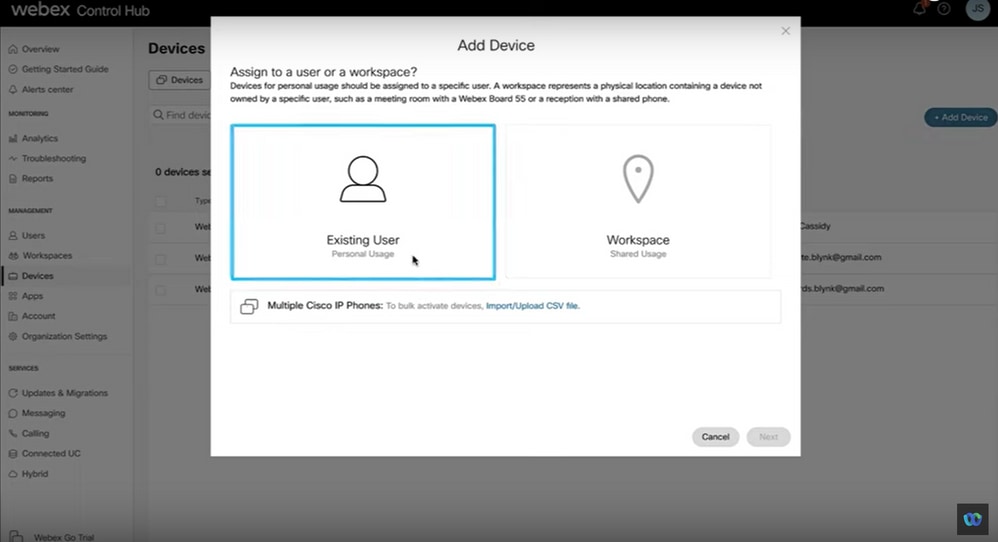
Step 2. Select Existing User option on the Add Device page and click the Next button.
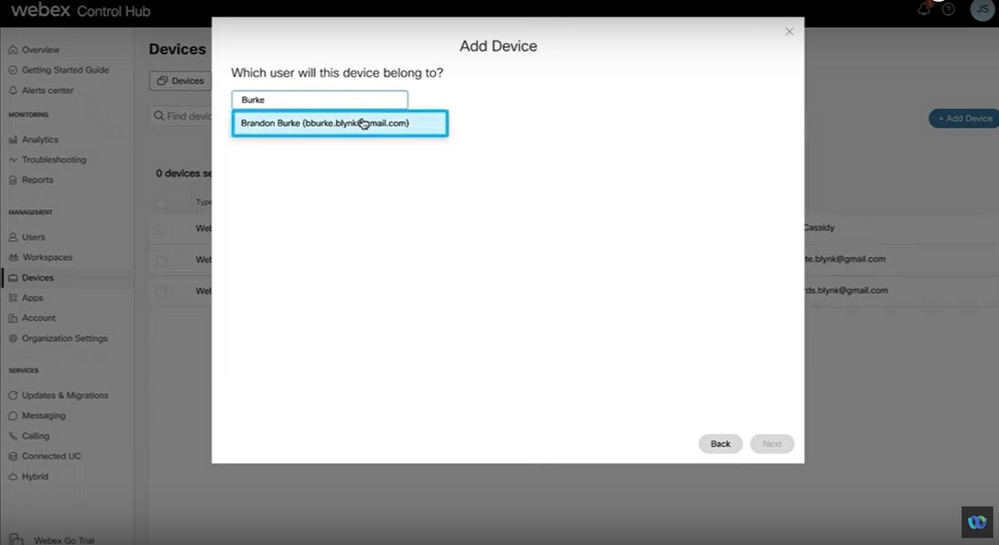
Step 3. Search and select the user from the dropdown.
Step 4. Select Webex Go Device option and click the Next button to generate an activation code.
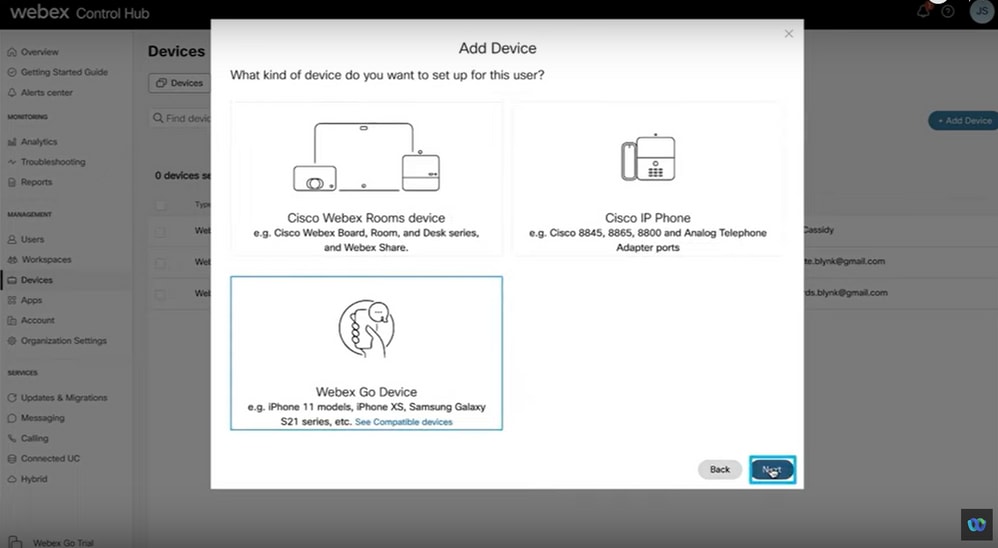
Step 5. An activation code is returned which can be used to add a mobile plan on a supported mobile device.
- Once the user receives the activation code, they need to scan the QR code / manually enter the activation details to extend Webex Calling to the mobile device.
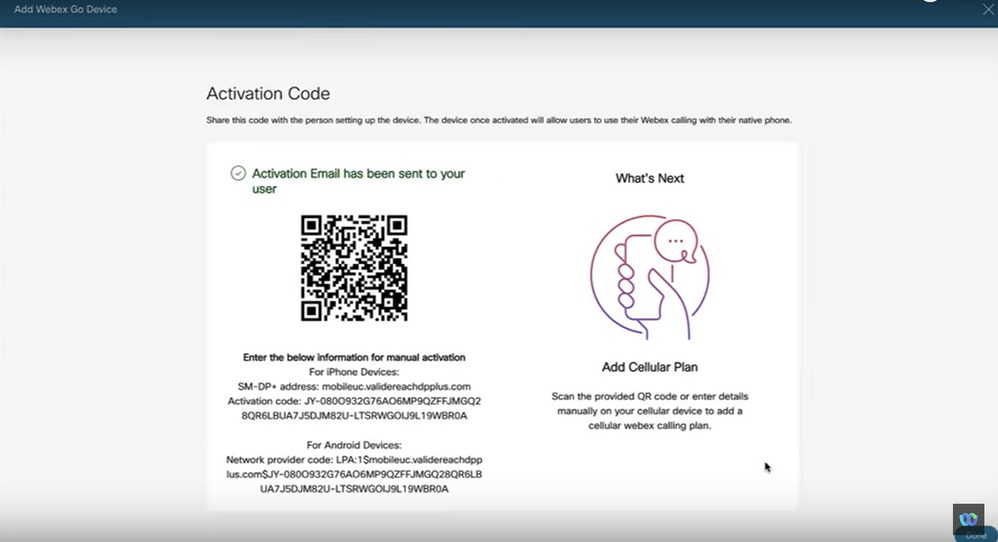

Note: This single-use activation code expires after 90 days.
Activate Webex Go for an iPhone User
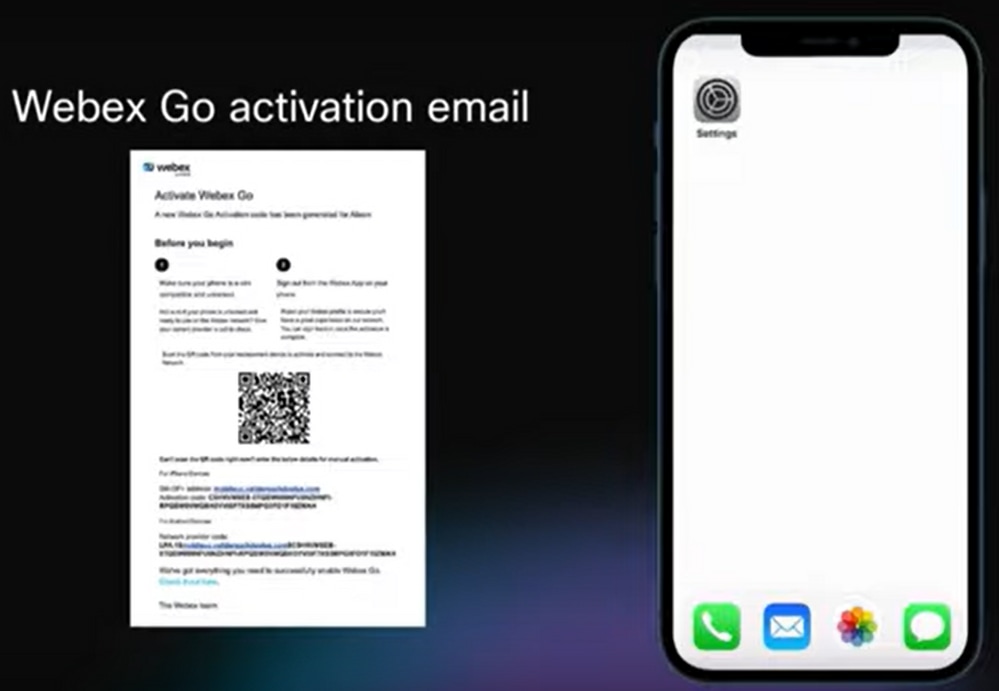
The Email received after Administrator has completed account provision. It contains the Activation code and SM-DP+ Address information:
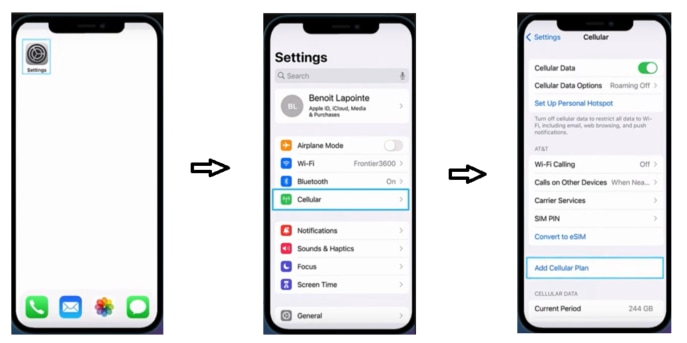
Step 1. Navigate to Settings > Cellular Data > Add Cellular Plan
- Tap Settings Icon.
- Locate and choose Cellular, Mobile Data.
- Select Add Cellular Plan.
Step 2. Scan QR Code.
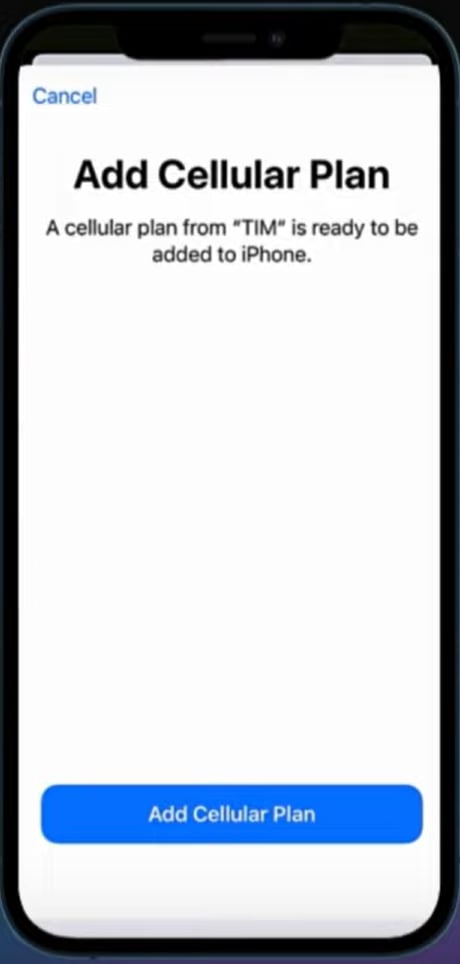
- New screen appears to Add Cellular Plan from TIM.
- Tab Add Cellular Plan.

Note: This step could take a few minutes to complete.
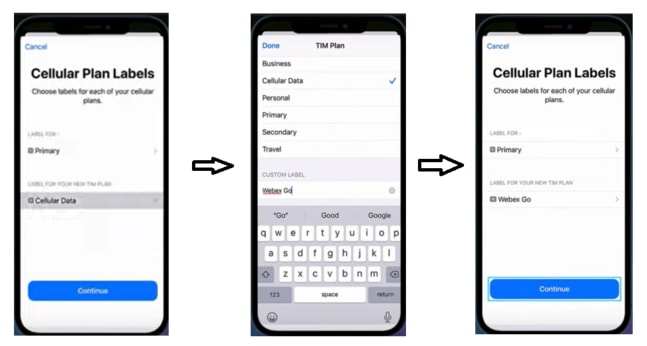
Step 3. Accept Label or Create Custom Label.
- Pick the label shown or create a custom label and click Continue.
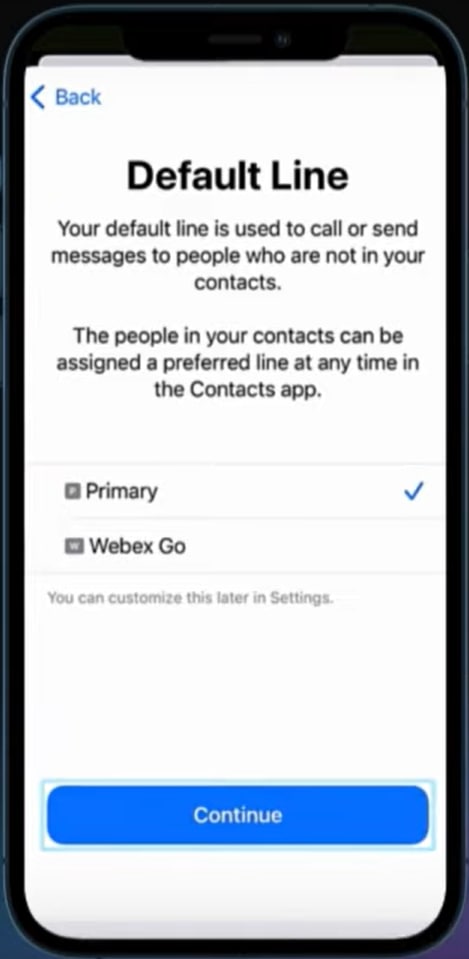
Step 4. Select the default line.
- Set your default number. The default line is used when you call or send a message to someone who is not in your Contacts application.

Note: Texting is not currently available in Webex Go
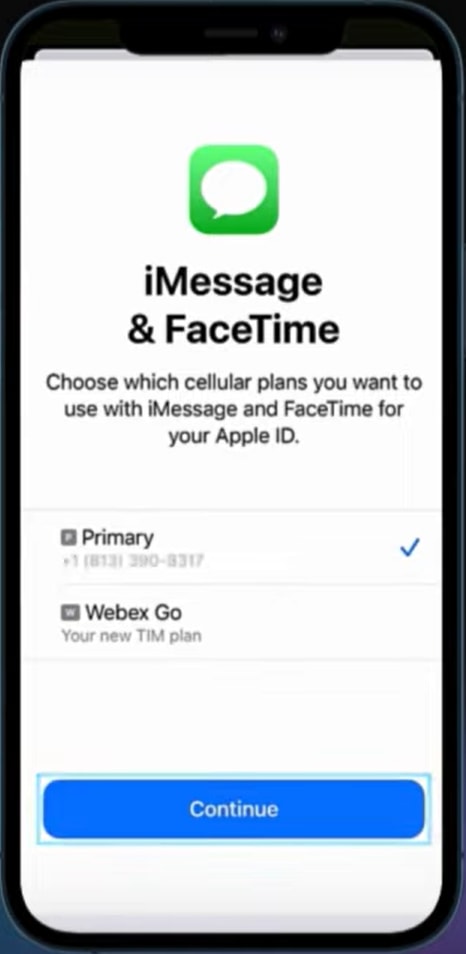
Step 5. Set line for iMessage and FaceTime.
- If you are on iOS 13 and later, you can choose which cellular plan you want to use for iMessage and FaceTime.
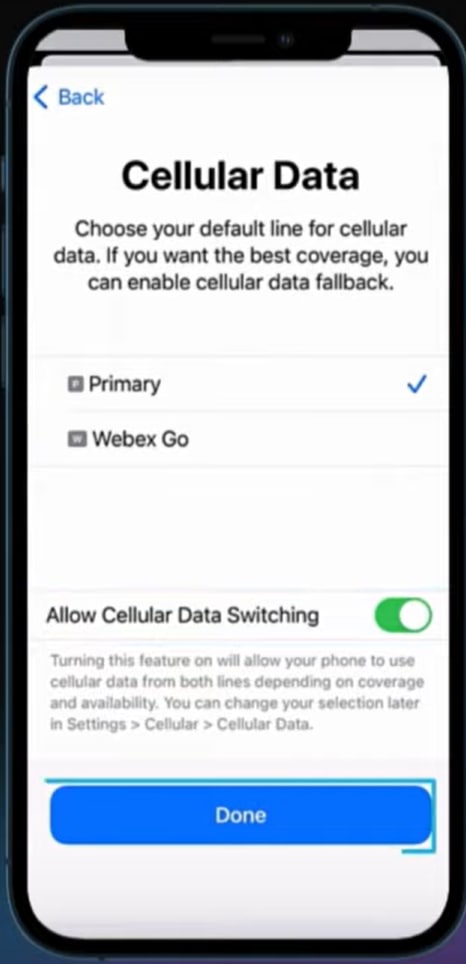
Step 6. Set default line for Cellular data.
- It is recommended to set it to the plan active on your device.
- Turn on Allow Cellular Data Switching to access applications when on a call on your business line.
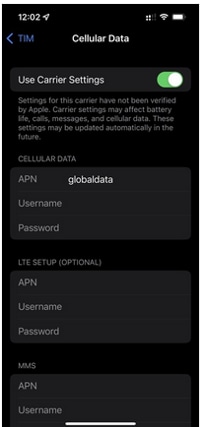
Step 7. Enable to Use Carrier Settings slider under Cellular Data Network.

Note: Webex Go leverages VoLTE mobile network for routing calls. This configuration must not be overlooked; otherwise, the result is Inbound and Outbound call failure.
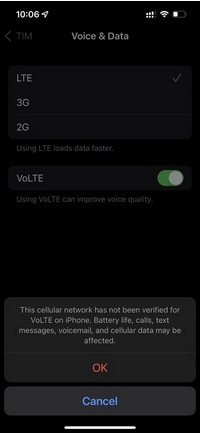
Step 8. Under Voice & Data, ensure 4G or LTE is selected for data and VoLTE is enabled for voice.
- Click OK to message This cellular network has not been verified for VoLTE on iPhone...

Note: Webex Go leverages VoLTE mobile network for routing calls. This configuration must not be overlooked; otherwise, the result is Inbound and Outbound call failure.
Step 9. Enable Data Roaming.
- Navigate to Settings > choose Cellular > select the Webex Go Cellular Plan > enable Data Roaming.
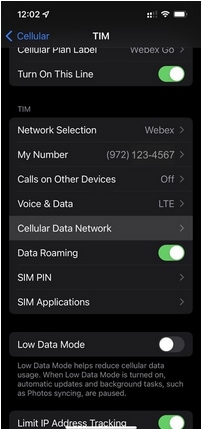
Step 10. Under Network Selection, enable Automatic.
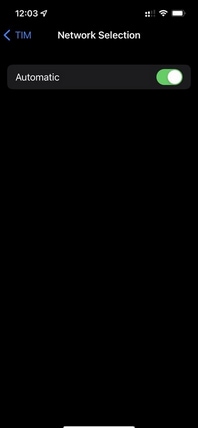
Step 11. You must restart your mobile phone once this setup is complete.
To Manually Enter the Plan for iPhone
- Navigate to Settings.
- Tap either Cellular or Mobile Data.
- Tap Add Cellular Plan.
- Tap Enter Details Manually, at the bottom of your iPhone screen and enter SM-DP+ address and activation code provided in the email. Proceed with steps 3 through step 10 from Scan the QR Code procedure to complete the setup.

Note: Steps 7, 8, 9, 10 and 11 from section Activate Webex Go for an iPhone User are omitted in the Activate Webex Go for iPhone walk through.
Activate Webex Go for a Samsung S21 User
Refer to this video demonstration on how to use the QR code to activate Webex Go on an android device:
Activate Webex Go for Samsung S21
To manually add the plan for a Samsung S21 device, enter the provider activation code and sm-dp+ address information provided in the activation email.
Verify
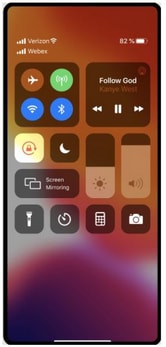
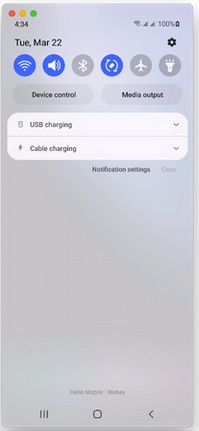
Once Webex business line has been activated on the mobile device, users see the Webex network added to their device.
iPhone user:
- Once setup is complete, you see Webex network in the Control Center.
- To open the Control Center, swipe down from the top right corner of your iPhone screen.
Samsung Galaxy S21 user:
Troubleshoot
There is currently no specific troubleshoot information available for this configuration.


 Feedback