Introduction
This document describes the steps to configure an Email asset with Open Authorization (OAuth 2.0).
Contributed by Anuj Bhatia and Bhushan Suresh, Cisco TAC Engineer.
Reason to use OAuth 2.0
Google has deprecated the Less secure app access feature and this requires configuration of the Email Asset with OAuth 2.0 for Authentication for use with Third-party Apps, such as Webex connect.
Prerequisites
Requirements
Cisco recommends that you have knowledge of these topics:
- Webex Contact Center (WxCC) 2.0
- Webex connect portal with Email flows configured
Components Used
The information in this document is based on these software versions:
The information in this document was created from the devices in a specific lab environment. All of the devices used in this document started with a cleared (default) configuration. If your network is live, ensure that you understand the potential impact of any command.
Configure
Step 1: Create a Project on Google Developer Console
Please follow the steps to create a Google project
Step 2: Configure OAuth Consent
1. Choose Internalor Externalas required.
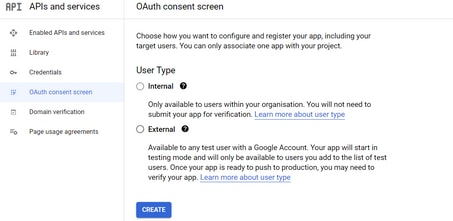
2. Click Create.
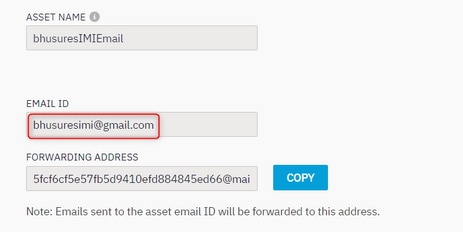
3. Enter the User Support Email which is the Email ID associated on the Asset.
// On the Asset:
// On the Google Console:
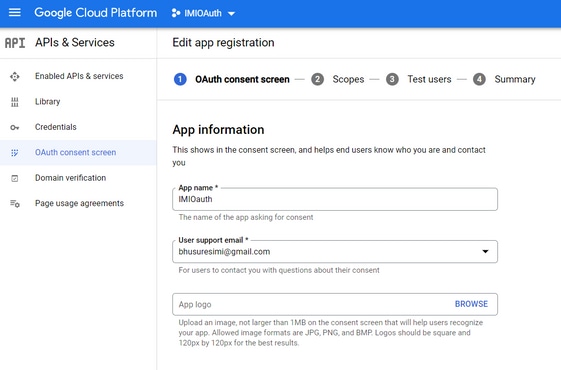
Note: Please make sure you are logged in with the Email ID associated with the Asset or the User Support Email does not show the the email in the drop-down list.

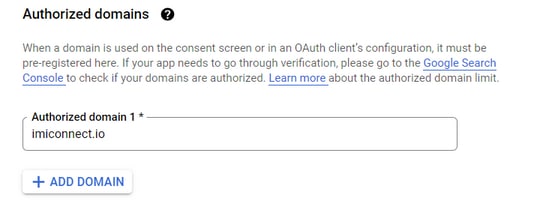
4. Enter the Authorized Domain as the Webex connect domain as shown:
5. Enter Save and Continue and under Test users enter the same user email as the User Support Email.
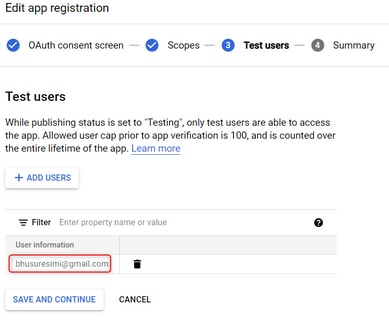
6. Enter Save and Continue and go Back to the Dashboard.
Step 4. Create OAuth Credentials
1. Navigate to Credentials > Create credentials and select OAuth client ID.
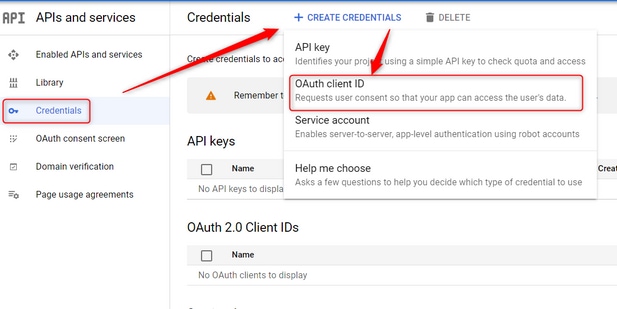
2. Create and enter the details:
Application Type: Web Application
Authorized JavaScript origins: WebEx Connect URL
Authorized redirect URIs: The callback URL (This URL can be found on the Email Asset page once Authentication Type as OAuth 2.0 is chosen.)
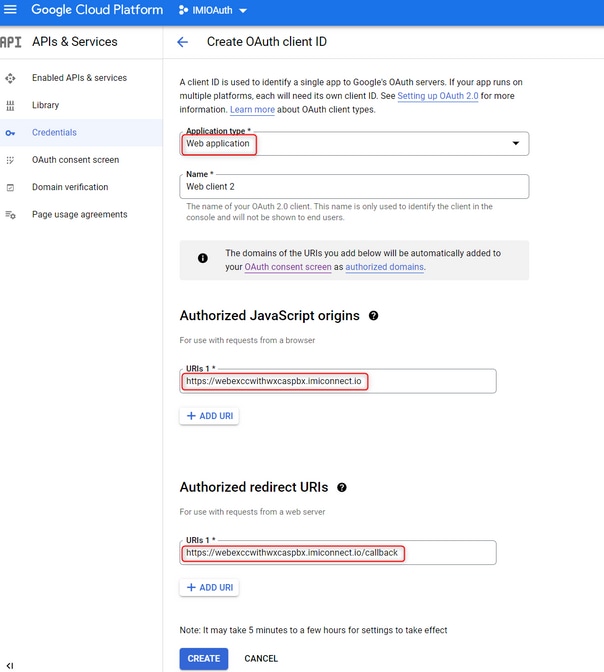
3. Copy the Client ID, Client Secret, and Download the JSON.

4. On Webex Connect, create an Asset (Under Asset > Apps > Configure New Application > Email) and enter the details:
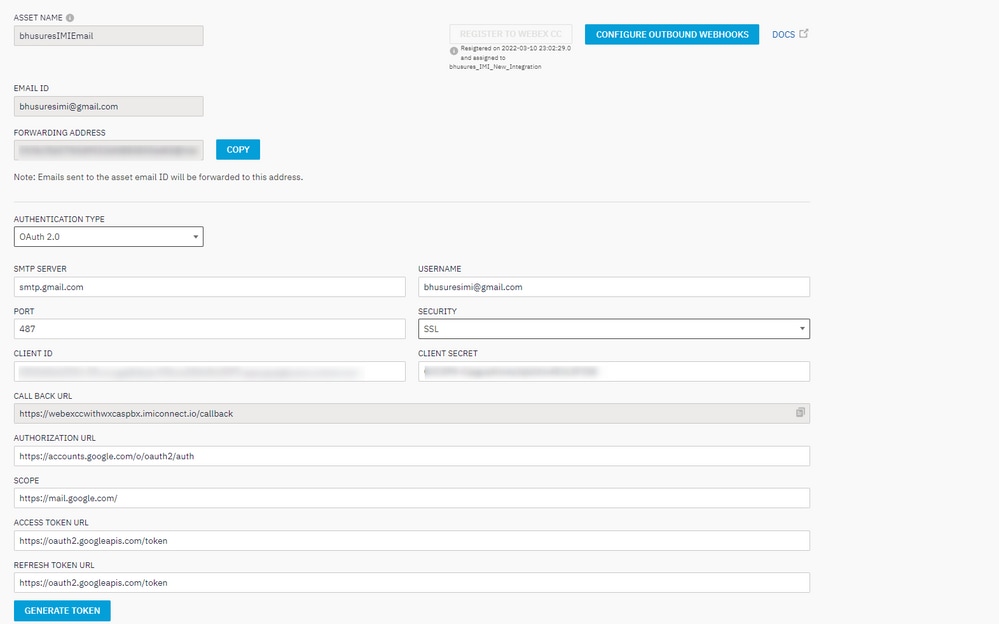
5. Click Generate Token and you are redirect to the Gmail log in.
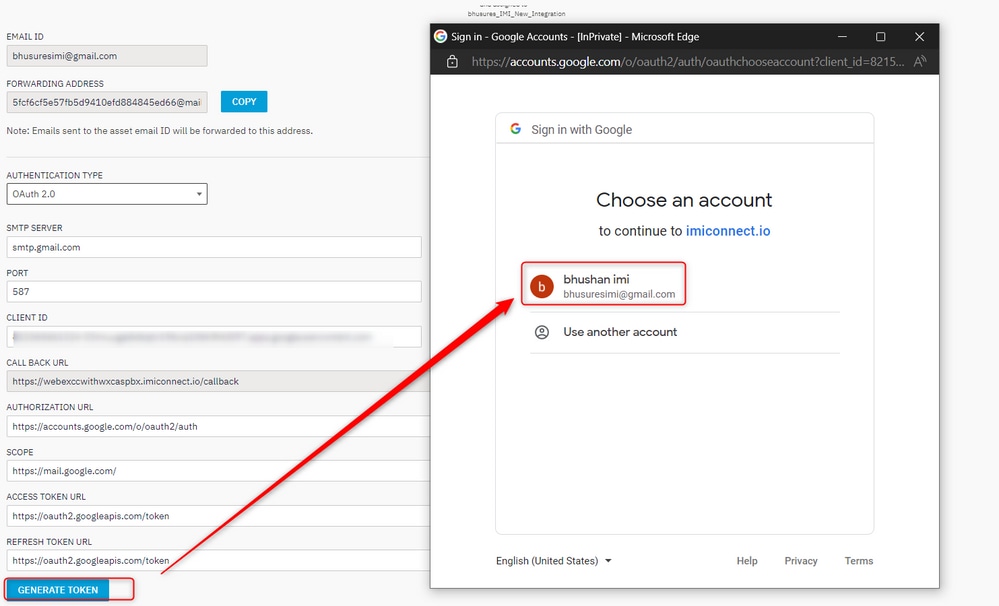
Note: The Access token and Refresh token are internally used by WebEx Connect to talk to Gmail.


 Feedback