Introduction
This article is one in a series to assist in the setup, troubleshooting, and maintenance of Cisco Small Business products.
Q. How do I set up Servers Behind a Cisco Small Business VOIP Router?
A.
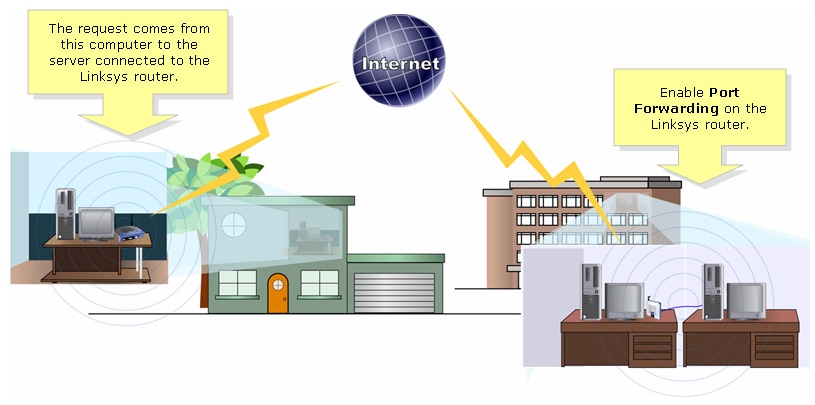
Port Forwarding is a method that allows you to run a server behind the router. Port Forwarding opens a specific port to a computer behind the router, allowing all incoming traffic on that port to be sent directly to that server. It is used to set up servers behind the router.
In setting-up Port Forwarding on the Linksys router, you will need to go through two steps:
- Assigning Static IP Address on the Server PC
- Setting-up Port Forwarding on the Router

Below is an example of how to set up Port Forwarding. In the example below, we will be setting-up an FTP Server. FTP uses ports 20 and 21.
Note: It is important that you know the service ports the server is using. If you do not know which port/s your server is using, consult the user guide or contact the developer.
It is strongly recommended that the server is wired to the router for a stable connection.
Most common ports:
Web Server: 80
FTP Server: 20 and 21
POP3: 110
SMTP: 25
Assigning Static IP Address on the Server PC
This is done to prevent the server from changing or obtaining a new IP address from the router. This article assumes that the LAN IP address of the router is 192.168.15.1.
After assigning a static IP address on the server PC, set-up port forwarding on the router. For instructions, follow the steps below.
Setting-up Port Forwarding on the Router
Step 1:
Access the router's web-based setup page. For instructions, click here.
Step 2:
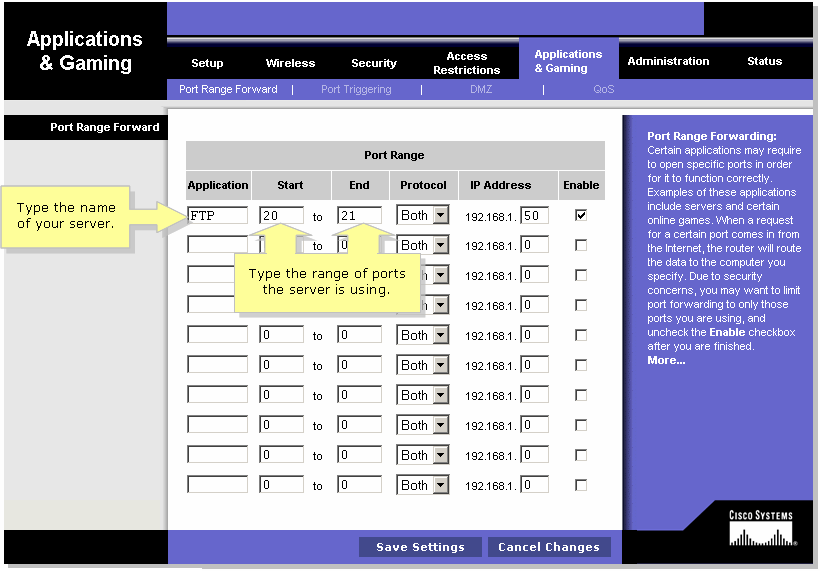
When the router's web-based setup page appears, click Applications & Gaming.

Step 3:
Click Port Range Forward. Under Application, enter the name of the server you'll be setting up. Then for the Start and End fields, enter the range of ports your server will be using.

Step 4:
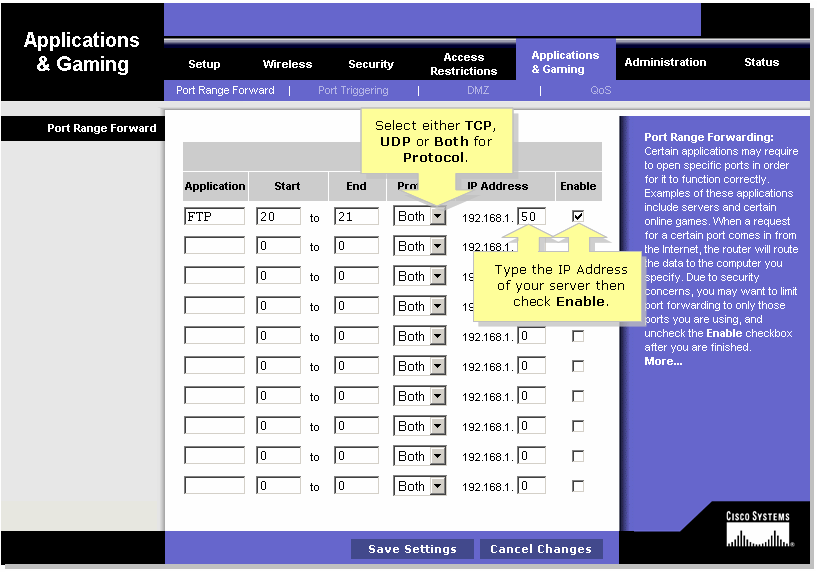
Select either protocol TCP or protocol UDP or if you're not sure which protocol your server is using, select Both.
Step 5:
Look for the IP Address field, enter the IP address that you assigned your server then check Enable.

Step 6:
Click  .
.
Related Information


 .
. Feedback