Configure Auto Logout for CAD Agents in UCCX
Available Languages
Contents
Introduction
Cisco Agent Desktop is a powerful software solution for the customer contact center. Cisco Agent Desktop is easily deployed as a transparently integrated component of Cisco Unified Contact Center. This document describes the way to log agents out automatically from Cisco Agent Desktop (CAD) after a certain time, if they forget to logout.
Prerequisites
Requirements
Cisco recommends that you have knowledge of these topics:
-
Cisco Desktop Administrator
-
Cisco Agent Desktop
-
Cisco Customer Response Solutions (CRS)
Components Used
The information in this document is based on UCCX 7.0(1).
The information in this document was created from the devices in a specific lab environment. All of the devices used in this document started with a cleared (default) configuration. If your network is live, make sure that you understand the potential impact of any command.
Conventions
Refer to the Cisco Technical Tips Conventions for more information on document conventions.
Configure Auto-logout Feature
About Cisco Desktop Administrator
The Cisco Desktop Administrator (CDA) allows system administrators to define and configure agent desktops and work flow from a centralized location. Administrators can choose which agent states are visible on an agent's toolbar, define unique icons for agent and knowledge worker toolbar buttons, add reason codes for wrap-up and agent state changes, and customize the user interface of agent desktops.
The steps to configure the auto-logout feature for CAD agents through the CDA in UCCX 7.x are provided in this document. You need to create a work flow group based on Time of Day event and add this group to the agents who need auto-logout.
Create a New Work Flow Group
First, you must create the new work flow group. Complete these steps:
-
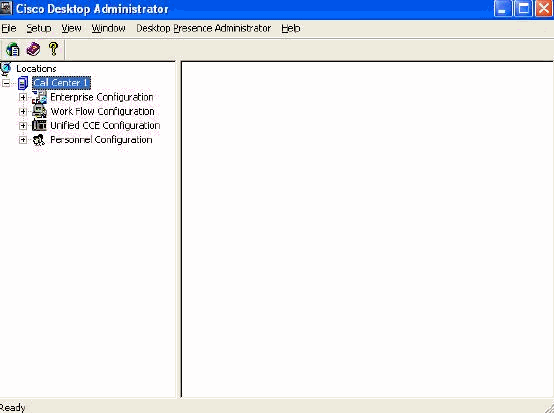
Click Start > Programs > Cisco > Desktop > Admin in order to launch Cisco Desktop Administrator (CDA).
-
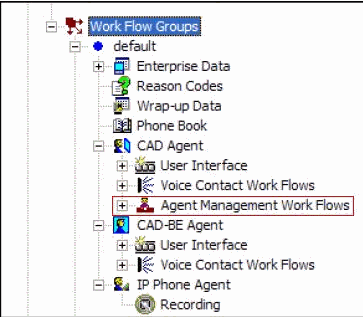
Navigate to Locations > Call Centre 1 > Work Flow groups > CAD Agent > Agent Management Work Flows.
-
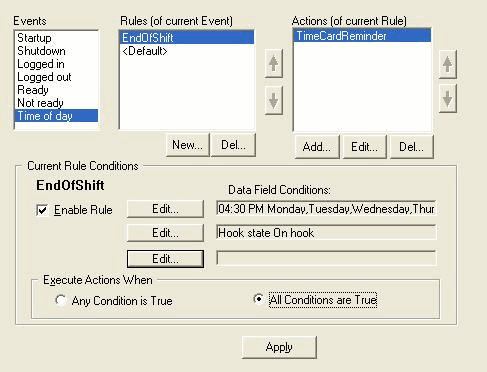
When you select the Agent Management Work Flow node, the Work Flow window appears.
-
Select the Time of day event from the Events pane.
-
Under the Rules pane, click New in order to set up a new rule. The New Rule Name dialog box appears.
-
Enter the name of the new rule, and then click OK.
-
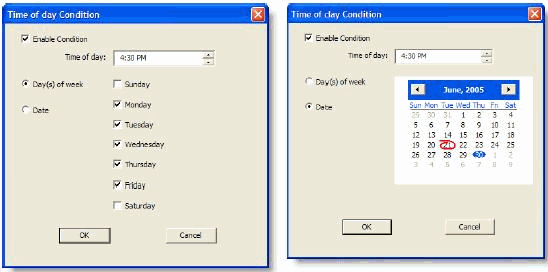
The fields in the Current Rule Conditions section of the window are enabled, and the Time of Day Condition dialog box appears.
-
Set up the day or date conditions for the rule, and then click OK. The condition you set up is automatically entered in the first line for Data Field Conditions under the Current Rule Conditions section of the Work Flow window, and the Enable Rule check box is automatically selected.
-
In order to specify that an action takes place every week on certain days or at a certain time, select Day(s) of the week and then check the desired days. You must specify a time of day as well.
-
In order to specify that an action takes place on a specific date, select Date, and then select the desired date from the calendar. Today’s date is circled in red. You must specify a time of day as well.
-
-
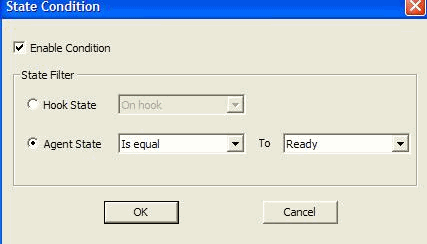
Click Edit next to the two remaining Data Field Conditions in order to display the State Condition dialog box, and further define the rule, if desired.
-
Specify the Hook State as Off hook.
-
Specify the Agent state Is equal To Ready, and click OK .
-
-
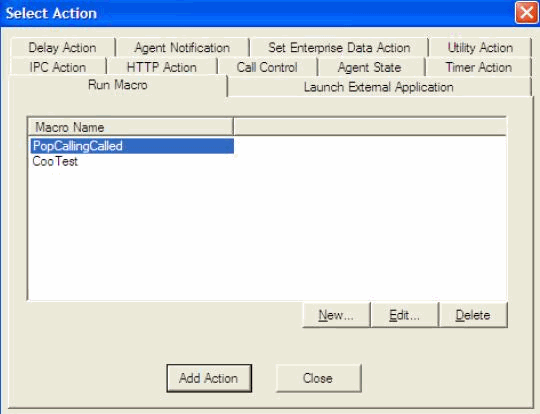
Under the Actions pane, click Add. The Select Action dialog box appears.
-
Click New, name the action, choose the logout action from the list, and click Add Action.
-
Click Apply in order to save the new Time of day work flow.
Add Work Flow to Work Flow Groups Tree
The next step is to add this new work flow group under the Work Flow groups tree. Complete these steps:
-
Navigate to Locations > Call Centre 1 > Work Flow groups.
-
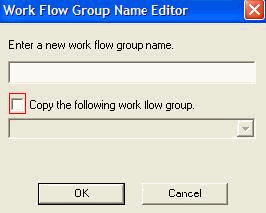
Choose File > New, or click New on the toolbar. The Work Flow Group Name Editor dialog box appears.
-
Enter the new work flow group name.
-
Select the check box which says Copy the following work group.
-
Click OK. The new work flow group appears in the Navigation pane under the Agents node.
Add Work Flow Groups to Agents
Finally, you must add this new work flow group to the agents. Complete these steps:
-
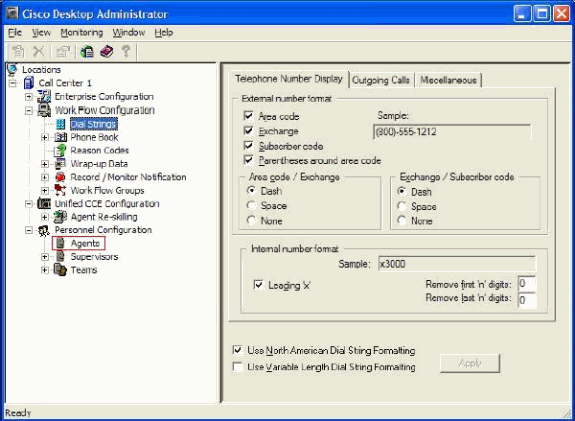
Start Desktop Administrator. The Cisco Desktop Administrator window appears
-
Navigate to Locations > Call Centre 1 >Personnel Configuration > Agents.
-
Select the agent to whom you want to enable the feature, and select the work flow in which you have configured the Time Of Day event.
-
Click the Save button.
-
Logout and login to the CAD agent.
Related Information
Revision History
| Revision | Publish Date | Comments |
|---|---|---|
1.0 |
02-Sep-2010 |
Initial Release |
Contact Cisco
- Open a Support Case

- (Requires a Cisco Service Contract)


 Feedback