Export CRS Database Table - Microsoft SQL 2000 Server
Available Languages
Contents
Introduction
This document describes the method to export a Cisco Customer Response Solutions (CRS) database table to text file in a Cisco Unified Contact Center Express environment.
Prerequisites
Requirements
Readers of this document should have knowledge of these topics:
-
Cisco CRS
-
Cisco CallManager
-
Microsoft SQL
Components Used
The information in this document is based on these software and hardware versions:
-
Cisco CRS version 3.x
-
Cisco CallManager 3.x
-
Microsoft SQL 2000 Server
The information in this document was created from the devices in a specific lab environment. All of the devices used in this document started with a cleared (default) configuration. If your network is live, make sure that you understand the potential impact of any command.
Conventions
For more information on document conventions, refer to the Cisco Technical Tips Conventions.
Background
There are two databases which are related to CRS, db_cra and db_cra_ccdr. These databases contain tables such as the following:
-
AgentConnectionDetail
-
AgentStateDetail
-
Application
-
ContactRoutingDetail
-
ContactServiceQueue
-
CRSProperties
-
DataSynchFlag
-
DBInfo
-
debugflag
-
dgeb_bin_wfnuance
-
dgdb_src_wfnuance
-
dgdb_timestamp_wfnuance
-
HistoricalUsers
-
ProductInfo
-
ProfileIDMapping
-
PurgeConfig
-
RemoteDBAddress
-
Resource
-
ResourceGroup
-
ResourceSkillMapping
-
RtCSQsSummary
-
RtICDStatistics
-
Skill
-
SkillGroup
-
sqllogging
-
WorkflowTask
db_cra_ccdr contains tables such as, ContactCallDetail.
Export CRS Table to Text File
The lowest denominator in the CRS database format is a flat file. There are times you need to export data to such a file in a text file, Excel spreadsheet, or other format supported by Microsoft SQL Server 2000. The following procedure is used to export a CRS table to a text file:
-
Open SQL Server Enterprise Manager by select Start > Programs > Microsoft SQL Server > Enterprise Manager.
-
Connect to the server that contains the CRS database.
-
Navigate to the table level for db_cra and db_cra_ccdr in the left pane, as shown in Figure 1, click the +. The numbers in Figure 1 represent the navigation path order.
Figure 1: SQL Server Enterprise Manager -- Navigation Path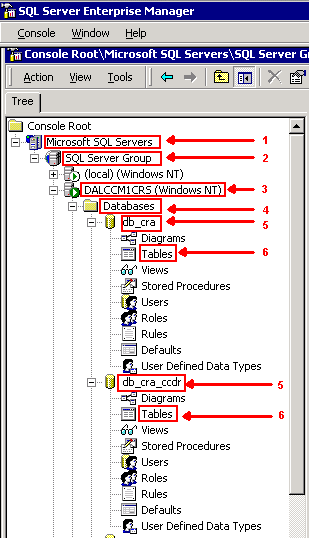
-
Right-click the table name in the right pane.
-
Select All Tasks > Export Data from the menu, as shown in Figure 2.
Figure 2: Selection of Table to Export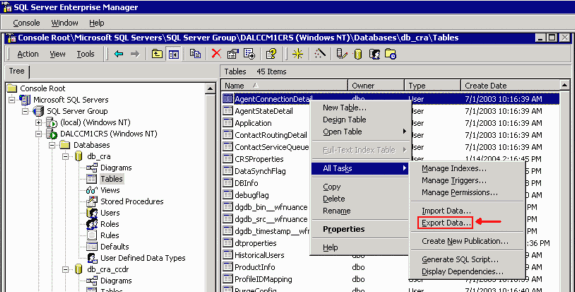
The DTS Import/Export Wizard screen appears as shown in Figure 3.
Figure 3: DTS Import/Export Wizard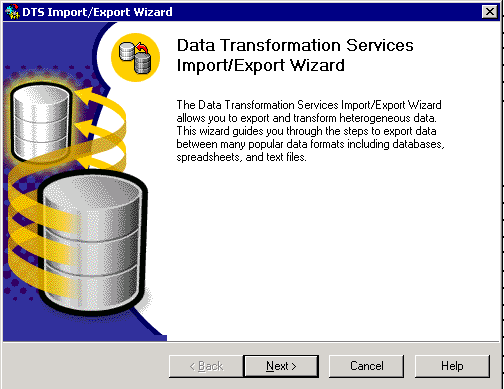
-
Click Next. The Choose a Data Source screen appears, as shown in Figure 4.
Figure 4: Choose a Data Source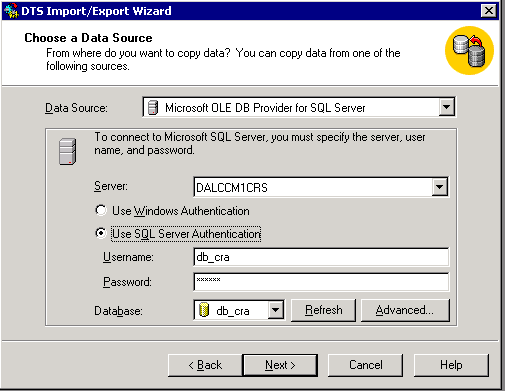
-
Click to select the Use SQL Server Authentication radio button.
-
Enter the Username and Password.
-
Click the down arrow in the Database field and select the database you want to use.
-
Click Next. The Choose a Destination screen appears as shown in Figure 5.
Figure 5: Choose a Destination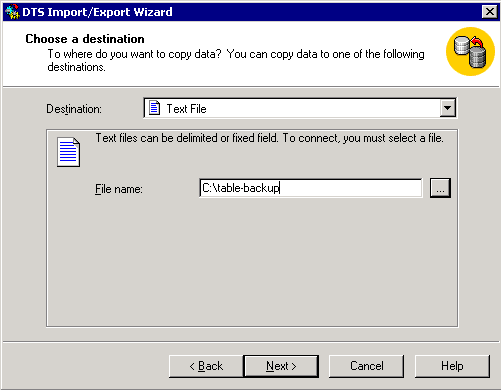
-
In the Destination field, select the export data format.
-
Enter the File name.
-
Click Next. The Specify Table Copy or Query screen appears, as shown in Figure 6.
Figure 6: Specify Table Copy or Query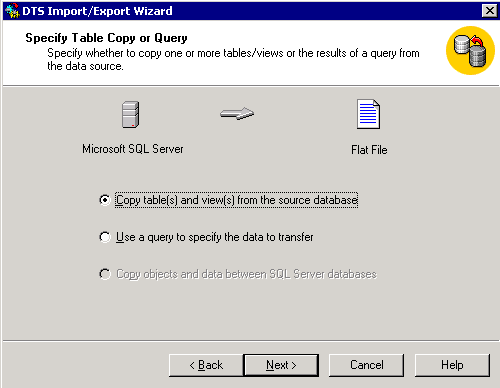
-
Click to select the Copy table(s) and view(s) from the source database radio button.
-
Click Next. The Select Destination File Format screen appears, as shown in Figure 7.
Figure 7: Select Destination File Format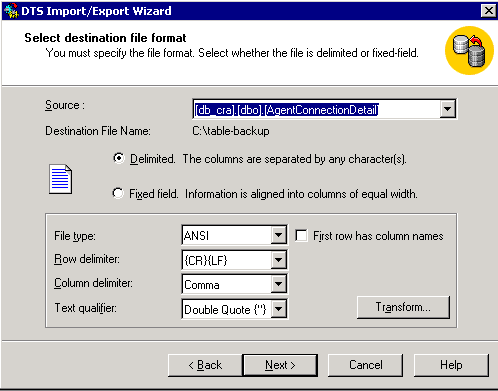
-
Select the table you want to export, click the down arrow in the Source field.
-
Click to select the format, delimited or fixed.
Note: The default is to create a delimited format file, where commas separate the fields, fields are surrounded by double quotation marks, and row delimiters are carriage returns and line feeds.
-
Click Next. The Save, schedule, and replicate package screen appears, as shown in Figure 8.
Figure 8: Save, Schedule, and Replicate Package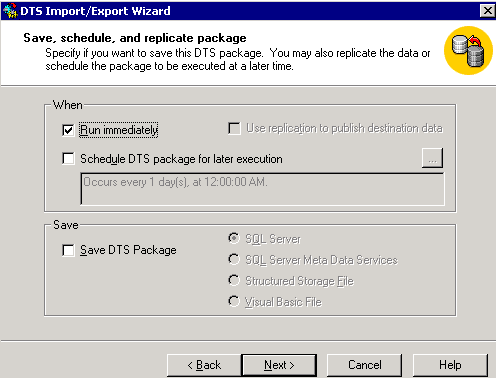
-
On this screen, choose either Run immediately or Schedule DTS package for later execution. In this case, select Run immediately.
-
Click Next. The Completing the DTS Import/Export Wizard screen appears.
Figure 9: Completing the DTS Import/Export Wizard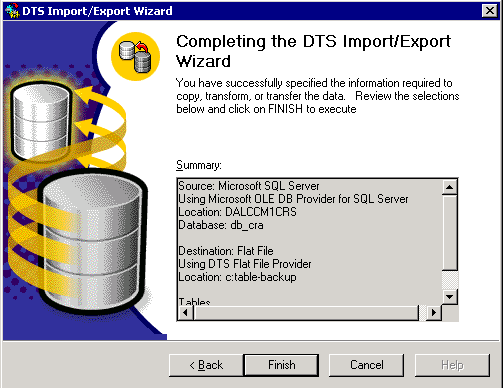
-
Click Finish.
The Summary section displays the summary of choices in the previous steps.
-
Click Next. The Executing Package screen appears and writes the file, as shown in Figure 10.
Figure 10: Executing Package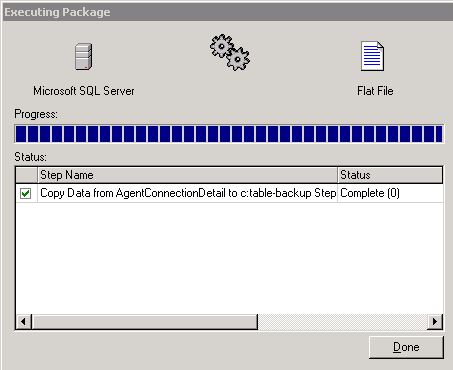
-
If the task is successful, this message appears:
Figure 11: DTS Import/Export WizardSuccessfully copied 1 table(s) from Microsoft SQL Server to Flat File.

You can export data from SQL Server to any format, as long as an OLE DB driver or an ODBC driver exists for the destination.
Related Information
Revision History
| Revision | Publish Date | Comments |
|---|---|---|
1.0 |
31-Aug-2004 |
Initial Release |
Contact Cisco
- Open a Support Case

- (Requires a Cisco Service Contract)


 Feedback