SQL Server 2000 Setup configuration for ICM 5.0
Available Languages
Contents
Introduction
This document outlines the procedure for setting up Structured Query Language (SQL) Server 2000 for use with Cisco Intelligent Contact Management (ICM) versions 5.0 and 6.0. It covers only the new installation of Microsoft SQL Server 2000 in the ICM version 5 and 6 environments.
Prerequisites
Requirements
Cisco recommends that you have knowledge of these topics:
-
Cisco ICM databases
-
Microsoft SQL Server database connectivity
-
Microsoft Windows connectivity
Components Used
The information in this document is based on these software and hardware versions:
-
Cisco ICM versions 5.0 and 6.0
-
Microsoft SQL Server 2000
The information in this document was created from the devices in a specific lab environment. All of the devices used in this document started with a cleared (default) configuration. If your network is live, make sure that you understand the potential impact of any command.
Conventions
Refer to Cisco Technical Tips Conventions for more information on document conventions.
Step-by-Step Instructions
Complete these steps:
-
Log on to the operating system under a user account that has local administration permissions, or assign the appropriate permissions to the domain user account.
-
Shut down all services dependent on SQL Server.
This includes any service that uses Open DataBase Connectivity (ODBC), such as Microsoft Internet Information Services (IIS).
-
Shut down Microsoft Windows NT Event Viewer and registry viewers (regedit.exe or regedt32.exe).
-
Begin the SQL Server setup program.
This window opens:
Figure 1: Microsoft SQL Server 2000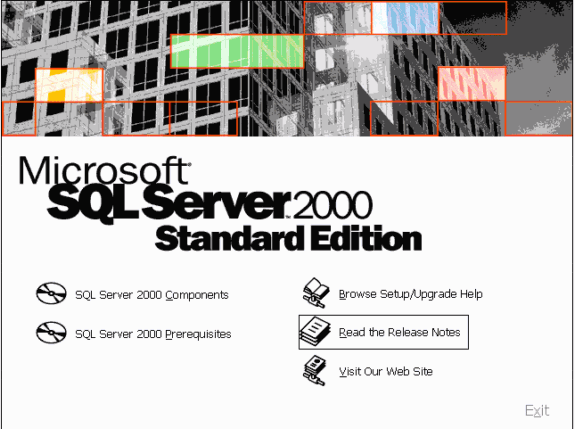
-
Click SQL Server 2000 Components.
Figure 2: Microsoft SQL Server 2000 -- Install Components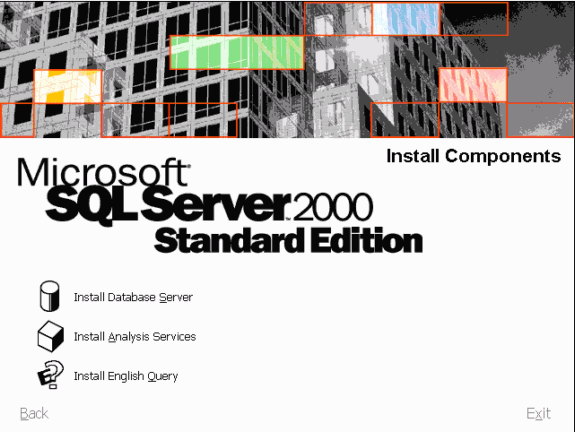
-
Click Install Database Server.
Figure 3: Microsoft SQL Server -- Welcome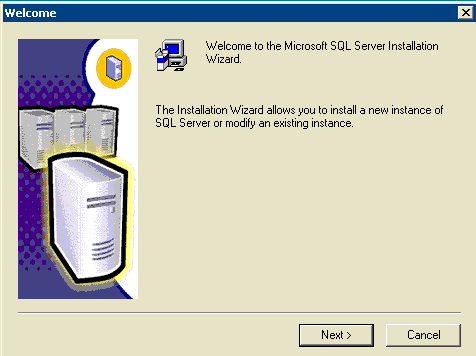
-
Click Next.
Figure 4: Microsoft SQL Server -- Computer Name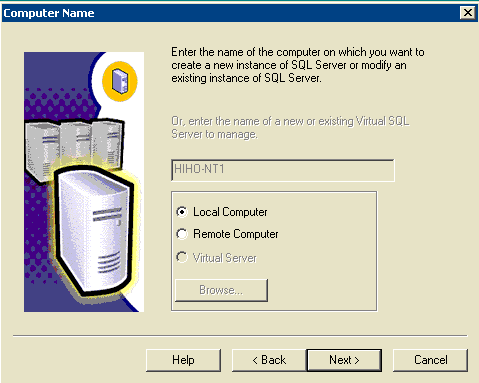
-
Choose Local Computer , click Next.
Figure 5: Microsoft SQL Server -- Installation Selection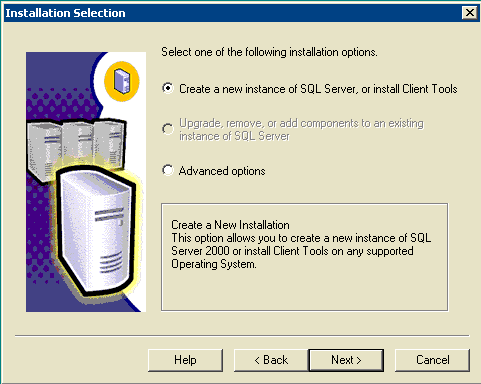
-
Choose Create a new instance of SQL Server, or install Client Tools, click Next .
Figure 6: Microsoft SQL Server -- User Information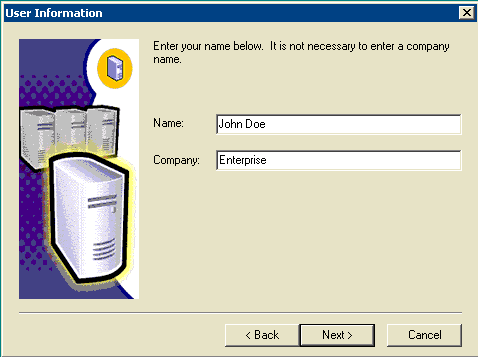
-
Enter the customer name in the Name field, the company name in the Company field, click Next.
The Software License Agreement window opens.
Figure 7: Microsoft SQL Server -- Software License Agreement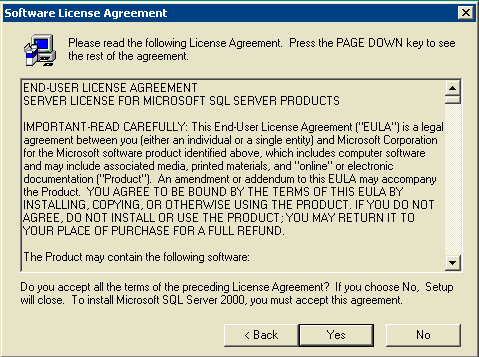
-
Read the License Agreement, click Yes.
The Installation Definition window appears.
Figure 8: Microsoft SQL Server -- Installation Definition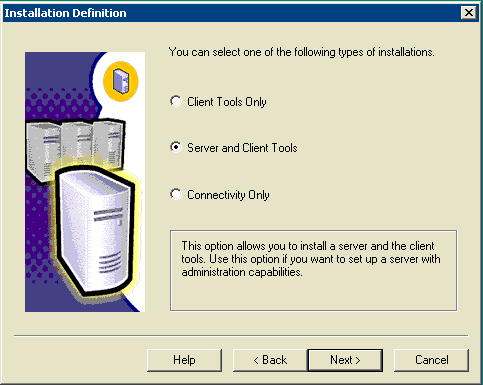
-
Choose Server and Client Tools.
-
Click Next.
The Instance Name window appears.
Figure 9: Microsoft SQL Server -- Instance Name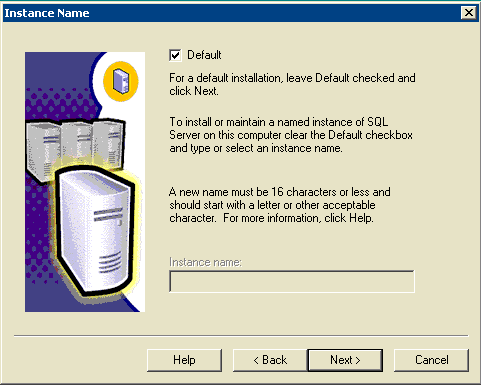
-
Choose Default.
-
Click Next.
The Setup Type window appears.
Figure 10: Microsoft SQL Server -- Setup Type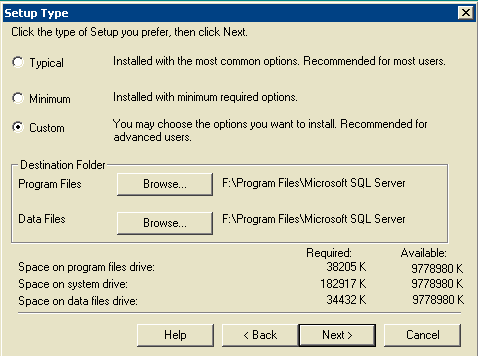
-
Choose Custom.
-
Choose the preferred disk for both Program Files and Data Files.
-
Click Next.
Figure 11: Microsoft SQL Server -- Select Components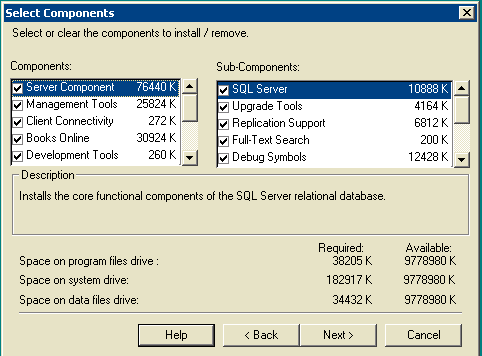
-
Leave defaults under Components and Sub-Components. Click Next.
Figure 12: Microsoft SQL Server -- Services Accounts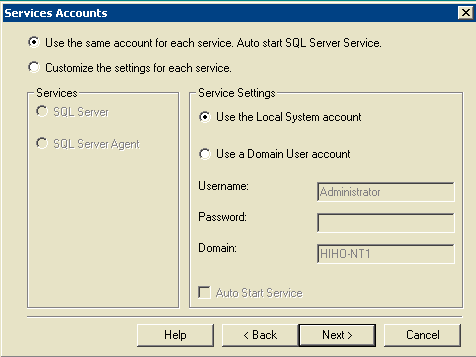
-
Choose Use the same account for each servce. Auto start SQL Server Service and Use the Local System account under Service Settings.
-
Click Next.
The Authentication Mode window appears.
Figure 13: Microsoft SQL Server -- Authentication Mode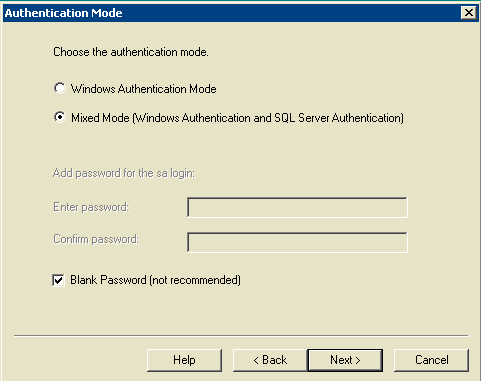
Note: Blank Password is not recommended in the production environment. It is for demonstration purposes only in this document.
-
Choose Mixed Mode (Windows Authentication and SQL Server Authentication).
-
Check the Blank Password (not recommended) box.
-
Click Next.
The Collation Settings window appears.
Figure 14: Microsoft SQL Server -- Collation Settings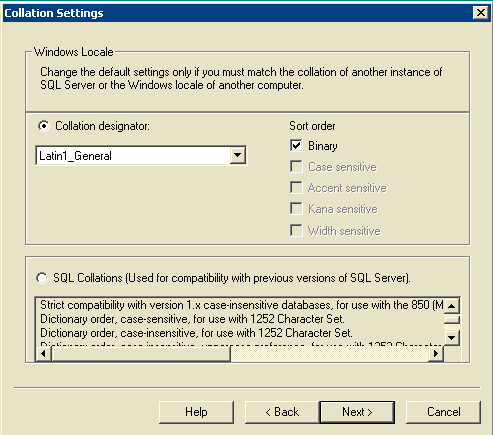
-
Choose Collation designator.
-
Choose Latin1_General.
-
Choose Binary under Sort order.
The Latin1_General encompasses these languages:
-
Afrikaans
-
Catalan
-
Dutch (Standard)
-
Dutch (Belgium)
-
English (United States)
-
English (Britain)
-
English (Canada)
-
English (New Zealand)
-
English (Australia)
-
English (Ireland)
-
English (South Africa)
-
English (Carribean)
-
English (Jamaican)
-
Faeroese
-
German (Standard)
-
German (Switzerland)
-
German (Austria)
-
German (Luxembourg)
-
German (Liechtenstein)
-
Indonesian
-
Italian
-
Italian (Switzerland)
-
Portuguese (Standard)
-
Portuguese (Brazil)
-
-
Click Next.
The Network Libraries window opens.
Figure 15: Microsoft SQL Server -- Network Libraries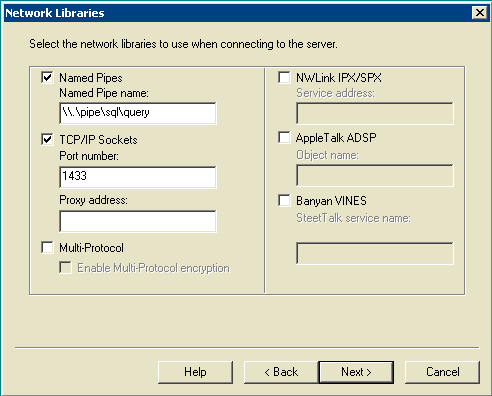
-
Check the Named Pipes and TCP/IP Sockets boxes.
-
Leave defaults in the Named Pipe Name field and the Port number field.
-
Click Next.
Figure 16: Microsoft SQL Server -- Start Copying Files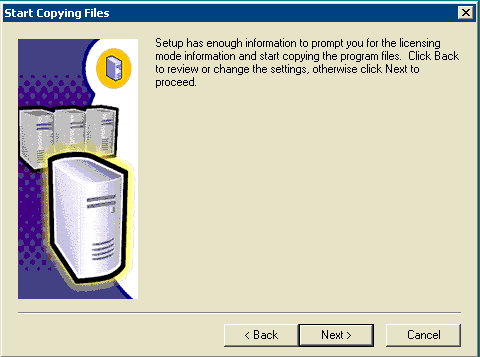
-
Click Next.
The Choose Licensing Mode window appears.
Figure 17: Microsoft SQL Server -- Choose Licensing Mode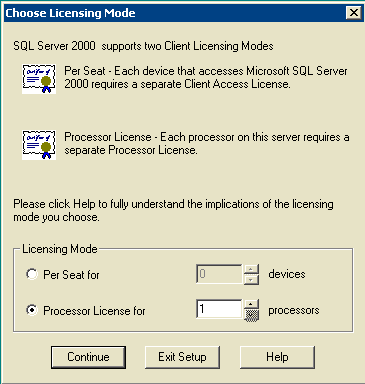
-
Choose either Per Seat for or Processor License for.
Note: Contact your system administrator for the licensing information.
-
Click Next.
When the installation of SQL Server 2000 is complete, the Setup Complete window appears.
Figure 18: Microsoft SQL Server -- Setup Complete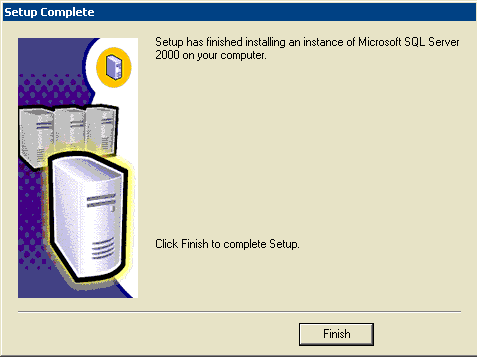
-
Click Finish to complete the setup.
Related Information
Contact Cisco
- Open a Support Case

- (Requires a Cisco Service Contract)


 Feedback