Introduction
This document describes the method to configure quality of service (QoS) on Microsoft Windows based Fax Servers. This practice allow for the correct Differentiated Services Code Point (DSCP) values in order to applied on packets sent by the server into the network.
Prerequisites
Cisco Unified Communications solutions for fax and a third party Fax Server on Microsoft Windows Server versions 2007 and above.
Requirements
Cisco recommends that you have knowledge of these topics:
- Layer 3 QoS
- Fax over Internet Protocol (FOIP)
- Capture and view network traffic in WIreshark
Components Used
The information in this document is based on these software and hardware versions:
- 2951 router with IOS 154-3.M4
- Windows Server 2007
- Xmedius Fax Server 6.5
The information in this document was created from the devices in a specific lab environment. All of the devices used in this document started with a cleared (default) configuration. If your network is live, make sure that you understand the potential impact of any command.
Problem
By default Microsoft Windows servers mark packets with a differentiated services code point (DSCP) value of zero. This can cause QoS problems with media packet delivery over high latency network segments.
Solution
This problem can be resolved by configuring the Windows Server group policy to apply a DSCP value of 46 (expedited Forwarding) based on the RTP port range.
Configure
To configure the Windows Server in order to apply desired DSCP values follow these steps.
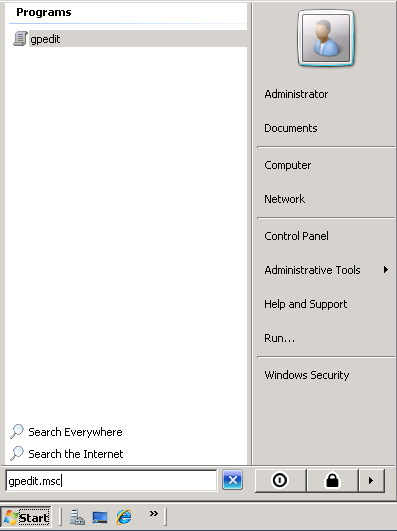
Step 1. Access the MS Windows group policy edit configuration page by entering the command gpedit.msc
into the run section of the Windows start menu.
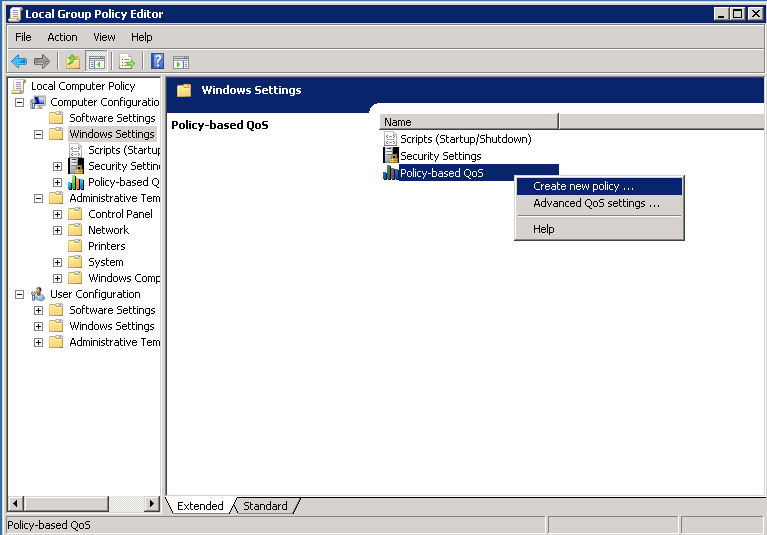
Step 2. Expand the Windows Setting section of the Local Computer Policy and right click the Policy-based QoS selection.
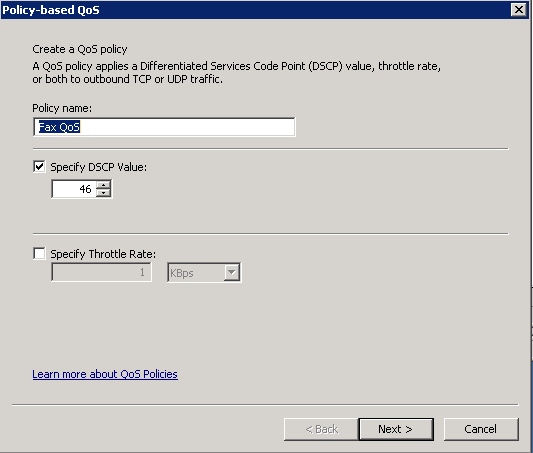
Step 3. In the Policy-based QoS configuration pop-up provide the desired Policy name. Then choose the desired value in the Specify DSCP Value. This is the value with which you would like to mark the packets sent from the server. Once this values has been defined select the Next button.
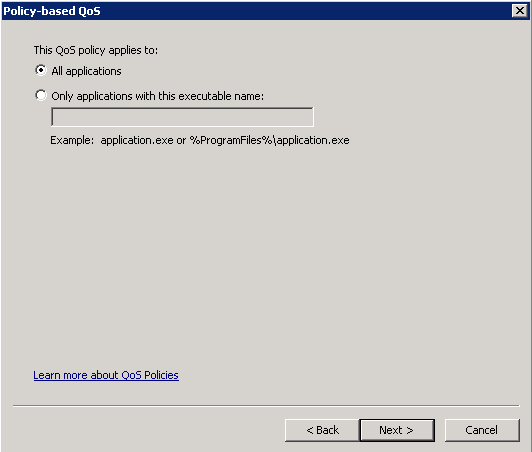
Step 4. One way to choose which packets are marked is select which program use the QoS policy. Select the radio button in order to allow the policy been applied to All Applications. Once this values has been defined select the Next button.
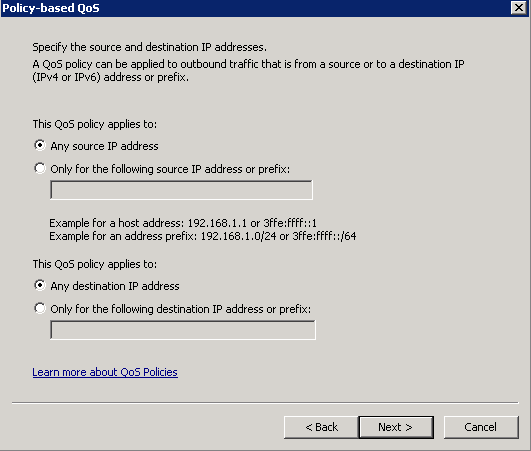
Step 5. IP address ranges can also be used to define which packets are marked with the QoS policy. Select the radio buttons for any source IP address and also any destination IP address. Once this entries has been defined select the Next button.
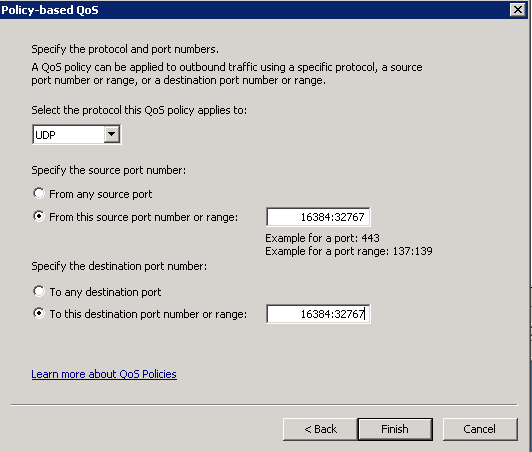
Step 6. To allow for the media packets sent by the server marked with the DSCP value of 46 select the option for User Datagram Protocol (UDP) in theSelect the protocol this QoS policy applies to drop down menu. Select the radio button for the From this source port number or range section and apply the Real-time Transport Protocol (RTP) port range 16384:32767 values. Select the radio button for the To this destination port number of range and apply the RTP port range 16384:32767 values. Once this setting has been defined select the Next button.
Network Diagram

Verify
Use this section to confirm that your configuration works properly. Install Wireshark on the Windows Server where the QoS policy configuration was applied. Once it is installed start a packet capture and send a test fax. After the test fax has completed save the packet capture. Find the media stream for the test fax and highlight an Real-time Transport Protocol (RTP) or UDP-TL packet sent by the server. Double click the Internet Protocol Version 4 expansion menu in the lower half of the Wireshark window. Afterward verify that Differentiated Services Field: 0xb8 (DSCP 0x2e: Expedited Forwarding) is visble for the desired packet stream.
Troubleshoot
There is currently no specific troubleshoot information available for this configuration.
Related Information
