Introduction
This document describes the steps to renew the SD-WAN certificate on the controllers through the Cisco or Manual method.
Available Methods
There are four different options available for the Controller Certificate Authorization.
- Cisco (Recommended) - Semi-automated process that uses the Cisco Plug and play (PnP) portal to sign the CSR generated by the vManage and automatically download and install them.
- Manual - Manual certificate sign through Cisco PnP.
- Symantec - Manual third-party certificate sign through Symantec/Digicert.
- Enterprise Root Certificate - Manual certificate sign through a private Root Certificate Authority (CA).
This document describes only the steps for the Cisco (Recommended) and Manual methods.
Caution: The certificates cover by this document are not related to the Web Certificate for vManage.
Requirements
- A PC/Laptop.
- A Netadmin account for the vManage GUI and for for each controller (vManage, vSmart, and vBond).
- Access to the CA Server.
- For Cisco (recommended) or Manual, a valid account/password for the PnP Portal.
- For Cisco (recommended), the vManage must have internet access.
- All the Controllers need a valid NTP server and/or all of them need to have the correct date and time.
- Communication between the vBond and vSmart to the vManage.
Note: The certificate install in the vManage would not impact your control plane or data plane. For the certificate in the vSmart, the control connections can be affected. The control plane continue to work due to the OMP graceful timer. In order to perform a certificate change, you must schedule a maintenance window for the activity.
Renewal Process
This is a high-level procedure:
- Identify the Controller Certificate Authorization option in use in the vManage GUI.
- Generate a new CSR through the vManage GUI.
- Create a new Certificate.
- Download the Certificate.
- Install the Certificate.
Cisco (Recommended)
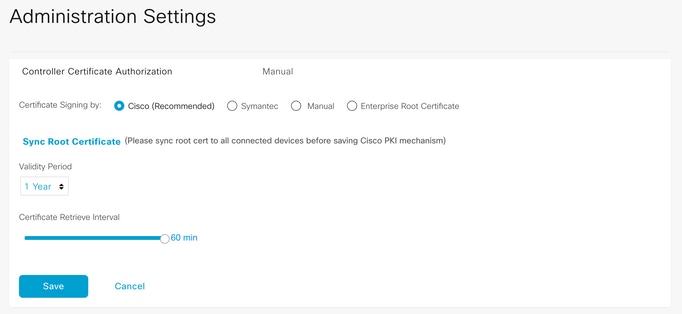
- Navigate to the vManage > Administration > Settings > Certificate Authority Server.
- Verify the correct option is selected.
- Select the duration of the certificate.
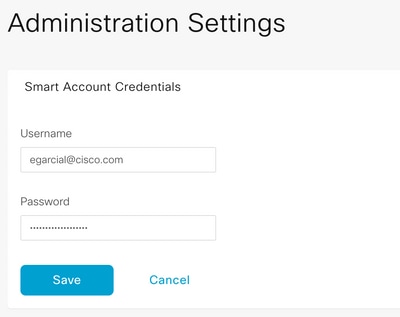
2. Scroll down to Smart Account Credentials and introduce valid User/Password. The credentials must have access to the Smart Account where the SD-WAN overlay is configured, as shown in the image.
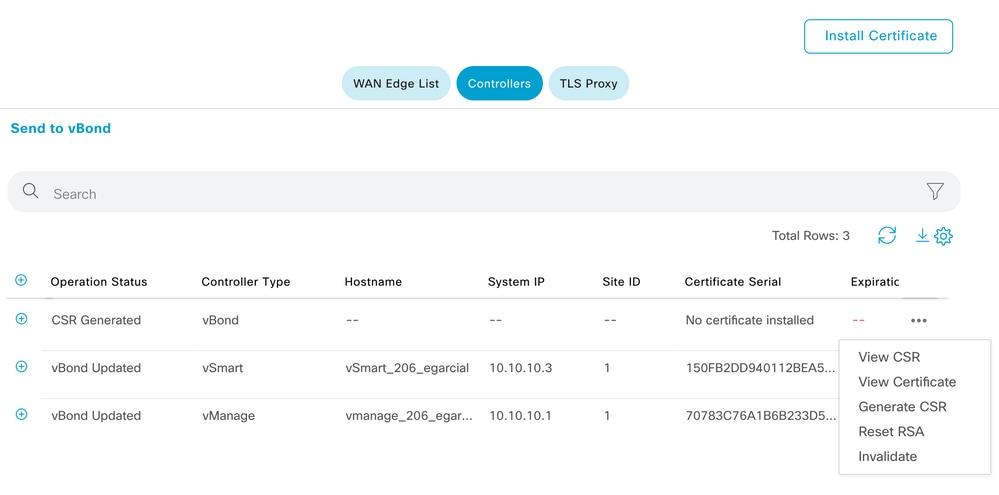
3. Navigate to vManage > Configuration > Certificates > Controllers.
- Select the ellipsis (...) on the controller (vBond, vSmart or vManage).
- Select Generate CSR.
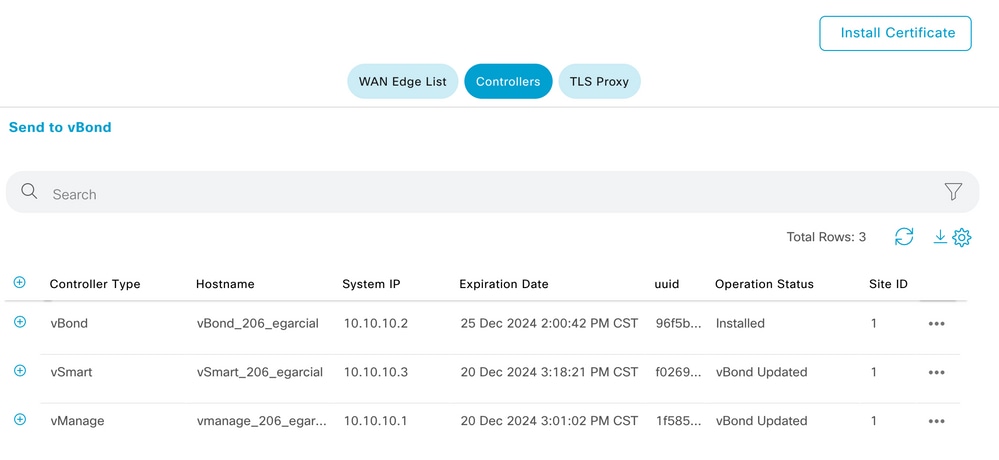
4. Five to twenty minutes is required for the process to finish.
Verify the installation was correct in the GUI vManage > Configuration > Certificates > Controllers.
Manual (PnP)
1. Navigate to the vManage > Administration > Settings > Certificate Authority Server
- Verify the correct option is selected.
2. Navigate to vManage > Configuration > Certificates > Controllers.
- Select the ellipsis (...) on the controller (vBond, vSmart or vManage).
- Select Generate CSR.
- Copy and save all the text in a temporally file.
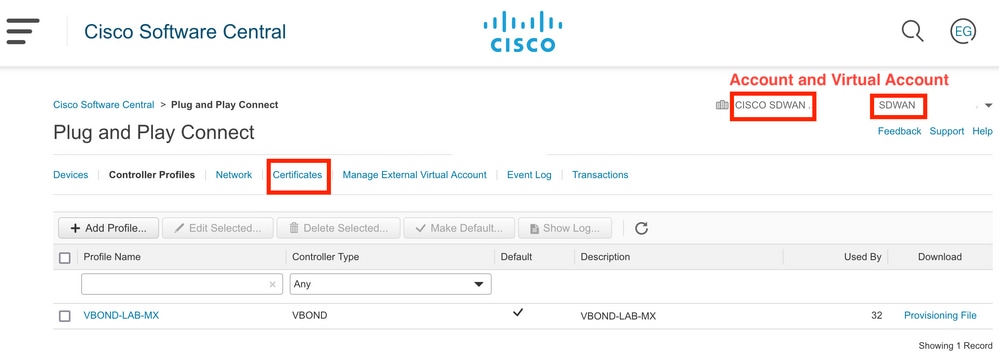
3. Access the PnP portal, select your SD-WAN overlay, and navigate to certificates, as shown in the image.
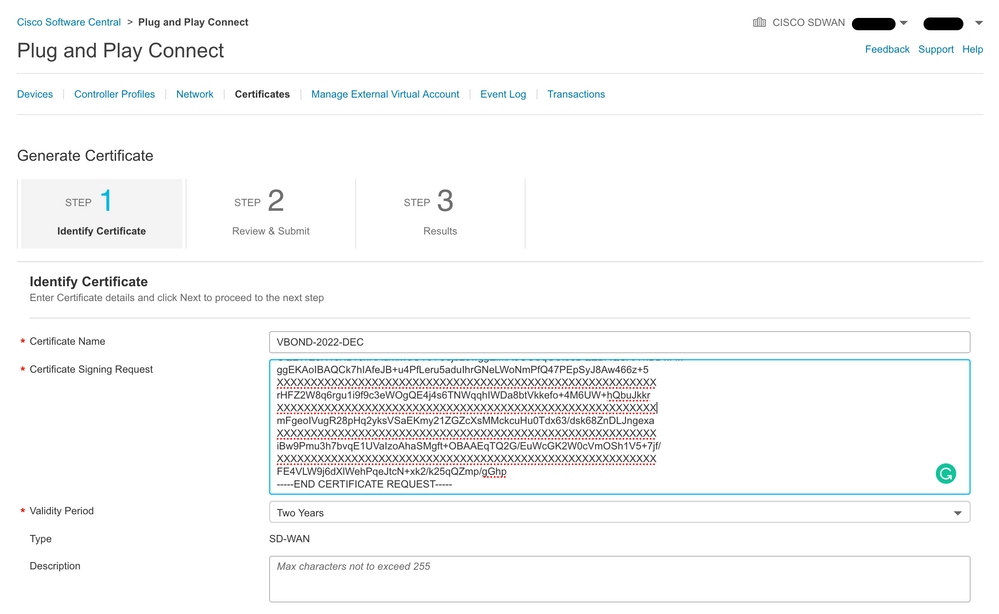
4. In the Certificates section, click Generate a new certificate and enter all the information.
- On Certificate Signing Reuqest, enter the CSR generated on step 2.
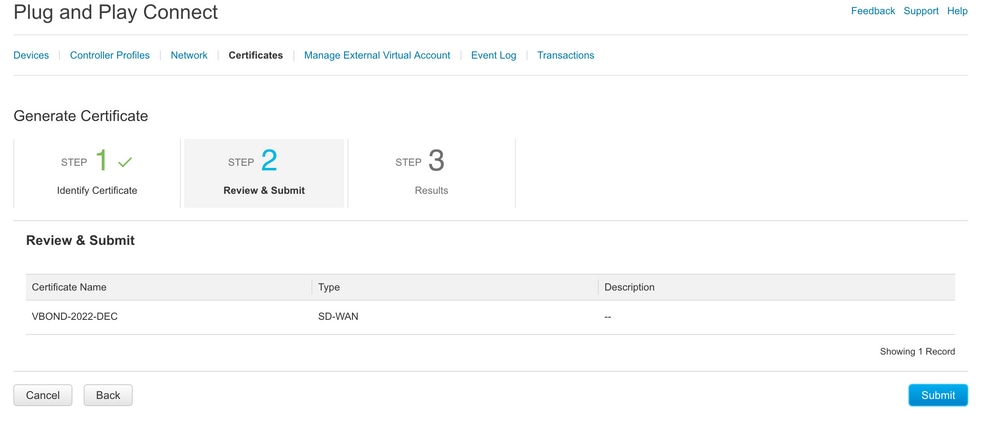
5. Click on Submit and Done.
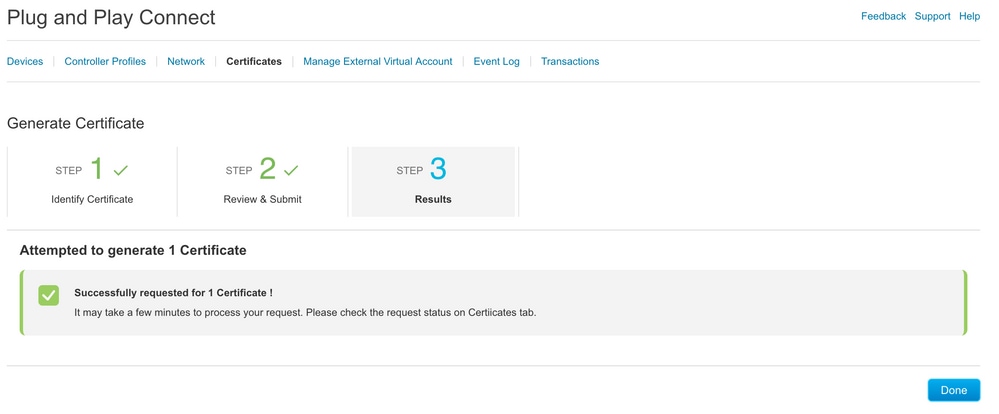
6. After few minutes, the certificate its ready to download.
- Download the certificate file
- Access the vManage GUI
- Select install certificate under vManage > Certificate > Controllers.
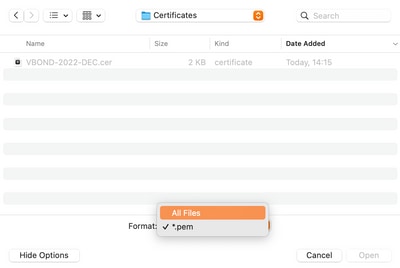
- Select the certificate in the pop window.
Note If you are not able see or select the certificate, ensure to choose All files under format option. If the format box is not visible, use a different web browser.
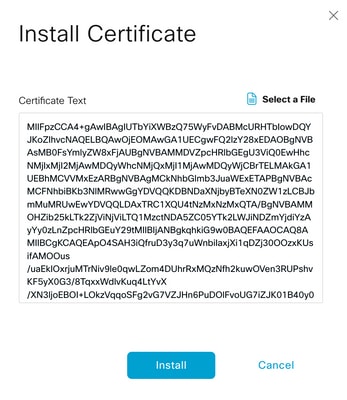
7. The certificate is now installed.

Common Problems
Time Mismatch
Cisco Cloud hosted controllers have a NTP server configured.
If the NTP is not present due to a configuration change, the controllers can have different times and this can interfere with the certificate installation or CSR generation.
Ensure that the controllers have the same time.
Not Able to Establish Connection
The SD-WAN controllers must be reachable via the interface configured under VPN0.
Verify that there is Layer 3 and Layer 4 communication.
We can check the logs of the controller via console for more details about the problem.


 Feedback